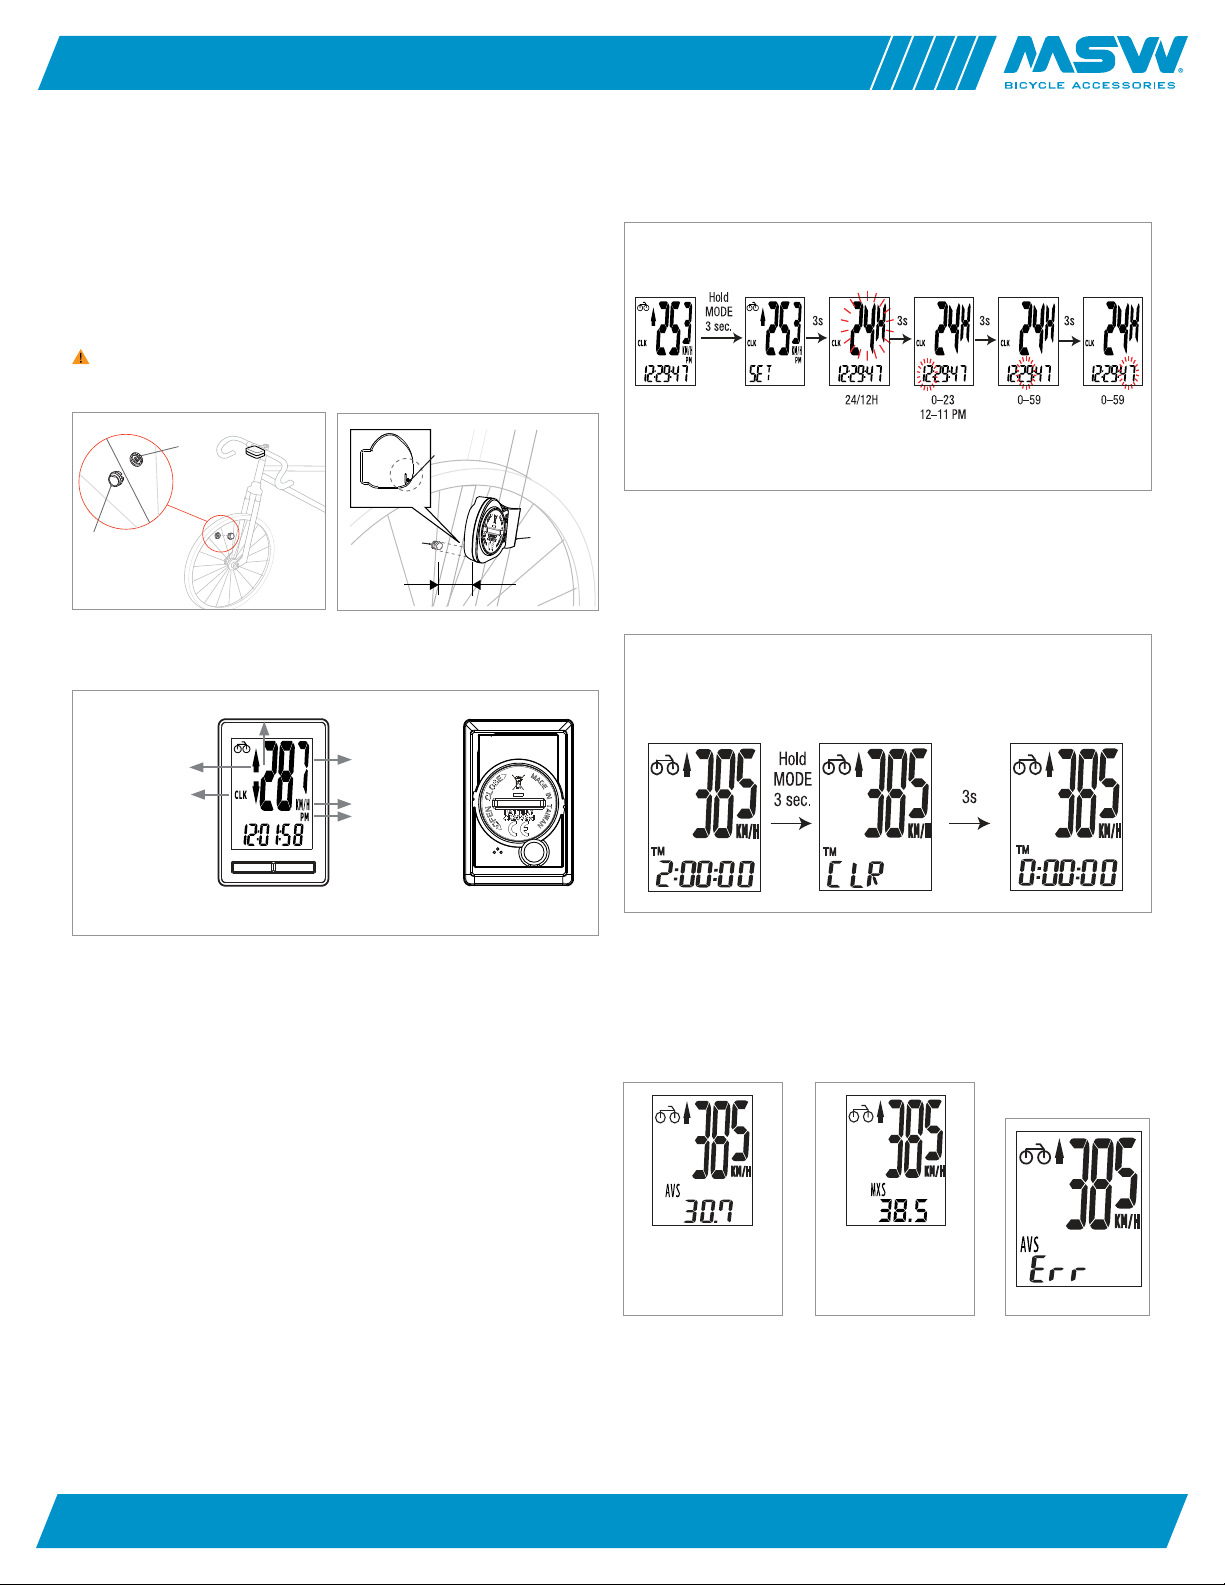
10444 10/16 | 85-000276_INST01_RG
MINIAC WIRELESS CYCLING COMPUTER INSTRUCTIONS
6400 WEST 105TH STREET // BLOOMINGTON, MN 55438 // 1-855-883-6563 // WWW.MSWBIKE.COM
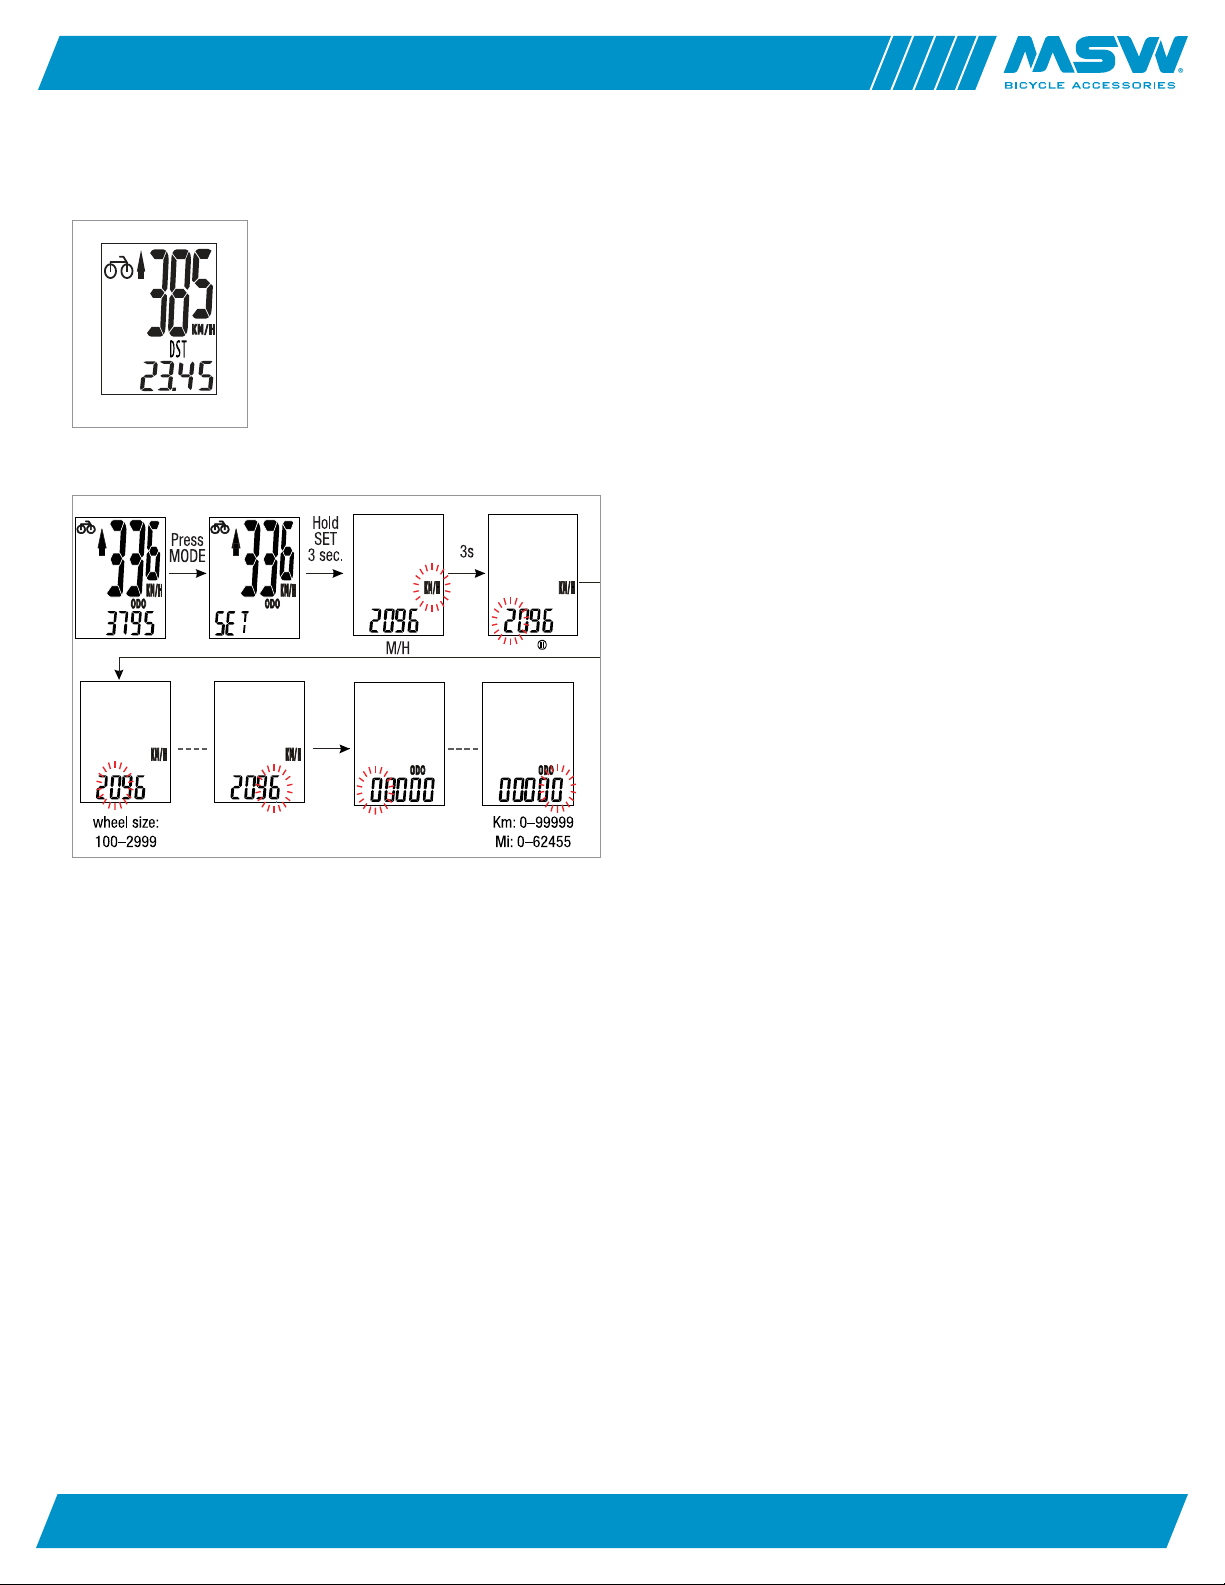
DST MODE (DISTANCE MODE)
The trip distance accumulated from the beginning of the trip.
ODO (TOTAL MILEAGE MODE)
Total mileage accumulated from the last time the computer was reset.
NOTE: Odometer mode will return to zero after replacing the battery.
Changing the speed scale, wheel settings, and entering mileage: Under ODO
Mode, press and hold “SET” button for 3 seconds to go to setting function.
Press “SET” button again to select Km/h or Mile/h.
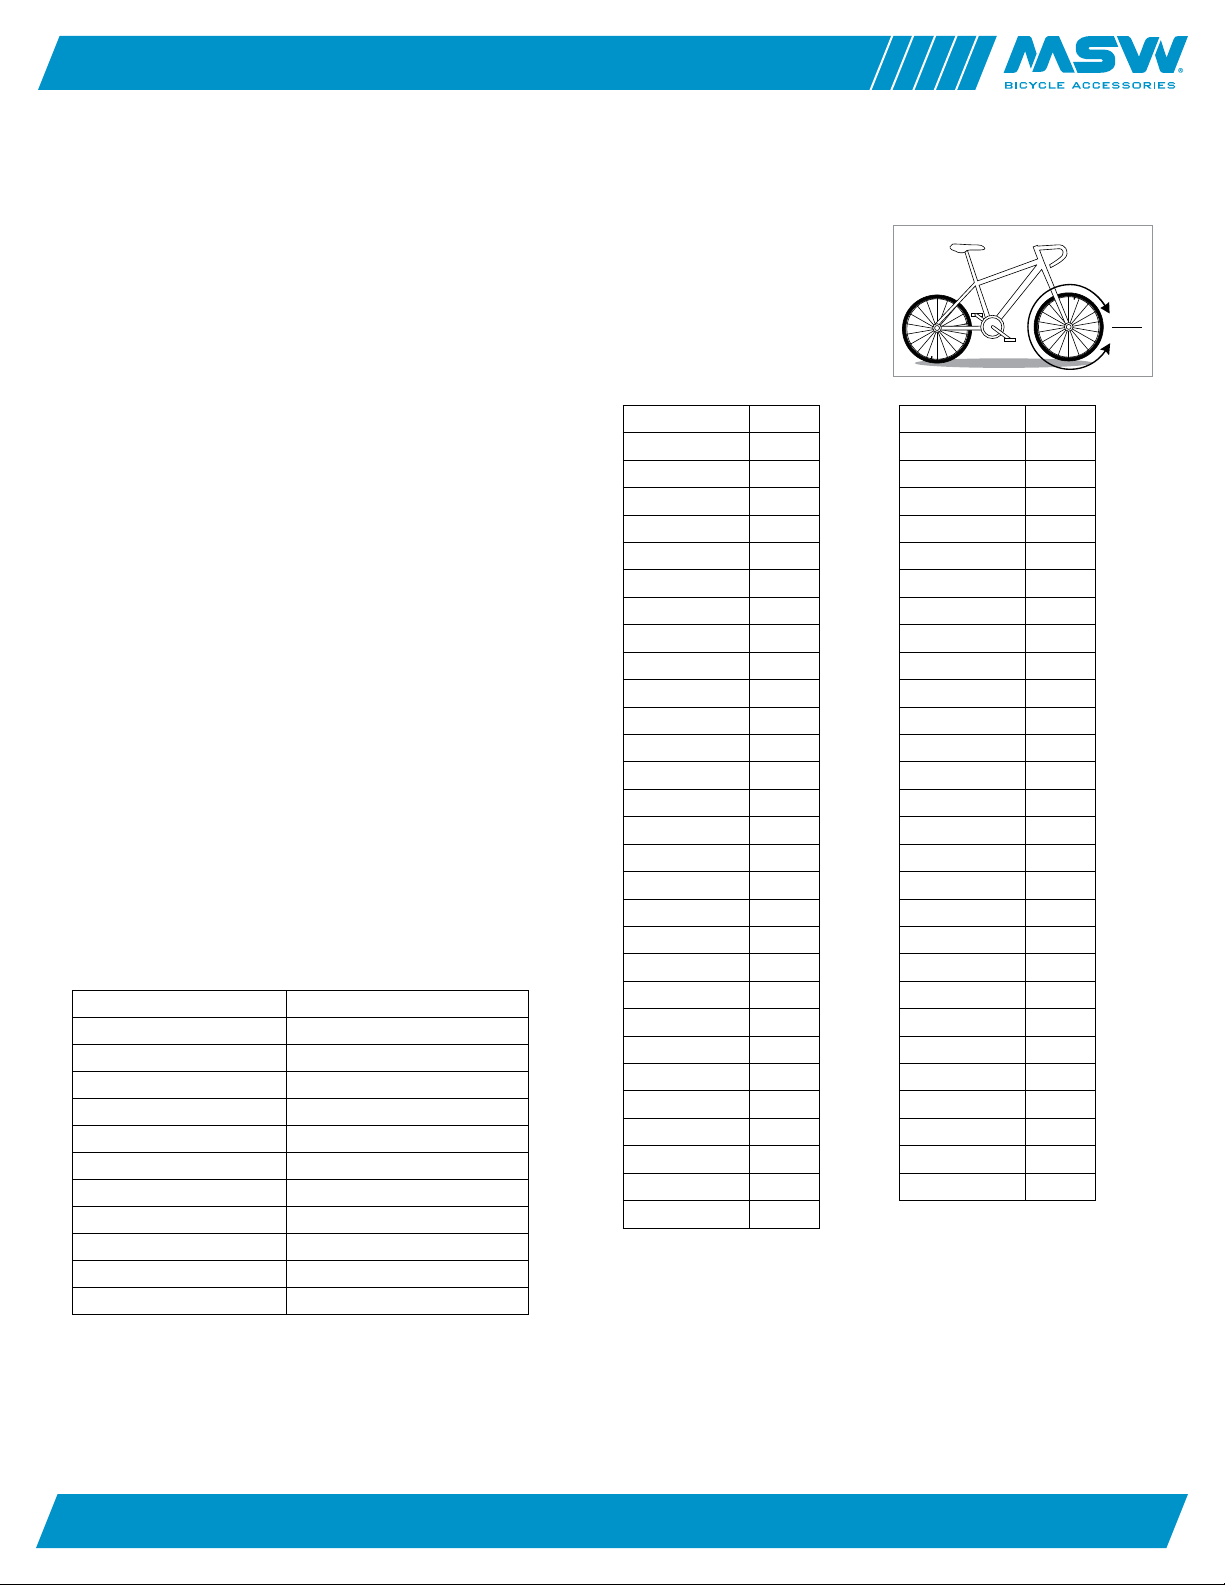
Press “MODE” button to go to Wheel Settings. Input the correct wheel size
by pressing “SET” button. You can input wheel sizes (circumference) from
100–2999mm. See chart for common wheel sizes or instructions for
calculating your wheel circumference.
Once you’ve entered your wheel size, press MODE button to proceed to
entering mileage.
Press and hold the MODE button for 3 seconds to exit the setting function
and return to ODO mode.
SCAN MODE
Under SCAN MODE the display will automatically show all modes in a repeating
loop every 4 seconds. Once the speed has been detected press any button to
stop the SCAN feature.
MAINTENANCE
If the display contrast changes and figures become faint, it’s time to replace
the battery. Consider changing the computer sensor and transmitter batteries
at the same time.
NOTE: Do not expose the computer to extremely cold or hot temperatures
i.e. don’t leave the unit in direct sunlight for extended periods of the time.
SENSOR
Check the position of sensor and magnet periodically. Rust or corrosion on the
magnet may cause malfunction. The gap between magnet and sensor cannot
exceed 5mm.
BRACKET / MAGNET / SENSOR BAND
These items can be wiped with a damp rag or mild soap solution.
BATTERY REPLACEMENT
COMPUTER
Unscrew the back cover. The (+) side should be facing up. Gently remove the
battery and replace it with a new battery model CR2032.
SENSOR:
Unscrew the back cover. The (+) side should be facing up. Gently remove the
battery and replace it with a new battery model CR2032.
BATTERY WARNINGS
A coin-cell, lithium-ion battery is used in this device. If these guidelines are not
followed, batteries may experience a shortened lifespan or may present a risk
of damage to the device, fire, chemical burn, electrolyte leak, and/or injury.
• Do not leave the device exposed to a heat source or in a high-temperature
location, such as in the sun in an unattended vehicle. To prevent the
possibility of damage, remove the device from the vehicle or store it out
of direct sunlight, such as in the glove box
• Do not disassemble, modify, remanufacture, puncture or damage the device
or batteries
• Do not immerse or expose the device or batteries to water or other liquids,
fire, explosion, or other hazard
• Do not use a sharp object to remove the batteries
• KEEP BATTERIES AWAY FROM CHILDREN
• NEVER PUT BATTERIES IN MOUTH. Swallowing can lead to chemical burns,
perforation of soft tissue, and death. Severe burns can occur within two
hours of ingestion. Seek medical attention immediately
• Replaceable coin-cell batteries may contain perchlorate material. Special
handling may apply. See www.dtsc.ca.gov/hazardouswaste/perchlorate
• Only replace batteries with correct replacement batteries. Using other
batteries presents a risk of fire or explosion
• Do not operate the device outside of the temperature ranges specified
in these instructions
• Contact your local waste disposal department to dispose of batteries
in accordance with applicable local laws and regulations