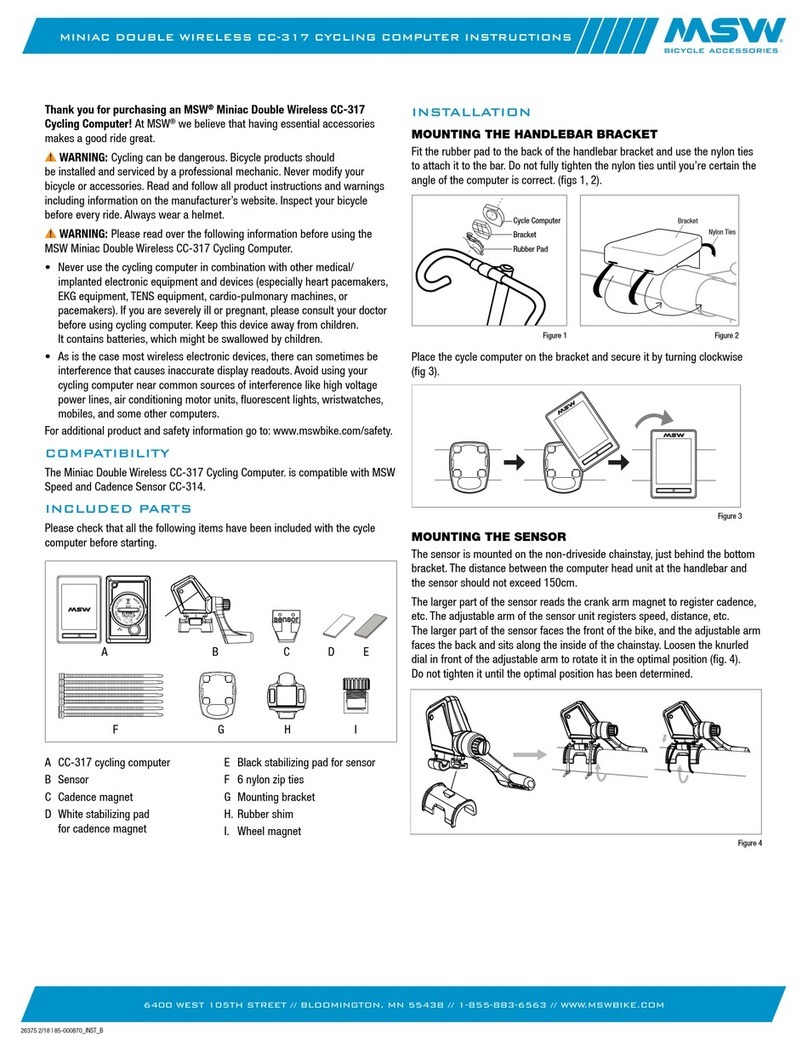
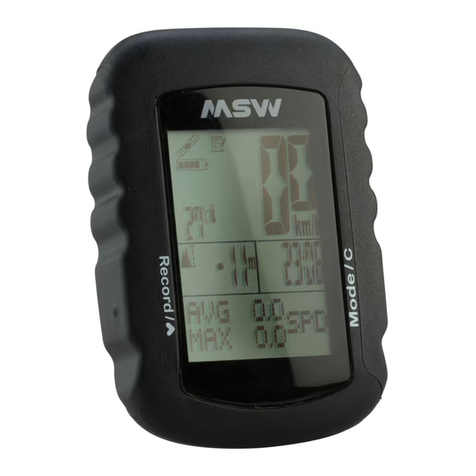
MSW Miniac GPS-333 User manual

25658 2/18 | 85-000868_INST_D
MINIAC GPS-333 CYCLING COMPUTER INSTRUCTIONS
6400 WEST 105TH STREET // BLOOMINGTON, MN 55438 // 1-855-883-6563 // WWW.MSWBIKE.COM
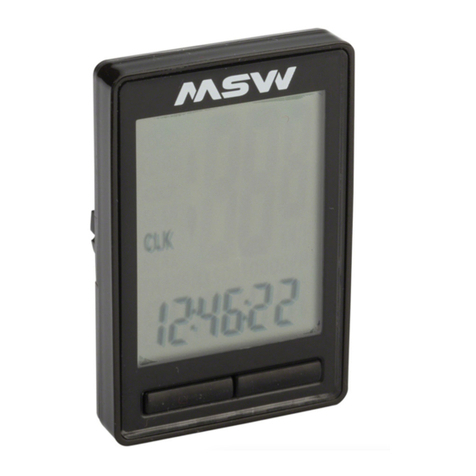
Thank you for purchasing an MSW Miniac GPS-333 Cycling Computer!
Thank you for your purchase! At MSW©we believe having essential
accessories makes a good bike ride great. The 33-function Miniac GPS-333
Cycling Computer is loaded with features that will add to any ride experience.
Take it along on every ride!
WARNING: Cycling can be dangerous. Bicycle products should be installed
and serviced by a professional mechanic. Never modify your bicycle
or accessories. Read and follow all product instructions and warnings including
information on the manufacturer’s website. Inspect your bicycle before every
ride. Always wear a helmet.
For additional product and safety information go to: www.mswbike.com/safety.
COMPATIBILITY AND INTENDED USE
The MSW MINIAC GPS-333 function list includes: GPS Technology, Auto
Wake-Up, Backlight On/Off, Actual Temperature, Riding Data File Storage,
PC Link Connection, Device Battery Life Indicator, Button Sound, Clock, Trip
Time, Trip Distance, Total ODO, Speed Comparison, Current / Average /
Maximum Speed, Actual Altitude, Trip Altitude Gain / Loss, Total Altitude,
Maximum Altitude, Current / Average / Maximum Gradient.
FUNCTIONS AVAILABLE WITH ADDITIONAL BLE SENSORS NOT INCLUDED:
Current /Average / Maximum Cadence, Current / Average / Maximum Power,
Current / Average /Maximum Heart Rate, Maximum Pulse %.
The MSW Miniac GPS-333 is intended for use on roads and
paved trails as well as ASTM Condition 2 use. This includes
smooth paved roads, unpaved and gravel roads, and trails with
moderate grades where loss of contact with ground may occur
but drops are less than 6" (15cm).
The Miniac GPS-333 head unit mounting bracket is compatible with most
handlebar diameters.
INSTALLATION
ITEM CHECKLIST
HOW TO MOUNT THE BRACKET
Use the rubber pad to tighten the bracket on the handlebar or stem with the
rubber ties.
Place the computer on the bracket and secure it by turning it clockwise.
COMPUTER MAIN DISPLAY
& BUTTON FUNCTION
TURN ON / OFF
Press RECORD button and MODE button for three seconds to turn on / off
the device.
WAKE UP AND SLEEP
Auto Wake Up: When there is any speed or vibration, the computer will wake up.
Auto Sleep: After six minutes without any speed or vibration, computer will
go to sleep.
MODE CHANGE
Press MODE button to change mode.
BIKE MODE
In Bike Mode, press SELECT button to change functions.
Flash 3 Sec.
Flash 3 Seconds
Turn Off
Functions
Cadence / Altitude
Gradient / Temperature
Record Button
GPS Indicator
Battery
Set Button
(located on
back of device)
Mode Button
Touch Button / Select Button / Enter
Clock / Heart Rate / Power
ALT GAIN ALT LOSS Gradient Maximum ALT Total ALT
GPS - 333
These two tenons
have to be on the
left and right side
of the bracket.
Micro USB CableBracket
Rubber Pad
Rubber Ties x 4
Bracket
Bands stretch around
the stem or bar
Rubber Pad
Computer
Bracket
Rubber Pad
Rubber Ties
GPS - 333
These two tenons
have to be on the
left and right side
of the bracket.
Micro USB CableBracket
Bracket
Bands stretch around
the stem or bar
Rubber Pad
Rubber Pad
Set Button
Mode Button
Functions
Cadence / Altitude
Gradient / Temperature
Record Button
Touch Button / Select Button / Enter
Clock / Heart Rate / Power
GPS Indicator
Battery
Computer
Bracket
Rubber Pad
Rubber Ties x 4
Rubber Ties
GPS - 333
These two tenons
have to be on the
left and right side
of the bracket.
Micro USB CableBracket
Bracket
Bands stretch around
the stem or bar
Rubber Pad
Rubber Pad
Set Button
Mode Button
Functions
Cadence / Altitude
Gradient / Temperature
Record Button
Touch Button / Select Button / Enter
Clock / Heart Rate / Power
GPS Indicator
Battery
Computer
Bracket
Rubber Pad
Rubber Ties x 4
Rubber Ties
Flash 3 Sec.
Flash 3 Seconds
Turn Off
Functions
Cadence / Altitude
Gradient / Temperature
Record Button
GPS Indicator
Battery
Set Button
(located on
back of device)
Mode Button
Touch Button / Select Button / Enter
Clock / Heart Rate / Power
ALT GAIN ALT LOSS Gradient Maximum ALT Total ALT
GPS - 333
These two tenons
have to be on the
left and right side
of the bracket.
Micro USB CableBracket
Rubber Pad
Rubber Ties x 4
Bracket
Bands stretch around
the stem or bar
Rubber Pad
Computer
Bracket
Rubber Pad
Rubber Ties
For off-road
riding and
jumps less than
6" (15cm)
GPS - 333
These two tenons
have to be on the
left and right side
of the bracket.
Micro USB CableBracket
Bracket
Bands stretch around
the stem or bar
Rubber Pad
Rubber Pad
Set Button
Mode Button
Functions
Cadence / Altitude
Gradient / Temperature
Record Button
Touch Button / Select Button / Enter
Clock / Heart Rate / Power
GPS Indicator
Battery
Computer
Bracket
Rubber Pad
Rubber Ties x 4
Rubber Ties

25658 2/18 | 85-000868_INST_D
MINIAC GPS-333 CYCLING COMPUTER INSTRUCTIONS
6400 WEST 105TH STREET // BLOOMINGTON, MN 55438 // 1-855-883-6563 // WWW.MSWBIKE.COM
CADENCE MODE
In Cadence Mode, you will only see Average and Max cadence.
HEART RATE MODE
In Heart Rate Mode, press SELECT button to change functions.
POWER MODE
In Power Mode, you will only see Average and Max power.
ALTITUDE MODE
In Altitude Mode, press SELECT button to change functions.
NOTE: When the corresponding sensors are paired, the Cadence Mode,
Heart Rate Mode, and Power Mode will appear.
The speed must be maintained for 8 or more seconds to have AVG
MAX Cadence,
AVG
MAX Heart Rate, MAX Heart Rate %, and AVG
MAX Power data.
On any screen, press and hold MODE button for 3 seconds to clear the data.
NOTE: wOdometer and total ALT cannot be cleared no matter it is recording or
not, users can set the Odometer and total ALT in the set mode.
• Please note while recording, not only Odometer and Total ALT, but also all
the data cannot be cleared.
SET MODE
Press SET button 3 seconds to go to set mode.
Press SELECT button to enter options.
Press RECORD button to scroll through options.
Press MODE button to get to next setting.
Press SET button three seconds or wait 60 seconds to exit set mode.
SET GPS
Press SELECT button to enter options.
Press RECORD button to select POWER SAVING / ALWAYS OFF / ALWAYS ON.
Press MODE button to set option.
Press MODE button again to move to altitude.
SET ALTITUDE
Press SELECT button to enter options.
Press RECORD button to scroll options.
Press SELECT button to choose manual or auto detect.
Manual Setting:
Press RECORD button to scroll through numbers.
Press SELECT button to move to next number column.
Press MODE button to set option.
Press MODE button again to move to backlight.
BACKLIGHT
Press SELECT button to enter options.
Press RECORD button to scroll through options.
Press MODE button to set option.
Press MODE button again to move to set sensor.
SET SENSOR
(If you are not adding a sensor press MODE button to move to set wheel and
then press MODE button again to move to auto wake up.)
Press SELECT button to select SPD&CAD / HEART RATE / POWER.
Press RECORD button to search.
If, after searching for 30 seconds it is unsuccessful, it will display the sensor ID.
If it has failed, it will display “ID not found.”
Press MODE button to set option.
Press MODE button again to move to set wheel.
SET WHEEL
Press SELECT to enter options.
Press RECORD button to select SET / TIRE LIST.
Manual Set:
Press RECORD button to select number.
Press SELECT button to go to next setting.
Tire List:
Press RECORD button to select option.
Press SELECT button to go to next setting.
Press MODE button to set option.
Press MODE button again to move to auto wake up.
AUTO WAKE UP
Press SELECT button to enter options.
Press RECORD button to select ON / OFF.
Press MODE button to set option.
Press MODE button again to move to set clock.
SET CLOCK
Press SELECT button to enter options.
Press RECORD button to select AUTO DETECT / MANUAL SET.
Auto Detect: Set 12H / 24H ➞Set Time Zone ➞Set Daylight Savings
Manual: Set 12H / 24H ➞Set Clock ➞Set Date
Press RECORD button to select option.
Press SELECT button to go to next setting.
Press MODE button to set option.
Press MODE button again to move to set user.
Select AUTO DETECT and turn on GPS, time information will be updated by GPS
signal automatically.
SET USER
Press SELECT button to enter options.
Press RECORD button to select MALE / FEMALE.
Press SELECT button to set option.
Press RECORD button to select birthday.
Press SELECT button to move from year / month / day.
Press MODE button to set option.
Press MODE button again to move to set unit.
Flash 3 Sec.
Flash 3 Seconds
Turn Off
Functions
Cadence / Altitude
Gradient / Temperature
Record Button
GPS Indicator
Battery
Set Button
(located on
back of device)
Mode Button
Touch Button / Select Button / Enter
Clock / Heart Rate / Power
ALT GAIN ALT LOSS Gradient Maximum ALT Total ALT
GPS - 333
These two tenons
have to be on the
left and right side
of the bracket.
Micro USB CableBracket
Rubber Pad
Rubber Ties x 4
Bracket
Bands stretch around
the stem or bar
Rubber Pad
Computer
Bracket
Rubber Pad
Rubber Ties
GPS - 333
These two tenons
have to be on the
left and right side
of the bracket.
Micro USB CableBracket
Bracket
Bands stretch around
the stem or bar
Rubber Pad
Rubber Pad
Set Button
Mode Button
Functions
Cadence / Altitude
Gradient / Temperature
Record Button
Touch Button / Select Button / Enter
Clock / Heart Rate / Power
GPS Indicator
Battery
Computer
Bracket
Rubber Pad
Rubber Ties x 4
Rubber Ties
25658 2/18 | 85-000868_INST_D
MINIAC GPS-333 CYCLING COMPUTER INSTRUCTIONS
6400 WEST 105TH STREET // BLOOMINGTON, MN 55438 // 1-855-883-6563 // WWW.MSWBIKE.COM
SET UNIT
Press SELECT button to enter options.
Press RECORD button to scroll METRIC / IMPERIAL.
Press SELECT button to move to temperature options.
Press RECORD button to scroll C / F.
Press MODE button to set option.
Press MODE button again to move to set button tone.
SET BUTTON TONE
Press SELECT button to enter options.
Press RECORD button to select ON / OFF.
Press MODE button to set option.
Press MODE button again to move to set odometer.
SET ODOMETER
Press SELECT button to enter options.
Press RECORD button to scroll through numbers.
Press SELECT button to move to next number column.
Press MODE button to set.
Press MODE button again to move to factory default.
FACTORY DEFAULT
Press SELECT button to reset data.
Press RECORD button to select Yes.
Press RECORD button to confirm.
Press MODE button to set.
Press MODE button again to move to about.
ABOUT
Press SELECT button to go to next information.
View the software version.
View the BLE Module.
View the device ID.
HOW TO RECORD YOUR RIDE
Press RECORD button to start recording.
Press RECORD button to stop recording.
Press MODE button to select Yes.
Press RECORD button to select No and continue riding.
LOW BATTERY
When the power is less than 10%, it will automatically stop recording and turn
off. After it is recharged and restarted, recording will resume.
When the power is less than 10%, the low battery indicator will flash every
60 seconds. The battery needs to be recharged.
MEMORY FULL
When the storage space is full, the device will automatically stop recording
and store.
If the space is full, when pressing the Record Key, the device will flash and the
information will not be recorded.
GPS - 333
These two tenons
have to be on the
left and right side
of the bracket.
Micro USB CableBracket
Bracket
Bands stretch around
the stem or bar
Rubber Pad
Rubber Pad
Set Button
Mode Button
Functions
Cadence / Altitude
Gradient / Temperature
Record Button
Touch Button / Select Button / Enter
Clock / Heart Rate / Power
GPS Indicator
Battery
Computer
Bracket
Rubber Pad
Rubber Ties x 4
Rubber Ties
Flash 3 Sec.
Flash 3 Seconds
Turn Off
Functions
Cadence / Altitude
Gradient / Temperature
Record Button
GPS Indicator
Battery
Set Button
(located on
back of device)
Mode Button
Touch Button / Select Button / Enter
Clock / Heart Rate / Power
ALT GAIN ALT LOSS Gradient Maximum ALT Total ALT
GPS - 333
These two tenons
have to be on the
left and right side
of the bracket.
Micro USB CableBracket
Rubber Pad
Rubber Ties x 4
Bracket
Bands stretch around
the stem or bar
Rubber Pad
Computer
Bracket
Rubber Pad
Rubber Ties
GPS - 333
These two tenons
have to be on the
left and right side
of the bracket.
Micro USB CableBracket
Bracket
Bands stretch around
the stem or bar
Rubber Pad
Rubber Pad
Set Button
Mode Button
Functions
Cadence / Altitude
Gradient / Temperature
Record Button
Touch Button / Select Button / Enter
Clock / Heart Rate / Power
GPS Indicator
Battery
Computer
Bracket
Rubber Pad
Rubber Ties x 4
Rubber Ties
GPS - 333
These two tenons
have to be on the
left and right side
of the bracket.
Micro USB CableBracket
Bracket
Bands stretch around
the stem or bar
Rubber Pad
Rubber Pad
Set Button
Mode Button
Functions
Cadence / Altitude
Gradient / Temperature
Record Button
Touch Button / Select Button / Enter
Clock / Heart Rate / Power
GPS Indicator
Battery
Computer
Bracket
Rubber Pad
Rubber Ties x 4
Rubber Ties

Display 2 Seconds
GPS - 333
These two tenons
have to be on the
left and right side
of the bracket.
Micro USB CableBracket
Bracket
Bands stretch around
the stem or bar
Rubber Pad
Rubber Pad
Set Button
Mode Button
Functions
Cadence / Altitude
Gradient / Temperature
Record Button
Touch Button / Select Button / Enter
Clock / Heart Rate / Power
GPS Indicator
Battery
Computer
Bracket
Rubber Pad
Rubber Ties x 4
Rubber Ties
25658 2/18 | 85-000868_INST_D
MINIAC GPS-333 CYCLING COMPUTER INSTRUCTIONS
6400 WEST 105TH STREET // BLOOMINGTON, MN 55438 // 1-855-883-6563 // WWW.MSWBIKE.COM
HOW TO CONNECT TO PC SOFTWARE
Install the software on a Microsoft PC.
Insert the USB cable into the device and connect it to the computer’s USB port.
Start the PC software.
1. Under “File”, select “Import from device.”
2. Choose the device and press “OK.”
3. Choose the data you want to use and press “Upload Select File.”
4. After uploading the data, press “Cancel” to start review.
NOTE: We strongly suggest users use the USB cable that is included to connect
to the PC.
MAINTENANCE
If the display contrast changes and becomes faint, it’s time to recharge
the battery.
NOTE: For the most updated information on software and APP please visit our
website.
We strongly suggest using the USB cable that is included to connect to the PC.
SENSOR
Check the position of sensor and magnet periodically. Rust or corrosion on the
magnet may cause malfunction. The gap between magnet and sensor cannot
exceed 5mm.
TROUBLESHOOTING
Q1. Display is black or very light:
The battery power may be low. Make sure the battery is installed correctly
or replace if necessary.
Q2. Display becomes dark or black:
The unit is too hot. Place the unit in a shaded area and it will return to normal.
Q3. The unit operates slowly or struggles:
The unit is too cold. Warm the unit and it will return to normal.
Q4. Data in display varies enormously:
Check the surroundings for electromagnetic or high energy interference,
e.g. power lines, and move away from the source of interference.
Q5. Data in display shows slowly:
The unit may be too cold. When the temperature rises, the data reading will
return to normal.
Q6. Current speed does not appear:
The sensor may be too far from the magnet. Make sure the gap is no wider
than 5mm. Make sure the magnet is free of corrosion.
SPECIFICATIONS
Operating Temp 32–104°F (0–40°C)
Storage Temp 14–122°F (-10–50°C)
Battery USB Rechargeable
Battery life (computer) 15 hrs
Weight 53.5g
Cadence 0~999 RPM
Heart Rate 30~240 BPM
Power 0~999 Watt
Timer Range 99 (hour) : 59 (minute) : 59 (second)
Current Speed Range 0~99.9kph / 0~62.4 mph
Average Speed Range 0~99.9kph / 0~62.4 mph
MAX Speed Range 0~99.9kph / 0~62.4 mph
(Trip) Distance Range 0~9999.99km / 0~6249.99 mi
Odometer Range 0~999999km / 0~624999 mi
Altitude Gain/Loss 0~30479km / 0~99999 ft
Total Altitude 0~304799km / 0~999999 ft
Maximum Altitude 0~3999km / 0~9999 ft
Current Altitude -699~3999km / -999~9999 ft
WHEEL SIZE CHART
CALCULATING WHEEL CIRCUMFERENCE
To get the most accurate speed and
distance data, the wheel size must
be correct. Mark the tire or position the
valve stem at the 6 o’clock position and
push the bike until the mark or valve stem
is back to 6 o’clock. Then measure the
length between two points to get the
circumference.
Tire Scale L (mm)
14 x 1.50" 1020
14 x 1.75 1055
16 x 1.50 1185
16 x 1.75 1195
18 x 1.50 1340
18 x 1.75 1350
20 x 1.75 1515
20 x 1-3/8 1615
22 x 1-3/8 1770
22 x 1-1/2 1785
24 x 1 1753
24 x 3/4 Tubular 1785
24 x 1-1/8 1795
24 x 1-1/4 1905
24 x 1.75 1890
24 x 2.00 1925
24 x 2.125 1965
26 x 7/8 1920
26 x 1 (59) 1913
Tire Scale L (mm)
26 x 1 (65) 1952
26 x 1-1/8 1970
26 x 1-3/8 2068
26 x 1-1/2 2100
26 x 1.40 2005
26 x 1.50 2010
26 x 1.75 2023
26 x 1.95 205
26 x 175 2023
26 x 1.95 2050
26 x 2.00 2055
26 x 2.10 2068
26 x 2.125 2070
26 x 2.35 2083
26 x 3.00 2170
27 x 1 2145
27 x 1-1/8 2155
27 x 1-1/4 2161
27 x 1-3/8 2169
Tire Scale L (mm)
27.5 x 2.10 2170
27.5 x 2.30 2202
29 x 2.10 2288
29 x 2.30 2326
650 x 35A 2090
650 x 38A 2125
650 x 38B 2105
700 x 18C 2070
700 x 19C 2080
700 x 20C 2086
700 x 23C 2096
700 x 25C 2105
700 x 28C 2136
700 x 30C 2146
700 x 32C 2155
700c Tubular 2130
700 x 35C 2168
700 x 38C 2180
700 x 40C 2200

25658 2/18 | 85-000868_INST_D
MINIAC GPS-333 CYCLING COMPUTER INSTRUCTIONS
6400 WEST 105TH STREET // BLOOMINGTON, MN 55438 // 1-855-883-6563 // WWW.MSWBIKE.COM
LIMITED 2-YEAR WARRANTY
MSW warrants this new MSW product against defects in materials and
workmanship for two (2) years from the original date of retail purchase
by the consumer. This limited warranty is expressly limited to the repair
or replacement of the original product, at the option of MSW, and is the
sole remedy of the warranty. This limited warranty applies only to the
original purchaser of the MSW product and is not transferable.
In no event shall MSW be liable for any loss, inconvenience or damage,
whether direct, incidental or consequential or otherwise resulting from breach
of any express or implied warranty or condition of merchantability, fitness for
a particular purpose, or otherwise with respect to this product except as set
forth herein. This warranty gives the consumer specific legal rights, and those
rights and other rights may vary from state to state.
This warranty does not cover the following:
• Damage due to improper assembly or follow-up maintenance or lack
of skill, competence or experience of the end user
• Products that have been modified, neglected, used in competition or for
commercial purposes, misused or abused, involved in accidents or anything
other than normal use
• Damage or deterioration to the surface finish, aesthetics or appearance
of the MSW product
• Normal wear and tear
• Labor required to remove and/or refit and re-adjust the product within
the bicycle assembly
• Installation of components, parts, or accessories not originally intended
use with or compatible with MSW products
TO THE EXTENT NOT PROHIBITED BY LAW, THESE WARRANTIES ARE
EXCLUSIVE AND THERE ARE NO OTHER EXPRESS OR IMPLIED WARRANTIES
OR CONDITIONS INCLUDING WARRANTIES OR CONDITIONS OF
MERCHANTABILITY AND FITNESS FOR A PARTICULAR PURPOSE.
WARRANTY PROCESS
If you and your shop think your MSW product is worthy of a warranty
inspection, please return the product to the original place of purchase,
accompanied by a sales receipt.
For complete warranty information, visit www.mswbike.com/safety/warranty.
Table of contents
Other MSW Bicycle Accessories manuals

MSW
MSW MINIAC GPS-322 User manual

MSW
MSW Ride & Repair Kit With Pump User manual

MSW
MSW Clipless Pedal User manual

MSW
MSW TIGER MOTH 40 User manual

MSW
MSW MINIAC User manual

MSW
MSW MSW-SPS-18 User manual

MSW
MSW MSW-MWB-11 User manual

MSW
MSW CRICKET SAFETY LIGHTS HLT-017 User manual

MSW
MSW MSW-SBR-01 User manual

MSW
MSW TOOL HUGGER KIT User manual
Popular Bicycle Accessories manuals by other brands

Wuxi LingDe Microelectronics
Wuxi LingDe Microelectronics LD903GUB instruction manual

Garmin
Garmin Aerosensor quick start guide

Shimano
Shimano UM-8VT0A-003 user manual

Jetson
Jetson Haze quick start guide

HERRMANS
HERRMANS MR GO EBIKE user manual

Bear Bones Systems
Bear Bones Systems Motono Dirt Bike Platform user manual