Nakayama ES1200 User manual

ES1200 Art.-Nr.: 014546
Original instructions
3 in 1 garden tool
GB
GARDEN TOOLS EXPERT
Μετάφραση του πρωτοτύπου των
οδηγιών χρήσης
ΠΟΛΥΜΗΧΆΝΗΜΑ ΗΛΕΚΤΡΙΚΌ
GR

2
B1
4
16
6
8
1235
10
14
19
18
10
15
17
9
7

3
B2
B4
B3
B5
B6 B7
B8 B9
22

4
B10 B11
B12 B13
B14 B15
B16 B17
23
21
12
20
11
13

5
B18 B19
B20
B22
B21
B23
B24 4
6
B25

6
B28 B29
B27B26

7
1. Introduction
Please read this user’s manual carefully before
starting work, to be able handle the garden tool
properly and to avoid accidents. In this manual
you will nd the explanation for the functioning
of the various components and information on
the applicable inspection and maintenance work.
Comment: The descriptions and illustrations
contained in this operating manual are not
binding. The manufacturer reserves the right
to make any changes eventually without
having made any prior adjustment to this
user's manual
2. Purpose of use
Electric chain saw
The electric chain saw has been constructed only
for sawing wood. The saw is not intended for all
other types of usages (e.g. cutting of stonework,
plastic or food).
Grass trimmer/Brush cutter
The lawn trimmer is suitable only for cutting
grass in gardens and along edges of ower-beds.
Any other use, which is not expressly permitted
in this manual, can lead cause damage to the
device and pose a serious threat to the user.
All other applications that are not described
in this manual, could damage the device and
seriously jeopardise the life or safety of the user.
The device may not be used when it is raining
and in a moist environment.
The device was developed for adults. The operator
or the user shall be liable toward themselves
and third parties alone in the event of accidents
and damage to property. The manufacturer is
not liable for damages that have been caused by
unintended use or incorrect operation.
Please note that this device has been developed
only for use in private households. This device
is not designed for business, industrial and
commercial use. We disclaim all warranties, if
the device is used for industrial, commercial,
industrial or similar purposes.
3. Explanation of symbols
The following symbols are used in this power
tool. With the correct interpretation of these
symbols, you can use the electric tool more
securely and eectively.
Caution!
Pull out the plug when the connecting
cable is damaged.
Wear protective gloves.
Wear tight tting clothing !
Wear safety shoes.
Do not use the power tool during rain
or leave it out in the rain.
Risk of death by electrocution! Please
keep away from power lines at least
10 meters .
Before start-up and before all
maintenance, assembly and cleaning
work, please read the instructions for
use thoroughly.
GB

8
Wear a protection helmet !
Symbol of no-load speed.
Cutting length.
Cutting speed at rated speed .
Guaranteed sound power level.
Attention! Injury from rotating blades!
Wear eye protection!
Wear ear protection!
keep away from the danger zone.
Attention! Risk of sling parts! distance!
Cutting width
Nylon cutting line.
Protection class II
Collect scrapped electrical tools
and other electrical-technical and
electrical products separately and
bring them for environmentally sound
recycling.

9
4. Technical data
Rated voltage: 230-240V~
Rated frequency: 50Hz
Power: 1200W
Chain saw
Power consumption: 1200 W
Length of cut max.: 205 mm
cutting speed for rated speed: 9.5 m/s
Oil-tank capacity: 120 ml
Guaranteed sound power level under load LWA:
99 dB(A)
Grass trimmer
Power consumption: 1200 W
Speed n0: 5500 min-1
Cutting diameter: 380 mm
Nylon cutting line: 2 mm
Guaranteed sound power level under load LWA:
96 dB(A)
Brush cutter
Power consumption: 1200 W
No-load speed : 5700 min-1
Cutting diameter: 230mm
Blade: Φ230mmX1.6mm, 3T
Guaranteed sound power level under load LWA:
99 dB(A)
sound pressure level LPA: 85.6dB(A), K=3 dB(A)
sound power level LWA: 96.7 dB(A), K=2.35dB(A)
Vibration of the main handle ah:
6.749 m/s2; K=1.5 m/s2
Vibration of the auxiliary handle ah:
6.715 m/s2; K=1.5 m/s2
The specied vibration emission value is
measured as per a standardized test procedure
and can be used for comparing a power tool with
another one.
The specied vibration emission value can be also
used for an initial estimation of the impairment.
Warning:
The vibration emission value can be distinguished
during the actual use of the power tool from the
specied value, depending on the way in which
the power tool is used.
There is a need to specify security measures
for protecting the user, which are based on an
estimation of the exposure during the actual
usage conditions (here all parts of the operating
cycle has to be taken into account, for example,
the time periods in which the power tool is
switched o, and those, in which it is switched on
but is running without strain).
OTHER RISKS
Even if you operate this power tool properly,
there will still be other risks. The following risks
may occur in connection with the style and
design of this power tool:
a) Cut injuries
b) Hearing damage if no suitable ear protection is
worn.
c) Health risks, which result due to hand-arm
vibrations, if the device is used for a longer period
or if it is not properly handled or maintained.
Warning! This electric tool creates an
electromagnetic eld during operation. This eld
can impair active or passive medical implants
under certain circumstances. To prevent the risk
of serious or fatal injuries, we advise individuals
with medical implants to consult with their
doctor and the manufacturer of the medical
implant before the machine is operated.
5. General Safety Rules
WARNING
Please read all safety instructions and
instructions. Failure to comply with the safety
instructions and directions can cause electric
shock, re and/or cause serious injury. Keep
all safety precautions and instructions for
future reference.

10
The term"electric tool” used in the safety
instructions, refers to corded electric tools (with
AC power cable), and battery-powered electric
tools (without power cable).
5.1 Safety at the workplace
a) Keep your work area clean and well
illuminated. Disorder and non-illuminated areas
can lead to accidents.
b) Do not work with the power tool in a
potentially explosive atmosphere, in which
there are inammable liquids, gases or dust.
Power tools create sparks, which could ignite
dust or vapours.
c) Keep children and other persons away while
using the power tool. If you are distracted, you
could lose control of the device.
5.2 Electrical safety
a) The connector of the power tool must t
into the socket. The plug must not be changed
in any way. Do not use any adapter plug
together with power tools that are grounded
for protection. Unchanged power plugs and
matching sockets reduce the risk of electric
shock.
b) Avoid body contact with grounded
surfaces such as pipes, heaters, stoves and
refrigerators. There is an increased risk of
electric shock if your body is grounded.
c) Keep the appliance away from rain or wet
conditions. The penetration of water into an
electrical device increases the risk of electrical
shock.
d) Do not use the cable for purposes not
intended, for carrying, hanging the power
tool, or for pulling out the plug from the AC-
wall outlet. Hold the cable away from heat, oil,
sharp edges or movable parts of the device.
Damaged or entangled cords increases the risk of
electric shock.
e) If you work with a power tool outdoors,
please use only extension cords, which are
also suitable for outdoor use. The application
of an extension cable for outdoor use reduces the
risk of electrical shock.
f) If the operation of the electric tool cannot
be avoided in a moist environment, please use
a fault-current circuit breaker. Using a fault-
current circuit breaker reduces the risk of an
electrical shock.
5.3 Safety of Persons
a) Be alert, watch what you do and be sensible
when you work with a power tool. Do not
use power tools if you are tired or under the
inuence of drugs, alcohol or medications. A
moment of carelessness while using the power
tool can result in serious injury.
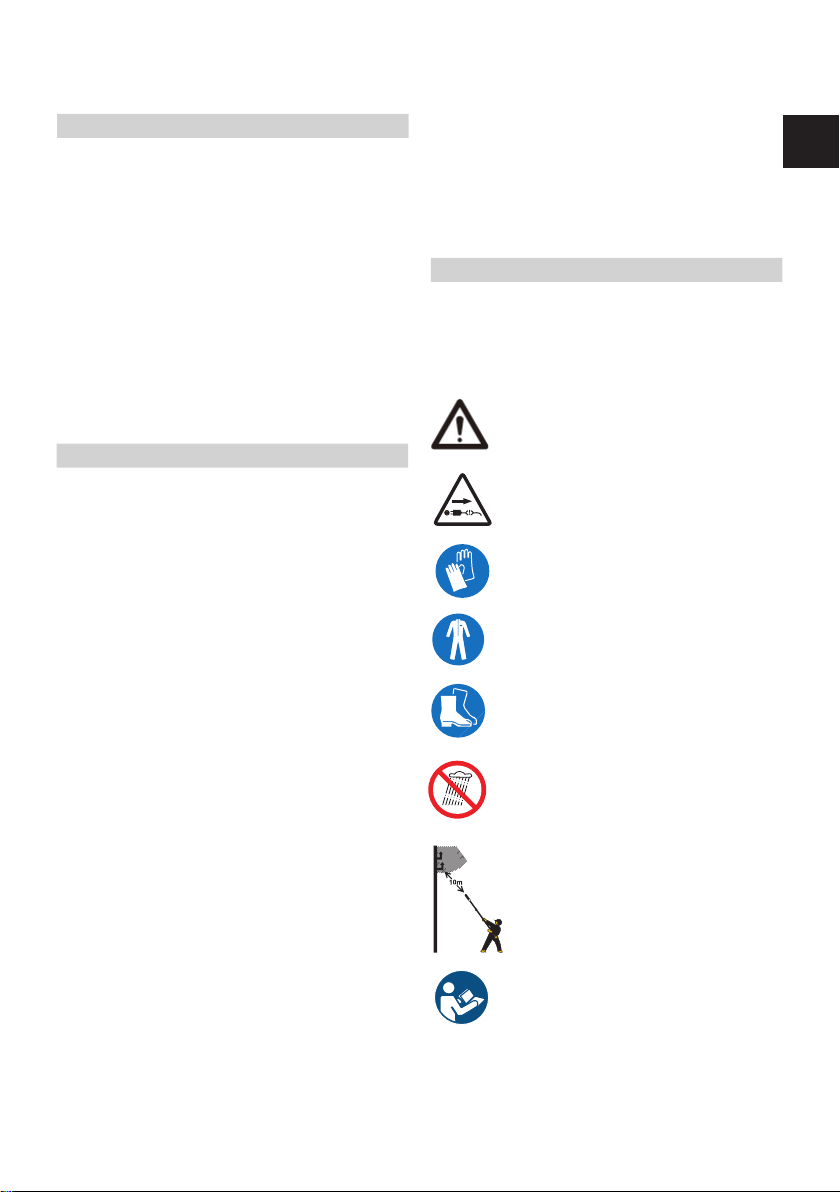
b) Always wear personal protective equipment
and safety goggles. Wearing personal protective
equipment such as dust mask, non-slip safety
shoes, safety helmet or hearing protection,
depending on the type and use of the electric
tool, reduces the risk of injury.
c) Please avoid accidental start-up. Make sure
that the power tool is turned o, before you
connect it to the power supply and / or to the
battery, lift it up or carry it. If you have your
nger on the switch while carrying the power
tool or if the power tool is connected to the
power supply in switched-on condition, this can
lead to accidents.
d) Remove the adjustment tool or screw-
wrench before you switch on the power tool.
A tool or key, which is found in a rotating part of
the device, can lead to injuries.
e) Avoid abnormal body posture. Make sure
you stand securely and keep your balance at
all times. This allows you to control the power

11
tool in unexpected situations better.
f) Wear suitable clothes! Do not wear loose
clothing or jewelry. Keep your hair, clothing
and gloves away from moving parts. Loose
clothing, jewelry, or long hair could get caught
by the moving parts.
g) If dust extraction equipment and dust
collection facilities can be installed, make
sure that they are connected and are correctly
used. Using a dust extraction system can reduce
the hazards caused by dust.
5.4 Using and handling the power tool
a) Do not overload the device. Use the
particular power tool meant for your work.
With the appropriate power tool, you will work
better and more safely in the specied output
range.
b) Do not use any power tool, which has a
defective switch. A power tool, which cannot
be switched on or switched o any more is
hazardous and must be repaired.
c) Remove the plug from the wall socket
and/or remove the battery before you make
changes to unit’s settings, change accessory
parts or put away the device. This precautionary
measure prevents the accidental start of the
power tool.
d) Keep unused power tools out of the reach
of children. Do not allow persons to use the
device, who are not familiar with this device
or who have not read these instructions.
Power tools are dangerous, if they are used by
inexperienced persons.
e) Maintain your power tools with care. Check
if the moving parts are working properly and
do not jam, whether parts are broken or are so
damaged that the function of the power tool
is impaired. Get the damaged parts repaired
before using the device. Many accidents are the
result of poorly maintained power tools.
f) Keep your cutting tools sharp and clean.
Carefully maintained cutting tools with sharp
cutting edges are less likely to jam and are easier
to handle.
g) Use power tools, accessories, insertion tools
etc., as per these instructions. While doing so,
please consider the working conditions and
the work to be carried out. The use of power
tools for purposes other than the intended
applications can lead to dangerous situations.
5.5 Service
A) Get your power tool repaired only by
qualied personnel and only with original
spare parts. WIth that, it will be ensured that the
safety of the device is maintained.
6. Special Safety Instructions
6.1 IMPORTANT for the power tool
Read thoroughly before use. Keep these
instructions safe, so that you can read them
later.
- Keep all your body parts far from the power
tool, when it is running. Before starting the
electric tool, make sure that the device is not
touching anything. When working with the
electrical tool, a moment of carelessness can lead
to the clothing or parts of your body to be caught
by the power tool.
- Hold the power tool always with your right
hand on the rear handle and your left hand
on the front handle. Holding the electric tool
in reverse working position increases the risk of
injury and should not be done so.
- Wear protective glasses and hearing
protection. Additional protective
equipment for head, hands, legs and feet is

12
recommended. Suitable protective clothing
reduces the risk of injury caused by wood chips
ying around and by accidentally coming in
contact with of the power tool.
- Never let children work with the power tool.
-Always make sure that you are standing on
solid ground and use the power tool only if
you are on solid, secure and level ground.
Slippery ground or unstable surfaces such as on a
ladder could make you lose balance or make you
lose control of the power tool.
- While cutting a branch that is under tension,
you have to anticipate that it could spring
back. If the pressure in the wood bres is
released, the branch under pressure may hit
the operator and / or wrench the tool from your
grasp.
-Be especially careful when cutting
undergrowths and young trees. The thin
material may get caught in the electric power
tool and hit you or throw you o balance.
-Follow the instructions for lubrication and
changing accessories. Improperly tightened
or lubricated chain/ shears may either break or
increase the risk of a kickback.
- Keep handles dry, clean and free of oil and
grease. Greasy, oily handles are slippery and lead
to the loss of control.
- If the cutting mechanism bumps against foreign
bodies of if the power tool has unusual sounds
or strong vibration, disconnect the power supply
and let the device to come to a standstill.
Take the following steps:
a) Check the device for damages
b) Check the device whether parts are loosened.
- If necessary, tighten loose parts again
- Get all defective parts repaired or replace
original spare parts.
- Check the material to be cut before beginning
work. Remove any foreign material found. Pay
heed while you are working on foreign objects.
Should you nevertheless encounter an obstacle
when cutting, switch o the machine and remove
the obstacle.
- Never leave the appliance unattended at the
workplace. If you stop work, please store the
appliance in a safe place.
- Never use the device in rain or in damp, moist
environment.
- Do not cut against hard objects. By doing so,
you will avoid hurting yourself and damaging the
device.
- Do not try to use the device to cut grass that
does not grow on the ground; for example, do
not try to cut grass, which grows on walls or on
the stones, etc.
- Before you connect the appliance to the mains,
please ensure that none of the rotating elements
are damaged and the reels are used correctly and
are attached.
- Before putting the machine into operation
and after any impact, check for signs of wear or
damage, and get the necessary repairs done.
- Repairs may be done only by an electrical
specialist.
6.2 Security warnings for chain saw
1. Keep all parts of your body away from the saw
chain, when it is functioning. Before you start
the chain saw, make sure that the chain does
not touch anything. Lack of attention during the
operation of the chain saw can cause the saw
chain to get entangled with your clothes or body.

13
2. Do not use the saw on a tree. Sawing a tree can
lead to a serious injury.
3. Always have a secure foothold and use the saw
only if you are standing on a xed, safe and level
surface. Slippery and unstable surfaces such as
ladders can lead to a loss of balance or the loss of
control of the chain saw.
4. If you saw away a branch, which is found under
tension, please be careful because there could be
a kickback. If the pressure of the wooden bre is
released, this can hit the user and / or bring the
saw out of control.
5. Be especially careful when cutting bushes and
young trees. The soft material can jam the chain
and can be thrown forward or throw you o
balance.
6. Carry the switched o chain saw at the front
handle with the switched-o saw away from your
body. During transport or when storing, always
use the chain guard. The proper handling of the
chain saw reduces the likelihood of unintended
contact with the moving saw chain.
7. Follow the instructions regarding lubrication,
chain tension and replacement of the accessories.
An improperly tensioned or oiled chain can break
or lead to an increased likelihood of a kickback.
8. The handles should be dry, clean and without
any oil or grease. Greasy, oily handles are slippery
and lead to loss of control.
9. Saw only wood. Do not use the chain saw for
purposes not intended for it. For example: Do
not saw plastic, brickwork or other construction
material not made of wood. The use of the saw
for purposes other than what it was intended for,
could result in dangerous situations.
10. Keep a rm grip with the thumb and
ngers around the chain saws handles, both
hands on the saw and your body and arms in a
position, which can resist a kickback. The forces
of the kickback can be controlled if proper
precautionary measures are taken. Do not let go
of the saw.
11. Do not stretch too much forward and do
not saw over shoulder height. This prevents
accidental contact of the chain nose and allows
better control of the chain saw in unexpected
circumstances.
12. Use only replacement saw blades and chains,
which are specied by the manufacturer. Wrong
spare blades and chains can break the chain and/
or cause a kickback.
13. Follow the instructions provided by the
manufacturer regarding sharpening as well as
the maintenance instructions for the chain. The
reduction of the depth adjustment can lead to an
increased kickback.
6.3 Security warning for grass trimmer/brush
cutter
1. Grass trimmers must not be used by children
or untrained persons.
2. Wear stout shoes or boots to protect your feet.
3. Wear long trousers to protect your legs.
4. Check the appliance before use. If it is
damaged, it must not be used.
5. If the unit is damaged, have the damage
repaired by an authorized repair agent.
6. Do not use the appliance if the mains cable is
damaged or worn.
7. Before use check the extension cord for
possible wear and tear. In case of damage,
immediately remove the mains cable from the
wall socket. Do not touch the cable before the
mains cable has been removed from the wall
socket.
8. Do not use the appliance in daylight or with
good lighting.
9. Never use the appliance without the guard in
place.
10. Before using the appliance, remove sticks,
stones, wire and other obstacles from the surface

14
on which you intend to work.
11. Only use the appliance in an upright position,
with the cutting line pointing to the ground.
Never switch on the appliance in another
position.
12. Always keep your hands and feet away from
the cutting line.
13. Avoid touching the cutting line.
14. Make sure that the mains cable does not
touch the cutting line.
15. Before putting the appliance down, switch
it o and wait for the cutting line to come to a
complete standstill. Never attempt to bring the
cutting line to a standstill yourself.
16. Only use the type of cutting line
recommended by the manufacturer. Never use a
metal cutting line or shing line.
17. Remove the plug from the wall socket when
you have nished, before servicing, or when the
appliance is not being used.
18. After use, always store the appliance safety
and out of the reach of children.
19. Do not cut against hard objects. This could
cause injury or damage the trimmer.
20. Do not use the trimmer to cut grass which is
not in contact with the ground, for example, do
not cut grass which is on walls or rocks etc.
WARNING: Read the user’s manual before
rst use. Failure to follow the warnings and
instructions can result in serious injury.
7. Device Description
1. Motor Housing
2. Grip handle
3. Lock o switch
4. On/o switch
5. Auxiliary handle
6. Lock button
7. Adapter
8. Driver tube
9. Sponge
10. Lower tube
11. Safety guard
12. Gear box
13. Line head
14. Blade
15. Saw chain
16. Guide bar
17. Chain cover
18. Strap
19. Blade cover
20. Angle-adjustment trigger
21. Oil tank
22. Chain tensioning knob
23. Wrench
8. Mounting
Caution! Connect the electric power tool to
the mains only after it has been completely
installed. Always wear protective gloves when
you work on the garden tool, to avoid injury.
8.1 Installation of auxiliary handle (B2-3)
1. Turn the lock button(6) to open the lock
assembly in the handle.
2. Put the auxiliary handle in your desired
position.
3. Turn the lock button(6) to lock the handlebar in
place.
8.2 Installation of tube (B4-5)
1. Insert the lower tube(10) into the hole of driver
tube (8).
2.Rotate the lock button to tighten the tubes.
8.3 Installation of strap (B6)
Checks before use:
-Distance from the shoulder strap suspension up
to the cutting tool min. 750mm
-Distance of the cutter from the oor, while using
as trimmer 0-300mm and while using with cutter
blade 100- 300mm
-Keep a safe distance between yourself and the
cutting tool while working.
-The brush cutter/grass trimmer/ chain saw must
be used with the shoulder strap(20). Balance out
the machine rst at the switched-o state.

15
1. Put on the shoulder strap (20).
2. Adjust the strap length
3. Hang the device to the snap hook of the
shoulder strap.
4. Let the machine swing.
- The cutting tool may just about touch the
ground during normal work posture.
ATTENTION! In the event of an emergency, the
secure-t tab can be pulled out at the shoulder
strap. The machine will then be immediately
released from the shoulder strap (20) and falls to
the oor.
8.4 Installation of chain-saw
Your new chain saw requires an adjustment of
the chain and lling of the lubrication oil tank
with the lubricating oil before the device is ready
for operation. Do not keep the saw’s engine on as
long as the the device is not properly prepared.
Read all instructions carefully.
Do not install any other rail or chain as the one
recommended for the model.
8.4.1 The guide bar and chain assembly(B7-11)
1. First remove the chain guard from the blade
unit.
2. Then rotate the locking screw on the cutting
head with the wrench and remove the upper
housing cover.
3. Set the saw chain into the groove guide of the
blade unit, Start as far as possible at the blade's
top edge.
4. Place the saw chain around the chain sprocket
and set the blade unit on the bolt of the tension
slide . Make sure that the bolt intervenes in the
corresponding opening on the blade.
5. If necessary, turn the screw on the tensioner. So
that a uniform wear of the chain blade is ensured,
the the chain blade should be rotated after 8 - 10
working hours.
Make sure that there is always a correct tension of
the chain and check them before each use of the
device. A loose chain could get loosened from
the guide groove of the blade unit and cause
serious injury. Further a loose chain also increases
the danger of a backlash. In addition, the blade ,
chain and chain sprocket get worn out faste
8.4.2 Adjustment of the chain stretching (B8)
1. First turn the locking screw at the sprocket
cover slightly.
2. Below the chain blade, the screw of the
tensioner is located on the front side of the
head of the device. Turn this with the help of
the wrench, in the corresponding direction, to
increase and/ or loosen the tension of the chain.
Turn in clockwise direction: Chain tension is
increased.
Rotate counter-clockwise: Tension of the chain is
loosened.
A correct chain tension can be recognized
through the saw chain resting at every point of
the blade unit uniformly and does not sag or is
not too strongly tensed.
3. If the chain tension is correctly set, tighten the
locking knob of the chain sprocket cover again.
New chains stretch out. Check the new chain
after a few minutes of the operation. Let the
chain to cool down and then, if necessary, set the
chain tension again.
8.4.3 Fill the oil tank (B12)
The prerequisite for a proper function and a long
product life cycle is a regular lubrication. You
should therefore check the oil tank in this device
before each start-up and ll oil as required.
Proceed as follows:
1. Open the cap of the oil reservoir. Remove oil
residues and other impurities by wiping the tank
cap and the oil ller neck with a cloth.
2. Fill in environmentally-friendly and
biodegradable chain lubricant oil in the oil
reservoir and plug it back subsequently. To rule

16
out the risk of a re as much as possible, when
lling, ensure that there are no oil residues are
found outside the tank. Always use a funnel to ll
the oil.
Notes:
- Never use waste oil for the chain lubrication.
- Waste oil does not have the necessary
lubrication properties, is harmful to the
environment and causes skin cancer due to
prolonged and repeated contact with the skin.
- Use only lube oil, which is a sucient resistance
to aging, so that it does not resinify and forms
solid deposits, which could damage the device.
- Always adhere to the specied oil intervals. This
device must be provided with new oil after a
working time of max. 15 min.
- Adjustment of the ow of the oil Warning:
An increase in the oil ow accelerates the
oil consumption, leading to more frequent
inspections/rell.
- In order to ensure a sucient lubrication, it
may be necessary to check the oil level more
frequently than in the case of lling the fuel tank.
- The guide rail and chain are automatically
lubricated by a pump that works when the chain
is turning.
8.4.4 Changing the cutting angle
1. In order to change the cutting angle, press two
angle change lever simultaneously.
2. Turn the guide head to the desired angle.
3. The recommended cutting angle is between
? and ? degrees.
8.5 Installation of grass trimmer and brush
cutter
8.5.1 Protective shield assembly (B13-14)
WARNING: To prevent an accident, always pull
out the plug from the wall socket before you use
the machine, t the protective shield or adjust
the settings.
WARNING: If the protective shield is damaged,
please do not use the trimmer, till it is replaced.
1. Put the aluminous protective shield in the gear
box. Then insert four screws and tighten them.
2. Put the plastic protective shield on the
aluminous safety cover and align the fastening
groove.
3. Insert four screws and tighten them.
8.5.2 Trimmer spool assembly (B15-16)
1. Insert the support ange on the shaft.
2. Lock the support ange of the grass trimmer
at the required position with a screwdriver or
other (B15).
3. Rotate the thread spool against the clockwise
on the shaft.
8.5.3 Replacing the trimmer cord (B17-18)
1. In order to remove the hub cover, simply press
it on both sides to detach it.
2. After removing the cover, remove the rest of
the thread or dirt from the coil and the lid.
3. Insert the new thread in the coil slots and
secure the thread in the locking device. Make
sure that the end of the thread is approximately
80 mm longer than the end of the other thread.
4. Follow the arrow mark on the coil and wind the
thread in this direction indicated. While winding,
pull.
5. Wrap the inner spool up to around 100 mm
before the locking notch.
6. Put on the cover. When installing, make sure
that the elevated part matches. The writing on
the coil should be visible from the outside.
7. After properly tting the cover, please pull the
thread through the eye. One thread per eye, not
both threads through an eye.
8. After aligning the slotted elevated parts and

17
the eyes, press the cover inwards and ensure that
the cover and the drum are properly correctly
protected.
8.5.4 Cutter blade(14) assembly (B19-23)
To use the device as brush cutter, the cutting
guard and the cutter blade have to be mounted.
Remove the plastic protective shield but retain
the aluminous protective shield.
1. Lock the shaft of the brush cutter in the
required position using a screwdriver or other.
2. Turn the thread spool in the clockwise
direction from the shaft (if already installed).
3. Leave the support ange on the shaft.
4.Lock the support ange of the brush cutter
at the required position with a screwdriver or
other(B20).
5.Set the cutter blade (14) on the support ange .
6. Place the clamping ange on the cutter blade
(14).
7. Tighten the lock nut.
9. Operation
9.1 Switch on/o (B24)
The power tool is equipped with a locking button
for preventing accidents.
To switch on: Push the locking button for switch-
on/switch-o (3) and then press the ON/OFF
switch (4).
To switch o:: Release the on/o switch(4).
9.2 Working with the chain saw
9.2.1 Precaution measures for the sawing
procedure
So that the injury or accident risk is reduced as
far as possible, it is important to be suciently
informed about the sawing procedures as well as
about the precautionary measures for accident
prevention.
Never position yourself directly under the branch,
which you want to saw. There is a very big risk
that the branch falls down unexpectedly on you.
In general it is recommended that the pruning
saw is set at an angle of 60° to the branch (B26).
- Hold the device well with both hands tightly
during the cutting process and make sure you
always pay attention to a balanced as well as a
good rm position.
- Never try to operate your tool with one hand.
Loss of control over your machine can cause
serious or fatal injuries. Never work on a ladder, a
branch of a tree or other unsafe substrates.
- Do not saw strong branches in one cut, but
always in several steps.
- Put the saw chain for cutting on the branch.
- Put a little pressure for guiding the device but
do not overload the engine.
-Clean the working area before cutting the
disruptive branches and undergrowth. Then
you create a retreat area, far from the area, on
which the cut branches could fall and remove all
obstacles. Keep the work area free, remove the
branches that have been cut o immediately.
Pay attention to your position, the wind direction
and the possible falling direction of the branches.
Please be prepared that the fallen branches could
hit back. Place all other tools and equipment in
a safe distance from the branches to be cut, but
not in the area of a backlash.
-Always observe the condition of the tree.
-Look for decay and rot in the roots and branches.
If these are decayed inside, they can break o
unexpectedly and fall down while cutting. Please
look out also for broken and dead branches,
which get loosened through shaking and
could fall on you. In case of very thick or heavy
branches, rst make a small cut under the branch
before you work from top to bottom, to prevent a
breakage.
9.2.2 Basic cutting technology
Heavy branches will slightly break when cutting
and while doing so long branch straps can tear

18
away from
the trunk, which damages the tree long term.
With the following technology you can reduce
this risk signicantly(see B25):
1. Saw the branch rst about 10 cm from the
trunk, at the branch’s lower side
2. Estimate another cut from above at a distance
of about 15 cm to the trunk. Saw it for so long till
the branch breaks. The risk of a breach in a bark
at the trunk is no longer there any more
3. Finally, remove the remaining snag with a
clean cut along the top of the trunk
So that the damages to the tree are kept as low as
possible, we recommend seal up the cut surface
in addition with tree wax seal.
9.2.3 Dangers caused by reactive forces
Reactive forces come during the operation of
the saw chain. In this, the force, which should be
used on the wood is eected on the operator.
This happens when the operating chain comes in
contact with a solid object such as a branch or is
jammed. These forces can lead to a loss of control
and injury from it. Understanding the origin of
these forces can help you determine the moment
of shock and to avoid the loss of control.
This saw is designed in such a way that the
rebound eects are not felt as in the case of
conventional chain saws. Nevertheless always
keep a rm grip and a good position, to have
control over the tool in case of doubt.
The most common eects are:
• backlash,
• rebound,
• retraction.
Backlash
The backlash can take place if the operating saw
chain at the upper area of the guide rail comes in
contact with a xed object or if it is jammed (see
B27).
The cutting force of the chain exerts a rotational
force on the saw in the opposite direction to the
movement of the chain.
This leads to an upward movement of the guide
rail.
Avoid backlash
The best protection is to avoid situations that
lead to backlashes.
1. Keep your eyes on the position of the upper
guide rail always.
2. Let this area never come in contact with an
object. Do not cut anything with it. Be especially
careful in the vicinity of wire fences and when
cutting small, hard branches, in which the chain
can become slightly jammed.
3. Cut only one branch at a time.
A = Retraction (see B28)
The retraction takes place if the chain suddenly
gets stuck at the lower side of the rail, since it
is jammed or comes in contact with a foreign
body in the wood. The chain then pulls the saw
forward. The retraction happens often when
the chain during contact with the wood is not
running at full speed.
Avoid backlash
1. Be aware of the forces and situations, which
could lead to the jamming of the chain at the
rail's bottom part.
2. Always start with the chain running at full
speed cutting for cutting.
B = Rebound (see B29)
The rebound takes place if the chain gets stuck
on the top side of the rail suddenly, since it is
jammed or if it comes in contact with a foreign
body in the wood. The chain can press the saw
jerkily against the operator. Rebounds happen
often when the rail's upper side is used for
cutting.
Avoid rebounds
- Danger of backlash! There is always danger
of backlash, if the blade tips come into contact
with branches or other objects. The brush cutter
becomes uncontrollable due to this and can
pushed with great force in the direction of the
operator.

19
1. Be aware of the forces and situations, which
can lead to jamming of the chain at the rail's top
side.
2. Do not cut more than a branch at a time.
3. Do not tilt the rail to the side when you drag
it from a cutting gap, since the chain could be
otherwise jammed.
9.3 Working with the grass trimmer/ brush
cutter
- Familiarize yourself - if the device is switched o
- rst with the operation and holding, if you are
working with the brush cutter work for the rst
time.
- The brush cutter has to be designed in such a
way that they are held by the operator only on
the right side of the body’s side.
- Hold the brush cutter tight always with both
hands on the handles.
- Hold the operating handle with your right hand
and with the left hand the handle of the hand
bar.
- Work with high speed, and thus you will have
the best cutting results.
- Hold the device with evenly curved movement
from left to right and back again.
Then cut the next length.
Caution: Direct the device always back only again
to the initial position before you cut the next
length.
- If you bump into a stone or a tree while working,
switch o the machine and disconnect the plug.
Caution: When working in dicult terrain and
slopes, please be especially careful. In case of
high grass, cut gradually in order not to overload
the device. First cut the tips, work then gradually.
Always wear safety glasses and a hearing
protection and during deforestation work, a
protective helmet.
9.3.1 Mowing with a thread head
- Use the thread cartridge to maintain a clean cut
also of uneven edges, fence posts and trees.
- Guide the trim line carefully past an obstacle
and cut with the thread tip around the obstacle.
In case the trim line comes in contact with rocks,
trees and walls, the thread becomes frayed
prematurely or breaks.
- Never replace the plastic thread never by a
metal wire - Risk of injury!
9.3.2 Mowing with a cutter blade
- Use the cutter blade to thin out scrub,
uncontrolled growth, young stocks of trees
(maximum 2 cm trunk diameter) and tall grass.
- While using the metal cutting tools, there is
always the danger of a backlash, if the tool comes
into contact with a solid obstacle (rocks, trees,
branches etc.).
While doing so, the device is thrown back against
the direction of rotation.
- In case of uncontrolled growth and scrub, let
the cutter blade to "dive" from above. Through
this, the material to be cut is chopped.
ATTENTION: Follow the procedures for this work
technology with caution, because the greater the
distance of the cutting tool to the ground, the
greater the risk that the material to be cut and
foreign objects are thrown to the side.
For an adequate protective equipment during
the use, care has to be taken as per the operating
instructions. All other usages are ruled out. The
user / operator is responsible for injuries resulting
damage or injury due to incorrect use. and not
the manufacturer. Only 3-teeth blades suitable
for the machine as mentioned in the operating
manual may be used.
- To comb through young stocks of trees and for
cutting grass, hold the device such as a string
trimmer close to the ground.
ATTENTION: Incorrect use and abuse can
damage the cutter blade and cause serious injury
through the parts that are hurled down.
- To reduce the risk of accident due to the cutter
blade, note the following points:
- Never cut shrubs or wood with more than 2 cm
in diameter
- Avoid contact with the metal bodies, stones, etc.
- Check the cutter blade regularly for damage.
Never use damaged cutter blade again.
- If the cutter blade is noticeably dulled, it must
be sharpened by a qualied specialist, as per the

20
specications. In case of noticeable imbalance,
the cutter blade must be replaced.
9.3.3 Trim-line Automatic
The brush cutter is delivered with a full spool
holder.
The thread becomes worn out during the work.
So that new thread is supplied, press the shutter
release at the spool holder vigorously on the
ground.
The thread is automatically released by the
centrifugal force. Through the blade at the
cutting guard, the trim thread is shortened on
the correct length.
10. Maintenance
Use only original spare parts while doing
maintenance work. Using any other parts may
be dangerous and damage the device.
Warning: Always stop the engine, wait until
all moving parts have completely come to a
standstill and disconnect the power supply
before you examine, clean or maintain the
device. Failure to follow these instructions
may result in damage to property and serious
and fatal injury.
11. Cleaning and Storage
Clean the clamping mechanism regularly by
blowing it out it with compressed air or by
cleaning with a brush.
Do not use any tools for cleaning. Clean the
device if required, with a damp cloth and, if
necessary, with a mild detergent.
If the chain saw is not used for a longer period
of time, then remove the chain oil from the tank.
Place the saw chain and the sword briey in an
oil bath and then wrap it in oil blotting paper.
Caution!
Before every cleaning, remove the plug from the
wall socket
Never immerse the appliance in water or any
other liquid for cleaning.
Keep the garden tool in a safe and dry place and
out of the reach of children.
12. Notes on environmental protection
/ Disposal
Transport the device for a proper
disposal once it has been used.
Do not dispose of the device through the normal
household waste, but hand it at a collection
point for electronic devices, in the interest of
environmental protection. Your local council will
be pleased to inform you about the addresses
and opening hours. You may also hand over the
packaging materials and worn accessories to the
designated collection poin
Table of contents
Languages:
Other Nakayama Tools manuals

Nakayama
Nakayama PRO BL3600 User manual

Nakayama
Nakayama PRO BS2900 User manual

Nakayama
Nakayama EH1000 User manual

Nakayama
Nakayama EB3600 User manual

Nakayama
Nakayama PS3100 User manual

Nakayama
Nakayama EC1350 User manual

Nakayama
Nakayama PRO EC1400 User manual

Nakayama
Nakayama Pro EC1300 User manual

Nakayama
Nakayama PRO PS2600 User manual

Nakayama
Nakayama PRO EB3600 User manual
Popular Tools manuals by other brands

HARVEST
HARVEST H13102 Operator's manual

Sealey
Sealey SDC01 quick start guide

WOHLHAUPTER
WOHLHAUPTER COMBILINE 401 Series operating instructions

ITATOOLS
ITATOOLS ITA11 Operation manual & spare parts list

Southwire
Southwire Shoreline Reels RW instructions

Utility Solutions
Utility Solutions BREAK-SAFE 600 Inspection Procedure