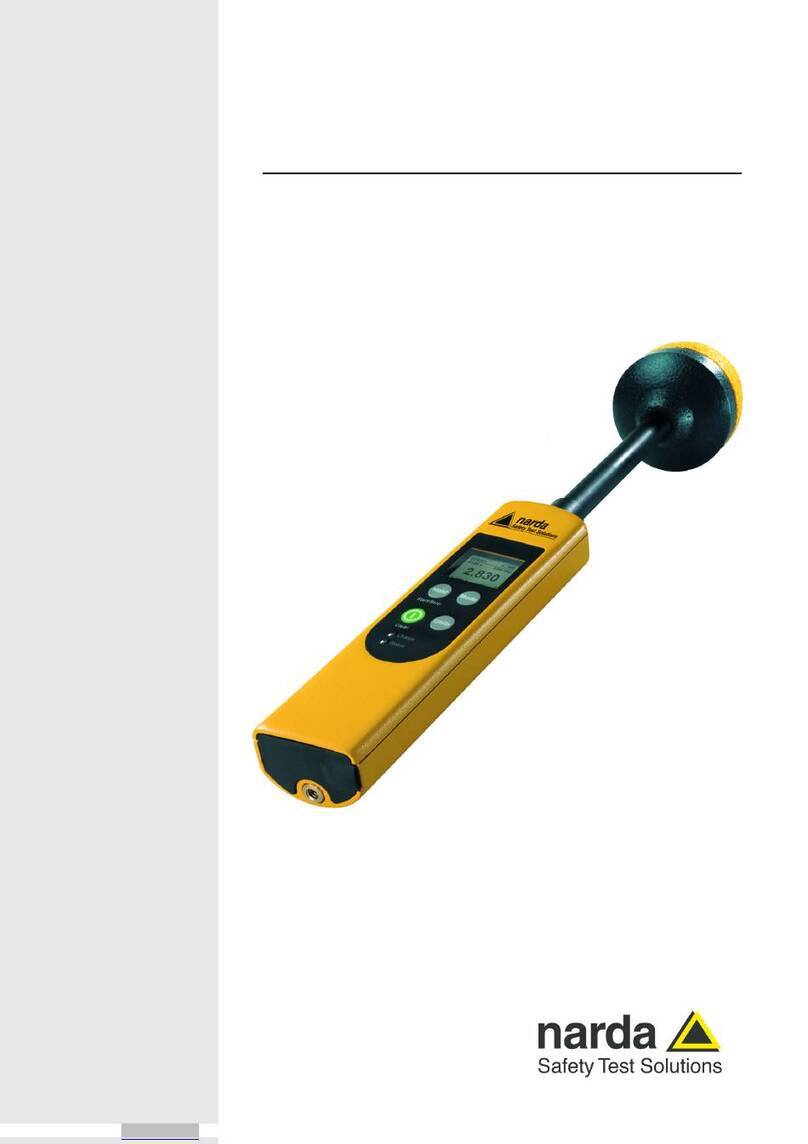
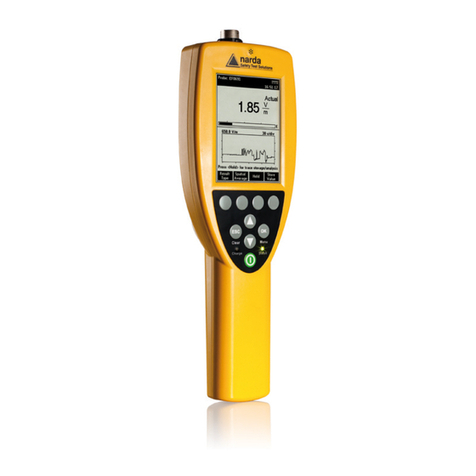
NARDA SRM-3000 User manual

SRM-3000
Selective Radiation Meter
Operating Manual
3001/98.21
Advanced Test Equipment Rentals
www.atecorp.com 800-404-ATEC (2832)
®
E
s
t
a
b
l
i
s
h
e
d
1
9
8
1


SRM-3000
Selective Radiation Meter
300X/XX, Series C ...
Operating Manual

Please direct all enquiries to your local
sales company.
Narda Safety Test Solutions GmbH
Sandwiesenstr. 7
72793 Pfullingen, Germany
© 2007
Order no.: 3001/98.21
Edition: 11/07.06, C ...
Previous edition: 10/06.11, C ...
Subject to change without notice.
Our normal guarantee and delivery
terms apply
Printed in Germany

Contents
1 Introduction . . . . . . . . . . . . . . . . . . . . . . . . . . . . . . . . . . . . 1-1
1.1 Application. . . . . . . . . . . . . . . . . . . . . . . . . . . . . . 1-1
1.2 About this instrument. . . . . . . . . . . . . . . . . . . . . . 1-3
1.3 About this Manual . . . . . . . . . . . . . . . . . . . . . . . . 1-4
2 Safety instructions . . . . . . . . . . . . . . . . . . . . . . . . . . . . . . 2-1
2.1 Before connecting up . . . . . . . . . . . . . . . . . . . . . 2-1
2.2 Correct use . . . . . . . . . . . . . . . . . . . . . . . . . . . . . 2-1
2.3 AC Adapter / Charger . . . . . . . . . . . . . . . . . . . . . 2-3
2.4 Faults and excessive stresses . . . . . . . . . . . . . . 2-4
2.5 Disposal in accordance with local regulations. . . 2-4
3 Preparation for use . . . . . . . . . . . . . . . . . . . . . . . . . . . . . . 3-1
3.1 Unpacking . . . . . . . . . . . . . . . . . . . . . . . . . . . . . . 3-1
3.1.1 Packaging . . . . . . . . . . . . . . . . . . . . . . . . . . . . . . 3-1
3.1.2 Checking the instrument for transport damage . . 3-1
3.1.3 Recovery after transport and storage . . . . . . . . . 3-1
3.2 Power supply. . . . . . . . . . . . . . . . . . . . . . . . . . . . 3-2
3.2.1 Battery pack operation . . . . . . . . . . . . . . . . . . . . 3-2
3.2.2 Handling the battery pack . . . . . . . . . . . . . . . . . . 3-3
3.2.3 Operation from AC Adapter / Charger. . . . . . . . . 3-3
3.3 Switching the instrument on and off . . . . . . . . . . 3-4
3.3.1 Switching on . . . . . . . . . . . . . . . . . . . . . . . . . . . . 3-4
3.3.2 Switching off . . . . . . . . . . . . . . . . . . . . . . . . . . . . 3-5
4 Instrument concept . . . . . . . . . . . . . . . . . . . . . . . . . . . . . . 4-1
4.1 SRM as a field strength meter. . . . . . . . . . . . . . . 4-1
4.1.1 Overall concept . . . . . . . . . . . . . . . . . . . . . . . . . . 4-2
4.1.2 Basic instrument . . . . . . . . . . . . . . . . . . . . . . . . . 4-2

4.1.3 Antennas . . . . . . . . . . . . . . . . . . . . . . . . . . . . . . . 4-3
4.1.4 Cable . . . . . . . . . . . . . . . . . . . . . . . . . . . . . . . . . . 4-4
4.2 SRM as a spectrum analyzer . . . . . . . . . . . . . . . . 4-4
5 Measurement setup variants . . . . . . . . . . . . . . . . . . . . . . 5-1
5.1 Variant overview . . . . . . . . . . . . . . . . . . . . . . . . . . 5-1
5.1.1 Measurement setup with a three axis antenna. . . 5-2
5.1.2 Measurement setup with a single axis antenna . .5-3
5.2 Assembling the measurement setup . . . . . . . . . . 5-5
5.3 Fitting the antenna directly
on the basic instrument . . . . . . . . . . . . . . . . . . . . 5-6
5.4 Using a cable to connect the antenna
to the basic instrument . . . . . . . . . . . . . . . . . . . . . 5-8
5.5 Fitting the Narda antenna to a tripod . . . . . . . . . 5-11
5.5.1 Antenna holder for three axis antennas . . . . . . . 5-11
5.5.2 Antenna holder for single axis and
three axis antennas . . . . . . . . . . . . . . . . . . . . . . 5-12
5.6 Registering a non-Narda antenna . . . . . . . . . . . 5-14
5.7 Registering a non-Narda cable. . . . . . . . . . . . . . 5-15
6 User interface . . . . . . . . . . . . . . . . . . . . . . . . . . . . . . . . . . 6-1
6.1 Control elements . . . . . . . . . . . . . . . . . . . . . . . . . 6-2
6.1.1 On / Off switch . . . . . . . . . . . . . . . . . . . . . . . . . . . 6-2
6.1.2 Menu selection keys. . . . . . . . . . . . . . . . . . . . . . . 6-2
6.1.3 Softkeys . . . . . . . . . . . . . . . . . . . . . . . . . . . . . . . . 6-3
6.1.4 Function keys . . . . . . . . . . . . . . . . . . . . . . . . . . . . 6-3
6.1.5 Rotary control . . . . . . . . . . . . . . . . . . . . . . . . . . . . 6-7
6.1.6 Keys for optimizing the display. . . . . . . . . . . . . . . 6-8
6.2 Operating status display. . . . . . . . . . . . . . . . . . . . 6-9
6.3 LCD panel elements. . . . . . . . . . . . . . . . . . . . . . 6-10
6.4 External connectors . . . . . . . . . . . . . . . . . . . . . . 6-12

7 “Safety Evaluation” mode . . . . . . . . . . . . . . . . . . . . . . . . 7-1
7.1 “Safety Evaluation” mode functions. . . . . . . . . . . 7-1
7.2 Selecting the operating mode . . . . . . . . . . . . . . . 7-1
7.3 Selecting the service to be measured . . . . . . . . . 7-4
7.3.1 Restricting the list of services to be measured
using the first service. . . . . . . . . . . . . . . . . . . . . . 7-4
7.3.2 Restricting the list of services to be measured
using the last service. . . . . . . . . . . . . . . . . . . . . . 7-5
7.3.3 Restoring the original list of services
to be measured . . . . . . . . . . . . . . . . . . . . . . . . . . 7-5
7.4 Setting the measurement range . . . . . . . . . . . . . 7-6
7.4.1 Setting the measurement range manually. . . . . . 7-6
7.4.2 Search for the best measurement range. . . . . . . 7-7
7.4.3 Using noise suppression (Noise Threshold) . . . . 7-8
7.5 Selecting the result type . . . . . . . . . . . . . . . . . . 7-10
7.6 Selecting the averaging parameters . . . . . . . . . 7-11
7.7 Selecting the resolution bandwidth (RBW) . . . . 7-13
7.8 Selecting display options. . . . . . . . . . . . . . . . . . 7-15
7.8.1 Selecting the units for the results . . . . . . . . . . . 7-15
7.8.2 Selecting display options. . . . . . . . . . . . . . . . . . 7-16
8 “Spectrum Analysis” mode . . . . . . . . . . . . . . . . . . . . . . . 8-1
8.1 Operating mode functions . . . . . . . . . . . . . . . . . . 8-1
8.2 Selecting the operating mode . . . . . . . . . . . . . . . 8-1
8.3 Selecting the frequency range. . . . . . . . . . . . . . . 8-4
8.3.1 Selecting the frequency range entry method. . . . 8-4
8.3.2 Defining the frequency range
by upper and lower frequencies . . . . . . . . . . . . . 8-4
8.3.3 Defining the frequency range
by center frequency and frequency span . . . . . . 8-6
8.4 Setting the resolution bandwidth (RBW) . . . . . . . 8-7

8.5 Setting the measurement range . . . . . . . . . . . . . .8-9
8.5.1 Setting the measurement range manually . . . . . . 8-9
8.5.2 Search for the best measurement range . . . . . . 8-10
8.6 Selecting the result type . . . . . . . . . . . . . . . . . . . 8-11
8.7 Selecting the averaging parameters. . . . . . . . . . 8-12
8.8 Selecting the display . . . . . . . . . . . . . . . . . . . . . 8-14
8.8.1 Selecting the units . . . . . . . . . . . . . . . . . . . . . . .8-14
8.8.2 Selecting the display mode and scaling . . . . . . . 8-16
8.8.3 Rapidly changing the frequency span
(Zoom function) . . . . . . . . . . . . . . . . . . . . . . . . . 8-20
8.9 Evaluating results . . . . . . . . . . . . . . . . . . . . . . . . 8-28
8.9.1 Marker functions. . . . . . . . . . . . . . . . . . . . . . . . . 8-28
8.9.2 Peak table. . . . . . . . . . . . . . . . . . . . . . . . . . . . . . 8-32
8.9.3 Integration over a defined frequency band. . . . . 8-37
9 “UMTS P-CPICH Demodulation” mode (option) . . . . . . 9-1
9.1 Operating mode functions . . . . . . . . . . . . . . . . . . 9-1
9.2 Selecting the operating mode. . . . . . . . . . . . . . . .9-2
9.3 Selecting the display . . . . . . . . . . . . . . . . . . . . . .9-5
9.3.1 Table Normal display mode . . . . . . . . . . . . . . . . . 9-6
9.3.2 Table Ratio display mode . . . . . . . . . . . . . . . . . . . 9-9
9.3.3 Bar Graph display mode. . . . . . . . . . . . . . . . . . . 9-10
9.3.4 Mixed display mode (numerical display
with graphical display versus time). . . . . . . . . . . 9-13
9.3.5 Value display mode (numerical) . . . . . . . . . . . . . 9-17
9.3.6 Graph (versus time) display mode . . . . . . . . . . . 9-18
9.4 Selecting an UMTS frequency or channel . . . . . 9-20
9.4.1 Selecting the center frequency. . . . . . . . . . . . . . 9-21
9.4.2 Selecting the channel number . . . . . . . . . . . . . . 9-22
9.5 Selecting the measurement range . . . . . . . . . . . 9-23
9.5.1 Setting the measurement range manually . . . . . 9-23
9.5.2 Search for the best measurement range . . . . . . 9-24

9.5.3 Using noise suppression (Noise Threshold) . . . 9-25
9.6 Selecting the result type . . . . . . . . . . . . . . . . . . 9-27
9.7 Selecting the averaging parameters . . . . . . . . . 9-28
9.8 Selecting the UMTS demodulation algorithm
(FAST/SENSITIVE) . . . . . . . . . . . . . . . . . . . . . . 9-30
9.9 Setting the extrapolation factor (Extr. Fact.) . . . 9-31
9.10 Evaluating and interpreting
measurement results. . . . . . . . . . . . . . . . . . . . . 9-33
9.10.1 Individual results . . . . . . . . . . . . . . . . . . . . . . . . 9-33
9.10.2 Overall result (Total) . . . . . . . . . . . . . . . . . . . . . 9-34
9.10.3 Partial results for specific radio cells
(Scrambling Codes). . . . . . . . . . . . . . . . . . . . . . 9-34
9.10.4 Analog measurement result (Analog) . . . . . . . . 9-34
10 “Time Analysis” mode . . . . . . . . . . . . . . . . . . . . . . . . . . 10-1
10.1 Operating mode function . . . . . . . . . . . . . . . . . . 10-1
10.2 Selecting the operating mode . . . . . . . . . . . . . . 10-1
10.3 Selecting display options. . . . . . . . . . . . . . . . . . 10-4
10.3.1 Value display . . . . . . . . . . . . . . . . . . . . . . . . . . . 10-4
10.3.2 Graph display . . . . . . . . . . . . . . . . . . . . . . . . . . 10-6
10.3.3 Mixed display. . . . . . . . . . . . . . . . . . . . . . . . . . . 10-9
10.4 Selecting the Center Frequency (Fcent) . . . . . 10-10
10.5 Selecting the Detector Type
(RMS value, peak value) . . . . . . . . . . . . . . . . . 10-11
10.6 Selecting the Resolution Bandwidth (RBW) . . 10-12
10.7 Setting the measurement range . . . . . . . . . . . 10-13
10.7.1 Setting the measurement range manually. . . . 10-13
10.7.2 Search for the best measurement range. . . . . 10-14
10.7.3 Using noise suppression (Noise Threshold) . . 10-15
10.8 Selecting the Result Type . . . . . . . . . . . . . . . . 10-17
10.9 Selecting the Averaging Time . . . . . . . . . . . . . 10-18
10.10 Evaluating the results . . . . . . . . . . . . . . . . . . . 10-19

11 Isotropic measurements . . . . . . . . . . . . . . . . . . . . . . . . 11-1
11.1 Measurements with a three axis antenna. . . . . . 11-2
11.1.1 Isotropic measurement
with a three axis antenna . . . . . . . . . . . . . . . . . . 11-2
11.1.2 Measuring a single axis
with a three axis antenna . . . . . . . . . . . . . . . . . . 11-4
11.2 Measurement using a single axis antenna . . . . . 11-5
11.2.1 Standard measurement
using a single axis antenna . . . . . . . . . . . . . . . . 11-5
11.2.2 Isotropic measurement
with a single axis antenna . . . . . . . . . . . . . . . . . 11-6
12 Spatial Averaging (option) . . . . . . . . . . . . . . . . . . . . . . . 12-1
12.1 Spatial Averaging in
“Safety Evaluation” mode . . . . . . . . . . . . . . . . . . 12-4
12.1.1 Continuous Averaging . . . . . . . . . . . . . . . . . . . . 12-5
12.1.2 Discrete Averaging . . . . . . . . . . . . . . . . . . . . . . .12-8
12.1.2.1 Discrete Averaging with a three axis antenna . . 12-8
12.1.2.2 Discrete Averaging with a single axis antenna . 12-10
12.2 Spatial Averaging in
“Spectrum Analysis” mode . . . . . . . . . . . . . . . . 12-14
12.3 Spatial Averaging in
“Time Analysis” mode. . . . . . . . . . . . . . . . . . . . 12-16
13 Result memory . . . . . . . . . . . . . . . . . . . . . . . . . . . . . . . . 13-1
13.1 Saving data. . . . . . . . . . . . . . . . . . . . . . . . . . . . . 13-1
13.1.1 Saving a single measurement . . . . . . . . . . . . . . 13-2
13.1.2 Automatic saving . . . . . . . . . . . . . . . . . . . . . . . . 13-4
13.1.3 Time Controlled Storing (option). . . . . . . . . . . . . 13-9
13.2 Managing data sets . . . . . . . . . . . . . . . . . . . . . 13-13
13.3 Entering and editing comments . . . . . . . . . . . . 13-17
13.4 Reading out stored data sets . . . . . . . . . . . . . . 13-19

14 General settings (Configuration) . . . . . . . . . . . . . . . . . . 14-1
14.1 Configurations for “Safety Evaluation” mode. . . 14-3
14.2 Configurations for “Spectrum Analysis” mode. . 14-3
14.3 Configurations for
“UMTS P-CPICH Demodulation” mode. . . . . . . 14-4
14.4 Configurations for “Time Analysis” mode . . . . . 14-5
14.5 Selecting a safety standard. . . . . . . . . . . . . . . . 14-6
14.6 Selecting a service table . . . . . . . . . . . . . . . . . . 14-7
14.7 Selecting a cell name table . . . . . . . . . . . . . . . . 14-9
14.8 Displaying device information . . . . . . . . . . . . . 14-11
14.9 Setting the date and time . . . . . . . . . . . . . . . . 14-13
14.10 Setting the number format
(Configure General). . . . . . . . . . . . . . . . . . . . . 14-15
14.11 Selecting the remote control interface
(Configure General). . . . . . . . . . . . . . . . . . . . . 14-15
14.12 Selecting the parameters
for the measurement range search
(Configure General). . . . . . . . . . . . . . . . . . . . . 14-16
14.13 Selecting an antenna / sensor. . . . . . . . . . . . . 14-17
14.14 Selecting a cable. . . . . . . . . . . . . . . . . . . . . . . 14-18
14.15 Creating and managing setups . . . . . . . . . . . . 14-20
15 Maintenance and repairs. . . . . . . . . . . . . . . . . . . . . . . . . 15-1
15.1 Changing the battery pack . . . . . . . . . . . . . . . . 15-1
15.2 Cleaning . . . . . . . . . . . . . . . . . . . . . . . . . . . . . . 15-2
15.3 AC Adapter / Charger . . . . . . . . . . . . . . . . . . . . 15-3
16 Adapting the instrument configuration using
“SRM-Tools” or “SRM-TS”16-1
16.1 Task of the “SRM-Tools” software . . . . . . . . . . . 16-1
16.2 Connecting a PC to the SRM-3000 . . . . . . . . . . 16-3
16.2.1 Serial interface connection . . . . . . . . . . . . . . . . 16-4

16.2.2 USB interface connection. . . . . . . . . . . . . . . . . . 16-4
16.3 SRM configuration . . . . . . . . . . . . . . . . . . . . . . 16-10
16.4 Reading out the stored results from a SRM . . . 16-13
16.5 Updating the firmware of the SRM . . . . . . . . . . 16-15
16.6 Activating options . . . . . . . . . . . . . . . . . . . . . . . 16-16
16.7 Installing and uninstalling “SRM-Tools”
or “SRM-TS” . . . . . . . . . . . . . . . . . . . . . . . . . . . 16-18
17 Remote control . . . . . . . . . . . . . . . . . . . . . . . . . . . . . . . . 17-1
17.1 Connecting to the PC . . . . . . . . . . . . . . . . . . . . . 17-1
17.2 Switching the SRM to
remote controlled operation . . . . . . . . . . . . . . . .17-2
17.3 Fundamentals of remote control. . . . . . . . . . . . . 17-3
17.3.1 Remote control command syntax. . . . . . . . . . . . 17-3
17.3.2 Parameter syntax . . . . . . . . . . . . . . . . . . . . . . . . 17-4
17.3.3 Command line termination . . . . . . . . . . . . . . . . . 17-4
17.4 Separate document about remote control . . . . .17-5
18 Specifications . . . . . . . . . . . . . . . . . . . . . . . . . . . . . . . . . 18-1
18.1 Frequency range and operating modes . . . . . . .18-1
18.2 RF characteristics. . . . . . . . . . . . . . . . . . . . . . . . 18-1
18.2.1 Frequency . . . . . . . . . . . . . . . . . . . . . . . . . . . . . 18-1
18.2.2 “Spectrum Analysis” mode . . . . . . . . . . . . . . . . . 18-3
18.2.3 “Safety Evaluation” mode . . . . . . . . . . . . . . . . . . 18-4
18.2.4 “UMTS P-CPICH Demodulation” mode (Option) 18-5
18.2.5 “Time Analysis” mode. . . . . . . . . . . . . . . . . . . . . 18-7
18.2.6 Measurement functions . . . . . . . . . . . . . . . . . . . 18-8
18.2.7 General specifications . . . . . . . . . . . . . . . . . . . 18-11
18.3 Three axis E-field measurement antenna
specifications . . . . . . . . . . . . . . . . . . . . . . . . . . 18-13
18.3.1 Characteristics . . . . . . . . . . . . . . . . . . . . . . . . . 18-13
18.3.2 Measurement uncertainty. . . . . . . . . . . . . . . . . 18-14

18.3.3 General specifications . . . . . . . . . . . . . . . . . . . 18-14
18.4 Single axis E-field antenna specifications
(3531/01) . . . . . . . . . . . . . . . . . . . . . . . . . . . . . 18-16
18.4.1 Characteristics. . . . . . . . . . . . . . . . . . . . . . . . . 18-16
18.4.2 Measurement uncertainty . . . . . . . . . . . . . . . . 18-17
18.4.3 General specifications . . . . . . . . . . . . . . . . . . . 18-17
18.5 Single axis E-field antenna specifications
(3531/02B). . . . . . . . . . . . . . . . . . . . . . . . . . . . 18-19
18.5.1 Characteristics. . . . . . . . . . . . . . . . . . . . . . . . . 18-19
18.5.2 Measurement uncertainty . . . . . . . . . . . . . . . . 18-20
18.5.3 General specifications . . . . . . . . . . . . . . . . . . . 18-20
18.6 Single axis H-field antenna specifications
(3551/01) . . . . . . . . . . . . . . . . . . . . . . . . . . . . . 18-22
18.6.1 Characteristics. . . . . . . . . . . . . . . . . . . . . . . . . 18-22
18.6.2 Measurement uncertainty . . . . . . . . . . . . . . . . 18-22
18.6.3 General specifications . . . . . . . . . . . . . . . . . . . 18-23
18.7 Conformity declaration . . . . . . . . . . . . . . . . . . 18-24
Appendix A:
Measurement methods using a single axis antenna . . A-1
Appendix B:
Technical descriptions . . . . . . . . . . . . . . . . . . . . . . . . . . B-1
Appendix C:
Instrument graphics . . . . . . . . . . . . . . . . . . . . . . . . . . . . C-1


1-1
1Introduction
1.1 Application
In today’s world, virtually everyone lives and works in an environment full of
technical equipment that generates electric and magnetic fields. As
research into the possible effects on humans has increased, so has
awareness of the problem and the depth of information within this area of
interest. Various authorities have long defined limit values to protect users
from excessive exposure to emissions.
The SRM-3000 provides practically everyone who is concerned with this
problem with a measuring instrument which, with the minimum of fuss, is
capable not only of showing whether limit values are being adhered to or
not, but also of allowing further analysis of the field components in relation
to the overall exposure.
The available operating modes cover the requirements of very different
users.
For example, a safety engineer concerned with the frequency spectrum of
telecommunications equipment can use the instrument to monitor
compliance with limit values at the workplace, and a planner can measure
the emissions present in public areas so that these can be taken into
account in future plans.
On the other hand, the SRM is also a high-quality evaluation tool for
qualified communications engineers who may be concerned with the
emission spectra present around telecommunications equipment.
The SRM takes care of all evaluations directly on site. Nevertheless, the
results can be transferred to a PC, so that measurement reports can be
produced, for example. The SRM can also be remote controlled from a PC.

1 Introduction SRM-3000
1-2
Fig. 1-1 The SRM-3000 in use

SRM-3000 1 Introduction
1-3
1.2 About this instrument
The SRM-3000 is an instrument for measuring high-frequency fields in the
range from 100 kHz to 3 GHz.
The instrument incorporates a very wide, versatile range of functions in an
extremely light weight, handy device. This means that it is also ideal for use
particularly under conditions that require high mobility and robustness.
The SRM-3000 is a complete measuring system. Along with the basic
instrument, the SRM, Narda Safety Test Solutions GmbH also supplies
various antennas as solutions to different applications and frequency
ranges. These antennas have either three axes or a single axis. All Narda
antennas can be mounted directly on the basic instrument or connected to
it using a special RF cable.
Antennas with three axes (three axis antennas) make it possible to
automatically detect the three spatial components of the field to be
measured. Isotropic measurements are simpler and much faster than with
single axis antennas.
Other commonly available antennas can also be connected to the SRM
using the customary types of connecting cable.

1 Introduction SRM-3000
1-4
1.3 About this Manual
The following is a standard text which explains the typographic conventions
used in Narda documentation.
Typographic conventions
Some of the paragraphs in this Manual are marked with various symbols or
headings to make it easier to read and understand.
ªThe bent arrow indicates a cross-reference to another chapter or
section or to another document.
Note: This heading indicates important additional information or notes
about special features or situations.
✓The check mark before a paragraph indicates a requirement that must
be fulfilled before the next steps can be carried out.
⇒An arrow before a paragraph indicates a single action or task that must
be performed.
1. A numbered list indicates a series of actions that must be performed
one after the other.

2-1
2 Safety instructions
2.1 Before connecting up
This instrument was shipped in perfect condition. To ensure that this
condition is maintained and that operation is safe, please follow the
instructions given below.
2.2 Correct use
The instrument must only be used for the purpose and under the conditions
for which it is designed.
Danger
No warning function
The instrument is designed for detection and rapid evaluation of
electromagnetic field emissions. It is not a warning instrument; i.e. it does
not actively warn you of the presence of dangerous fields by means of
visible or audible signals.
⇒Always consider this instrument to be a measuring instrument, not a
warning device.
⇒Always carefully observe the measured value display when approaching
unknown fields.
⇒If you are in any doubt, use a warning device such as “RadMan” or
“Nardalert” from Narda Safety Test Solutions to give warning of
potentially hazardous field strengths.
Danger
Unsuitable frequency range
Dangerous fields can be overlooked if an unsuitable frequency range is
selected.
⇒Select the largest available or the appropriate frequency range.
⇒Always carefully observe the measured value display when approaching
unknown fields.
⇒If you are in any doubt, use a broadband device such as “RadMan” or
“Nardalert” from Narda Safety Test Solutions to give warning of
potentially hazardous field strengths.

2 Safety instructions SRM-3000
2-2
Danger
Misinterpretation of results obtained with single axis antennas
Only the field components which are parallel to the antenna axis will be
detected by a single-axis antenna.
Even if the field is strong, there is a danger that only a weak field or no field
at all will be measured if the antenna is not correctly positioned in the field.
⇒Make sure that the measurement setup is suitable when using a single-
axis antenna.
Danger
Strong fields
Very strong fields can occur in the vicinity of some radiation sources.
⇒Take care to observe safety barriers and markings.
⇒In particular, persons fitted with electronic implants (pacemakers) must
keep away from danger areas.
Danger
Electric shock
High voltages can occur inside the instrument.
⇒Do not bring the instrument or the antenna into contact with parts
carrying live voltages.
⇒Do not open the instrument.
⇒Do not use or handle an instrument which is open or which has been
visibly damaged.
⇒Only use the accessories supplied and intended for use with the
SRM-3000.
Caution
Malfunction
Incorrect use, damage and unauthorized repairs can adversely affect the
accuracy and function of the instrument.
⇒Only use the instrument under the conditions and for the purpose for
which it is designed.
⇒Check the instrument regularly for signs of damage.
⇒Repairs must only be made by qualified service personnel.
Table of contents
Other NARDA Measuring Instrument manuals

NARDA
NARDA 8718 User manual

NARDA
NARDA L3HARRIS SMARTS II User manual

NARDA
NARDA AMB-8059 User manual

NARDA
NARDA AMS-8063 Series User manual

NARDA
NARDA SRM-3006 Operating manual

NARDA
NARDA RadMan 2LT User manual

NARDA
NARDA NRA Series Instruction Manual

NARDA
NARDA IDA User manual

NARDA
NARDA SRM-3006 User manual

NARDA
NARDA nbm-520 User manual

NARDA
NARDA SignalShark 3310 User manual

NARDA
NARDA HP-01 User manual

NARDA
NARDA FieldMan User manual

NARDA
NARDA NIM-511 User manual

NARDA
NARDA PMM 6600 User manual

NARDA
NARDA EHP-50-G User manual

NARDA
NARDA EHP-50F User manual

NARDA
NARDA EFA-200 User manual

NARDA
NARDA PMM PL-01 User manual

NARDA
NARDA SRM-3006 User manual