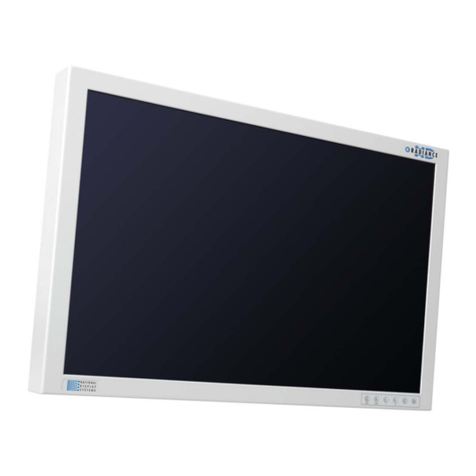
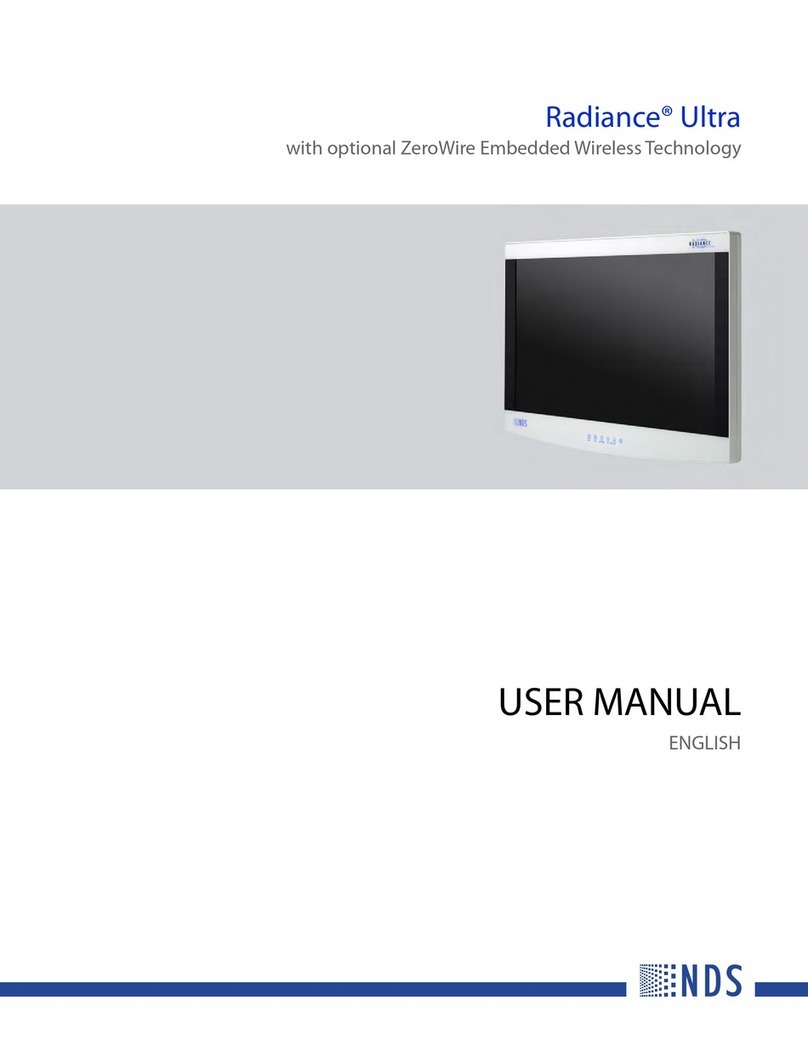
NDS Radiance Ultra 4K User manual

Radiance® Ultra 4K/UHD 32"
USER MANUAL
ENGLISH


© 2016 NDS Surgical Imaging, LLC. All rights reserved.
Information in this document has been carefully checked for accuracy; however, no guarantee is given to the
correctness of the contents. This document is subject to change without notice. NDS provides this information as
reference only. Reference to products from other vendors does not imply any recommendation or endorsement.
This document contains proprietary information protected by copyright. No part of this manual may be
reproduced by any mechanical, electronic, or other means, in any form, without prior written permission of NDS.
All trademarks are the property of their respective owners.


Table of Contents
Safety Information . . . . . . . . . . . . . . . . . . . . . . . . . . . . . . . . . . . . . . . . . . . . . . . . . . . . . . . . . . . . . . . . . . . . . . . . . . . . . . . . . . 1
Warnings and Cautions . . . . . . . . . . . . . . . . . . . . . . . . . . . . . . . . . . . . . . . . . . . . . . . . . . . . . . . . . . . . . . . . . . . . . . . . . . . 1
System Safety Requirements . . . . . . . . . . . . . . . . . . . . . . . . . . . . . . . . . . . . . . . . . . . . . . . . . . . . . . . . . . . . . . . . . . . . . . 1
Intended Use and Contraindications. . . . . . . . . . . . . . . . . . . . . . . . . . . . . . . . . . . . . . . . . . . . . . . . . . . . . . . . . . . . . . . 1
Power Requirements. . . . . . . . . . . . . . . . . . . . . . . . . . . . . . . . . . . . . . . . . . . . . . . . . . . . . . . . . . . . . . . . . . . . . . . . . . . . . . 2
Power Supply . . . . . . . . . . . . . . . . . . . . . . . . . . . . . . . . . . . . . . . . . . . . . . . . . . . . . . . . . . . . . . . . . . . . . . . . . . . . . . . . . 2
Power Cord. . . . . . . . . . . . . . . . . . . . . . . . . . . . . . . . . . . . . . . . . . . . . . . . . . . . . . . . . . . . . . . . . . . . . . . . . . . . . . . . . . . . 2
Grounding . . . . . . . . . . . . . . . . . . . . . . . . . . . . . . . . . . . . . . . . . . . . . . . . . . . . . . . . . . . . . . . . . . . . . . . . . . . . . . . . . . . . 2
Recycling. . . . . . . . . . . . . . . . . . . . . . . . . . . . . . . . . . . . . . . . . . . . . . . . . . . . . . . . . . . . . . . . . . . . . . . . . . . . . . . . . . . . . . . . . 2
Medical Device Shipping Symbols. . . . . . . . . . . . . . . . . . . . . . . . . . . . . . . . . . . . . . . . . . . . . . . . . . . . . . . . . . . . . . . . . 2
Terms and Conditions . . . . . . . . . . . . . . . . . . . . . . . . . . . . . . . . . . . . . . . . . . . . . . . . . . . . . . . . . . . . . . . . . . . . . . . . . . . . . . . 3
Declarations of Conformity. . . . . . . . . . . . . . . . . . . . . . . . . . . . . . . . . . . . . . . . . . . . . . . . . . . . . . . . . . . . . . . . . . . . . . . . 3
Legal Statement . . . . . . . . . . . . . . . . . . . . . . . . . . . . . . . . . . . . . . . . . . . . . . . . . . . . . . . . . . . . . . . . . . . . . . . . . . . . . . . . . . 3
Standard Warranty and Service. . . . . . . . . . . . . . . . . . . . . . . . . . . . . . . . . . . . . . . . . . . . . . . . . . . . . . . . . . . . . . . . . . . . 4
Display User Interface . . . . . . . . . . . . . . . . . . . . . . . . . . . . . . . . . . . . . . . . . . . . . . . . . . . . . . . . . . . . . . . . . . . . . . . . . . . . . . . 7
Display Keypad . . . . . . . . . . . . . . . . . . . . . . . . . . . . . . . . . . . . . . . . . . . . . . . . . . . . . . . . . . . . . . . . . . . . . . . . . . . . . . . . . . . 7
OSD Menu Overview. . . . . . . . . . . . . . . . . . . . . . . . . . . . . . . . . . . . . . . . . . . . . . . . . . . . . . . . . . . . . . . . . . . . . . . . . . . . . . 7
Keypad Menu Navigation . . . . . . . . . . . . . . . . . . . . . . . . . . . . . . . . . . . . . . . . . . . . . . . . . . . . . . . . . . . . . . . . . . . . . . . . . 7
INPUT Button. . . . . . . . . . . . . . . . . . . . . . . . . . . . . . . . . . . . . . . . . . . . . . . . . . . . . . . . . . . . . . . . . . . . . . . . . . . . . . . . . . 7
MENU Button. . . . . . . . . . . . . . . . . . . . . . . . . . . . . . . . . . . . . . . . . . . . . . . . . . . . . . . . . . . . . . . . . . . . . . . . . . . . . . . . . . 7
SCROLL Button: Vertical Selection Control . . . . . . . . . . . . . . . . . . . . . . . . . . . . . . . . . . . . . . . . . . . . . . . . . . . . . . 7
Left/Right Buttons: Horizontal Selection Controls . . . . . . . . . . . . . . . . . . . . . . . . . . . . . . . . . . . . . . . . . . . . . . . 7
Color Button . . . . . . . . . . . . . . . . . . . . . . . . . . . . . . . . . . . . . . . . . . . . . . . . . . . . . . . . . . . . . . . . . . . . . . . . . . . . . . . . . . 7
OSD Menu. . . . . . . . . . . . . . . . . . . . . . . . . . . . . . . . . . . . . . . . . . . . . . . . . . . . . . . . . . . . . . . . . . . . . . . . . . . . . . . . . . . . . . . . 8
Picture Menu . . . . . . . . . . . . . . . . . . . . . . . . . . . . . . . . . . . . . . . . . . . . . . . . . . . . . . . . . . . . . . . . . . . . . . . . . . . . . . . . . . 8
Color Menu. . . . . . . . . . . . . . . . . . . . . . . . . . . . . . . . . . . . . . . . . . . . . . . . . . . . . . . . . . . . . . . . . . . . . . . . . . . . . . . . . . . . 9
Setup Menu . . . . . . . . . . . . . . . . . . . . . . . . . . . . . . . . . . . . . . . . . . . . . . . . . . . . . . . . . . . . . . . . . . . . . . . . . . . . . . . . . .10
Input Menu. . . . . . . . . . . . . . . . . . . . . . . . . . . . . . . . . . . . . . . . . . . . . . . . . . . . . . . . . . . . . . . . . . . . . . . . . . . . . . . . . . . 11
Connector Panel . . . . . . . . . . . . . . . . . . . . . . . . . . . . . . . . . . . . . . . . . . . . . . . . . . . . . . . . . . . . . . . . . . . . . . . . . . . . . . . . . . . 13
Radiance Ultra 4K/UHD Connector Panel . . . . . . . . . . . . . . . . . . . . . . . . . . . . . . . . . . . . . . . . . . . . . . . . . . . . . . . . . 13
Standard Input/Output . . . . . . . . . . . . . . . . . . . . . . . . . . . . . . . . . . . . . . . . . . . . . . . . . . . . . . . . . . . . . . . . . . . . . . .13
Connector Types . . . . . . . . . . . . . . . . . . . . . . . . . . . . . . . . . . . . . . . . . . . . . . . . . . . . . . . . . . . . . . . . . . . . . . . . . . . . .13
Data Connectors and Pinouts . . . . . . . . . . . . . . . . . . . . . . . . . . . . . . . . . . . . . . . . . . . . . . . . . . . . . . . . . . . . . . . . . . . . 13
SDI . . . . . . . . . . . . . . . . . . . . . . . . . . . . . . . . . . . . . . . . . . . . . . . . . . . . . . . . . . . . . . . . . . . . . . . . . . . . . . . . . . . . . . . . . . . 13
DisplayPort 1.2 . . . . . . . . . . . . . . . . . . . . . . . . . . . . . . . . . . . . . . . . . . . . . . . . . . . . . . . . . . . . . . . . . . . . . . . . . . . . . . . 13
HDMI 1.4B. . . . . . . . . . . . . . . . . . . . . . . . . . . . . . . . . . . . . . . . . . . . . . . . . . . . . . . . . . . . . . . . . . . . . . . . . . . . . . . . . . . . 14
DVI-D Digital . . . . . . . . . . . . . . . . . . . . . . . . . . . . . . . . . . . . . . . . . . . . . . . . . . . . . . . . . . . . . . . . . . . . . . . . . . . . . . . . . 14
Control Connectors and Pinouts. . . . . . . . . . . . . . . . . . . . . . . . . . . . . . . . . . . . . . . . . . . . . . . . . . . . . . . . . . . . . . . . . . 15
USB Mini B . . . . . . . . . . . . . . . . . . . . . . . . . . . . . . . . . . . . . . . . . . . . . . . . . . . . . . . . . . . . . . . . . . . . . . . . . . . . . . . . . . . 15
USB Micro AB. . . . . . . . . . . . . . . . . . . . . . . . . . . . . . . . . . . . . . . . . . . . . . . . . . . . . . . . . . . . . . . . . . . . . . . . . . . . . . . . .15
6-pin Modular RS-232 Serial Control. . . . . . . . . . . . . . . . . . . . . . . . . . . . . . . . . . . . . . . . . . . . . . . . . . . . . . . . . . . 15
Power Connector and Pinout. . . . . . . . . . . . . . . . . . . . . . . . . . . . . . . . . . . . . . . . . . . . . . . . . . . . . . . . . . . . . . . . . . . . . 16
24 Vdc Connector . . . . . . . . . . . . . . . . . . . . . . . . . . . . . . . . . . . . . . . . . . . . . . . . . . . . . . . . . . . . . . . . . . . . . . . . . . . . 16
Electrical Symbols . . . . . . . . . . . . . . . . . . . . . . . . . . . . . . . . . . . . . . . . . . . . . . . . . . . . . . . . . . . . . . . . . . . . . . . . . . . . . . . 16
Cable Bend Radius . . . . . . . . . . . . . . . . . . . . . . . . . . . . . . . . . . . . . . . . . . . . . . . . . . . . . . . . . . . . . . . . . . . . . . . . . . . . . . . 16
Specifications . . . . . . . . . . . . . . . . . . . . . . . . . . . . . . . . . . . . . . . . . . . . . . . . . . . . . . . . . . . . . . . . . . . . . . . . . . . . . . . . . . . . . . 17
Supported Resolutions . . . . . . . . . . . . . . . . . . . . . . . . . . . . . . . . . . . . . . . . . . . . . . . . . . . . . . . . . . . . . . . . . . . . . . . . . . . . .18
DisplayPort . . . . . . . . . . . . . . . . . . . . . . . . . . . . . . . . . . . . . . . . . . . . . . . . . . . . . . . . . . . . . . . . . . . . . . . . . . . . . . . . . . . . . . 18
DVI-D . . . . . . . . . . . . . . . . . . . . . . . . . . . . . . . . . . . . . . . . . . . . . . . . . . . . . . . . . . . . . . . . . . . . . . . . . . . . . . . . . . . . . . . . . . . 18
HDMI . . . . . . . . . . . . . . . . . . . . . . . . . . . . . . . . . . . . . . . . . . . . . . . . . . . . . . . . . . . . . . . . . . . . . . . . . . . . . . . . . . . . . . . . . . . 19
3G-SDI . . . . . . . . . . . . . . . . . . . . . . . . . . . . . . . . . . . . . . . . . . . . . . . . . . . . . . . . . . . . . . . . . . . . . . . . . . . . . . . . . . . . . . . . . . 19
Installation and Maintenance . . . . . . . . . . . . . . . . . . . . . . . . . . . . . . . . . . . . . . . . . . . . . . . . . . . . . . . . . . . . . . . . . . . . . . 20
VESA Mounting. . . . . . . . . . . . . . . . . . . . . . . . . . . . . . . . . . . . . . . . . . . . . . . . . . . . . . . . . . . . . . . . . . . . . . . . . . . . . . . . . .20
Cable Cover Installation. . . . . . . . . . . . . . . . . . . . . . . . . . . . . . . . . . . . . . . . . . . . . . . . . . . . . . . . . . . . . . . . . . . . . . . . . . 20
Cleaning Instructions . . . . . . . . . . . . . . . . . . . . . . . . . . . . . . . . . . . . . . . . . . . . . . . . . . . . . . . . . . . . . . . . . . . . . . . . . . . . 20
Maintenance Requirements . . . . . . . . . . . . . . . . . . . . . . . . . . . . . . . . . . . . . . . . . . . . . . . . . . . . . . . . . . . . . . . . . . . . . . 20
Image Retention Notice. . . . . . . . . . . . . . . . . . . . . . . . . . . . . . . . . . . . . . . . . . . . . . . . . . . . . . . . . . . . . . . . . . . . . . . 20
Troubleshooting . . . . . . . . . . . . . . . . . . . . . . . . . . . . . . . . . . . . . . . . . . . . . . . . . . . . . . . . . . . . . . . . . . . . . . . . . . . . . . . . . . . 20

Electromagnetic Compatibility Tables. . . . . . . . . . . . . . . . . . . . . . . . . . . . . . . . . . . . . . . . . . . . . . . . . . . . . . . . . . . . . . 21
Electromagnetic Emissions. . . . . . . . . . . . . . . . . . . . . . . . . . . . . . . . . . . . . . . . . . . . . . . . . . . . . . . . . . . . . . . . . . . . . . .21
Electromagnetic Immunity. . . . . . . . . . . . . . . . . . . . . . . . . . . . . . . . . . . . . . . . . . . . . . . . . . . . . . . . . . . . . . . . . . . . . . . 22
Recommended Separation Distances. . . . . . . . . . . . . . . . . . . . . . . . . . . . . . . . . . . . . . . . . . . . . . . . . . . . . . . . . . . . . 23
Contact . . . . . . . . . . . . . . . . . . . . . . . . . . . . . . . . . . . . . . . . . . . . . . . . . . . . . . . . . . . . . . . . . . . . . . . . . . . . . . . . . . . . . . . . . . . .26

Safety Information | 1
Safety Information
Warnings and Cautions
This symbol alerts the user that important information regarding the installation and/or operation of
this equipment follows. Information preceded by this symbol should be read carefully in order to avoid
damage to the equipment.
This symbol warns the user that un-insulated voltage within the unit may have sufficient magnitude to
cause electrical shock. It is dangerous to make contact with any part inside the unit. To reduce the risk of
electric shock, DO NOT remove cover (or back).
Note: There are no user serviceable parts inside. Refer servicing to qualified service personnel.
This symbol cautions the user that important information regarding the operation and/or maintenance
of this equipment has been included. Information preceded by this symbol should be read carefully to
avoid damage to the equipment.
This symbol denotes the manufacturer.
This symbol denotes the manufacturer’s European Community representative.
Safety Compliance
This product is T.U.V. approved with respect to electric shock, fire and mechanical hazards only in
accordance with CAN/CSA C22.2 No. 60601-1 and ANSI/AAMI ES60601-1.
Safety Compliance
This product meets the requirements of EN60601-1 so as to conform to the Medical Device Directive
93/42/EEC and 2007/47/EC (general safety information).
This product is intended only for use by healthcare professionals in professional healthcare environments.
This product is designed to meet medical safety requirements for a patient vicinity device.
This product is a Class
I
medical device. No modifications are allowed.
This product is intended for continuous operation.
System Safety Requirements
External equipment connected to the signal input/output or other connectors of this product for use in a patient
environment must comply with the requirements of ISO and UL/EN/IEC 60601-1 safety standards. A person who
connects such equipment to this product has by definition formed a system, and is responsible for compliance of
that system to the same ISO and UL/EN/IEC 60601-1 safety standards.
Installation of this product shall be carried out only by NDS authorized and trained personnel.
Intended Use and Contraindications
Intended Use
This product is intended for use in a medical environment to display high quality video and graphic images.
Contraindications
1. Do not use this product in the presence of flammable anesthetics mixture with air, oxygen or nitrous oxide.
2. To prevent fire or shock hazards, do not expose this product to rain or moisture.
3. No part of this product may come in contact with a patient. Never touch the product and a patient at the
same time.
4. This product is capable of displaying Radiology (PACS) images for reference only, and is not intended for
diagnostic use.
5. For mission critical applications, we strongly recommend that a replacement unit be immediately available.

2 | Safety Information
Power Requirements
Power Supply
This product complies to the listed safety standards only when used with the supplied medical grade power
supply:
Power Cord
Use the supplied hospital grade power cord with the correct plug for your power source.
• The power cord is the only recognized disconnect device for this product. To power off the product,
disconnect the power cord from the AC mains.
• The product and other medical equipment should be positioned so that the power cord and connection to AC
mains is readily accessible.
• If an extension cord or power strip is needed for connection of this product to AC mains, confirm that the
power cord plug can be securely connected to the cord or power strip.
• This product should be powered from a center tapped circuit when used in the US at voltages over 120 volts.
Grounding
This product is energized from an external electrical power source for MDD 93/42/EEC Class
I
equipment. It is the
responsibility of the installer to test the product’s earth ground to verify that it complies with the hospital, local
and national impedance requirements.
A ground post is located on the back of the product to use for grounding the chassis of the unit. Any such
grounding must be installed in accordance with applicable electrical codes. The ground post location is shown in
the illustration found on page 16.
Recycling
Follow local governing ordinances and recycling plans regarding the recycling or disposal of this
product.
Medical Device Shipping Symbols
Medical device shipping symbols, as defined below, are printed on the end panels of shipping containers used to
transport this product.
Model BridgePower BPM150S24F06
AC Input 100 - 240 Volts, 50 to 60 Hz
DC Output 24 Vdc, 6.25 A, 150 W
Conformité
Européenne
(European
Conformity)
Position
container
up
Keep dry Fragile Fragile,
keep dry

Terms and Conditions | 3
Terms and Conditions
Declarations of Conformity
FCC and Council Directives of European Standards
This device complies with Part 15 of FCC rules and 93/42/EEC and 2007/47/EC of the Council Directives of
European Standards. Operation is subject to the following two conditions: (1) This device may not cause harmful
interference, and (2) this device must accept any interference received, including interference that may cause
undesirable results.
1. Use the attached specified cables with the color monitor so as not to interfere with radio and television
reception. Use of other cable and adapters may cause interference with other electronic equipment.
2. This equipment has been tested and found to comply with the limits pursuant to FCC part 15 and CISPR 11.
This equipment generates, uses and can radiate radio frequency energy and, if not installed and used in
accordance with the instructions, may cause harmful interference to radio communications.
IEC
This equipment has been tested and found to comply with the limits for medical devices to the IEC 60601-1-2.
These limits are designed to provide reasonable protection against harmful interference in a typical medical
installation. This equipment generates, uses and can radiate radio frequency energy and, if not installed and
used in accordance with the instructions, may cause harmful interference to other devices in the vicinity.
FCC, Council Directives of European Standards, and IEC:
There is no guarantee that interference will not occur in a particular installation. If this equipment does cause
harmful interference to radio or television reception, which can be determined by turning the equipment off and
on, the user is encouraged to try to correct the interference by one or more of the following measures:
• Reorient or relocate the receiving antenna.
• Increase the separation between the equipment and receiver.
• Connect the equipment into an outlet on a circuit different from that to which the receiver is connected.
• Consult your dealer or an experienced radio/TV technician for help.
Accessory equipment connected to this product must be certified according to the respective IEC Standards (i.e.,
IEC 60950-1) for data processing equipment and IEC 60601-1 for medical equipment. Furthermore, all
configurations shall comply with the system standard, IEC 60601-1-1. Anyone who connects additional
equipment to the signal input part or signal output part configures a medical system, and is therefore
responsible that the system complies with the requirements of system standard IEC 60601-1-1. Whoever is
responsible for securing the unit to a system needs to insure that the mounting equipment used with this
product complies to IEC standard 60601-1. If in doubt, consult the technical services department or your local
representative.
Legal Statement
NDS may sell its products through other medical device manufacturers, distributors and resellers and therefore,
purchasers of this NDS product should consult with the entity through which this product was originally
purchased regarding the terms of any applicable product warranties provided by such entity, if any.
NDS neither assumes nor authorizes any person to assume for it any other liabilities in conjunction with and/or
related to the sale and/or use of its products. To ensure proper use, handling and care of NDS products,
customers should consult the product specific literature, instruction manual, and/or labeling included with the
product or otherwise available.
Customers are cautioned that system configuration, software, the application, customer data and operator
control of the system, among other factors, affect the product’s performance. While NDS products are
considered to be compatible with many systems, specific functional implementation by customers may vary.
Therefore, suitability of a product for a specific purpose or application must be determined by the consumer and
is not warranted by NDS.

4 | Terms and Conditions
NDS SPECIFICALLY DISCLAIMS ALL WARRANTIES OF ANY KIND, WHETHER EXPRESS, IMPLIED AND/OR
STATUTORY, INCLUDING, BUT NOT LIMITED TO WARRANTIES OF MERCHANTABILITY, FITNESS AND/OR OF
SUITABILITY FOR A PARTICULAR PURPOSE, AND NON-INFRINGEMENT WITH RESPECT TO ALL NDS PRODUCTS OR
SERVICES. ANY AND ALL OTHER WARRANTIES, REPRESENTATIONS AND/OR GUARANTEES, OF ANY TYPE, NATURE
OR EXTENT, BE IT IMPLIED, EXPRESS AND/OR WHETHER ARISING UNDER OR AS A RESULT OF ANY STATUTE, LAW,
COMMERCIAL USAGE, CUSTOM, TRADE OR OTHERWISE, ARE HEREBY EXPRESSLY EXCLUDED AND DISCLAIMED.
NDS, its suppliers and/or distributors are not liable, directly or by way of indemnity for any special, incidental,
consequential, punitive, exemplary or indirect damages, including but not limited to alleged damages for
delayed shipment, non-delivery, product failure, product design or production, inability to use such products or
services, loss of future business (lost profits), or from any other cause, whatsoever, in connection with or arising
from the purchase, sale, lease, rental, installation or use of such NDS products, these terms and conditions, or
with respect to any the terms of any agreement which incorporates these terms and conditions.
SOME JURISDICTIONS DO NOT ALLOW EXCLUSIONS AND DISCLAIMERS OF CERTAIN WARRANTIES OR
LIMITATIONS OF LIABILITY, SO THE LIMITATIONS AND/OR EXCLUSIONS, SET FORTH HEREIN, MAY NOT APPLY. IN
THAT EVENT LIABILITY WILL BE LIMITED TO THE GREATEST EXTENT PERMITTED BY LAW IN THE SUBJECT
JURISDICTION.
The information provided in this document, including all designs and related materials, is the valuable property
of NDS and/or its licensors and, as appropriate, they reserve all patent, copyright, and other proprietary rights to
this document, including all design, manufacturing reproduction, use, and sales rights thereto, except to the
extent said rights are expressly granted to others.
This user manual is subject to change without notice. If there is any concern about the latest instructions for use,
please consult with NDS.
Standard Warranty and Service
COVERAGE: NDS warrants this product to be in compliance with the specifications provided by NDS and to be
free from defects in material and workmanship as defined in such specifications. Subject to the conditions set
forth below, NDS agrees to repair or replace any part of the enclosed unit for the length of period indicated on
the chart below:
WARRANTY SERVICE: REPAIR and RETURN
1. Our standard warranty service is “Repair and Return.” Repair and Return requires the defective unit to be
returned to our service location for repair.
2. Cost of shipment of the defective unit to NDS is the responsibility of the customer. Cost of shipment of the
repaired unit to Customer is the responsibility of NDS.
3. NDS reserves the right in its sole discretion to provide Customer with a comparable refurbished replacement
unit in lieu of repair of customer's defective unit.
4. If NDS is unable within a reasonable time to repair or replace the defective unit, it shall refund the purchase
price for the product paid by the customer (exclusive of taxes, installation and shipping related fees).
EXCLUSIONS - WHAT IS NOT COVERED
1. Any product with a defaced, modified, or removed serial number.
2. Damage, deterioration or a malfunction resulting from accident, misuse, neglect, fire, water, lightning, or
other acts of nature, unauthorized product modification, or failure to follow instructions supplied with the
product.
3. Cosmetic damage including, but not limited to: scratches, cracks, dents, markings, glue and adhesive residue.
4. Any damage of the product due to shipment.
5. Any damage caused by factors external to the product, such as electric power fluctuation or failure.
NDS Product Standard Warranty Coverage
Radiance Ultra 4K/UHD 32" 3 Years from date of shipment by NDS

Terms and Conditions | 5
6. Normal wear and tear.
7. Removal, installation, and set-up service charges.
8. Failures not reported within the warranty term.
9. Any NDS products purchased through a distributor, reseller, or medical device manufacturer other than NDS
(each, an “Intermediary”), where such Intermediary provides direct warranty service to its end-user customers
in connection with such product.
a. An Intermediary may provide their end-user customers direct warranty support. Please contact NDS
Customer Service to determine if the product that you purchased is covered by this Standard Limited
Warranty or whether you need to contact the Intermediary through which you purchased the product for
warranty service.
CONTACTING NDS CUSTOMER SERVICE
1. Contact NDS Customer Service during the hours listed above. Have your NDS model number and serial
number available. You may be required to provide proof of purchase as a condition for receiving warranty
service.
2. Our representative may perform troubleshooting and diagnosis of the problem over the telephone/email. If
our representative is unable to fix the problem over the phone/email, we will issue a Return Material
Authorization (RMA) for the non-functioning unit and provide return instructions.
3. Upon receipt of the returned product, a service technician will evaluate the unit and confirm the failure
description provided by the customer.
a. If the found failure type is covered under warranty, the repair, parts, labor and shipment back to the
customer will be at no charge.
b. If the found failure type is not covered under warranty, NDS’s then current evaluation fee will apply in
addition to the cost of parts, labor and the return shipment.
c. If the unit is within the warranty period but the customer does not provide a problem description and the
service technician cannot determine the failure (no problem found - “NPF”) NDS’s then current evaluation
fee will apply in addition to return shipment.
Payment for Non-Warranty Evaluations and Repairs and other Evaluation Charges: Non-warranty repairs
requested by the customer will be performed at NDS's then current rates for any non-warranty repairs and will
include applicable evaluation fees and the cost of return shipping (if customer requests that NDS ship the
repaired product). NDS further reserves the right, in its sole discretion, to request pre-payment for any non-
warranty repairs, NPF evaluations, and return shipping charges prior to return of the product to customer. Any
invoiced amount not paid when due shall be subject to a service charge equal to the lesser of one and one-half
percent (1.5%) per month or the maximum rate permitted by law. If NDS undertakes collection or enforcement
efforts, customer shall be liable for all costs thereof, including attorney's fees. NDS reserves the right to suspend
warranty coverage to any customer who is in default of payment until such payment has been made.
DISCLAIMER
This limited product warranty sets forth your sole and exclusive remedy and NDS's sole and exclusive liability
under the Standard Limited Warranty described herein.
There are no warranties, express or implied, which extend beyond the description contained herein including,
but not limited to, the implied warranty of merchantability, fitness for a particular purpose, or non-infringement.
Country Phone Email Time Available
United States +1 408 754 4210 customercare@ndssi.com 7 am – 5 pm PST

6 | Terms and Conditions
NDS's liability is limited to the cost of repair or replacement of the product. NDS shall not be liable for:
1. Damage to other property caused by any defects in the product, damages based upon inconvenience, loss of
use of the product, loss of time, loss of profits, loss of business opportunity, loss of goodwill, interference with
business relationships, or other commercial loss, even if advised of the possibility of such damages.
2. Any other damages, whether incidental, indirect, consequential or otherwise.
3. Any claim against the customer by a third party.
End-users are cautioned that system configuration, software, the application, customer data and operator
control of the system, among other factors, affect the product performance. While NDS products are considered
to be compatible with many systems, specific functional implementation by the customers of the product may
vary. Therefore, suitability of a product for a specific purpose or application must be determined by consumer
and is not warranted by NDS.
This warranty gives you specific legal rights. You may have other rights, which may vary from locality to locality.
Some localities do not allow limitations on implied warranties and/or do not allow the exclusion of incidental or
consequential damages, so the above limitations might not apply to you.

Display User Interface | 7
Display User Interface
Display Keypad
The Display Keypad is centered on the lower front surface of the display enclosure, providing controls for
adjustment of display parameters using the On Screen Display (OSD) Menu system.
OSD Menu Overview
The OSD Menu provides controls divided into 4 categories: the Picture Menu, the Color Menu, the Setup Menu,
and the Input Menu.
Keypad Menu Navigation
INPUT Button
To directly open the Input Menu, tap the
INPUT
button. Input signal options are displayed in the right
column. The Input Menu is described on page 11.
MENU Button
To open the OSD Menu, tap the
MENU
button. The Picture Menu is initially displayed, with details of the
current Primary and Secondary inputs listed left and right respectively above the menu tabs.
SCROLL Button: Vertical Selection Control
To enter a menu, tap the
SCROLL
button. The top parameter row is selected with first tap of the
SCROLL
button, and the selection moves downward to the next row with each successive tap.
To exit a menu, use the
SCROLL
button to move the selection to the bottom menu row, and then tap the
SCROLL
button just once to highlight the menu tab, where you can use the or buttons to select
another menu tab.
Left/Right Buttons: Horizontal Selection Controls
To adjust a parameter, select the parameter row using the
SCROLL
button, then tap the or
buttons to select or to change a setting.
Color Button
To directly open the Color Menu, tap the
COLOR
button. The Color Menu contains Color, Brightness,
Contrast, and other parameters described on page 9.
INPUT MENU SCROLL
INPUT
MENU
SCROLL

8 | Display User Interface
OSD Menu
Access the OSD Menu by tapping the
MENU
button. The OSD Menu opens displaying the Picture Menu, with
details of the current Primary and Secondary inputs listed left and right across the top of the menu above the
menu tabs. Operating Hours and Firmware version number are listed left and right respectively at the bottom of
the menu.
To select other menu tabs, tap the or buttons to highlight a menu tab, then tap the
SCROLL
button to enter
the menu.
To adjust a parameter, tap the
SCROLL
button to move the row selection down to it, and then tap the or
buttons to adjust the parameter or select a setting. Parameter adjustments are applied in real time while
changing values or settings.
The OSD Menu closes automatically 30 seconds after the last action or can be closed by tapping the
MENU
button.
Note: Grayed out descriptions indicate parameters not available for the current signal or input configuration.
Picture Menu
Horizontal Position
To horizontally center the image, tap the or buttons.
Vertical Position
To vertically center the image, tap the or buttons.
Sharpness
To adjust sharpness (edge enhancement) of the displayed image, tap the or buttons.
= 50: default value displays the image as received.
> 50: increasing values sharpen the image.
< 50: decreasing values soften the image.
Overscan
To select an overscan setting, tap the or buttons.
0: The image is displayed at a size that fills the screen without losing any video information. Image could be
displayed as letterboxed, with black bars top and bottom or left and right.
1, 2, 3, 4, 5or 6: Incrementally enlarges and crops the centered image. As the image becomes larger, video
information is lost on all sides.
Scaling
To select a scaling option, tap the or buttons.
Fill: Expands the video image to fill the entire screen. The aspect ratio may not be accurately displayed.
Aspect: Expands the video image until its largest dimension fills the screen while retaining the aspect ratio.
The image may be displayed as letterboxed, with black bars top and bottom or left and right.
1:1: Displays the video data in its native size and aspect ratio. Images with resolution less than the Radiance
Ultra 4K/UHD native 3840 x 2160 resolution are displayed with a black background surrounding the image.
Note: Scaling options are limited to Aspect when overscan settings are > 0.

Display User Interface | 9
Color Menu
Open the Color Menu directly by tapping the
COLOR
button.
Gamma
To select a gamma setting, tap the or buttons.
1.8, 2.0, 2.2, 2.4 or 2.6: Preset gamma values
Video: Linear gamma Look Up Table (LUT)
PACS: DICOM gamma LUT
This product is capable of displaying Radiology (PACS) images for reference purposes only.
Color Temperature
To select a preset color temperature, tap the or buttons.
5500, 6500, 8000, 9300: Preset color temperatures.
User: With a preset color temperature selected, if any other Color parameter is subsequently adjusted from the
default setting, the resulting values are copied to the Color Temperature User presets and User is selected.
Red / Green / Blue
To adjust balance of the selected color in the image, tap the or buttons.
Saturation (available only for YUV inputs)
To adjust saturation (color intensity) of the image, tap the or buttons.
Hue (available only for YUV inputs)
To adjust hue (color) of the image, tap the or buttons.
Brightness
To darken or lighten the image, tap the or buttons.
Contrast
To adjust contrast of the image, tap the or buttons.
Video Level
To select a video level setting, tap the or buttons.
Normal: The incoming signal is displayed without modification.
Expanded: Expands a Limited Range 16–235 signal (220 shades from black to white) to a Full Range 0–255
signal (256 shades from black to white).
Note: Application of the Expanded setting to a Full Range signal will clip the image, with loss of detail in dark
and light areas.

10 | Display User Interface
Setup Menu
Menu Position:
To select from 4 preset screen locations for display of the OSD menu, tap the or buttons.
Language:
To select one of eight languages: English, Deutsch, Français, Italiano, Svenska, Español, Nederlands, or
Pycckий, tap the or buttons.
DPMS Enable
To enable or disable Display Power Management System (DPMS), tap the or
buttons.
Off: Default setting.
On: If there is no input signal, a “D.P.M.S” message displays for 10 - 15 seconds before
the display goes into Power Saving mode. The display turns on when the input signal is restored.
Menu Lock
To enable Menu Lock, tap the button.
Off: Default setting.
On: Disables access to all OSD menus except the Input Menu. The OSD Menu closes,
and a MENU LOCKED message displays briefly. To unlock OSD access, simultaneously
press the
MENU
and
SCROLL
buttons until the MENU UNLOCKED message displays.
Backlight
To adjust the backlight level of the display, tap the or buttons.
Backlight Stabilization
To enable or disable backlight stabilization, tap the or buttons.
Off: Default setting.
On: Controls LED output to maintain a consistent backlight luminance to compensate for LED output
degradation over the display lifetime.
Keypad Color
To modify the Keypad color setting, tap the or buttons.
Factory Defaults
To return all settings to factory preset values, tap the button. The “Restoring
Factory Defaults”message displays while processing.

Display User Interface | 11
Input Menu
Open the Input Menu directly by tapping the
INPUT
button.
Input Menu Overview
The Primary image is designated by selection of a Primary input.
The first (left) column is for designating the Primary input, indicated with the letter P. The second column
contains the selection cell ( ) which is moved to the input row beneath it by tapping the
SCROLL
button.
The third column displays either an Sfor a selected Secondary input, or an Xsignifying “unavailable for input.”
To set an input as Primary, position the selection cell on the input row, and tap the button. To set an input as
Secondary, position the selection cell on the input row, and tap the button.
Note: If Input Searching Mode is set to Priority, a Secondary input must be selected.
Input Options
4x 3G-SDI
DisplayPort
3G-SDI-5
HDMI
DVI-D
4x 3G-SDI Signal Format
Square Division: 4x 3G-SDI signal format consisting of 4 full resolution parts of the original image assembled
and displayed as quadrants of the full resolution image.
2 Sample Interleave: 4x 3G-SDI signal consisting of 4 entire image 1/4 resolution parts combined through
interleaving to display the full resolution image.
(Input Menu continues on next page)

12 | Display User Interface
Input Searching Mode:
On: Inputs will be searched in order from the last selected input and will keep cycling through the inputs until
a signal is found or until DPMS is enabled – see “DPMS Enable”on page 10.
Off: Input will remain set to the currently selected input regardless of presence of signal on that input.
Priority: Primary input will be displayed while there is signal on the Primary input. If there is no signal on the
Primary input, the input will be automatically switched to the Secondary input.
Note: If the Primary signal returns following an automatic switch to the Secondary input, input will then be
automatically switched back to the Primary input.
The above table shows which inputs may be selected as Secondary relative to selected Primary inputs. Inputs
marked with a in the Secondary columns can be selected as Secondary. Gray cells mark inputs that share a
common connector or electronics, and cannot be used simultaneously.
SECONDARY
INPUT 4x 3G-SDI 3G-SDI-5 DisplayPort HDMI DVI-D
PRIMARY
4x 3G-SDI
3G-SDI-5
DisplayPort
HDMI
DVI-D

Connector Panel | 13
Connector Panel
Radiance Ultra 4K/UHD Connector Panel
Connector Types
Data Connectors and Pinouts
SDI
DisplayPort 1.2
Standard Input/Output
Notes
1. 3G-SDI IN 1, 2, 3, and 4 inputs accept 3G-SDI signals combined to display as UHD image.
2. 3G-SDI OUT 1, 2, 3, and 4 re-drive outputs are active only with monitor powered on and signals applied to
3G-SDI 1-4.
3. 3G-SDI IN-5 input supports up to Full HD signals.
4. The Service 1 and Service 2 USB connectors are designated for installing firmware upgrades.
5. RS-232 6-pin modular connector used for Unified Serial Command (USC) input.
Inputs Connector
Types
Inputs Connector
Types
Outputs Connector
Types
3G-SDI 1, 2, 3, 4, 5 BNC RS-232 6-pin Modular 3G-SDI 1, 2, 3, 4 BNC
DVI–In DVI-D Service 1 USB Mini B DVI–Out DVI–D
DisplayPort Service 2 USB Micro AB
HDMI Type A DC Input XLR, Neutrik type
Pin Name Description
1TXD Transmit
2GND Ground
PinName Description PinName Description
1ML_Lane 0 (p) Lane 0 (positive) 11 GND Ground
2GND Ground 12 ML_Lane 3 (n) Lane 3 (negative)
3ML_Lane 0 (n) Lane 0 (negative) 13 CONFIG1 connected to Ground1)
4ML_Lane 1 (p) Lane 1 (positive) 14 CONFIG2 Connected to Ground1)
5GND Ground 15 AUX CH (p) Auxiliary Channel (positive)
6ML_Lane 1 (n) Lane 1 (negative) 16 GND Ground
7ML_Lane 2 (p) Lane 2 (positive) 17 AUX CH (n) Auxiliary Channel (negative)
8GND Ground 18 Hot Plug Hot Plug Detect
9ML_Lane 2 (n) Lane 2 (negative) 19 Return Return for Power
10 ML_Lane 3 (p) Lane 3 (positive) 20 DP_PWR Power for Connector (3.3 V 500 mA)
SERVICE 23G-SDI IN-5 SDI OUT-3SDI IN-3SDI OUT-2SDI IN-2SDI OUT-1SDI IN-1 SDI OUT-4SDI IN-4
4x 3G-SDI
DC INPUTDVI-OUTDVI-INRS-232 SERVICE 1 HDMIDISPLAYPORT
12
135791113151719
2468101214161820

14 | Connector Panel
HDMI 1.4B
DVI-D Digital
DVI-D IN Supports digital signals.
Pin Signal Pin Signal
1TMDS Data2+ 11 TMDS Clock Shield
2TMDS Data2 Shield 12 TMDS Clock−
3TMDS Data2− 13 CEC
4TMDS Data1+ 14 Reserved (HDMI 1.0–1.3c)
5TMDS Data1 Shield 15 SCL (I²C Serial Clock for DDC)
6TMDS Data1− 16 SDA (I²C Serial Data Line for DDC)
7TMDS Data0+ 17 DDC/CEC/ARC/HEC Ground
8TMDS Data0 Shield 18 +5 V (min. 0.055 A)[3]
9TMDS Data0− 19 Hot Plug detect (all versions)
10 TMDS Clock+
Pin Signal Pin Signal Pin Signal
1T.M.D.S. DATA 2- 11 T.M.D.S. DATA 1/3 SHIELD 21 N/C
2T.M.D.S. DATA 2+ 12 N/C 22 T.M.D.S. CLOCK SHIELD
3T.M.D.S. DATA 2/4 SHIELD 13 N/C 23 T.M.D.S. CLOCK+
4N/C 14 +5V POWER 24 T.M.D.S. CLOCK-
5N/C 15 GND DVI-I IN Only
6DDC CLOCK 16 HOT PLUG DETECT C1 N/C
7DDC DATA 17 T.M.D.S. DATA 0- C2 N/C
8N/C 18 T.M.D.S. DATA 0+ C3 N/C
9T.M.D.S. DATA 1- 19 T.M.D.S. DATA 0/5 SHIELD C4 N/C
10 T.M.D.S. DATA 1+ 20 N/C C5 N/C
135791113151719
24681012141618
18
C1 C2
C3 C4
916
17 24
C5
C5
Table of contents
Other NDS Monitor manuals

NDS
NDS GX2MP User manual

NDS
NDS DTB01 User manual

NDS
NDS DOMETIC SS12-100 User manual

NDS
NDS DT002 User manual

NDS
NDS DTB01 User manual

NDS
NDS RADIANCE ULTRA 32 4K ZEROWIRE DUO User manual

NDS
NDS Radiance G3 User manual

NDS
NDS DOMETIC BS12-100 User manual

NDS
NDS EndoVue 19" User manual

NDS
NDS DOMETIC BS12-100 User manual