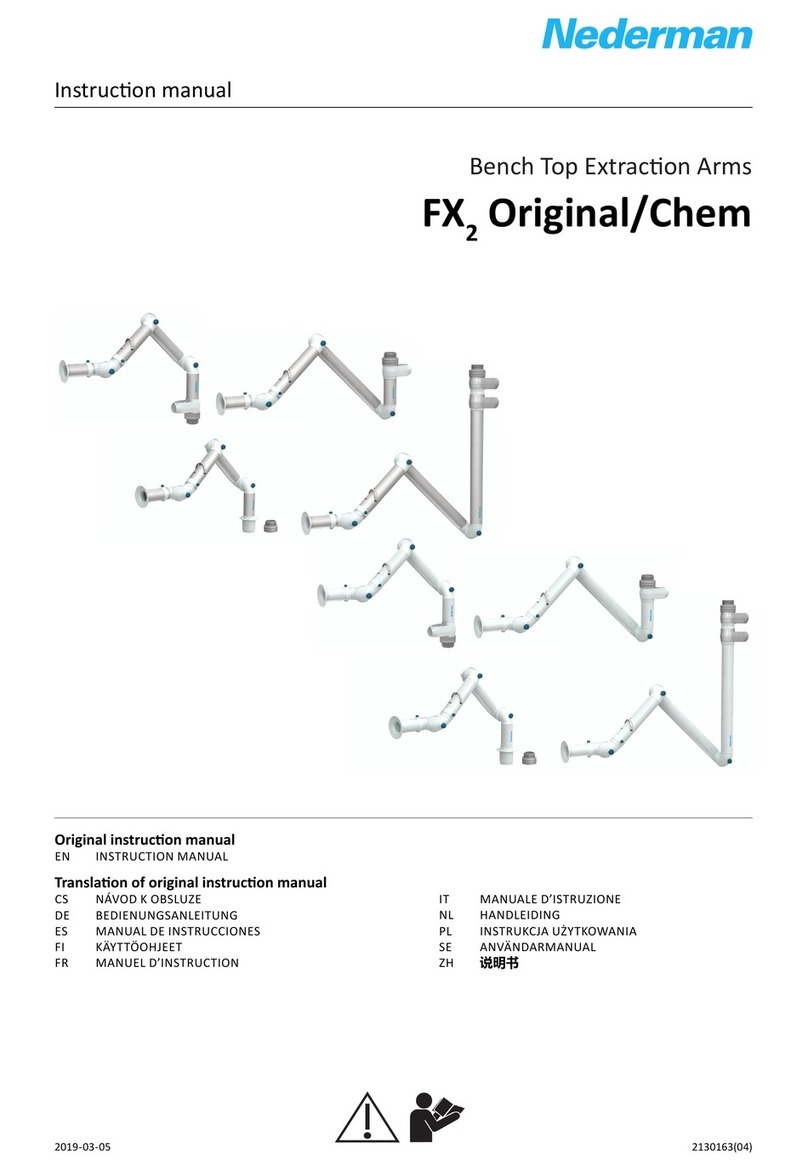
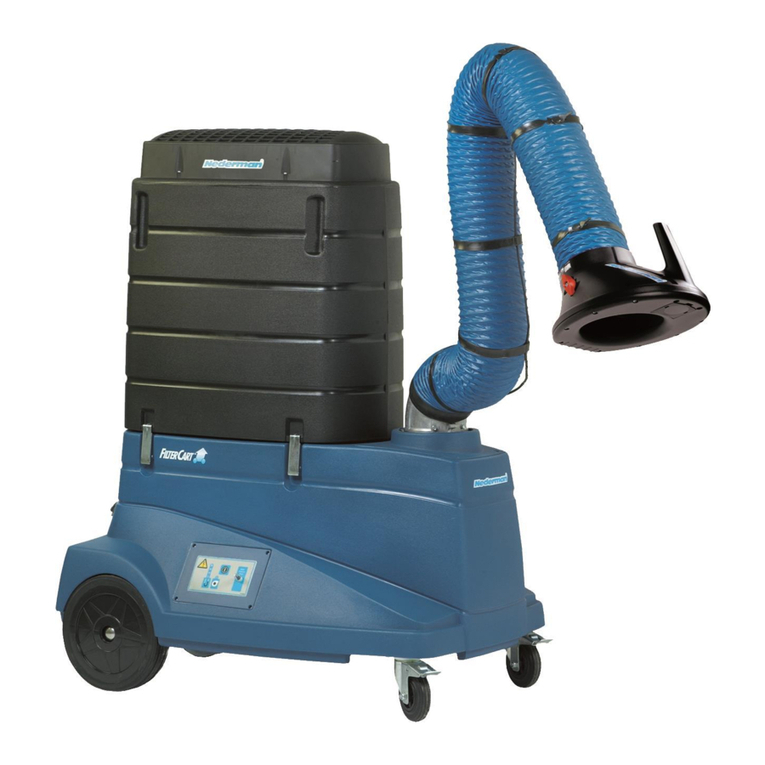
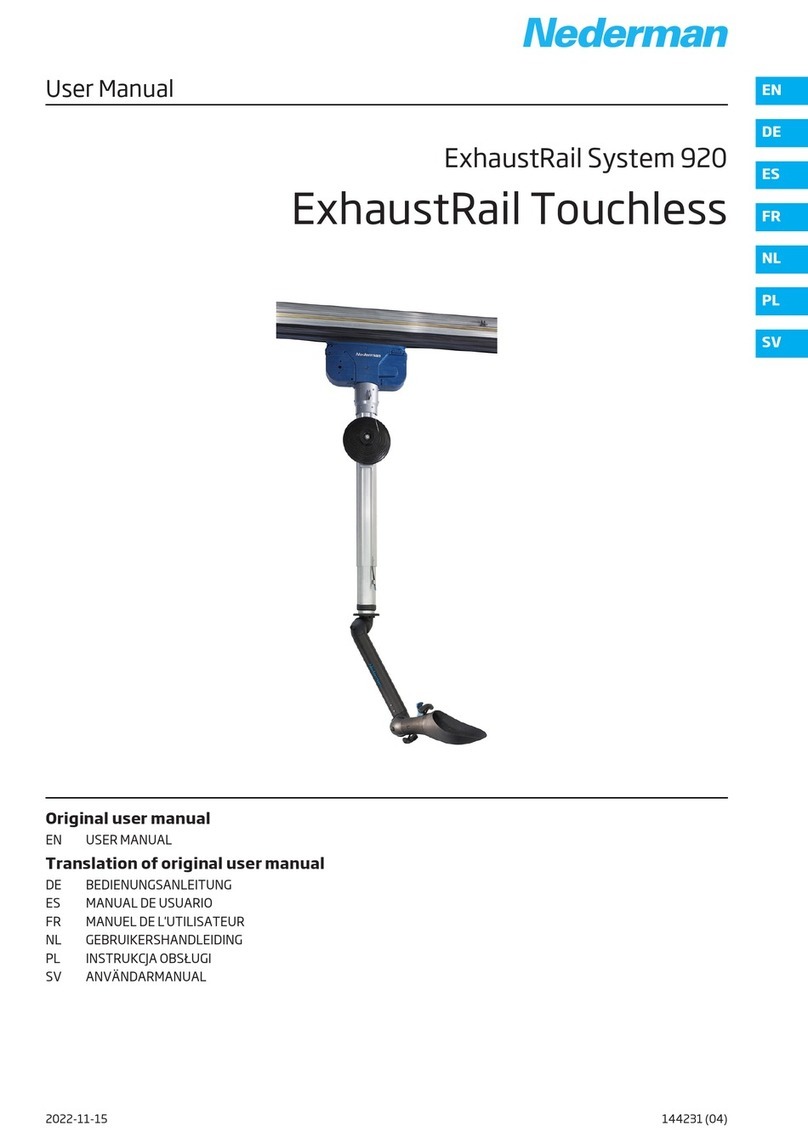
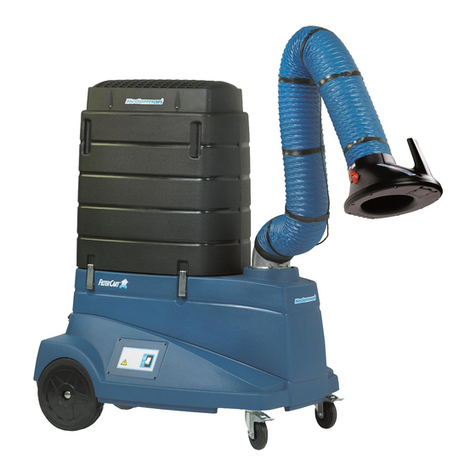
Nederman FilterCart Advanced User manual

Instruction Manual
FilterCart
FilterCart Advanced
Originalinstruction manual
EN INSTRUCTION MANUAL
Translation of originalinstruction manual
ES MANUAL DE INSTRUCCIONES
FR MANUEL D’INSTRUCTIONS
2020-11-04 2130333 (00)
EN
ES
FR

FilterCart Advanced
Trace back information:
Workspace Main version a18
Checked in 2020-11-04
Skribenta version 5.3.085

FilterCart Advanced
Declaration of conformity ......................................................... 4
Figures .......................................................................................... 5
English ........................................................................................... 10
Español .......................................................................................... 16
Français ......................................................................................... 22
3

FilterCart Advanced
Declaration of conformity
EN English
Declaration of conformity
We, AB Ph. Nederman & Co., declare under our sole responsibility that
the Nederman product:
FilterCart Advanced (Part No. **, and stated versions of **) to which
this declaration relates, is in conformity with all the relevant provisions
of the following directives and standards:
Directives
2006/42/EC, 2014/30/EC, 2011/65/EU.
Standards
EN ISO 12100:2010, EN 60204-1:2018, EN 61000-6-2:2019, EN
61000-6-4:2019, EN 61000-3-3:2013.
The name and signature at the end of this document is the person re-
sponsible for both the declaration of conformity and the technical file.
ES Español
Declaración de Conformidad
Nosotros, AB Ph. Nederman & Co., declaramos bajo nuestra exclusiva
responsabilidad que el producto de Nederman,
FilterCart Advanced (Ref. n.º ** y las versiones indicadas de **), al que
hace referencia esta declaración, cumple con todas las provisiones rele-
vantes de las Directivas y normas que se indican a continuación:
Directivas
2006/42/EC, 2014/30/EC, 2011/65/EU.
Normas
EN ISO 12100:2010, EN 60204-1:2018, EN 61000-6-2:2019, EN
61000-6-4:2019, EN 61000-3-3:2013.
El nombre y firma que figuran al final de este documento corresponden
a la persona responsable, tanto de la declaración como de la ficha técni-
ca.
FR Français
Déclaration de conformité
Nous, AB Ph. Nederman & Co., déclarons sous notre seule responsabili-
té que le produit Nederman :
FilterCart Advanced (réf. ** et versions indiquées de **) auquel fait ré-
férence la présente déclaration est en conformité avec toutes les dis-
positions applicables des directives et normes suivantes :
Directives
2006/42/EC, 2014/30/EC, 2011/65/EU.
Normes
EN ISO 12100:2010, EN 60204-1:2018, EN 61000-6-2:2019, EN
61000-6-4:2019, EN 61000-3-3:2013.
Le nom et la signature à la fin de ce document sont ceux de la personne
responsable de la déclaration de conformité et du fichier technique.
**
12635845, 12635945, 12636045
AB Ph. Nederman & Co.
P.O. Box 602
SE-251 06 Helsingborg
Sweden
Fredrik Hermann
Product Center Manager
Technical Product Management
2020-11-04
4

FilterCart Advanced
Figures
Dimensions
Abmessungen
Dimensions
Dimensiones
Dimensioni
Afmetingen
Mitat
Dimensioner
~ 240°
Horizontally swiveling arm
Horizontal drehbarer Arm
Bras orientable horizontale
Brazo articulado horizontal
Braccio girevole orizzontale
Horizontale draaibare arm
Vaaka kääntyvä imuvarsisto
Horisontellt vridbar arm
Horisontal svingarm
min. 685 mm (27")
770 mm (30.3")
1145 mm (45")
)
"5.55(0 mm141
)"
56(0 mm561.xam:mram
2
)
"1
8(
0 mm502.xam:mra
m
3
max. 2000 mm (79")
3000 mm (118")
Ø 160 mm
(6.3")
1
D
C
B
A
2
5

FilterCart Advanced
Wiring diagram
Anschluss schema
Schéma électrique
Esquema de circuitos
Schema elettrico
Elektrisch
aansluit schema
Kytken täkaavio
Kopplingsschema
* Voltage: depending on model
* Spannung: modelabhängig
* Tension: en fonction du modèle
* Tensión: según el modelo
* Voltaggio: a seconda del modello
* Spanning: afhankelijk van het model
* Jännite: mallista riippuen
* Spänning: beroende på modell
3 2 1
A1
H2
H1
M
M1
F1
K1
3 1
1
5
5
4
4
PTC
PTC
2
2
6
6
A1
A2
T1
L1
N
PE
O
~1
,
zH
0
5,V042/032/011*
~1,zH06,V021
*
3
Motor
Protector
Reset
A
B C D
4
6

FilterCart Advanced
Directions for use
Gebrauchsanweisung
C
B
A
Instructions d’utilisation
Instrucciones de uso
Istruzioni per l’uso
Gebruiksaanwijzing
Käyttöohje
Bruksanvisning
5
BCD
A
FGH
E
red
yellow
green
green
yellow
green
green
red
red
red
yellow
green
green
green green green
snoitacidnidr
aoblortno
C
6
7

FilterCart Advanced
A
B
7
New
Note:
UP-arrow
Pfeil nach oben
UP-pijl
Flèche HAUT
Flecha hacia arriba
Freccia SU
Ylös-nuoli
Upp-pil
8
8

FilterCart Advanced
9
10
9

FilterCart Advanced
EN English
Instruction Manual
Table of contents
Figures ............................................................................................................................................................................. 5
1 Preface ............................................................................................................................................................................ 11
2 Safety .............................................................................................................................................................................. 11
2.1 Classification of important information ......................................................................................................... 11
2.2 General safety instructions .............................................................................................................................. 11
3 Description ..................................................................................................................................................................... 12
4 Fitting the Fume Extractor hood ................................................................................................................................ 13
5 Wiring diagram ............................................................................................................................................................... 13
6 Initial operation ............................................................................................................................................................. 13
6.1 Overload protector ............................................................................................................................................. 13
7 Directions for use .......................................................................................................................................................... 13
8 The control board indications ..................................................................................................................................... 13
9 Changing the filter cartridge ....................................................................................................................................... 13
10 Changing the HEPA-filter (accessory) ....................................................................................................................... 14
11 Maintenance .................................................................................................................................................................. 14
12 Spare Parts ..................................................................................................................................................................... 14
12.1 Ordering spare parts .......................................................................................................................................... 14
13 Accessories ..................................................................................................................................................................... 15
14 Recycling ......................................................................................................................................................................... 15
10

FilterCart Advanced
1Preface
Thank you for using a Nederman product!
The Nederman Group is a world-leading supplier and
developer of products and solutions for the environ-
mental technology sector. Our innovative products
will filter, clean and recycle in the most demanding of
environments. Nederman's products and solutions will
help you improve your productivity, reduce costs and
also reduce the impact on the environment from in-
dustrial processes.
Read all product documentation and the product iden-
tification plate carefully before installation, use, and
service of this product. Replace documentation imme-
diately if lost. Nederman reserves the right, without
previous notice, to modify and improve its products
including documentation.
This product is designed to meet the requirements
of relevant EC directives. To maintain this status, all
installation, maintenance, and repair is to be done
by qualified personnel using only Nederman original
spare parts and accessories. Contact the nearest au-
thorized distributor or Nederman for advice on tech-
nical service and obtaining spare parts. If there are
any damaged or missing parts when the product is de-
livered, notify the carrier and the local Nederman rep-
resentative immediately.
2Safety
2.1Classification of important informa-
tion
This document contains important information that
is presented either as a warning, caution or note, ac-
cording to the following examples:
WARNING!Risk of personal injury
Warnings indicate a potential hazard to the
health and safety of personnel, and how that
hazard may be avoided.
CAUTION!Risk of equipment damage
Cautions indicate a potential hazard to the
product but not to personnel, and how that
hazard may be avoided.
Notes contain other information that is import-
ant for personnel.
2.2General safety instructions
WARNING!Work safety regulations. Risk
of personal injury, fire or explosion.
• In case of fire, smoke from FilterCart Ad-
vanced may contain hazardous substances
such as burning polycarbonate, Pvc, poly-
ethylene, etc. Also, depending on the mater-
ial being separated, there may be hazardous
smoke from the separated dust.
• The product must not be used in an environ-
ment with the danger of explosion or for dust
or gases in explosive concentrations.
• If the product has been used for dust applic-
ations it must not be used for welding fumes
or grinding dust.
• Check that no sparks or other objects that can
cause fire are sucked into the arm. For weld-
ing applications generating a high amount
of sparks, spark protection (accessory) must
be mounted in the hood to reduce the risk of
fire. See Figure10.
• The product must not be used for extracting
toxic substances (except welding fume).
• The product must not be used without filter
cartridge and casing.
• The product must not be used in closed
rooms without general ventilation.
WARNING!Risk of personal injury
Only properly trained personnel are allowed to
use this product.
EN
11

FilterCart Advanced
EN 3Description
Technical data
Capacity 600–1050 m3/h (350–620 cfm)
Filtration efficiency, main filter > 99 % average weight filtration efficiency. Minim-
um Efficiency W3 (99% ), EN ISO 15012-1*.
Filtration efficiency, HEPA-filter (accessory) > 99.95 % H13*
Filter area, main filter 30 m2 (323 ft2)
Filter area, HEPA-filter (accessory) 7.5 m2 (81 ft2)
Motor power 0.75 kW (1 hp)
Voltage** 110/120/230/240 V
Phase 1 ~
Frequency** 50/60 Hz
Transformer 24 V secondary
Alarm signal acoustic, 2.9 kHz
Extraction arm, action radius maximum 2 m (6 ft 7 in) or 3 m (9 ft 10 in)
Extraction arm, swivelling approx. 240°
Weight • 71 kg (156 lb) with 2 m arm
• 73 kg (161 lb) with 3 m arm
Temperature, max. ambient temp. 40 °C (104 °F)
Temperature, max. airflow temp. 60 °C (140 °F)
Noise level, measured according to ISO 11204. 73 dB(A)
Material recycling 90 weight-%, without filter cartridge
*See the filter cartridge information for more specific data.
** Depending on the model.
12

FilterCart Advanced
4Fitting the Fume Extractor hood
The Fume Extractor arm is already fitted. The hood
must be fitted according to Figure2. Adjust the links
so that the hood easily can be positioned.
X: Cable with loop.
5Wiring diagram
See Figure3.
• M1: Fan motor, 0.75 kW.
• A1: Circuit card.
• T1: Transformer, 24 V secondary.
• K1: Relay, fan.
• F1: Overload protector relay.
• H1: Alarm signal, 2.9 kHz.
• H2: Alarm signal, 2.9 kHz.
6Initial operation
See Figure4.
1 Ensure the FilterCart Advanced has not been dam-
aged during transport.
2 Check that the mains voltage is the same as on the
sign plate.
3 Connect the connection cable with plug to the
mains. The light emission diodes at B indicate
fixed light and an alarm signal sounds for a short
time. The light diode at C indicates blinking green
light (stand by).
4 Start the FilterCart Advanced with switch A.
The light emission at C indicates fixed green light:
The fan operates.
6.1Overload protector
See Figure4. The FilterCart Advanced is equipped
with an overload protector which means that the
power will disconnect automatically if the fan motor is
overloaded.
• C: Red light emission light indicates: disconnected
power and released overload protector.
• D: Button for re-setting the overload protector.
7Directions for use
See Figure5. The F$i$l$t$e$r$C$a$r$t$$A$d$v$a$n$c$e$d$ is only intended
for indoor use and is designed for extraction and fil-
tration of welding fumes. It must not be used for the
extraction of fluids. The hood of the extraction arm
is to be positioned as close to the pollution source as
possible, see Figure5, item A. The F$i$l$t$e$r$C$a$r$t$$A$d$v$a$n$c$e$d$
is to be moved from behind according to item B and
with the wheels unlocked. The extraction arm is to be
positioned with the wheels locked according to item C.
8The control board indications
See Figure6.
1 When the mains plug is connected the light emis-
sion diodes indicate fixed light and an alarm signal
sounds a short time.
2 The light emission diode indicates blinking green
light: The FilterCart Advanced has been connected
to the mains (stand by).
3 As the FilterCart Advanced has been started the
light emission diode indicates fixed green light.
The fan is in operation.
4 The FilterCart Advanced is ready for use and after
a while, the light emission diode indicates fixed
green light. After use for a certain time, the air-
flow will be reduced through the extraction arm
and the pressure drop will increase, which will res-
ult in having to change the filter cartridge.
5 The light emission diodes indicate fixed light: The
pressure drop has increased. Pre-warning for
changing the filter cartridge.
6 The light emission diodes indicate fixed light
and after about 30s an intermittent alarm signal
starts. Change the filter cartridge. If you want to
finish the work in progress before the filter cart-
ridge is changed, the alarm signal can be stopped
by pushing once on the start button. The alarm
signal activates after about 10 minutes. Push-
ing twice on the start button makes a fan stop. As
an alternative, the fan can be stopped with the
switch on the Fume Extractor hood.
7 The light emission diode indicates blinking red
light = alarm memory. The FilterCart Advanced has
been stopped after the alarm start (according to
above), for example at work shifts. The filter cart-
ridge has to be changed.
8 The light emission diode indicates fixed red light
and an intermittent alarm signal starts. The over-
load protector has been released. Examine the
reason and reset the overload protector by push-
ing the “Motor Protector Reset”- button.
9Changing the filter cartridge
See Figure7. The filter cartridge is disposable and is
to be thrown away after use. The life span of the filter
cartridge varies greatly depending on how the Filter-
Cart Advanced is used and how much and what type of
pollutants are collected.
Regularly check the light-emitting diodes on the pres-
sure drop symbol on the control board to know when
to change the filter cartridge, see Chapter8The con-
trol board indications. Always check that the hoses for
the extraction arm and the fan inlet are undamaged
before it is decided to replace the filter cartridge.
WARNING!Risk of personal injury
Use necessary personal safety equipment
when replacing the filter cartridges.
EN
13

FilterCart Advanced
EN Change the filter cartridge in the following way:
1 Disconnect the mains connection cable.
2 Unlock the eccentric locks and remove the filter
casing.
3 Use the plastic bag which comes with the new fil-
ter cartridge and pull it over the used cartridge.
Fold the plastic bag under the cartridge.
4 Use a duster to wipe off the filter cartridge con-
tact surfaces in the FilterCart Advanced. Put the
duster in the plastic bag with the filter cartridge
and close the bag with the band supplied.
5 Handle the used filter cartridge according to the
relevant regulations for the substances that have
been collected.
6 Check that the pressure drop hose (from the con-
trol board) not is damaged and is fitted properly.
7 Check that the new filter cartridge is not damaged.
Also, check that the seal fitted on the underside
of the cartridge is not damaged. Then fit the cart-
ridge on the FilterCart Advanced.
8 Refit the filter casing. Make sure the eccentric
locks tighten the filter casing properly.
• A. Increasing the locking power.
• B. Decreasing the locking power.
10 Changing the HEPA-filter (access-
ory)
See Figure8. If the FilterCart Advanced has been sup-
plied with a HEPA-filter, this is to be changed at the
same time as the main filter cartridge is changed.
WARNING!Risk of personal injury
Use necessary personal safety equipment
when changing the HEPA-filter.
Change the HEPA-filter cartridge in the following way:
1 Disconnect the mains connection cable.
2 Unscrew the top cover.
3 Remove the used HEPA-filter and put it in the
plastic bag which comes with the new HEPA filter.
Close the plastic bag with the band supplied.
4 Handle the used HEPA-filter according to the rel-
evant regulations for the substances that have
been collected.
5 Check that the new HEPA-filter not is damaged.
Note that the filter surface must not be touched.
Handle the HEPA-filter very carefully and fit it in
the FilterCart Advanced. Ensure it is fitted in the
correct position and that the seal is downwards.
Check that the seal not is damaged. Note the UP-
arrows.
6 Refit the top cover. Fasten it securely.
11Maintenance
See Figure9. Maintenance is recommended at least
once a year.
WARNING!Risk of personal injury
• Disconnect the mains connection cable be-
fore starting any maintenance work.
• Use the necessary personal safety equip-
ment.
• FilterCart Advanced needs to be cleaned be-
fore any disassembly.
• FilterCart Advanced must only be disas-
sembled in a well-ventilated room.
• Use proper equipment, such as a vacuum
cleaner to clean FilterCart Advanced.
• The area where maintenance is done must be
properly cleaned after work is complete.
Do as follows:
• Change the filter cartridge (and optional HEPA-fil-
ter) if necessary, see Chapter9Changing the filter
cartridge
• Check that the Fume Extractor hose is not damaged.
If necessary change the hose.
• Check that the hose to the fan inlet is not damaged.
If necessary change the hose.
• Check that no objects have been caught on the
guard net on the fan inlet.
• Check that the pressure drop hose (from the control
board) not is damaged and is fitted properly.
• If necessary, adjust the Fume Extractor links.
• If necessary, tighten the arm profile bolts, see the *
symbols in Figure9.
• Check that the mains connection cable and the fan
motor cable are not worn out or damaged.
• Check that the eccentric locks tighten the filter cas-
ing properly. Adjust the eccentric locks if necessary.
See Chapter9Changing the filter cartridge.
12Spare Parts
CAUTION!Risk of equipment damage
Use only N$e$d$e$r$m$a$n$ original spare parts and ac-
cessories.
Contact your nearest authorized distributor or
N$e$d$e$r$m$a$n$ for advice on technical service or
if you require help with spare parts. See also
w$w$w$.$n$e$d$e$r$m$a$n$.$c$o$m$.
12.1Ordering spare parts
When ordering spare parts always state the following:
• The part number and control number (see the
product identification plate).
• Detail number and name of the spare part (see
w$w$w$.$n$e$d$e$r$m$a$n$.$c$o$m$/$e$n$/$s$e$r$v$i$c$e$/$s$p$a$r$e$-$p$a$r$t$-
$s$e$a$r$c$h$).
• Quantity of the parts required.
14

FilterCart Advanced
13Accessories
•HEPA-filter H13, 7.5 m2 high-efficiency final filter,
class H13. (Part no. 12374016)
• Spark protection, for mounting in the hood. To re-
duce the risk of fire. (Part no. 10551335)
14Recycling
The product has been designed for component mater-
ials to be recycled. Different material types must be
handled according to relevant local regulations. Con-
tact the distributor or$N$e$d$e$r$m$a$n$ if uncertainties arise
when scrapping the product at the end of its service
life.
EN
15

FilterCart Advanced
ES
Español
Manual de instrucciones
Tabla de contenidos
Ilustraciones ................................................................................................................................................................... 5
1 Prólogo ............................................................................................................................................................................ 17
2 Seguridad ........................................................................................................................................................................ 17
2.1 Clasificación de información importante ....................................................................................................... 17
2.2 Instrucciones generales de seguridad ........................................................................................................... 17
3 Descripción ..................................................................................................................................................................... 18
4 Montaje de la campana de extracción de humos ..................................................................................................... 19
5 Esquema de circuitos .................................................................................................................................................... 19
6 Instrucciones de arranque ........................................................................................................................................... 19
6.1 Protector de sobrecarga ................................................................................................................................... 19
7 Instrucciones de uso ..................................................................................................................................................... 19
8 Indicaciones del panel de control ............................................................................................................................... 19
9 Cambio del cartucho filtrante ...................................................................................................................................... 19
10 Cambio del HEPA-filter (accesorio) ............................................................................................................................ 20
11 Mantenimiento .............................................................................................................................................................. 20
12 Piezas de repuesto ........................................................................................................................................................ 21
12.1 Solicitud de piezas de repuesto ....................................................................................................................... 21
13 Accesorios ....................................................................................................................................................................... 21
14 Reciclaje .......................................................................................................................................................................... 21
16

FilterCart Advanced
1Prólogo
¡Gracias por usar un producto de Nederman!
El Grupo Nederman es un proveedor y desarrollador lí-
der mundial de productos y soluciones para el sector
de la tecnología ambiental. Nuestros productos inno-
vadores filtrarán, limpiarán y reciclarán en los entor-
nos más exigentes. Los productos y soluciones de Ne-
derman le ayudarán a mejorar su productividad, redu-
cir costes y también el impacto en el medio ambiente
de los procesos industriales.
Lea con atención toda la documentación del produc-
to y la placa de identificación del producto antes de la
instalación, uso y mantenimiento o reparación de este
producto. Si pierde la documentación, sustitúyala in-
mediatamente. Nederman se reserva el derecho a mo-
dificar y mejorar sus productos sin previo aviso, inclui-
da la documentación.
Este producto está diseñado para cumplir los requisi-
tos de las directivas CE aplicables. Para mantener es-
ta condición, cualquier instalación, mantenimiento o
reparación deberán ser efectuados por personal cuali-
ficado utilizando únicamente piezas de repuesto y ac-
cesorios originales Nederman. Póngase en contacto
con el distribuidor autorizado más próximo o con Ne-
derman para asesoramiento sobre servicio técnico y
obtención de piezas de repuesto. Si hay algún compo-
nente dañado o extraviado en la entrega del producto,
notifíquelo inmediatamente al transportista y al re-
presentante local de Nederman.
2Seguridad
2.1Clasificación de información impor-
tante
Este documento incluye información importante que
se presenta como una advertencia, precaución o nota.
Consulte los siguientes ejemplos:
¡ADVERTENCIA!Riesgo de lesiones perso-
nales
Las advertencias indican un peligro potencial
para la salud y la seguridad del personal, y la
forma en que el peligro puede ser evitado.
PRECAUCIÓN!Riesgo de daño del equipo
Las precauciones indican un peligro potencial
para el producto, pero no para el personal y el
modo en que se puede evitar dicho peligro.
Las notas contienen otra información de impor-
tancia para el personal.
2.2Instrucciones generales de seguri-
dad
¡ADVERTENCIA!Regulaciones dobre segu-
ridad. Riesgo de daños personales, incen-
dio y explosión.
• En caso de incendio, el humo del FilterCart
Advanced puede contener sustancias peli-
grosas tales como la combustión de policar-
bonato, PVC, polietileno, etc. También, de-
pendiendo del material que se separara, po-
dría salir humo peligroso del mismo.
• El producto no debe utilizarse en un entorno
con peligro de explosión o con polvo o gases
en concentraciones explosivas.
• Si el producto se ha utilizado para aplicacio-
nes de polvo, no debe utilizarse para humos
de soldadura o polvo de esmerilado.
• Asegúrese de que el brazo no absorba chis-
pas ni otros objetos que puedan provocar un
incendio. Para aplicaciones de soldadura que
generan gran cantidad de chispas, debe mon-
tarse una protección contra chispas (acceso-
rio) en la campana para reducir el riesgo de in-
cendio. Ver Ilustración10.
• El producto no debe utilizarse para extraer
sustancias tóxicas (excepto humos de solda-
dura).
• El producto no debe usarse sin cartucho de
filtro y carcasa.
• El producto no debe utilizarse en habitacio-
nes cerradas sin ventilación general.
¡ADVERTENCIA!Riesgo de lesiones perso-
nales
Sólo al personal capacitado adecuadamente se
le permite usar este producto.
ES
17

FilterCart Advanced
ES
3Descripción
Datos técnicos
Capacidad 600–1050 m3/h (350–620 cfm)
Eficacia de filtrado, filtro principal > 99 % eficiencia de filtración de peso medio. Efi-
ciencia mínima W3 (99% ), EN ISO 15012-1*.
Eficacia de filtración, HEPA-filter (accesorio) > 99.95 % H13*
Superficie, filtro principal 30 m2 (323 ft2)
Superficie, HEPA-filter(accesorio) 7.5 m2 (81 ft2)
Potencia del motor 0.75 kW (1 hp)
Tensión** 110/120/230/240 V
Fase 1 ~
Frecuencia** 50/60 Hz
Transformador 24 V secundaria
Señal de alarma acústica, 2.9 kHz
Brazo extractor, radio de acción máxima 2 m (6 ft 7 in) o 3 m (9 ft 10 in)
Brazo extractor, brazo articulado Aprox. 240°
Peso • 71 kg (156 lb) con brazo de 2 m
• 73 kg (161 lb) con brazo de 3 m
Temperatura, max, temp. ambiente 40 °C (104 °F)
Temperatura, temp. flujo aire 60 °C (140 °F)
Nivel de ruido, Medido con arreglo a ISO 11204. 73 dB(A)
Reciclaje de material 90 %, en peso sin cartucho de filtro
*Consulte la información del cartucho de filtro para obtener datos más específicos.
** Según el modelo.
18

FilterCart Advanced
4Montaje de la campana de extrac-
ción de humos
El brazo extractor de humos ya viene mon-tado. La
campana se debe montar como muestran la Ilustra-
ción2. Ajuste las articulaciones de manera que sea fá-
cil ubicar la campana.
X: Cable con bucle.
5Esquema de circuitos
Consulte Ilustración3.
• M1: Motor del ventilador, 0.75 kW.
• A1: Placa de circuito.
• T1: Transformador, 24 V, secundaria.
• K1: Relé, ventilador.
• F1: Protector de sobrecarga.
• H1: Señal de alarma, 2,9 kHz.
• H2: Señal de alarma, 2,9 kHz.
6Instrucciones de arranque
Consulte Ilustración4.
1 Compruebe que el FilterCart Advanced no haya su-
frido daños durante el transporte.
2 Compruebe que el voltaje de la red sea el mismo
que en la placa de señalización.
3 Conecte el cable con el enchufe a la red. Los diodos
luminosos en B brillan con luz fija y se emite una
señal de alarma durante un lapso breve. El diodo
luminoso en C parpadea con luz verde (en espera).
4 Active el FilterCart Advanced con el interruptor A.
El diodo luminoso en C brilla con luz verde fija. El
ventilador está en funcionamiento.
6.1Protector de sobrecarga
Ver la Ilustración4. El FilterCart Advanced va provisto
de un protector de sobrecarga térmica que derconecta
automáticamente el suministro eléctrico si se sobre-
carga el motor del ventilador.
• C: Una emisión de luz roja indica: desconexión de la
alimentación y protector de sobrecarga activado.
• D: Botón para restablecer el protector de sobrecar-
ga.
7Instrucciones de uso
Ver la Ilustración5. El F$i$l$t$e$r$C$a$r$t$$A$d$v$a$n$c$e$d$ está des-
tinado a ser utilizado en interiores exclusivamente y
está previsto para la extracción y filtrado de humos
de soldadura. La campana ha de colocarse lo más cer-
ca posible de la fuente de polución, Ilustración5A. El
F$i$l$t$e$r$C$a$r$t$$A$d$v$a$n$c$e$d$ se debe desplazar desde atrás co-
mo muestra la artículo B y con las ruedas desbloquea-
das. El brazo de extracción se debe colocar con las rue-
das bloqueadas como muestra la artículo C.
8Indicaciones del panel de control
Consulte Ilustración6.
1 Al conectar la clavija de alimentación, los diodos
luminosos brillan con luz fija y se emite una señal
de alarma durante un breve lapso.
2 El diodo luminoso parpadea con luz verde: El Filter-
Cart Advanced está conectado a la red (en espera).
3 Una vez que el FilterCart Advanced se ha puesto
en marcha, el diodo luminoso brilla con luz verde
fija. El ventilador está en funcionamiento.
4 El FilterCart Advanced está listo para usar. Tras un
breve lapso, el diodo luminoso brilla con luz verde
fija. Después de utilizarlo un determinado tiempo,
el flujo de aire se reducirá a través del brazo ex-
tractor y la caída de presión se incrementará, por
lo que será necesario cambiar el cartucho filtrante.
5 Los diodos luminosos brillan con luz fija: incremen-
to de la caída de presión. Pre-calentamiento para
cambiar el cartucho filtrante.
6 Los diodos luminosos brillan con luz fija y después
de 30 s se inicia una señal de alarma intermitente.
Cambiar el cartucho filtrante. Si se desea finalizar
el trabajo en curso antes de cambiar el cartucho
filtrante, se puede detener la señal de alarma pul-
sando el botón de arranque una vez. La señal de
alarma vuelve a activarse después de 10 segundos
aproximadamente. Si se pulsa el botón de arran-
que dos veces el ventilador se detiene. Alternati-
vamente, el ventilador puede detenerse con el in-
terruptor situado en la cubierta del extractor de
humos.
7 El diodo luminoso parpadea con luz roja = memo-
ria de alarma. El FilterCart Advanced se ha deteni-
do después del inicio de alarma (como se describió
anteriormente, por ejemplo al cambiar de trabajo.
Es necesario reemplazar el cartucho filtrante.
8 El diodo luminoso brilla con luz roja fija y se inicia
una señal de alarma intermitente. El protector de
sobrecarga ha sido activado. Determinar la causa
del fallo y restablecer el protector de sobrecarga
pulsando el botón “Motor Protector Reset“.
9Cambio del cartucho filtrante
Ver la Ilustración7. El cartucho filtrante es del tipo no
recuperable por lo que debe desecharse cuando se ha
consumido. La duración del cartucho varía considera-
blemente según como se utiliza el FilterCart Advanced
y el tipo de impurezas de que se trata.
Controle con regularidad los diodos luminosos en el
símbolo de caída de presión del panel de control para
saber cuándo es hora de cambiar el cartucho filtran-
te (ver Capítulo8Indicaciones del panel de control).
Compruebe siempre que las mangueras para el brazo
extractor y la entrada del ventilador no estén dañadas
antes de decidirse a cambiar el cartucho filtrante.
ES
19

FilterCart Advanced
ES
¡ADVERTENCIA!Riesgo de lesiones perso-
nales
Use los equipos necesarios de seguridad perso-
nal al cambiar los cartuchos de filtro.
Cambie el cartucho filtrante de la siguiente manera:
1 Desconecte el cable de conexión a la red.
2 Libere los cierres excéntricos y retire la carcasa del
filtro.
3 Utilice la bolsa de plástico que se suministra con
el nuevo cartucho filtrante y cubra con ella el car-
tucho usado. Doble la bolsa de plástico debajo del
cartucho.
4 Limpie con un trapo las superficies de contacto del
cartucho filtrante en el FilterCart Advanced. Intro-
duzca el trapo en la bolsa de plástico con el cartu-
cho filtrante, y cierre la bolsa con la cinta suminis-
trada.
5 Maneje el cartucho usado de acuerdo con las regu-
laciones aplicables para las sustancias retenidas.
6 Compruebe que la manguera de caída de presión
(del panel de control) no esté dañada y esté debi-
damente colocada.
7 Compruebe que el nuevo cartucho filtrante no es-
té dañado. Compruebe también que la junta situa-
da en el lado inferior del cartucho no esté dañada.
Después, coloque el cartucho en el FilterCart Ad-
vanced.
8 Vuelva a colocar la carcasa del filtro. Cerciórese de
que los cierres excéntricos aprieten bien la carcasa
del filtro.
• A. Aumenta la fuerza de bloqueo.
• B. Reduce la fuerza de bloqueo.
10 Cambio del HEPA-filter (acceso-
rio)
Ver la Ilustración8. Si el FilterCart Advanced fue su-
ministrado con un HEPA-filter, éste debe cambiarse al
mismo tiempo que el cartucho principal.
¡ADVERTENCIA!Riesgo de lesiones perso-
nales
Use los equipos necesarios de seguridad perso-
nal al cambiar el HEPA-filter.
Cambie el cartucho HEPA-filter de la siguiente mane-
ra:
1 Desconecte el cable de conexión a la red.
2 Desatornille la cubierta superior.
3 Retire el HEPA-filter usado y colóquelo en la bolsa
de plástico que se incluye con el nuevo filtro HEPA.
Cierre la bolsa de plástico con la cinta suministra-
da.
4 Maneje el HEPA-filter usado de acuerdo con las re-
gulaciones aplicables para las sustancias reteni-
das.
5 Compruebe que el nuevo HEPA-filter no esté da-
ñado. Preste atención a no tocar la superficie del
filtro. Maneje el HEPA-filter con mucho cuidado y
colóquelo en la unidad. Compruebe que quede co-
locado en la posición correcta y que la junta quede
dirigida hacia abajo. Compruebe que la junta no es-
té dañada. Observe las flechas hacia arriba.
6 Vuelva a colocar la tapa superior. Ajústalo de for-
ma segura.
11Mantenimiento
Ver la Ilustración9. Se recomienda como minimo una
vez al año.
¡ADVERTENCIA!Riesgo de lesiones perso-
nales
• Desconecte siempre el cable de alimentación
de la red antes de comenzar los trabajos de
mantenimiento.
• Use los equipos de protección individual ne-
cesariosl.
• El FilterCart Advanced debe limpiarse antes
de cualquier desmontaje.
• El FilterCart Advanced solo debe desmontar-
se en una habitación bien ventilada.
• Utilice el equipo adecuado, como una aspira-
dora para limpiar FilterCart Advanced.
• El área donde se realiza el mantenimiento de-
be limpiarse adecuadamente una vez finali-
zado el trabajo.
Haga lo siguiente:
• Cambie el cartucho filtrante (y el HEPA-filter opcio-
nal) si es necesario, ver la Capítulo9Cambio del car-
tucho filtrante.
• Compruebe que la manguera del extractor no esté
dañada. Cámbiela si es necesario.
• Compruebe que la manguera conectada a la entrada
del extractor no esté dañada. Si es necesario, cam-
bie la manguera.
• Compruebe que no hayan quedado objetos reteni-
dos en la rejilla de protección de la entrada del venti-
lador.
• Compruebe que la manguera de caída de presión
(del panel de control) no esté dañada y esté debida-
mente colocada.
• Si es necesario, ajuste las articulaciones del extrac-
tor de humos.
• Si es necesario, apriete los pernos del perfil del bra-
zo, consulte los símbolos * en Ilustración9.
• Compruebe que el cable de conexión de la red y el
cable del motor del ventilador no estén gastados ni
dañados.
• Compruebe que los cierres excéntricos aprieten bien
la carcasa del filtro. Ajuste los cierres excéntricos si
20
Other manuals for FilterCart Advanced
1
This manual suits for next models
3
Table of contents
Languages:
Other Nederman Scrubber manuals

Nederman
Nederman FE840 PLUS User manual

Nederman
Nederman FilterCart Original User manual

Nederman
Nederman FilterBox 12M User manual

Nederman
Nederman Single Exhaust Extractor User manual

Nederman
Nederman FX2 Original Series User manual

Nederman
Nederman ORIGINAL 535 Series User manual

Nederman
Nederman SYSTEM 920 Product information sheet

Nederman
Nederman WeldFilter EC10 User manual

Nederman
Nederman ORIGINAL 535 Series User manual

Nederman
Nederman MagnaTrack HS Product information sheet