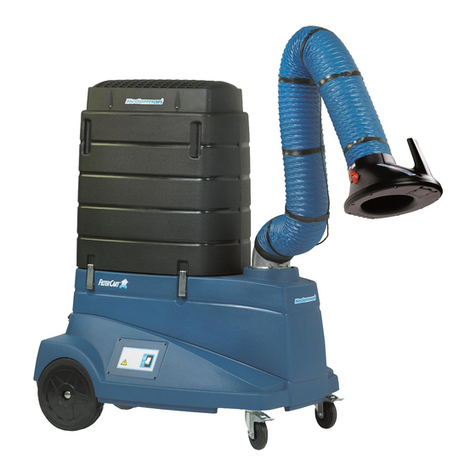
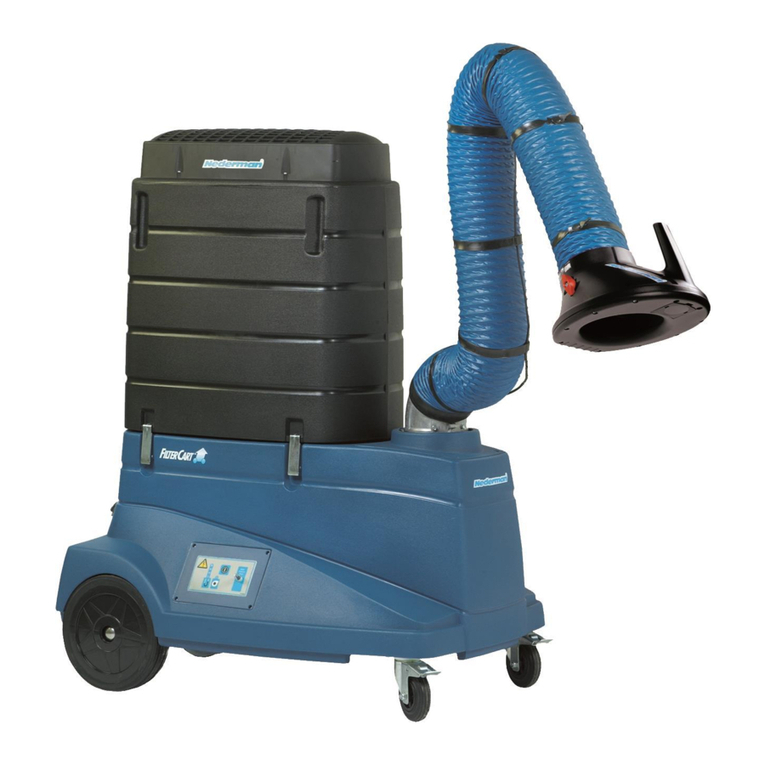
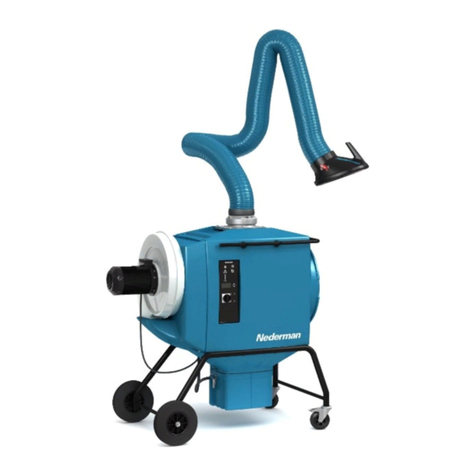
Nederman FilterCart Advanced User manual

Instruction Manual
FilterCart
FilterCart Advanced
Originalinstruction manual
EN INSTRUCTION MANUAL
2020-07-01 2130308 (01)

FilterCart Advanced
Trace back information:
Workspace Main version a8
Checked in 2020-07-01
Skribenta version 5.3.068

FilterCart Advanced
Table of contents
Declaration of conformity ........................................................................................................................................... 4
Figures ............................................................................................................................................................................. 5
1 Preface ............................................................................................................................................................................ 10
2 Safety .............................................................................................................................................................................. 10
2.1 Classification of important information ......................................................................................................... 10
2.2 General safety instructions .............................................................................................................................. 10
3 Description ..................................................................................................................................................................... 11
4 Fitting the Fume Extractor hood ................................................................................................................................ 12
5 Wiring diagram ............................................................................................................................................................... 12
6 Initial operation ............................................................................................................................................................. 12
6.1 Overload protector ............................................................................................................................................. 12
7 Directions for use .......................................................................................................................................................... 12
8 The control board indications ..................................................................................................................................... 12
9 Changing the filter cartridge ....................................................................................................................................... 12
10 Changing the HEPA-filter (accessory) ....................................................................................................................... 13
11 Maintenance .................................................................................................................................................................. 13
12 Spare Parts ..................................................................................................................................................................... 13
12.1 Ordering spare parts .......................................................................................................................................... 13
13 Accessories ..................................................................................................................................................................... 14
14 Recycling ......................................................................................................................................................................... 14
3

FilterCart Advanced
Declaration of conformity
We, AB Ph. Nederman & Co., declare under our sole responsibility that the Nederman product:
FilterCart Advanced (Part No. **, and stated versions of **) to which this declaration relates, is in conformity
with all the relevant provisions of the following directives and standards:
Directives
2006/42/EC, 2014/30/EC, 2011/65/EU.
Standards
EN 60204-1, EN ISO 12100:2010, EN 61000-3-3, EN 61000-6-2, EN 61000-6-4.
The name and signature at the end of this document is the person responsible for both the declaration of con-
formity and the technical file.
**
12633345, 12631645, 12631745
AB Ph. Nederman & Co.
P.O. Box 602
SE-251 06 Helsingborg
Sweden
Fredrik Hermann
Product Center Manager
Technical Product Management
2020-07-01
4

FilterCart Advanced
Figures
Dimensions
Abmessungen
Dimensions
Dimensiones
Dimensioni
Afmetingen
Mitat
Dimensioner
~ 240°
Horizontally swiveling arm
Horizontal drehbarer Arm
Bras orientable horizontale
Brazo articulado horizontal
Braccio girevole orizzontale
Horizontale draaibare arm
Vaaka kääntyvä imuvarsisto
Horisontellt vridbar arm
Horisontal svingarm
min. 685 mm (27")
770 mm (30.3")
1145 mm (45")
)
"5.55(0 mm141
)"
56(0 mm561.xam:mram
2
)
"1
8(
0 mm502.xam:mra
m
3
max. 2000 mm (79")
3000 mm (118")
Ø 160 mm
(6.3")
1
D
C
B
A
2
5

FilterCart Advanced
Wiring diagram
Anschluss schema
Schéma électrique
Esquema de circuitos
Schema elettrico
Elektrisch
aansluit schema
Kytken täkaavio
Kopplingsschema
* Voltage: depending on model
* Spannung: modelabhängig
* Tension: en fonction du modèle
* Tensión: según el modelo
* Voltaggio: a seconda del modello
* Spanning: afhankelijk van het model
* Jännite: mallista riippuen
* Spänning: beroende på modell
3 2 1
A1
H2
H1
M
M1
F1
K1
3 1
1
5
5
4
4
PTC
PTC
2
2
6
6
A1
A2
T1
L1
N
PE
O
~1
,
zH
0
5,V042/032/011*
~1,zH06,V021
*
3
Motor
Protector
Reset
A
B C D
4
6

FilterCart Advanced
Directions for use
Gebrauchsanweisung
C
B
A
Instructions d’utilisation
Instrucciones de uso
Istruzioni per l’uso
Gebruiksaanwijzing
Käyttöohje
Bruksanvisning
5
BCD
A
FGH
E
red
yellow
green
green
yellow
green
green
red
red
red
yellow
green
green
green green green
snoitacidnidr
aoblortno
C
6
7

FilterCart Advanced
A
B
7
New
Note:
UP-arrow
Pfeil nach oben
UP-pijl
Flèche HAUT
Flecha hacia arriba
Freccia SU
Ylös-nuoli
Upp-pil
8
8

FilterCart Advanced
9
10
9

FilterCart Advanced
1Preface
Thank you for using a Nederman product!
The Nederman Group is a world-leading supplier and
developer of products and solutions for the environ-
mental technology sector. Our innovative products
will filter, clean and recycle in the most demanding of
environments. Nederman's products and solutions will
help you improve your productivity, reduce costs and
also reduce the impact on the environment from in-
dustrial processes.
Read all product documentation and the product iden-
tification plate carefully before installation, use, and
service of this product. Replace documentation imme-
diately if lost. Nederman reserves the right, without
previous notice, to modify and improve its products
including documentation.
This product is designed to meet the requirements
of relevant EC directives. To maintain this status, all
installation, maintenance, and repair is to be done
by qualified personnel using only Nederman original
spare parts and accessories. Contact the nearest au-
thorized distributor or Nederman for advice on tech-
nical service and obtaining spare parts. If there are
any damaged or missing parts when the product is de-
livered, notify the carrier and the local Nederman rep-
resentative immediately.
2Safety
2.1Classification of important informa-
tion
This document contains important information that
is presented either as a warning, caution or note, ac-
cording to the following examples:
WARNING!Risk of personal injury
Warnings indicate a potential hazard to the
health and safety of personnel, and how that
hazard may be avoided.
CAUTION!Risk of equipment damage
Cautions indicate a potential hazard to the
product but not to personnel, and how that
hazard may be avoided.
Notes contain other information that is import-
ant for personnel.
2.2General safety instructions
WARNING!Work safety regulations. Risk
of personal injury, fire or explosion.
• In case of fire, smoke from FilterCart Ad-
vanced may contain hazardous substances
such as burning polycarbonate, Pvc, poly-
ethylene, etc. Also, depending on the mater-
ial being separated, there may be hazardous
smoke from the separated dust.
• The product must not be used in an environ-
ment with the danger of explosion or for dust
or gases in explosive concentrations.
• If the product has been used for dust applic-
ations it must not be used for welding fumes
or grinding dust.
• Check that no sparks or other objects that can
cause fire are sucked into the arm. For weld-
ing applications generating a high amount
of sparks, spark protection (accessory) must
be mounted in the hood to reduce the risk of
fire. See Figure10.
• The product must not be used for extracting
toxic substances (except welding fume).
• The product must not be used without filter
cartridge and casing.
• The product must not be used in closed
rooms without general ventilation.
WARNING!Risk of personal injury
Only properly trained personnel are allowed to
use this product.
10
FilterCart Advanced
3Description
Technical data
Capacity 600–1050 m³/h (350–620 cfm)
Filtration efficiency, main filter*> 99 % average weight filtration efficiency
Filtration efficiency, HEPA-filter (accessory)* > 99.97 % DOP 0.3 µm
Filter area, main filter 30 m2 (323 ft2)
Filter area, HEPA-filter (accessory) 7.5 m2 (81 ft2)
Motor power 0.75 kW (1 hp)
Voltage** 110/120/230/240 V
Phase 1 ~
Frequency ** 50/60 Hz
Extraction arm, action radius maximum 2 m (6 ft 7 in) or 3 m (9 ft 10 in)
Extraction arm, swivelling approx. 240°
Transformer 24 V secondary
Weight 73 kg (161 lb)
Alarm signal acoustic, 2.9 kHz
Temperature, max. ambient temp. 40 °C (104 °F)
Temperature, max. airflow temp. 60 °C (140 °F)
Noise level*** 73 dB(A)
Material recycling 90 weight-%****
Application***** welding fume, class W3******
*See cartrige type label for details.
** Depending on the model.
*** Measured according to ISO 11204.
**** Without filter cartridge.
***** For the treatment of non-alloy steel to high alloy steel with nickel and chromium > 30 % (also pay attention to local regulations).
****** EN ISO 15012-1 / ASHRAE 52.2-2017
11

FilterCart Advanced
4Fitting the Fume Extractor hood
The Fume Extractor arm is already fitted. The hood
must be fitted according to Figure2. Adjust the links
so that the hood easily can be positioned.
X: Cable with loop.
5Wiring diagram
See Figure3.
• M1: Fan motor, 0.75 kW.
• A1: Circuit card.
• T1: Transformer, 24 V secondary.
• K1: Relay, fan.
• F1: Overload protector relay.
• H1: Alarm signal, 2.9 kHz.
• H2: Alarm signal, 2.9 kHz.
6Initial operation
See Figure4.
1 Ensure the FilterCart Advanced has not been dam-
aged during transport.
2 Check that the mains voltage is the same as on the
sign plate.
3 Connect the connection cable with plug to the
mains. The light emission diodes at B indicate
fixed light and an alarm signal sounds for a short
time. The light diode at C indicates blinking green
light (stand by).
4 Start the FilterCart Advanced with the switch A.
The light emission at C indicates fixed green light:
The fan operates.
6.1Overload protector
See Figure4. The FilterCart Advanced is equipped
with an overload protector which means that the
power will disconnect automatically if the fan motor is
overloaded.
• C: Red light emission light indicates: disconnected
power and released overload protector.
• D: Button for re-setting the overload protector.
7Directions for use
See Figure5. The F$i$l$t$e$r$C$a$r$t$$A$d$v$a$n$c$e$d$ is only intended
for indoor use and is designed for extraction and fil-
tration of welding fumes.It must not be used for the
extraction of fluids. The hood of the extraction arm
is to be positioned as close to the pollution source as
possible, see Figure5, item A. The F$i$l$t$e$r$C$a$r$t$$A$d$v$a$n$c$e$d$
is to be moved from behind according to item B and
with the wheels unlocked. The extraction arm is to be
positioned with the wheels locked according to item C.
8The control board indications
See Figure6.
1 When the mains plug is connected the light emis-
sion diodes indicate fixed light and an alarm signal
sounds a short time.
2 The light emission diode indicates blinking green
light: The FilterCart Advanced has been connected
to the mains (stand by).
3 As the FilterCart Advanced has been started the
light emission diode indicates fixed green light.
The fan is in operation.
4 The FilterCart Advanced is ready for use and after
a while, the light emission diode indicates fixed
green light. After use for a certain time, the air-
flow will be reduced through the extraction arm
and the pressure drop will increase, which will res-
ult in having to change the filter cartridge.
5 The light emission diodes indicate fixed light: The
pressure drop has increased. Pre-warning for
changing the filter cartridge.
6 The light emission diodes indicate fixed light
and after about 30s an intermittent alarm signal
starts. Change the filter cartridge. If you want to
finish the work in progress before the filter cart-
ridge is changed, the alarm signal can be stopped
by pushing once on the start button. The alarm
signal activates after about 10 minutes. Push-
ing twice on the start button makes a fan stop. As
an alternative, the fan can be stopped with the
switch on the Fume Extractor hood.
7 The light emission diode indicates blinking red
light = alarm memory. The FilterCart Advanced has
been stopped after the alarm start (according to
above), for example at work shifts. The filter cart-
ridge has to be changed.
8 The light emission diode indicates fixed red light
and an intermittent alarm signal starts. The over-
load protector has been released. Examine the
reason and reset the overload protector by push-
ing the “Motor Protector Reset”- button.
9Changing the filter cartridge
See Figure7. The filter cartridge is disposable and is
to be thrown away after use. The life span of the filter
cartridge varies greatly depending on how the Filter-
Cart Advanced is used and how much and what type of
pollutants are collected.
Regularly check the light-emitting diodes on the pres-
sure drop symbol on the control board to know when
to change the filter cartridge, see Chapter8The con-
trol board indications. Always check that the hoses for
the extraction arm and the fan inlet are undamaged
before it is decided to replace the filter cartridge.
WARNING!Risk of personal injury
Use necessary personal safety equipment
when replacing the filter cartridges.
12

FilterCart Advanced
Change the filter cartridge in the following way:
1 Disconnect the mains connection cable.
2 Unlock the eccentric locks and remove the filter
casing.
3 Use the plastic bag which comes with the new fil-
ter cartridge and pull it over the used cartridge.
Fold the plastic bag under the cartridge.
4 Use a duster to wipe off the filter cartridge con-
tact surfaces in the FilterCart Advanced. Put the
duster in the plastic bag with the filter cartridge
and close the bag with the band supplied.
5 Handle the used filter cartridge according to the
relevant regulations for the substances that have
been collected.
6 Check that the pressure drop hose (from the con-
trol board) not is damaged and is fitted properly.
7 Check that the new filter cartridge is not damaged.
Also, check that the seal fitted on the underside
of the cartridge is not damaged. Then fit the cart-
ridge on the FilterCart Advanced.
8 Refit the filter casing. Make sure the eccentric
locks tighten the filter casing properly.
• A. Increasing the locking power.
• B. Decreasing the locking power.
10 Changing the HEPA-filter (access-
ory)
See Figure8. If the FilterCart Advanced has been sup-
plied with a HEPA-filter, this is to be changed at the
same time as the main filter cartridge is changed.
WARNING!Risk of personal injury
Use necessary personal safety equipment
when changing the HEPA-filter.
Change the HEPA-filter cartridge in the following way:
1 Disconnect the mains connection cable.
2 Unscrew the top cover.
3 Remove the used HEPA-filter and put it in the
plastic bag which comes with the new HEPA filter.
Close the plastic bag with the band supplied.
4 Handle the used HEPA-filter according to the rel-
evant regulations for the substances that have
been collected.
5 Check that the new HEPA-filter not is damaged.
Note that the filter surface must not be touched.
Handle the HEPA-filter very carefully and fit it in
the FilterCart Advanced. Ensure it is fitted in the
correct position and that the seal is downwards.
Check that the seal not is damaged. Note the UP-
arrows.
6 Refit the top cover. Fasten it securely.
11Maintenance
See Figure9. Maintenance is recommended at least
once a year.
WARNING!Risk of personal injury
• Disconnect the mains connection cable be-
fore starting any maintenance work.
• Use the necessary personal safety equip-
ment.
• FilterCart Advanced needs to be cleaned be-
fore any disassembly.
• FilterCart Advanced must only be disas-
sembled in a well-ventilated room.
• Use proper equipment, such as a vacuum
cleaner to clean FilterCart Advanced.
• The area where maintenance is done must be
properly cleaned after work is complete.
Do as follows:
• Change the filter cartridge (and optional HEPA-fil-
ter) if necessary, see Chapter9Changing the filter
cartridge
• Check that the Fume Extractor hose is not damaged.
If necessary change the hose.
• Check that the hose to the fan inlet is not damaged.
If necessary change the hose.
• Check that no objects have been caught on the
guard net on the fan inlet.
• Check that the pressure drop hose (from the control
board) not is damaged and is fitted properly.
• If necessary, adjust the Fume Extractor links.
• If necessary, tighten the arm profile bolts, see the *
symbols in Figure9.
• Check that the mains connection cable and the fan
motor cable are not worn out or damaged.
• Check that the eccentric locks tighten the filter cas-
ing properly. Adjust the eccentric locks if necessary.
See Chapter9Changing the filter cartridge.
12Spare Parts
CAUTION!Risk of equipment damage
Use only$N$e$d$e$r$m$a$n$ original spare parts and ac-
cessories.
Contact your nearest authorized distribut-
or or N$e$d$e$r$m$a$n$ for advice on technical ser-
vice or if you require help with spare parts. See
also$w$w$w$.$n$e$d$e$r$m$a$n$.$c$o$m$.
12.1Ordering spare parts
When ordering spare parts always state the following:
• The part number and control number (see the
product identification plate).
• Detail number and name of the spare part
(see$w$w$w$.$n$e$d$e$r$m$a$n$.$c$o$m$).
• Quantity of the parts required.
13

FilterCart Advanced
13Accessories
• HEPA-filter H13, 7.5 m2 high-efficiency final filter,
class H13. (Part no. 12374016)
• Spark protection, for mounting in the hood. To re-
duce the risk of fire. (Part no. 10551335)
14Recycling
The product has been designed for component mater-
ials to be recycled. Its different material types must be
handled according to relevant local regulations. Con-
tact the distributor or$N$e$d$e$r$m$a$n$ if uncertainties arise
when scrapping the product at the end of its service
life.
14

www.nederman.com
Other manuals for FilterCart Advanced
1
This manual suits for next models
3
Table of contents
Other Nederman Scrubber manuals

Nederman
Nederman NEX HD User manual

Nederman
Nederman FX2 Original Series User manual

Nederman
Nederman Telescopic User manual

Nederman
Nederman SYSTEM 920 Product information sheet

Nederman
Nederman ORIGINAL 535 Series User manual

Nederman
Nederman ORIGINAL 535 Series User manual

Nederman
Nederman FilterCart Advanced User manual

Nederman
Nederman WeldFilter EC10 User manual

Nederman
Nederman FilterBox 12M User manual

Nederman
Nederman NEX HD User manual