manuals.online logo
Brands
  1. Home
  2. •
  3. Brands
  4. •
  5. NeuraLabel
  6. •
  7. Label Maker
  8. •
  9. NeuraLabel 550e Operator's manual

NeuraLabel 550e Operator's manual

Check Your Media
NeuraLabel 550e Label Printer -Quick Start Printing Guide
Set up Printer
Step 1. Reset Continuous Print Parameters
•Set Mark Adjust (MA) = 0
•Set Auto Calibrate Marks to Reset.
•Click Save.
•Set Auto Calibrate Marks to Normal.
•Click Save.
Step 2. Set Mark Adjustment and Begin Auto Calibration
Print 14 labels. This will run the auto-calibration routine which controls the
stretch of the printed image on the label.
Look at Labels 8 through 14.
•If labels are too close to leading edge of the media → Increase the Value of MA
•If labels are too far from leading edge of the media → Decrease the Value of MA
•MA is in inches and may be a negative number. (not common)
•Enter value in Mark Adjustment and click Save.
Repeat Step #2 until Mark Adjustment and Image Calibration is satisfactory.
Normally these steps are run 2 times for optimal calibration.
Select/Create Matching Form in Driver
-Set up printer and optional roll unit on baseplate or set up
printer and attach media basket.
-Attach feeder to printer front and plug in to printer.
-Turn printer on and get ready to print.
Select the Paper size in the Paper/Finishing tab of the driver.
If the size you need is not there create it:
Calibrate the NeuraLabel 550e Printer for your Media
The measured form height must match the Paper size length.
4800 Sugar Grove Blvd., Suite 200 ~ Stafford, Texas 77477 ~ 1-281-240-2525 ~ www.neuralabel.com
-Most media is Letter, Legal or longer standard size.
-For non-standard media measure complete form
to 0.10” accuracy. Width must be 8.50 inches.
-Check mark positions against provided template.
Detailed set up instructions are provided in separate documents.
-Manage Custom Sizes… and New…to create a custom size
-Width: 8.5”
Height: measured form height
-Name the form, for example
Custom-15.5 and select OK.
Select Paper size to use it.
This procedure uses the Continuous Print parameters accessible
through the Operator Panel or the printer web server under Settings.
When/Why to calibrate:
New printer installation
Changing media type –Length, Thickness and Slickness
08/01/20
measure
form height
NeuraLabel 550e Printer -Troubleshooting Guide
Label Placement is not good
-Check media against NeuraLabel specification. A sample is included with
your printer
-Follow the Printer Calibration Procedure
-If media is drastically different than previous media, repeat calibration
procedure
-Check to see if the cut is too far into the first label
-Check if media is too narrow and drifting during print
-Make sure your label image has at least 0.35”margin on the continuous
edge and at least 0.25” on the non continuous edge
-Make sure the selected page size matches the measured media size
The printer will NOT calibrate if the selected page size does not match the
measured media size.
NOTE: Media labeled Letter or A4 may actually be longer. Make sure you
measure to determine the exact size.
Initial Troubleshooting Checklist
-Feeder LED is white (mark mode) or green (gap mode) or after
feeder bootup
-Feeder is placed squarely on the printer front bar
-Media follows NeuraLabel specifications
-Fanfold Media is placed squarely in front of the printer with no twist
-Fanfold Media is not obstructed by box: no plastic in box
-Media pages are not sticking together
-Rolled Media is correctly aligned with feeder
-Winding equipment is turned on
-Media is loaded with marks face up and at top of page
-Media is not too narrow or too wide
-There are no pieces of label stuck in the feeder or the printer
-Paper size/type match within +/-0.1 inch
physical media = printer settings = driver selection
Cut is in wrong place (marked media only)
The media is not in spec or is loaded incorrectly. Watch the feeder during the
cut.
-If blinking Blue, RIGHT cut mark was missed.
-If blinking Yellow, LEFT cut mark was missed.
-If blinking Pink, BOTH cut marks were missed. Cuts one inch into the next label
and STOPS. The light will then blink Red until the media is removed and
reloaded. This is necessary to avoid label shards that can damage the printer.
The ideal location for the cut is about 1/32” past the perforation. The media
must be within specification for this to occur.
Contact NeuraLabel Support
support@neuralog.com
1-281-207-8555 x1
4800 Sugar Grove Blvd., Suite 200 ~ Stafford, Texas 77477 ~ 1-281-240-2525 ~ www.neuralabel.com
Media Jams
-Media is too wide and won’t flow through the feeder
-Media is too narrow and becomes crooked in the feeder
-Media is not properly aligned with the printer
-Box or Roll unit is not aligned with the printer
-Feeder is not properly attached to the printer
-Leading edge of media is folded, curled or damaged
-Media is loaded upside down
Media won’t Load
⁻Feeder is not ready. A solid white or green light means feeder is
ready. Red indicates booting up or error state.
⁻The media is too wide.
⁻The media is not aligned to the printer and entered crooked.
⁻A label fragment is in the feeder. Turn unit off, remove feeder lid.
⁻The cutter blade is not homed. Reboot system to home blade.
⁻One of the feeder wheels is not active and the feeder may be
damaged. Contact NeuraLabel support.
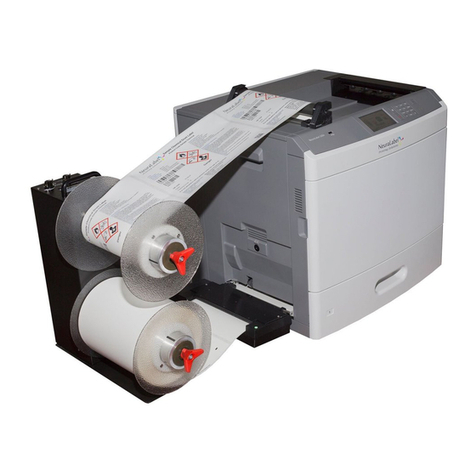
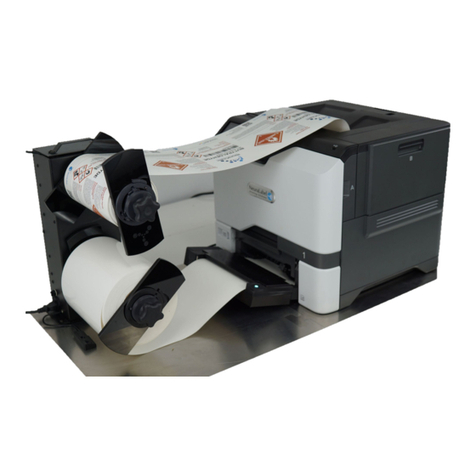
Other manuals for 550e

2

Other NeuraLabel Label Maker manuals

NeuraLabel Sirius 4 User manual

NeuraLabel

NeuraLabel Sirius 4 User manual

NeuraLabel 550e User manual

NeuraLabel

NeuraLabel 550e User manual

NeuraLabel 500e User manual

NeuraLabel

NeuraLabel 500e User manual

NeuraLabel Sirius User manual

NeuraLabel

NeuraLabel Sirius User manual

NeuraLabel 550e User manual

NeuraLabel

NeuraLabel 550e User manual

NeuraLabel 600e User manual

NeuraLabel

NeuraLabel 600e User manual

NeuraLabel 300x NoTouch User manual

NeuraLabel

NeuraLabel 300x NoTouch User manual

NeuraLabel 600e Configuration guide

NeuraLabel

NeuraLabel 600e Configuration guide

NeuraLabel Sprint User manual

NeuraLabel

NeuraLabel Sprint User manual

NeuraLabel Sprint User manual

NeuraLabel

NeuraLabel Sprint User manual

Popular Label Maker manuals by other brands

Epson LabelWorks LW-300 Notice

Epson

Epson LabelWorks LW-300 Notice

Renkforce RF-TTLP4-01/HT300 quick start guide

Renkforce

Renkforce RF-TTLP4-01/HT300 quick start guide

Dymo LabelManager 300 user manual

Dymo

Dymo LabelManager 300 user manual

iDPRT SP450 quick start guide

iDPRT

iDPRT SP450 quick start guide

Dymo 5500 user manual

Dymo

Dymo 5500 user manual

Dymo LabelPoint 250 user guide

Dymo

Dymo LabelPoint 250 user guide

Brother P-touch PT-P300BTBU user guide

Brother

Brother P-touch PT-P300BTBU user guide

Brother PT-P750W user guide

Brother

Brother PT-P750W user guide

U-Line H-8783 instruction manual

U-Line

U-Line H-8783 instruction manual

Epson LW-K400 user guide

Epson

Epson LW-K400 user guide

Oki Pro1040 Maintenance Guide

Oki

Oki Pro1040 Maintenance Guide

VIP Color VP485 user guide

VIP Color

VIP Color VP485 user guide

Brady BMP71 quick start guide

Brady

Brady BMP71 quick start guide

Dymo Rhino 5200 Brochure & specs

Dymo

Dymo Rhino 5200 Brochure & specs

Epson LabelWorks LW-400 user manual

Epson

Epson LabelWorks LW-400 user manual

Epson LABELWORKS LW-Z710 installation manual

Epson

Epson LABELWORKS LW-Z710 installation manual

Dymo LabelPOINT 100 Instructions for use

Dymo

Dymo LabelPOINT 100 Instructions for use

Avery Dennison Monarch 9860 quick reference

Avery Dennison

Avery Dennison Monarch 9860 quick reference

manuals.online logo
manuals.online logoBrands
  • About & Mission
  • Contact us
  • Privacy Policy
  • Terms and Conditions

Copyright 2025 Manuals.Online. All Rights Reserved.