manuals.online logo
Brands
  1. Home
  2. •
  3. Brands
  4. •
  5. Nexmosphere
  6. •
  7. Accessories
  8. •
  9. Nexmosphere X-Dot Motion Series User manual

Nexmosphere X-Dot Motion Series User manual

Nexmosphere
High Tech Campus 10 (Mμ building)
5656 AE Eindhoven • The Netherlands
T+31 40 240 7070
E support@nexmosphere.com
INSTALLATION GUIDE
and

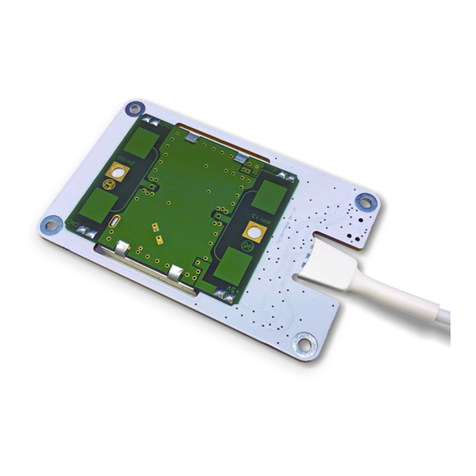
The Nexmosphere X-Dot Motion series oers a range of motion sensors based on IR-proximity technology and PIR
technology. This document oers information and guidelines on how the products with IR-proximity technology (M1, M4 and
M7) from the X-Dot motion series should be used and installed for stable and responsive operation.

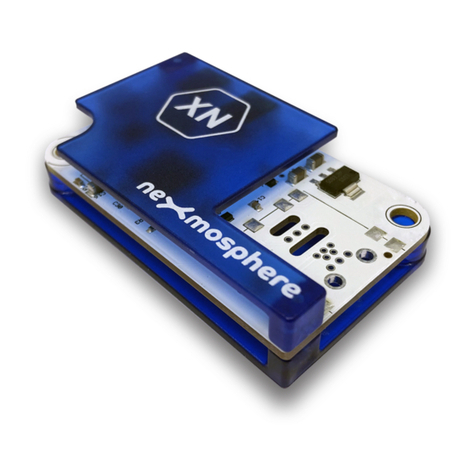
The X-Dot Motion series with IR-proximity technology consists out of 3 products:
XDW-M1 XDW-M4 XDW-M7
short range medium range long range
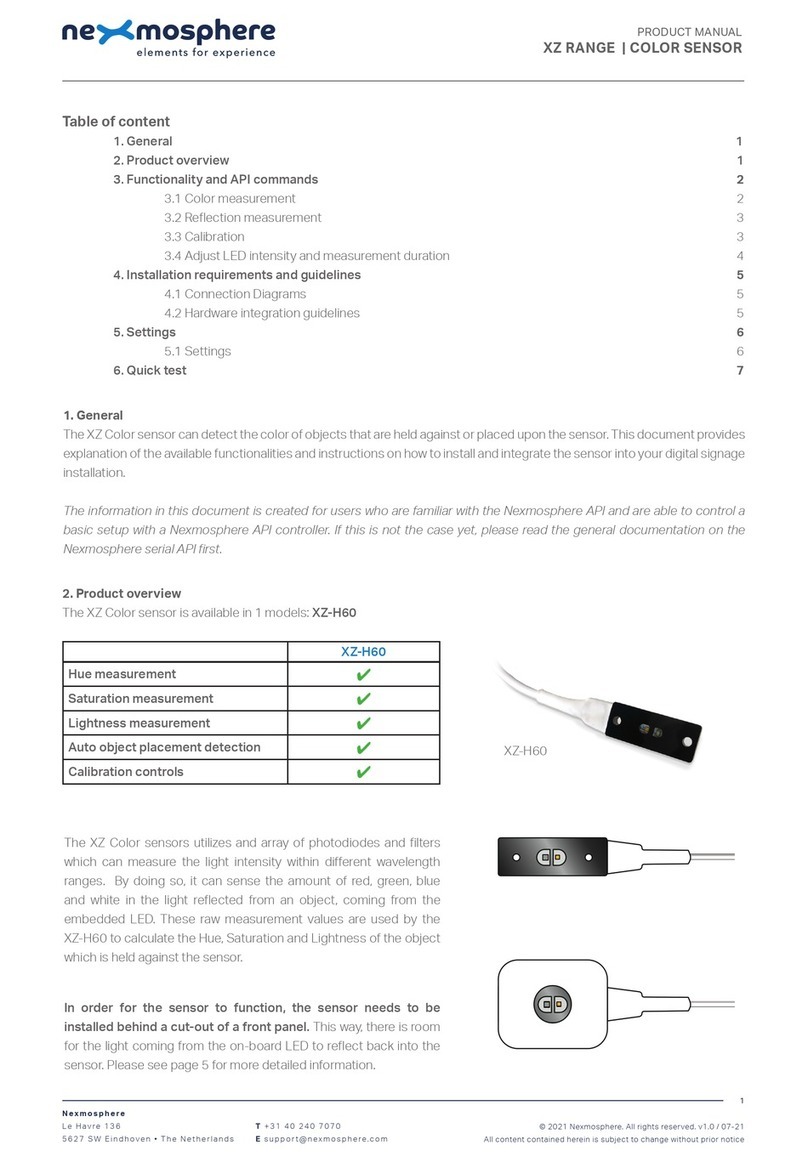
The Nexmosphere X-Dot motion series is designed to be used for creating integrated motion sensing solutions in retail
environments. All motion sensors listed above can detect a person or object in front of the sensor and are able to indicate at
what distance the person or object is positioned in relation to the sensor. The input provided from the sensor can be used to
trigger outputs such as LED lighting, video and audio. By connecting one or multiple motion sensors to one of the Xperience
controllers, typical retail applications such as “Approach & Learn” or “Interactive Storytelling” can be created.
In order to create one motion sensor, the following connections must be made:
The X-Dot M1, M4 and M7 are electronically designed and programmed to work optimally with the included IR proximity
sensor. Third party proximity sensors can be connected onto the X-Dot M0 (but will only be supported when compliant with
specications provided by Nexmosphere (available on request).
© 2018 Nexmosphere. All rights reserved. v1.0 / 04-18
All content contained herein is subject to change without prior notice.
1
X-Dot Moon
(e.g. XDW-M44)
X-Dot Sensor
Xperience controller
(e.g. XC-681)
XC
5VDC
ANALOG INPUT
GND
© 2017 Nexmosphere. All rights reserved. v1.0 / 08-17
All content contained herein is subject to change without prior notice.
Nexmosphere
High Tech Campus 10 (Mμ building)
5656 AE Eindhoven • The Netherlands
T+31 40 240 7070
E support@nexmosphere.com
2
and

When integrating X-Dot motion sensors in a retail environment such as POS displays or store xtures, several instructions
and guidelines need to be taken into account in order to guarantee accurate and stable sensor output.

Direct light sources aimed into the detection surface of
the sensor can cause inaccurate sensor output. Make
sure that the sensor is positioned in such a way that it’s
not directed towards any (strong) light source, such as a
halogen lamp, (compact) uorescent lamp or the sun.

Each motion sensor has a specic detection range. See
the table below to make sure that the area in which a
person should be detected is within the detection range
of the applied sensor.
Each sensor has a beam angle of approximately 5.5 °.
The detection range is divided into 10 so-called “distance-
slots”. The output of the motion sensor is the number of
the distance slot in which a person or object is detected.
If the position of a person overlaps multiple distance
slots, only the number of the slot which is closest to the
sensor is given. As external inuences such as light and
temperature can have an inuence on the sensor data,
we recommend to test and validate the nal setup before
starting production.
values below only apply for the default slot settings

Objects in front of the sensor interrupt the IR beam and
cause inaccurate sensor output. Make sure the sensor has
a clear view and is not obstructed by any objects within its
detection range.
Slot XDW-M1 XDW-M4 XDW-M7
10 5-10 cm 15-20 cm 50-100 cm
9 10-15 cm 20-30 cm 100-125 cm
8 15-20 cm 30-40 cm 125-150 cm
7 20-25 cm 40-50 cm 150-175 cm
6 25-30 cm 50-60 cm 175-200 cm
5 30-40 cm 60-80 cm 200-250 cm
4 40-50 cm 80-100 cm 250-300 cm
3 50-60 cm 100-120 cm 300-400 cm
2 60-80 cm 120-150 cm 400-500 cm
1 >80 cm (nothing detected) >150 cm (nothing detected) >500cm (nothing detected)
10987654321
± 5.5° ± 5.5°
10 9 8 5 4 3 2 1
7
7 6
© 2017 Nexmosphere. All rights reserved. v1.0 / 08-17
All content contained herein is subject to change without prior notice.
Nexmosphere
High Tech Campus 10 (Mμ building)
5656 AE Eindhoven • The Netherlands
T+31 40 240 7070
E support@nexmosphere.com
3
and

In case the sensor needs to be placed behind a transparent
front panel such as glass or acrylic, make sure the material
has a high transmittance with an emitted spectrum
wavelength of 850nm (+/-70nm). The material needs to be
completely smooth (e.g. no sand brushing).The clearance
between the sensor and the front panel needs to be 1mm
or less.
In case the sensor needs to be invisible, it is recommended
to use an IR optical lter plastic.

The ambient temperature has a minor inuence on the
detection range of the distance slots mentioned on the
previous page. The default distance slots are divided in
such a way that the motion sensor works most accurately
in the temperature range between 16-26 degrees Celsius
(61 to 79 Fahrenheit). When operation at colder or warmer
temperatures is expected, it is recommended to create
custom distance slots. Please refer to the API document
for instructions on how to do so, or contact support@
nexmosphere.com for help.

When using multiple IR sensors in one application, make
sure that they do not point to the same location. This can
cause interference which results in unstable behavior of
the sensor.
When using multiple sensors facing in the same direction,
it is recommended that:
• each sensor is placed at a dierent angle so that the
beams of the sensors are not parallel to each other
and/or
• that each sensor is placed with a minimum clearance
of >80cm between each other.
<1mm
>80cm
>80cm
© 2017 Nexmosphere. All rights reserved. v1.0 / 08-17
All content contained herein is subject to change without prior notice.
Nexmosphere
High Tech Campus 10 (Mμ building)
5656 AE Eindhoven • The Netherlands
T+31 40 240 7070
E support@nexmosphere.com
4
and

In order to test if the installed X-Dot motion sensor(s) work as expected, please follow the following test procedure:
        

The green status LED should go on after 2 to 3 sec-
onds and should be lit continuously.
         
       

The green status LED should NOT blink at any time. It
should be lit continuously.
 




 

The green LED should blink 1 time each time an object
moves in/out the detection range or moves from one
distance slot to another.
For system integrators who use the X-Dot motion with the
API controllers, it is possible to create custom distance
slots by changing settings 10 to 29. Please see the API
documentation for more info.
In case any of the 3 steps above does not provide the
expected result, please check the installation guidelines in
this document.
Please contact  for any
support questions you may have.
C
X-Dot Moon
(e.g. XDW-M44)
XC
AB
Xperience controller
(e.g. XC-681)
Power supply
(e.g.PU-0520US
+ CA-UM6B)
LED ON
X-Dot Moon
(e.g. XDW-M44)
ALED ON
A
X-Dot Moon
(e.g. XDW-M44)
BLED 1x blink

This manual suits for next models

6

Other Nexmosphere Accessories manuals

Nexmosphere X-EYE XY-116 User manual

Nexmosphere

Nexmosphere X-EYE XY-116 User manual

Nexmosphere X-EYE 200 Series User manual

Nexmosphere

Nexmosphere X-EYE 200 Series User manual

Nexmosphere XZ-A40 User manual

Nexmosphere

Nexmosphere XZ-A40 User manual

Nexmosphere XT-EF Series User manual

Nexmosphere

Nexmosphere XT-EF Series User manual

Nexmosphere X-EYE XY-510 User manual

Nexmosphere

Nexmosphere X-EYE XY-510 User manual

Nexmosphere XD Series User manual

Nexmosphere

Nexmosphere XD Series User manual

Nexmosphere X-EYE User manual

Nexmosphere

Nexmosphere X-EYE User manual

Nexmosphere XE Series User manual

Nexmosphere

Nexmosphere XE Series User manual

Nexmosphere XZ Series User manual

Nexmosphere

Nexmosphere XZ Series User manual

Nexmosphere XZ Series User manual

Nexmosphere

Nexmosphere XZ Series User manual

Nexmosphere XV User manual

Nexmosphere

Nexmosphere XV User manual

Nexmosphere XS Series User manual

Nexmosphere

Nexmosphere XS Series User manual

Nexmosphere XF-P3W User manual

Nexmosphere

Nexmosphere XF-P3W User manual

Popular Accessories manuals by other brands

Yard O Led Propelling Pencil user guide

Yard O Led

Yard O Led Propelling Pencil user guide

LEGRAND Plexo 0 697 93 quick start guide

LEGRAND

LEGRAND Plexo 0 697 93 quick start guide

August LP320 user manual

August

August LP320 user manual

Panasonic NN-SD767 user guide

Panasonic

Panasonic NN-SD767 user guide

ROSE DISPLAYS SUPERSNAP WITH SLATWALL HANGERS instruction sheet

ROSE DISPLAYS

ROSE DISPLAYS SUPERSNAP WITH SLATWALL HANGERS instruction sheet

Cooper Crouse-Hinds CEAG GHG 525 Series operating instructions

Cooper Crouse-Hinds

Cooper Crouse-Hinds CEAG GHG 525 Series operating instructions

HIOTH TECHNOLOGY CT-HAWF1007-BL quick start guide

HIOTH TECHNOLOGY

HIOTH TECHNOLOGY CT-HAWF1007-BL quick start guide

LEGRAND WattStopper DW-100-24-LA installation instructions

LEGRAND

LEGRAND WattStopper DW-100-24-LA installation instructions

Swann DC817B instruction manual

Swann

Swann DC817B instruction manual

Pepperl+Fuchs UC2000-L2M-E5-V15 quick start guide

Pepperl+Fuchs

Pepperl+Fuchs UC2000-L2M-E5-V15 quick start guide

NTI ENVIROMUX Series Installation and operation manual

NTI

NTI ENVIROMUX Series Installation and operation manual

Control Network Solution cns-enocean Series user guide

Control Network Solution

Control Network Solution cns-enocean Series user guide

Vega VEGAFLEX 81 operating instructions

Vega

Vega VEGAFLEX 81 operating instructions

Audio Technica AT440MLa manual

Audio Technica

Audio Technica AT440MLa manual

Cardinal Gates XTG Assembly instructions

Cardinal Gates

Cardinal Gates XTG Assembly instructions

camry CR 4469 user manual

camry

camry CR 4469 user manual

MOB MO6424 user manual

MOB

MOB MO6424 user manual

Avery Weigh-Tronix ZM510 User instructions

Avery Weigh-Tronix

Avery Weigh-Tronix ZM510 User instructions

manuals.online logo
manuals.online logoBrands
  • About & Mission
  • Contact us
  • Privacy Policy
  • Terms and Conditions

Copyright 2025 Manuals.Online. All Rights Reserved.