manuals.online logo
Brands
  1. Home
  2. •
  3. Brands
  4. •
  5. Niigata seiki
  6. •
  7. Measuring Instrument
  8. •
  9. Niigata seiki DUP-360AN User manual

Niigata seiki DUP-360AN User manual

+
360°
MODE ON/REF
HOLD
0°00′
OFF
+/−
°/ ′
デ ジタルユ ニ バ ー サルプ ロトラクタ 品番:DUP
−
360AN
この度はデジタルユニバーサルプロトラクタをお買上げいただきありがとうございます。
ご使用前に、本書をよくお読み頂き正しくお使いくださいますようお願い申し上げます。
取扱説明書
ブレード150mm
【 鋭 角 アタッチメント】
【マスタスコヤ】
【ブレード300mm】
ブレ ード 固 定 レバ ー
送りダイヤル
送りダイヤル
操作パネル
固定ねじ ロッカー
操作パネル
固定ねじ
文字回転ボタン
電池蓋
HOLDボタン
MODEボタン
LCD表示部
ON/REFボタン
基 準ストック
●機械・金型・治具工具等の角度測定、組み立て、加
工基準として使用する精密角度測定器です。
●読み取りやすいデジタル表示。
●360°・180°・90°の3つのモードで使用可能。
●文字回転ボタンで、LCD表示が180°回転。
●電池を入れ替えても角度を記憶しています。
●任意の位置で0設定ができます。
●鋭角アタッチメント付。
●+−切替機能付。
●測定範囲:0
-
360°
●最小読取値:1′/0.01°
●器    差:±5′/0.08°
●使用温度範囲:0〜40℃
●質    量:350g
●電    源:リチウム電池 CR2032×1
●付   属   品:・ブレード150mm
        ・ブレード300mm
        ・鋭角アタッチメント
        ・マスタスコヤ
        ・リチウム電池 CR2032(テスト用)
■用途・特長
■仕様
■各部の名称
1.電池蓋を引き出して開けます。(シリコンゴム製ですの
で、引っ張り出すようにしてください。)
2.電池は必ず(+)側を表にしてセットしてください。
3.電池蓋を元の位置に挿入してください。
電池は必ずCR2032
をお使いください。
ご注意
■電池のセット・交替
電池(+が表)
電池蓋
引き出す
●はじめてのご使用前には、柔らかい布などで防錆油
を拭き取ってください。
●本品は精密測定機器です。落下等の強いショックを
加えないでください。
●分解・改造はしないでください。
●電気ペンなどでの番号や文字などの書き込みはさけ
てください。また、ブレードや基準ストックにキズ
をつけないでください。
●水や油のかかる場所、ほこり等の多い場所、直射日
光の当たる場所、湿度の高い場所、温度変化の激し
い場所、子どもの手の届く所でのご使用や保管はお
やめください。
●本製品は精密角度測定器です。用途以外のご使用は、
事故やけがの原因となりますので絶対におやめくだ
さい。
■ご使用にあたって
ON/REFボ タ ン( 電 源 ON/OFF、比 較 測 定 の ON/OFF)
1
MODEボタン(測定範囲と角度単位の切り替え)
2
HOLDボ タ ン( HOLD機能のON/OFF、測 定 値 の +/− 方 向 切 り 替 え )
3
●電源OFFの状態で短押し・・・・電源ON
●電源ONの状態で短押し・・・・・比較測定のON/OFF
ONにすると「REF」が表示さ
れ、0°00′(0.00°)になります。
これを基準として比較測定がで
きます。
●電源ONの状態で長押し・・・・・電源OFF
●短押し・・・「360°」→「180°」→「90°」→
と測定範囲が切り替わります。測定範囲を超える
と、再び「0」から測定が始まります。
●長押し・・・「0°00′」←→「0.00°」に角度単位の切り替えをし
ます。
●短押し・・・数値をHOLDします。もう一度押すと解除します。
●長押し・・・測定値の+/−を切り替えます。
通常測定時、表示は+の値です。
例)測定値が15.00°の場合
  ・測定範囲「360°」時の−値 ・・・・・・・
−
345.00°
  ・測定範囲「180°」時の−値 ・・・・・・・
−
165.00°
  ・測定範囲「 90°」時の−値 ・・・・・・・
−
75.00°
■各ボタンの使用方法
●LCD表示部の液晶文字が180°回転します。
文字回転ボタン
4
ブレ ード
固定レバー
爪
基準点の設定
(付属のマスタスコヤを使用してください)
2
1.ON/REFボタンを押して、電源を入れます。
2.文字回転ボタン を押しながらMODEボタンを
長押しします。
3.LCD表示部に「     」が表示・点滅し、角
度設定モードに切り替わります。
4.①または②の使用する側のブレードと基準ス
トックに付属のマスタスコヤを当てます。(図2)
5.文字回転ボタン  を押すと角度設定終了です。
  これが「90°」の基準となります。
測定方法
3
ブレードのセット方法
1
1.ON/REFボタンを押して、電源を入れます。
2.
MODEボタンを押して測定範囲を選んでください。
3.ブレードと基準ストックで被測定物をはさみ、
測定してください。(図3)
上記の方法以外での、基準点の設定はしないでください。
例)①の面で基準点を設定した後、②の面をご使用になる
場合は、改めて②の面で基準点を設定してください。
※基準ストックが回らない場合は、操作パネル固定
ねじをゆるめてください。
※送りダイヤ ルを 回 すと 、基 準 ストックが 少しず つ 回り
ます。
鋭角アタッチメントの使用方法
4
1.鋭角アタッチメントのロッカーを基準ストック
の隙間に差し込んでください。
2.ロッカーを、基準ストックに対し、90°になるよ
うに回してください。(図4)
3.鋭角アタッチメントとブレードを合わせ、固定
ねじを締めて固定してください。
4.鋭角アタッチメントとブレードで被測定物をは
さみ、測定してください。(図5)
(図1)
(図2)
基準ストック
被測定物
マスタ
スコヤ
ブレ ード
送り
ダイヤル
送り
ダイヤル
ご注意
(図3)
(図4) (図5)
基準
ストック
固定ねじ
鋭角
アタッチメント
ロッカー
被測定物
ブレ ード
■使用方法
1.必要に応じて、ブレード150mmまたはブレード
300mmを選択します。
2.ブレード固定レバーをゆるめ、ブレード固定レ
バーの爪にブレードの溝を確実に差し込んでくだ
さい。(図1)
3.ブレード固定レバーを締めて固定してください。
ブレ ード
ブレ ード
固定レバー
差し込む
■トラブルと対応
■修理の際は
Q.画面に何も表示されなかったり、数字が点滅している。
 A.電池の残量が少なくなっていませんか?
Q.電源ONの状態でスライドさせてもLCD表示の数字が変わらない。
 A.一度電池を取り外し、30秒後に電池をセットし直してください。
Q.スイッチを押しても何も反応しない。
 A.電池が正しくセットされていますか?
●正常に作動しない場合や、不明な点がございましたらお買い上げの販売
店または、発売元までご連絡ください。
●お問い合わせや、ご連絡が無いまま直接発売元に修理品などを送付され
ても処理、対応ができない場合がありますのでご了承ください。
ゆるむ
締まる
①
②操作パネル
固定ねじ
合わせる
E1148-Q201030
発売元
〒955-0055
新潟県三条市塚野目5丁目3番14号
(0256)33-5502(代)FAX(0256)33-5528
URL http://www.niigataseiki.co.jp
●Short press・・・Hold display. Press again to release.
●Long press・・・Measurement +/- direction. Default is “+”
Example: For a “+” reading of 15.00°, “-” setting will display
as follows:
・For Measurement Range = 360° ・・・・・・
-
345.00°
・For Measurement Range = 180°・・・・・・・
-
165.00°
・For Measurement Range = 90°・・・・・・・
-
75.00°
● LCD display flips 180°
●Short press・・・「360°」→「180°」→「90°」→
●With power ON, a long press・・・・・・Power OFF
●With power OFF, a short press・・・・Power ON
●With power ON, a short press・・・・・Comparative meas. on/off
●Long press・・・Measurement units : 「0°00′」←→「0.00°」
+
360°
MODE ON/REF
HOLD
0°00′
OFF
+/−
°/ ′
DIGITAL UNIVERSAL PROTRACTOR
Model No.:DUP
−
360AN
Thank you for purchasing the Digital Universal Protractor.
Please read this manual thoroughly before use for proper operation.
INST. MANUAL
【Acute Angle Attachment】
【Master Square】
Blade Lock Lever
Fine Adj. Knob
Fine Adj. Knob
Control Panel
Catch
【300mm Blade】
Control Panel
Lock Screw
LCD Display
Reference Arm
Precision angle measurement for machinery, jigs,
molds, and assembly. Use as precision angle
reference, and for angle measurement.
Easy to read digital display.
Select from three output modes: 360°, 180°, 90°
Display orientation can be flipped 180°
Angle memory saved when replacing battery.
0-Reference can be set at any position.
Acute Angle Attachment included.
+/- Angle switching feature.
Weight: 350g
Power: CR3032 Lithium Battery (1x)
Accessories: ・150mm Blade
・300mm Blade
・Acute Angle Attachment
・Master Square
・CR3032 Lithium Battery (for test)
■FEATURES ・ APPLICATIONS
■SPECIFICATIONS M
■PART IDENTIFICATION
1. Open battery cover (Pull out silicone rubber cover to
remove.)
2. Insert battery with “+” side up.
3. Push battery cover back into it's original position.
Only use CR2032
battery.
CAUTION
■INSERTING / REPLACING BATTERY
Cover
Pull Out
■NOTICES
[ON/REF] Button
(Power ON/OFF, Comparative meas. on/off)
1
[MODE] Button (Switches measurement range and units)
2
[HOLD] Button (Display hold on/off, Measurement +/- direction)
3
When turned on, display
will indicate “REF”
and 0°00' (0.00°)
Switches measurement range. If range is
exceeded, measurement starts back at “0”
■CONTROL PANEL
Display Orientation Button
4
Blade Lock
Lever
Pawl
Setting the Reference Point (Use supplied Master Square)
2
1. Press [ON/REF] Button to turn on power.
2. While holding down the Display Orientation Button
, simultaneously apply a long press to the
[MODE] Button.
3. Instrument will switch to angle setting mode and
display a flashing on LCD.
4. To set the reference point, place the Master
Square in position ① or ② (depending upon how it
will be used) against the Reference Arm and Blade
as shown. (Fig. 2)
5. Press the Display Orientation Button to
establish this position as the 90° reference point.
Measurement
3
Mounting the Blade
1
1. Press [ON/REF] Button to turn on power.
2.
Press the [MODE] Button to chose measurement range.
3. Position the workpiece between the Reference bar
and Blade. Read the measurement from LCD. (Fig. 3)
Set the reference point using the
procedure above based on intended use.
Ex.) Once reference point is set using position ①, to switch
faces and take measurements with the opposite face, the
reference point must be reestablished using position ②.
※
※
If the Reference Bar does not rotate, loosen the
Control Panel Lock Screw.
The Fine Adjust Knob can be used to rotate the
Reference Bar with more precise control.
Acute Angle Measurements
4
1. Mount the Acute Angle Attachment onto the groove
on the Reference Bar.
2. Rotate the Catch 90° to the Reference Bar.
3. Align the Acute Angle Attachment to the Blade and
secure by tightening the Mounting Screw.
4. Position the workpiece between the Acute Angle
Attachment and Blade. Read the measurement
from LCD. (Fig. 5)
(Fig.1)
(Fig. 2)
Reference Arm
Workpiece
Master
Square
Blade
Fine Adj.
Knob
NOTICE
(Fig. 3)
(Fig. 4) (Fig. 5)
Reference
Arm
Mounting
Screw
Acute Angle
Attachment
Catch
Workpiece
Blade
■OPERATION
1. Select 150mm or 300mm blade as required.
2. Loosen the Blade Lock Lever. Insert the Blade
with the pawl securely in the groove. (Fig. 1)
3. Secure blade using the Blade Lock Lever.
Blade
Blade Lock
Lever
Insert
■SERVICE
■TROUBLESHOOTING
Q. Nothing is displayed, or the numbers are flashing.
A. Is the battery running low?
Q.
With power on, the number on the LCD does not change as blade is moved.
A. Please reset by removing battery for about 30sec., and then replacing.
Q. Nothing happens when buttons are pressed.
A. Is the battery inserted properly?
If not working properly, or if you have any questions, please contact
distributor or place of purchase.
Please note, manufacturer is unable to respond to inquires or provide
service directly. Please contact distributor or place of purchase.
loosen
Tighten
①
②
Control Panel
Lock Screw
Align
Niigata seiki Co., Ltd.
5-3-14, Tsukanome, Sanjo, Niigata, Japan, 955-0055
Tel. : +81-256-33-5522 Fax. : +81-256-33-5518
MAIL [email protected]
URL http://www.niigataseiki.co.jp
■150mm Blade
●
●
●
●
●
●
●
●
●
●
●
●
●
●
●
●
●
●
●
●
●
●
●
Fine Adj.
Knob
Battery(+side)
Mounting Screw
Battery Cover
Display Orient. Button
[HOLD ]Button
[MODE ]Button
[ON/REF ]Button
Before use, please wipe off corrosion protectant
using a soft cloth.
This product is a precision instrument. Use care not
to drop or subject to shock or strong force.
Do not disassemble or modify.
Do not scratch surface of Blade or Reference Arm.
Do not engrave or use electric pen, such as to
engrave with ID numbers.
Do not use or store in places subject to direct
sunlight, extreme temperate fluctuations, high
humidity, or high levels of dust. Also, keep away
from water and oil. Keep out of reach of children.
This product is precision measuring instrument. Use
only as directed. Improper use may cause accident
or injury.
Measuring Range: 0-360°
Resolution: 1' / 0.01°Maximum
Inst. Error: ±5' / 0.08°
Operating Temp. Range:
0 ~ 40°C

Other Niigata seiki Measuring Instrument manuals

Niigata seiki KAIDAN GVC-10 User manual

Niigata seiki

Niigata seiki KAIDAN GVC-10 User manual

Niigata seiki GDCS Series User manual

Niigata seiki

Niigata seiki GDCS Series User manual

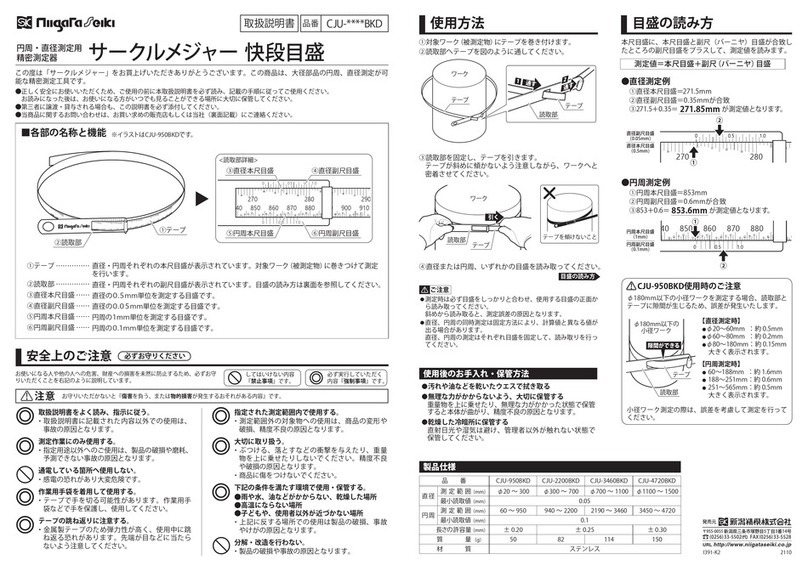
Niigata seiki CJU BKD Series User manual

Niigata seiki

Niigata seiki CJU BKD Series User manual

Niigata seiki CDI-18D User manual

Niigata seiki

Niigata seiki CDI-18D User manual

Niigata seiki GDCS-150ST User manual

Niigata seiki

Niigata seiki GDCS-150ST User manual

Niigata seiki WCDI-10D User manual

Niigata seiki

Niigata seiki WCDI-10D User manual

Niigata seiki VH-30D User manual

Niigata seiki

Niigata seiki VH-30D User manual

Niigata seiki WCDI-35 User manual

Niigata seiki

Niigata seiki WCDI-35 User manual

Niigata seiki GDCP-200AA User manual

Niigata seiki

Niigata seiki GDCP-200AA User manual

Niigata seiki WR-100 User manual

Niigata seiki

Niigata seiki WR-100 User manual

Niigata seiki WCDI-50D User manual

Niigata seiki

Niigata seiki WCDI-50D User manual

Niigata seiki DHG-35M User manual

Niigata seiki

Niigata seiki DHG-35M User manual

Niigata seiki GDG Series User manual

Niigata seiki

Niigata seiki GDG Series User manual

Niigata seiki VHS-30D User manual

Niigata seiki

Niigata seiki VHS-30D User manual

Niigata seiki DTW-DL01 User manual

Niigata seiki

Niigata seiki DTW-DL01 User manual

Niigata seiki JLVC-30 User manual

Niigata seiki

Niigata seiki JLVC-30 User manual

Niigata seiki FTM-52FN User manual

Niigata seiki

Niigata seiki FTM-52FN User manual

Niigata seiki LEVELNIC DL-S3L User manual

Niigata seiki

Niigata seiki LEVELNIC DL-S3L User manual

Niigata seiki GVC KDE Series User manual

Niigata seiki

Niigata seiki GVC KDE Series User manual

Niigata seiki MC122-25C User manual

Niigata seiki

Niigata seiki MC122-25C User manual

Niigata seiki TVC-15S User manual

Niigata seiki

Niigata seiki TVC-15S User manual

Niigata seiki EOM133 Series User manual

Niigata seiki

Niigata seiki EOM133 Series User manual

Niigata seiki MCD130-25 User manual

Niigata seiki

Niigata seiki MCD130-25 User manual

Niigata seiki ALD Series User manual

Niigata seiki

Niigata seiki ALD Series User manual

Popular Measuring Instrument manuals by other brands

Datakom DPR-350 Series user manual

Datakom

Datakom DPR-350 Series user manual

Megger MOM200A user manual

Megger

Megger MOM200A user manual

LDARtools phx42 user manual

LDARtools

LDARtools phx42 user manual

Veesta World V-PM2000 Series user manual

Veesta World

Veesta World V-PM2000 Series user manual

Extech Instruments SL130 user manual

Extech Instruments

Extech Instruments SL130 user manual

Hach ORBISPHERE 3654 user manual

Hach

Hach ORBISPHERE 3654 user manual

Megger MOM690 user manual

Megger

Megger MOM690 user manual

SMS ISKRA ME371 Technical description

SMS

SMS ISKRA ME371 Technical description

Burkert AC10 operating instructions

Burkert

Burkert AC10 operating instructions

Fieldmann FDLM 1040 instruction manual

Fieldmann

Fieldmann FDLM 1040 instruction manual

EUTECH INSTRUMENTS CYBERSCAN DO 5000 DO METER instruction manual

EUTECH INSTRUMENTS

EUTECH INSTRUMENTS CYBERSCAN DO 5000 DO METER instruction manual

Vega VEGAFLEX 82 Quick setup guide

Vega

Vega VEGAFLEX 82 Quick setup guide

Kessler-Ellis Products SQUIRT-R instruction manual

Kessler-Ellis Products

Kessler-Ellis Products SQUIRT-R instruction manual

Aegis CZ20050 user guide

Aegis

Aegis CZ20050 user guide

Bosch GAM Professional 220 Original instructions

Bosch

Bosch GAM Professional 220 Original instructions

Phoenix Controls FSR100 manual

Phoenix Controls

Phoenix Controls FSR100 manual

PKP DM01A instruction manual

PKP

PKP DM01A instruction manual

ECOWITT WH5360 manual

ECOWITT

ECOWITT WH5360 manual

manuals.online logo
manuals.online logoBrands
  • About & Mission
  • Contact us
  • Privacy Policy
  • Terms and Conditions

Copyright 2025 Manuals.Online. All Rights Reserved.