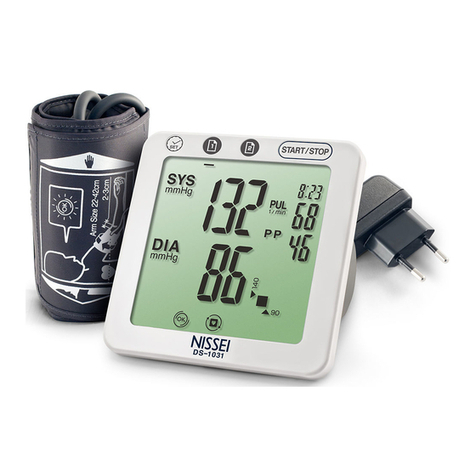
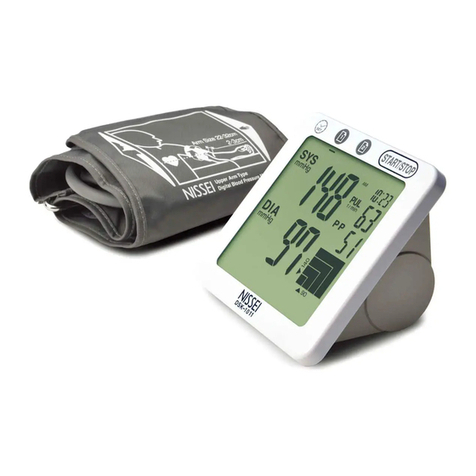
Nissei DS-1873 User manual

SOMMARIO pagina
INFORMAZIONI DI BASE SUL PRODOTTO . . .32
PRECAUZIONI PER L'USO . . . . . . . . . . . . . . .33
SUGGERIMENTI SULLA MISURAZIONE DELLA
PRESSIONE SANGUIGNA . . . . . . . . . . . . . . . .33
INSTALLAZIONE DELLE BATTERIE E
REGOLAZIONE DELL’OROLOGIO .. .. ... .. . .34
POSIZIONE DI MISURAZIONE CORRETTA ....35
pagina
AVVOLGIMENTO DEL BRACCIALE . . . . . . . . .35
PROCEDURE DI MISURAZIONE . . . . . . . . . . . .36
FUNZIONI DI MEMORIZZAZIONE . . . . . . . . . .37
CANCELLAZIONE DEI DATI MEMORIZZATI . ..37
CURA E MANUTENZIONE . . . . . . . . . . . . . . . .38
VISUALIZZAZIONE ERRORI E RISOLUZIONE
DEI PROBLEMI . . . . . . . . . . . . . . . . . . . . . . .38
Page
ENROULEMENT DU BRASSARD . . . . . . . . . .27
MÉTHODE DE MESURE . . . . . . . . . . . . . . . . .28
FONCTION MÉMOIRE . . . . . . . . . . . . . . . . . .29
EFFACEMENT DE DONNEES ENREGISTREES..29
SOINS ET ENTRETIEN . . . . . . . . . . . . . . . . . .30
AFFICHAGE DES ERREURS ET DEPANNAGE . .30
INSTRUCTIONS
FRANÇAIS
ISTRUZIONI
ITALIANO
INSTRUCCIONES
ESPANÕL
INSTRUCTIONS
ENGLISH
GEBRAUCHSANWEISUNG
DEUTSCH
A110701-1A
CONTENTS Page
BASIC PRODUCT INFORMATION . . . . . . . . . . . 8
PRECAUTIONS FOR USE . . . . . . . . . . . . . . . . 9
TIPS ON TAKING YOUR BLOOD PRESSURE ... 9
INSTALLING BATTERIES AND SETTING THE
CLOCK . . . . . . . . . . . . . . . . . . . . . . . . . . . . . . .10
CORRECT MEASURING POSTURE . . . . . . . . .11
Page
WRAPPING THE CUFF . . . . . . . . . . . . . . . . . .11
MEASUREMENT PROCEDURES . . . . . . . . . . .12
MEMORY FUNCTIONS . . . . . . . . . . . . . . . . . .12
DELETING STORED DATA . . . . . . . . . . . . . . . .13
CARE AND MAINTENANCE . . . . . . . . . . . . . .13
ERROR DISPLAYS AND TROUBLESHOOTING . .14
ÍNDICE página
INFORMACIÓN BÁSICA DEL PRODUCTO ....40
PRECAUCIONES DE USO . . . . . . . . . . . . . . . .41
CONSEJOS PARA MEDIR LA TENSIÓN
ARTERIAL . . . . . . . . . . . . . . . . . . . . . . . . . . .41
INSTALACIÓN DE PILAS Y AJUSTE DEL RELOJ
. . . . . . . . . . . . . . . . . . . . . . . . . . . . . . . . . . . . .42
POSTURA CORRECTA DE MEDICIÓN . .. ... .43
página
ENROLLADO DEL BRAZALETE . . . . . . . . . . . . 43
CÓMO EFECTUAR LA MEDICIÓN . . . . . . . . . .44
FUNCIONES DE MEMORIA . . . . . . . . . . . . . . .44
BORRADO DE LOS DATOS MEMORIZADOS .. .45
CUIDADOS Y MANTENIMIENTO . . . . . . . . . .45
INDICACIONES DE ERROR Y LOCALIZACIÓN
DE AVERÍAS . . . . . . . . . . . . . . . . . . . . . . . . .46
TABLE DES MATIÈRES Page
INFORMATIONS DE BASE SUR LE PRODUIT ...24
PRÉCAUTIONS D’EMPLOI . . . . . . . . . . . . . . .25
ASTUCES SUR LA MANIÈRE DE PRENDRE
VOTRE PRESSION SANGUINE . . . . . . . . . . . .25
INSTALLATION DES PILES ET REGLAGE DE
L'HORLOGE . . . . . . . . . . . . . . . . . . . . . . . . . . .26
POSTURE DE MESURE . . . . . . . . . . . . . . . . . .27
Seite
ANLEGEN DER MANSCHETTE . . . . . . . . . . . .19
MESSVERFAHREN ... . ... . ... ... .. ... . ..20
SPEICHERFUNKTIONEN . . . . . . . . . . . . . . . . .21
LÖSCHEN DER GESPEICHERTEN DATEN ....21
PFLEGE UND WARTUNG . . . . . . . . . . . . . . . . .22
FEHLERANZEIGEN UND STÖRUNGSSUCHE . . .22
INHALT Seite
ALLGEMEINE PRODUKTINFORMATION .....16
VORSICHTSMASSNAHMEN BEI DER
ANWENDUNG . . . . . . . . . . . . . . . . . . . . . . . . .17
TIPPS ZUR BLUTDRUCKMESSUNG . . . . . . . .17
EINSETZEN VON BATTERIEN UND EINSTELLEN
DER UHR . . . . . . . . . . . . . . . . . . . . . . . . . . . . .18
RICHTIGE KÖRPERHALTUNG . . . . . . . . . . . . .19
Digital Blood Pressure Monitor DS-1873

PARTS NAMES AND PRODUCT COMPONENTS
DISPLAY (SYS:systolic/DIA:diastolic/PUL:pulse) ON/OFF BUTTON MEMORY BUTTON M1 MEMORY BUTTON M2
AIR CONNECTOR ACADAPTER JACK CUFF HOLDER CUFF CUFF RING
AIR HOSE TUBE PLUG 4 XAA BATTERY INSTRUCTION MANUAL
BEZEICHNUNG DER TEILE UND PRODUKTBESTANDTEILE
ANZEIGE (SYS:systolische/DIA:diastolische/PUL:Puls) EIN/AUS-TASTE SPEICHER-TASTE M1 SPEICHER-TASTE M2
LUFT-VERBINDUNGSSTÜCK NETZTEILBUCHSE MANSCHETTENHALTER MANSCHETTE MANSCHETTENRING
LUFTSCHLAUCH SCHLAUCHSTECKER 4 xAA SÄUREBATTERIEN GEBRAUCHSANWEISUNG
NOM DES PIÈCES ET COMPOSANTES DU PRODUIT
AFFICHAGE (SYS:systolique/DIA:diastolicue/PUL:pouls) TOUCHE ON/OFF TOUCHE MÉMOIRE M1 TOUCHE MÉMOIRE M2
CONNECTEUR D'AIR PRISE ADAPTATEUR CA PORTE BRASSARD BRASSARD ANNEAU DU BRASSARD
TUYAU POUR AIR RACCORD DUTUBE 4 xAA BATTERIES MANUEL D'INSTRUCTIONS
NOMI DELLE PARTI E COMPONENTI DEL PRODOTTO
VISUALIZZAZIONE (SYS:systolica/DIA:diastolica/PUL:pulsazioni) TASTO ON/OFF TASTO MEMORIA M1 TASTO MEMORIA M2
CONNETTOREARIA PRESA DELL'ADATTATORE CA SUPPORTO DELLA FASCIA BRACCIALE ANELLO BRACCIALE
TUBO DELL'ARIA SPINA TUBO 4 x BATTERIE TIPOAA MANUAL DI ISTRUZIONI
NOMBRE DE LAS PIEZAS Y COMPONENTES DEL PRODUCTO
INDICADOR (SYS:sistólica/DIA:diastólica/PUL:pulsaciones) BOTÓN ON/OFF BOTÓN MEMORIA M1 BOTÓN MEMORIA M2
CONECTOR DEAIRE JACK DELADAPTADOR DE CA PORTABANDA BRAZALETE
PERÍMETRO DEL BRAZALETE
MANGUERA DEAIRE CLAVIJA DELTUBO 4 PILASTAMAÕ AA MANUAL DE INSTRUCCIONES
13
3
4
2
5
6
8
9
7
10
12
11
1
1
5
10
6
11
7
12 13
8 9
2 3 4
1
5
10
6
11
7
12 13
8 9
2 3 4
1
5
10
6
11
7
12 13
8 9
2 3 4
1
5
10
6
11
7
12 13
8 9
2 3 4
1
5
10
6
11
7
12 13
8 9
2 3 4
- 2 -

-2
-1
34
5 6
8 9
7
10 12
11
YEAR
JAHR
ANNEE
ANNO
AÑO
MONTH
MONAT
MOIS
MESE
MES
1-1 1-2 2
DAY
TAG
JOUR
GIORNO
DIA
HOUR
STUNDE
HEURE
ORA
HORAS
fig.1 INSTALLING BATTERIES AND SETTING THE CLOCK
p.10
EINSETZEN VON BATTERIEN UND EINSTELLEN
DER UHR
p.18
INSTALLATION DES PILES ET REGLAGE DE L'HORLOGE
p.26
INSTALLAZIONE DELLE
BATTERIE E REGOLAZIONE DELL’OROLOGIO
p.34
INSTALACIÓN DE PILAS Y AJUSTE DEL RELOJ
p.26
- 3 -

2~3cm
1
2
13 14
MINUTE
MINUTEN
MINUTE
MINUTO
MINUTOS
fig.2 CORRECT MEASURING POSTURE
p.11
RICHTIGE KÖRPERHALTUNG
p.19
POSTURE DE MESURE
p.27
POSIZIONE DI MISURAZIONE CORRETTA
p.35
POSTURA CORRECTA DE MEDICIÓN
p.43
fig.3 WRAPPING THE CUFF
p.11
ANLEGEN DER MANSCHETTE
p.19
ENROULEMENT DU BRASSARD
p.27
AVVOLGIMENTO DEL BRACCIALE
p.35
ENROLLADO DEL BRAZALETE
p.43
- 4 -

dfhfgjtkdfghhg!
..............
sfhdfrejrgyk;
1 2
3
3
4
fig.4 MEASUREMENT PROCEDURES
p.12
MESSVERFAHREN
p.20
MÉTHODE DE MESURE
p.28
PROCEDURE DI MISURAZIONE
p.36
CÓMO EFECTUAR LA MEDICIÓN
p.44
SYS
mmHg
DIA
mmHg PUL
/min MEMORY BANK NUMBER
SPEICHERBANKNUMMER
NUMERO DE LA BANQUE DE MEMOIRE
NUMERO DEL BANCO DI MEMORIA
NUMERO DEL BANCO DE MEMORIA
5
11
- 5 -

1
2
3
30 30
4
AVERAGE number of total
stored data
DURCHSCHNITTSWERT Gesamtzahl der
gespeicherten Daten
VALEUR MOYENNE nombre des données
totales enregistrées
VALORE MEDIO numero totale dei
dati memorizzati
MEDIA DE LOS DATOS número de datos
memorizados total
fig.5 MEMORY FUNCTIONS
p.12
SPEICHERFUNKTIONEN
p.21
FONCTION MÉMOIRE
p.29
FUNZIONI DI MEMORIZZAZIONE
p.37
FUNCIONES DE MEMORIA
p.44
latest data
latest data
Letzter W
Letzter W
ert
ert
Derni
Derni
ères donn
es donn
ées
es
Valor
alor
e pi
e pi
ùv
v
ecchio
ecchio
medici
medici
ón m
n m
ás r
s r
eciente
eciente
latest data
Letzter Wert
Dernières données
Valore più vecchio
medición más reciente
MEMOR
MEMOR
Y D
Y D
ATA NUMBER
A NUMBER
ANZAHL DER GESPEICHER
ANZAHL DER GESPEICHER
TEN D
TEN D
ATEN
TEN
NO
NO
.DES DONN
DES DONN
ÉES DE LA M
ES DE LA M
ÉMOIRE
MOIRE
N°D
D
ATO IN MEMORIA
O IN MEMORIA
NÚMERO DE REGISTRO DE MEMORIA
MERO DE REGISTRO DE MEMORIA
MEMORY DATA NUMBER
ANZAHL DER GESPEICHERTEN DATEN
NO. DES DONNÉES DE LA MÉMOIRE
N°DATO IN MEMORIA
NÚMERO DE REGISTRO DE MEMORIA
SYS
mmHg
DIA
mmHg
PUL
/min
2nd latest data
Vorletzter Wert
Avant-dernières données
penultimo valore
2º medición más reciente
Oldest data
Ältester Wert
Données les plus anciennes
Ultimo valore
dato más antiguo
UHRZEIT
HEURE
ORA
HORA
DATUM
DATE
DATA
FECHA
- 6 -

1
2
1
2
fig.6 DELETING STORED DATA
p.13
LÖSCHEN DER GESPEICHERTEN DATEN
p.21
EFFACEMENT DE DONNEES ENREGISTREES
p.29
CANCELLAZIONE DEI DATI MEMORIZZATI
p.37
BORRADO DE LOS DATOS MEMORIZADOS
p.45
- 7 -

BASIC PRODUCT INFORMATION
This manual is intended to assist the user in the safe and efficient operation of the Model DS-1873 Digital Blood Pressure Monitor. The
product must be used in accordance with the procedures contained in this manual and must not be used for purposes other than those
described herein. It is important to read and understand the entire manual. In particular, please read carefully and become familiar with the
section entitled“TIPS ON TAKINGYOUR BLOOD PRESSURE”.
The user is cautioned that the system may fail to yield specified measurement accuracy if operated or stored in temperature or humidity
conditions outside the limits stated in the specifications section of this manual. Also, an inaccurate reading may result if this instrument is
used on a child's arm. Consult your physician if you wish to take a child's blood pressure.
Indications for Use
The DS-1873 system is intended for the non invasive measurement of systolic and diastolic blood pressure and determination of heart rate
in adult patients, i.e., age 15 and above.The product is recommended for use by patients with labile blood pressure or known hypertension
in a home care environment as an adjunct to medical management. The cuff will accommodate an upper arm circumference range of
approximately 22 to 32 centimeters. Pressure is measured over a range of 0 to 300 mmHg and heart rate over a range of 40 to 160
beats/minute.
Method of Measurement
This product employs the oscillometric method for measurement of blood pressure and heart rate. The cuff is connected to the main unit
and wrapped around the arm.As ON/OFF BUTTON is pressed, the system starts automatic pressurization.Circuits within the cuff sense the
small oscillations in pressure against the cuff produced by the expansion and contraction of the arteries in the arm in response to each
heart beat.The amplitude of each pressure waves is measured, converted to millimeters of mercury, and displayed on the LCD as a digital
value.A memory circuit stores the 30 most recent measurement results for comparison.
Model : DS-1873
Operating Principle : Oscillometric method
Indicator : 13 digits LCD display
Pressure indicating Range : 0 to 300 mmHg (cuff pressure)
Measuring Range : 50 to 250 mmHg (systolic)
40 to 180 mmHg (diastolic)
40 to 160 pulse/min.(pulse rate)
Accuracy : ±3 mmHg (cuff pressure)
±5% of reading (pulse rate)
Inflation : Automatic inflation
Deflation : Electric control valve
Exhaust : Automatic exhaust valve
Power Supply : 4 pcs.1.5 volt "AA" (R6P/LR6) type batteries or
AC adapter
Power Consumption : 4W (max.)
Memory : 30 measurement results x 2, computation of
the average of stored data
Operating environment : +10˚C to +40˚C, 85% Relative humidity or below
Storage environment : -5˚C to +50˚C, 85% Relative humidity or below
Cuff : Coverage arm circumference ; 22 to 32 cm
Main Unit : Weight ;Approx. 370 g (without batteries)
Size ;163 x 180 x 83 mm (W x D x H) when
CUFF HOLDER attached
Key to symbols : Type BF equipment
Important : Read operating instructions
Specifications are subject to change without notice due to improvements
in performance.
SPECIFICATIONS
This device complies with EMC (IEC60601-1-2:1993),EN1060-1 and EN1060-3.
- 8 -

20
40
60
80
100
120
140
160
180
200
12 13 14 15 16 17 18 19 20 21 22 23 24 1 2 3 4 5 6 7 8 9 10 11
Blood pressure (mmHg)
Systolic Diastolic
Time
180~
160~179
140~159
130~139
120~129
~120
80 11080
84 85
89 90
99 100
109
DIA
SYS
mmHg
Hypertension
(severe)
(moderate)
(mild)
~
~
~
~
~
~
High Normal
Normal
Optimal
Blood pressure changes shown below.
Upper arm blood pressure date.
PRECAUTIONS FOR USE
Do not use cuffs other than the original cuff included with this product.
Do not use this instrument without consultation with your doctor if you are
under dialysis therapy or on anticoagulants, antiplatelets or steroids. Use of this
instrument under such conditions could cause internal bleeding.
To avoid any possibility of accidental strangulation, keep this unit away from
children and do not drape AIR HOSE
around your neck.
For specific information on your blood pressure, contact your physician.
Never make any judgment on measurement results on your own.
Use of this device in areas near portable phones, microwave ovens or other
devices with strong electromagnetic field may cause malfunctions.
TIPS ON TAKING YOUR BLOOD PRESSURE
Blood pressure is a measurement of the force exerted by the heart in pumping the
blood through the arteries and the resistance by the veins in this flow.
Blood pressure changes easily as influenced by mental and physical
factors and is never constant.
In general, blood pressure is highest during the working hours and gradually decreases
during the afternoon and evening hours. It is low during sleep and slowly increases at
a relatively fast rate after arising from bed.
Causes for Changes in Blood Pressure
•Body movement • Conversation • MentalTension • Emotions
•Meals • DrinkingAlcohol • Smoking
•Recent Urination or Bowel Movement • Temperature
•Changes in the surroundings such as movement or noise, etc.
Blood pressure measured at home tends to be lower than when
measured in a hospital, clinic or doctor's office.
When blood pressure is measured in a hospital, it could be higher than when measured
at home. This is because you are tense at the hospital and relaxed at home. It is
important to know your stable normal blood pressure at home.
Let a qualified physician interpret your blood pressure readings.
Depending on your age, weight and general condition,blood pressure can be slightly
different.Consult with your doctor on determining what blood pressure is normal for you.
113
Refer to "PARTS NAMESAND PRODUCT COMPONENTS" on page 2 for circled numbers:
~
10
Blood pressure classification byWHO
(1999)
- 9 -

Turn the unit over and remove CUFF HOLDER
from the unit.
Open the battery cover.
Never forcefully remove CUFF HOLDER or the battery cover.
Install four “AA” type batteries into the
compartment as indicated. Make sure that the
polarities correspond to the (+) and (-) marks.
Close the battery compartment cover.
Year flashes on the display.
Clock can be set only after the batteries are reinstalled.Adjust the clock
so that measurement results are stored with correct date and time.
Use M1
to increase the flashing number
and M2
to decrease the number.
Press ON/OFF BUTTON
to confirm and move
to next step.
Day flashes.
Adjust day with M1 and M2 buttons.
Press ON/OFF BUTTON and month flashes.
Adjust month with M1 and M2 buttons.
CAUTION!
Do not use rechargeable batteries.
battery replacement indication
Replace all the batteries when the battery replacement
indication appears on the display or nothing is displayed
even if ON/OFF BUTTON
is depressed.
Use alkaline batteries to increase battery life.Use of regular Carbon-
Zinc batteries will necessitate more frequent replacement.
The
enclosed batteries are for monitoring, and their life may be shorter
than that of commercial batteries.
Since neither the device nor batteries are
household waste, follow your local recycling
rules and dispose of them at appropriate
collection sites.
Operation with an AC adapter
AC ADAPTER JACK
is located
on the right side of the unit.Do not
use any adapters other than
the one specified below.
Specifications of theAC adapter to be selected are:
Output voltage : 6 VDC ±5%
Input voltage range : Standard voltage ±15%
Maximum electric load : 600mA or higher
INSTALLING BATTERIES AND SETTING THE CLOCK
TIPS ON TAKING YOUR BLOOD PRESSURE
see fig.1
Rest for approximately five minutes and take your blood pressure while relaxed in a quiet environment.
Take blood pressure measurement with the correct posture and do not move nor speak during
measurement.
Avoid exercise, eating, drinking alcohol, smoking and other activities that affect your blood pressure
right before a measurement.
Take your blood pressure every day at the same time.
The ambient temperature sould be approximately 20˚C when you take your blood pressure.
7
3
4
2
page 3
1
2
3
4
5
6
7
8
9
2
6
6
- 10 -

Output plug polarity : Center Minus
Output plug shape : External diameter 5.5ø±0.1 mm
:Internal diameter 2.1ø±0.1 mm
:Length 9.5±0.3 mm
Remove the batteries when operating the
unit with AC adapter for extended period
of time.
When batteries are removed or AC adapter is
unplugged, the clock returns to the default
value. *Stored measurement results remain.
INSTALLING BATTERIES AND SETTING THE CLOCK
Sit at the table and let the table support your arm as you take the blood pressure measurement.
Make sure that the measurement location on the upper arm is at approximately the same height as the heart,
and that the forearm is extended naturally on the table and does not move.
You may lie on your back and take the measurement. Look at the ceiling, stay calm, and do not move your
neck or body during the measurement. Again, make sure that the measurement location on the arm is at
approximately the same height as the heart.
With the tube of the cuff positioned in the direction of the fingertips, place it on your
left arm.
Wrap the cuff around the arm with the edge of the cuff approximately 2~3 cm above
the elbow.
Press the surface of the cuff to make sure that it is attached securely.
When wrapping the cuff, wrap it loosely enough around the arm so that two fingers can be placed between
the cuff and the arm. If the cuff is wrapped more tightly or loosely than this, inaccurate blood pressure
readings may result.
If you are wearing a shirt that might restrict circulation in your upper arm or you roll your sleeve up over
the upper arm, the blood flow will be restricted, preventing accurate measurement.
113
Refer to "PARTS NAMESAND PRODUCT COMPONENTS" on page 2 for circled numbers:
~
WRAPPING THE CUFF
see fig.3
page 4
page 4
CORRECT MEASURING POSTURE
see fig.2
Press ON/OFF BUTTON and hour flashes.
The clock operates in 24-hour mode.
Adjust with M1 and M2 buttons.
Press ON/OFF BUTTON and minute flashes.
Adjust with M1 and M2 buttons.
Press ON/OFF BUTTON.
The clock is set and the unit is turned off.
The clock is displayed while the unit is turned off.
1
2
3
10
11
12
13
14
- 11 -

page 5
MEMORY FUNCTIONS
see fig.5
page 6
MEASUREMENT PROCEDURES
see fig.4
Take deep breaths and relax.
Do not move, chat or strain your arm or hand
during measurement.
Insert TUBE PLUG
into AIR CONNECTOR
.
Press ON/OFF BUTTON
.
Inflation mark "
" flashes and the monitor starts automatic inflation.
Inflation stops and pressure starts to descend.
The pulse is indicated by heart mark "
".
Maximum and minimum blood pressures
and pulse rate are displayed.
Deflation mark "
" appears and the unit automatically exhausts the
air from the cuff.
Press either MEMORY BUTTON M1
or
M2
.
The displayed memory bank number changes as the button is pressed.
The result is stored in the selected bank.
The result is stored in the bank which is selected when the unit is
turned off.
When a measurement resulted in an error, it will not be
stored.
Press ON/OFF BUTTON to turn off the power.
If you forget to turn off the unit, it will be automatically turned off
after 3 minutes.
Measured result is automatically stored in either M1 or M2. Make sure which memory bank number is displayed before turning off the unit.
Each of two memory banks can store up to 30 results and their average. When the number of measurements exceeds 30, the oldest data
will be deleted to record new data. You may decide which bank to store your measurement results to avoid data mixture with someone
else's, or may use two banks to save data measured in the morning and evening separately.
Recalling measured data
Press MEMORY BUTTON M1
or M2
to see stored data.
1
2
3
4
1
Stopping Measurement
Press ON/OFF BUTTON
and the
monitor will stop inflation, discharge
air rapidly, and then turn off.
Automatic Repressurization
If the pressure applied is judged insufficient in the early
phase of measurement or if movement of arm or hand
occurs during measurement, the unit will inflate again to
a level about 40 mmHg higher.Automatic Repressurization
is repeated until a measurement is made. However,
this
does not indicate a problem.
To manually control pressurization, hold down ON/OFF
BUTTON immediately after the start of inflation and release
it when the pressure reaches the level 50 mmHg higher
than the expected maximum systolic pressure. If the
pressure value has exceeded 180 mmHg, the inflation
will stop when the key is released. Pressure can be
increased to approximately 300 mmHg.
Do not excute repeated
measurements for congestion of
blood could result in false
measurement. Let your arm rest for
at least 5 minutes.
11
2
5
3
4
2
3 4
- 12 -

GASOLINE
PAINT
THINNER
The avarage of the stored result in the selected bank is displayed.
The latest result stored is displayed when there is only a single result and the clock display remains when there are no results stored.
The indication at the top of the display alternately changes from memory data number to date and to time.
The memory data is displayed for approximately 30 seconds. Approximately 30 seconds after MEMORY BUTTON is released, the
apparatus will turn off.
Press MEMORY BUTTON to move to next data.
The memory data number 1 is the latest among the stored data in the selected memory bank.
Every depression of the key switches among the memory data.
As MEMORY BUTTON is pressed,the memory data number increases;the bigger the number,the older the result.
Press ON/OFF BUTTON
and turn off the unit.
Deleting a single data
Show the data to be deleted following
the steps in MEMORY FUNCTIONS.
Press and hold down MEMORY BUTTON
M1
or M2
whichever the data is
stored.
The displayed data starts flashing.
Hold down the button until the display
disappears.
MEMORY FUNCTIONS
113
Refer to "PARTS NAMESAND PRODUCT COMPONENTS" on page 2 for circled numbers:
~
page 7
CARE AND MAINTENANCE
DELETING STORED DATA
see fig.6
1
2
Deleting all data in a bank
Press MEMORY BUTTON M1
or M2
and show the average of the bank to be
deleted.
Press and hold down selected MEMORY
BUTTON.
The displayed data starts flashing.
Hold down the button until the display
disappears.
1
2
3 3
2
3
4
3
2
3 4
4
Because the unit includes precision parts, care should be taken to avoid extreme temperature variations, humidity, shock,dust,and direct sunlight. Do not drop
or strike the unit.Make sure not to expose the unit to moisture. This unit is not water resistant.
Use only a soft, dry cloth to clean the unit. Do not use gasoline, paint thinner, or other strong solvents on the unit. Since the cuff may absorb perspiration and
other fluids, inspect it for stain and discoloration after each use.When cleaning the cuff, do not machine wash or scrub it.Use a synthetic detergent and gently
rub the surface. Make sure fluid never gets inAIR HOSE
.Air dry throughly.
When storing the unit,do not place heavy objects on it and do not coilAIR HOSE too tightly.When the unit has been stored at a temperature below the freezing
point, keep it for at least 1 hour in a warm place before using it. Remove the batteries if the instrument is to be stored for an extended period of time. Keep
10
- 13 -

Do not move during measurement.
Remain still and quiet during measurement.
Reinsert TUBE PLUG
and make sure that it is
securely inserted.
Turn off the power and make another
measurement while being quiet and still.
Press ON/OFF BUTTON
to turn off the power
once and press it again to start a
measurement.
Reinsert the batteries in the correct position.
Replace them with new ones.
Clean the battery terminals with a dry cloth.
The cuff was inflated to the maximum pressure
because of movement of body etc.
Measurement could not be made because of
moving or talking during measurement.
TUBE PLUG
is not correctly inserted.
Movement or talking was detected during
measurement.
ON/OFF BUTTON
was accidentally pressed
during battery replacement.
Have the batteries polarities been positioned
incorrectly?
Have the batteries run down?
Are the battery terminals clean?
OVER-PRESSURIZATION
MEASUREMENT ERROR
INFLATION ERROR
DEFLATION ERROR
IMPROPER OPERATION
No display when ON/OFF BUTTON
is pressed.
ERROR DISPLAYS AND TROUBLESHOOTING
CARE AND MAINTENANCE
the batteries out of reach of children.
We suggest that you have your blood pressure monitor checked every 2 years. This operation may only be performed by the manufacturer or by firms
authorized by the manufacturer.
Do not inflate the cuff when it is not wrapped around your arm.
Do not disassemble or modify the unit.
CAUSE / CHECK POINTERROR SYMOL / SYMPTOM REMEDY
2
2 2
11 11
- 14 -

113
Refer to "PARTS NAMESAND PRODUCT COMPONENTS" on page 2 for circled numbers:
~
ERROR DISPLAYS AND TROUBLESHOOTING
Nothing is displayed when there is no
measured data stored.
Check the memory bank number.
Replace them with new ones.
Use alkaline batteries to increase battery life.
Replace all four batteries with new ones.
Measure with the correct posture.
See TIPS ON TAKING YOUR BLOOD PRESSURE.
Remain still during the measurement.
Measure again after resting for more than 5
minutes.
This does not indicate a problem. The instrument
automatically turns off 3 minutes after a
measurement or 30 seconds after memory display.
See MEASUREMENT PROCEDURES.
Remain still and continue the measurement.
Is there any measured result stored in the
memory?
Are you pressing the right MEMORY BUTTON?
Have the batteries run down?
Are you using alkaline batteries?
Have the batteries run down?
Are you measuring with correct posture?
Blood pressure readings constantly vary with
time of measurement and nervous condition.
Did you move during the measurement?
Did you make measurement right after exercise?
Have you left the instrument untouched after
the measurement?
Repressurization starts in order to make
accurate measuring.
Did you move your body during the
measurement?
Display does not change when
MEMORY BUTTON (
or
)is
pressed.
Cannot make great number of
measurements.
Cannot complete the measurement.
Blood pressure is different each
time. The reading is extremely low
(or high).
Pulse rate is too low (or too high).
The power is automatically turned
off.
Pressurization stops once and starts
again.
CAUSE / CHECK POINTERROR SYMOL / SYMPTOM REMEDY
3 4
If you cannot get correct measurement with the methods above, do not tamper with the internal mechanism.Contact your dealer. If the unit malfunctions,please
return it to the dealer or an authorized service representatives for service according to the warranty. Service data are provided to qualified dealers by the manufacturer.
- 15 -

ALLGEMEINE PRODUKTINFORMATION
Dieses Handbuch soll den Anwender bei der sicheren und wirkungsvollen Handhabung des Digitalen Blutdruckmonitors Modell DS-1873
unterstützen. Das Produkt ist in Übereinstimmung mit den in diesem Handbuch enthaltenen Verfahren zu verwenden und darf nicht für
irgendwelche, in diesem Handbuch nicht beschriebenen Zwecke verwendet werden. Lesen Sie bitte vor allem das Kapitel "TIPPS ZUR
BLUTDRUCKMESSUNG" aufmerksam durch und machen Sie sich damit vertraut.
Der Anwender wird darauf hingewiesen, dass das System unter Umständen keine Messgenauigkeit erzielt, falls es bei Temperaturen oder
Luftfeuchtigkeit betrieben oder gelagert wird, die außerhalb des in den Spezifikationen dieses Handbuchs beschriebenen Bereichs liegen.
Bitte auch beachten, daßsich bei Messungen an Kinderarmen eventuell keine korrekten Meßergebnisse erzielen lassen. Konsultieren Sie
Ihren Arzt, wenn Sie den Blutdruck eines Kindes messen wollen.
Gebrauchsanweisungen
Das DS-1873-System ist geeignet zur nicht-invasiven Messung des systolischen und diastolischen Blutdrucks sowie zur Bestimmung der
Pulsfrequenz bei erwachsenen Patienten, d.h. bei Patienten ab einem Alter von 15 Jahren. Das Produkt ist zur Anwendung in häuslicher
Umgebung durch Patienten mit labilem Blutdruck oder bekannter Hypertonie empfohlen, und zwar als Ergänzung zur ärztlichen
Behandlung. Die Manschette ist für einen Oberarmumfang im Bereich von ca. 22 bis 32 cm geeignet. Der Druck wird über einen Bereich
von 0 bis 300 mmHg gemessen, die Pulsfrequenz über einen Bereich von 40 bis 160 Schlägen pro Minute.
Messmethoden
Dieses Produkt wendet die oszillometrische Methode zur Messung von Blutdruck und Pulsfrequenz an. Die Manschette wird mit dem
Hauptgerät verbunden und um den Arm gewickelt. Mit dem Drücken des EIN/AUS-TASTE wird die Unter-Druck-Setzung automatisch
gestartet. Stromkreise in der Manschette spüren die geringfügigen Schwingungen des Blutdrucks,die entstehen, wenn sich die Arterien im
Arm als Reaktion auf jeden Herzschlag ausdehnen und zusammenziehen. Die Amplitude jeder Druckwelle wird gemessen, in Millimeter auf
der Quecksilbersäule umgewandelt und auf der Flüssigkristall-Anzeige (LCD) als digitaler Wert angezeigt. Ein Speicher speichert die 30
letzten Messwerte zum Vergleich.
Stromverbrauch : 4W (max.)
Speicher : 30 Messwerte x 2, Computerberechnung des
Durchschnitts der gespeicherten Daten
Betriebumgebung : +10˚C bis +40˚C
,
85 % oder weniger
Lagerbedingungen : -5˚C bis +50˚C, 85 % oder weniger
Manschette : Abdeckung und Umfang
: 22 bis 32 cm
Hauptgerät : Gewicht : Approx. 370 g (ohne Batterien)
Größe : 163(W) x 180(D) x 83(H) mm (auf
dem MANSCHETTENSTAND liegend)
Schlüssel zu den Symbolen: Ausstattung Typ BF
Wichtiger Hinweis : Betriebsanweisungen lesen.
Spezifikationen können sich ohne vorherigen Hinweis aufgrund von
Leistungs-und Qualitätsverbesserungen ändern.
Spezifikationen
Dieses Gerät entspricht den EMC-Bestimmungen (IEC60601-1-2:1998), EN1060-1 und EN1060-3.
Modell : DS-1873
Betriebsprinzip : Oszillometrische Methode
Anzeiger : 13 stelllige Flüssigkristallanzeige
Messbereich Druck : 0 bis 300 mmHg (Manschettendruck)
Messbereich : 50 bis 250 mmHg (systolisch)
40 bis 180 mmHg (diastolisch)
40 bis 160 Puls/Min. (Pulsfrequenz)
Genaugikeit : Manschettendruck : 3 mmHg
Pulsfrequenz : 5% der Anzeige
Aufpumpen : Automatisches Aufpumpen
Abpumpen : Elektrisches Steuerungsventil
Auslass : Automatisches Auslassventil
Betriebsstromversorgung : 4 Batterien des Typs R6P/LR6 (1,5 V) oder
ein Netzteil
- 16 -

Im Folgenden dargestellte Veränderungen des Blutdrucks.
Blutdruckwert bei Messung am Oberarm
20
40
60
80
100
120
140
160
180
200
12 13 14 15 16 17 18 19 20 21 22 23 24 1 2 3 4 5 6 7 8 9 10 11
Blutdruck (mmHg)
systolisch diastolisch
Uhrzeit
180~
160~179
140~159
130~139
120~129
~120
80
11080
84
85
89
90
99
100
109
DIA
SYS
mmHg
Hypertonie
(schwer)
(mittelschwer)
(leicht)
~
~
~
~
~
~
hoch normal
normal
optimal
VORSICHTSMASSNAHMEN BEI DER ANWENDUNG
Keine anderen Maschetten als die
beiliegende Originalmanschette
verwenden.
Verwenden Sie dieses Gerät nicht
ohne vorher Ihren Arzt zu konsultieren,
wenn Sie an einer Dialyse-Therapie
teilnehmen oder gerinnungshemmende,
anti-blutplättchbildende oder Steroid-
Medikamente einnehmen. Der Einsatz
des Geräts unter diesen Bedingungen
kann innere Blutungen hervorrufen.
Das Gerät außer Reichweite von Kindern
aufbewahren und den LUFTSCHLAUCH
nicht um den Hals führen, um der
Unfallgefahr einer möglichen
Strangulierung vorzubeugen.
Wenn Sie spezielle Informationen
über Ihren Blutdruck wünschen, fragen
Sie Ihren Arzt. Ziehen Sie niemals
irgendwelche eigenen Schlüsse aufgrund
Ihrer Messergebnisse.
Die Anwendung dieses Gerätes in
der Nähe von tragbaren Telefonen,
Mikrowellengeräten oder sonstiger
Geräte mit starken elektromagnetischen
Feldern kann zu Fehlfunktionen führen.
TIPPS ZUR BLUTDRUCKMESSUNG
Bei der Blutdruckmessung wird die Kraft, mit der das Herz das Blut durch die Arterien
pumpt und der dem Blutfluß entgegenwirkende Widerstand der Venen gemessen.
Der Blutdruck wechselt aufgrund mentaler und körperlicher
Faktoren ständig und ist nie konstant.
Im allgemeinen ist der Blutdruck tagsüber während der normalen Arbeitszeit am höchsten
und fällt im Verlauf des Nachmittags und Abends. Im Schlaf ist der Blutdruck niedrig
und steigt nach dem Erheben vom Bett relativ schnell an.
Gründe für Veränderungen des Blutdrucks
•Körperbewegung •Unterhaltung •Mentale Spannung •Gefühle
•Mahlzeiten •Alkoholgenuss •Rauchen •Kürzliche Urination oder Stuhlgang
•Temperatur •Änderungen in der Umgebung wie Bewegungen oder Geräusche usw.
Der zu Hause gemessene Blutdruck ist tendenziell niedriger als der
im Krankenhaus oder in der Arztpraxis gemessene Blutdruck.
Ein im Krankenhaus gemessener Blutdruck ist möglicherweise höher als bei einer zuhause
ausgeführten Messung.Das liegt daran, dass Sie im Krankenhaus angespannt, zu Hause
aber entspannt sind. Es ist wichtig,dass Sie Ihren stabilen normalen Blutdruck zu
Hause kennen.
Lassen Sie Ihre Blutdruckwerte von einem Arzt auswerten.
Der Blutdruck kann sich in Abhängigkeit von Ihrem Alter,Gewicht und Allgemeinzustand
geringfügig unterscheiden. Ziehen Sie niemals irgendwelche eigenen Schlüsse aufgrund
Ihrer Messergebnisse.
10
Siehe hierzu die Abbildungen und die eingekreisten Zahlen
bis
auf dem Faltbild nach der Titelseite.
1 13
Blutdruckeinstufung nach WHO (1999)
- 17 -

Das Gerät umdrehen und den MANSCHETTENSTAND
vom Gerät entfernen.
Öffnen Sie Batteriefachdeckel.
Den MANSCHETTENSTAND oder den Batteriefachdeckel niemals
mit Gewalt entfernen.
Das Batteriefach öffnen und vier Batterien des Typs R6P
(1,5 V) einlegen. Hierbei auf die korrekte Ausrichtung
der Plus- (+) und Minuspole (-) entsprechend den
Markierungen im Batteriefach achten.
Schließen Sie den Batteriefachdeckel.
Die Jahresanzeige blinkt im Display.
Die Uhr kann erst nach dem Einsetzen der Batterien eingestellt werden.
Stellen Sie die Uhr ein, so dass Messergebnisse mit richtigen Datums-
und Zeitangaben gespeichert werden.
Verwenden Sie M1
,um die blinkende Zahl
höher und M2
um sie niedriger einzustellen.
Drücken Sie die Taste ON/OFF
zur Bestätigung,
und gehen Sie zum nächsten Schritt weiter.
Die Tagesanzeige blinkt.
Stellen Sie den Tag mit den Tasten M1 und M2 ein.
Drücken Sie die Taste ON/OFF,und die
Monatsanzeige blinkt.
ACHTUNG! Verwenden Sie keine
wieder aufladbaren Batterien.
Symbol: Batteriewechsel
Ersetzen Sie alle Batterien, wenn
die Batterie-Ersetzen-Anzeige im Display
erscheint oder keine Anzeige erscheint, auch
wenn die Taste ON/OFF
gedrückt wird.
Verwenden Sie Säurebatterien, um die Haltbarkeit der Batterien
zu erhöhen. Die Verwendung handelsüblicher Carbon-Zink-
Batterien macht einen häufigeren Batterienwechsel notwendig.
Die beigefügten Batterien sind für Aufzeichnungszwecke
gedacht, und Ihre Haltbarkeit ist unter Umständen kürzer als
die handelsüblicher Batterien.
Da es sich weder beim Gerät noch bei den
Batterien um Hausmüll handelt, beachten
Sie bitte die in Ihrem Land/Ihrer Gemeinde
geltenden Vorschriften und entsorgen Sie
die Teile an den dafür vorgesehenen
Sammelstellen.
Netzteilbetrieb
Die NETZTEILBUCHSE
befindet sich an der rechten
Seite des Geräts.
Verwenden Sie keine anderen als das für
dieses Gerät empfohlene Netzteil.
Der zu verwendende Netzadapter sollte die folgenden
technischen Daten aufweisen:
EINSETZEN VON BATTERIEN UND EINSTELLEN DER UHR
TIPPS ZUR BLUTDRUCKMESSUNG
siehe Fig.1
Vorher etwa fünf Minuten ruhen und dann in ruhiger
und entspannter Umgebung den Blutdruck messen.
Den Blutdruck bei korrekter Körperhaltung messen
und während der Messung nicht sprechen und nicht
bewegen.
Vermeiden Sie vor der Messung des Blutdrucks
körperliche Anstrengung, Essen, Alkoholkonsum,
Rauchen und sonstige Aktivitäten, die den
Blutdruckwert beeinflussen.
Messen Sie täglich zur gleichen Uhrzeit!
Die Außentemperatur sollte während der
Blutdruckmessung etwa 20 C betragen.
7
3
4
2
seite 3
1
2
3
4
5
6
7
8
2
6
6
- 18 -

Ausgangsspannung : 6 VDC 5%
Eingangsspannungsbereich : Netzspannung 15%
Maximale elektrische Belastung : 600mA oder mehr
Polarität des Ausgangssteckers :Mittlerer Minuspol
Form des Ausgangssteckers
Außendurchmesser : 5.5ø0.1 mm
Innendurchmesser : 2.1ø0.1 mm
Länge : 9.50.3 mm
Bei Netzteilbetrieb über längere Zeit
vorher die Batterien aus dem Gerät
heraus nehmen.
Wenn die Batterien entfernt werden oder
das Netzteil abgezogen wird, schaltet
die Uhrzeit auf den Vorgabewert zurück.
*Gespeicherte Messergebnisse
verbleiben.
EINSETZEN VON BATTERIEN UND EINSTELLEN DER UHR
Setzen Sie sich an einen Tisch und legen Sie Ihren Arm während der Blutdruckmessung auf dem Tisch auf.
Vergewissern Sie sich, dass sich die Stelle der Messung am Oberarm in etwa auf der gleichen Höhe wie das Herz
befindet und dass der Unterarm in ausgestreckter Haltung bequem auf dem Tisch aufliegt und sich nicht bewegt.
Unter Umständen werden Sie bei der Messung auf dem Rücken liegen. Schauen Sie zur Decke,bleiben Sie ruhig,
und bewegen Sie Ihren Hals oder Körper während der Messung nicht. Vergewissern Sie sich wiederum, dass sich
die Stelle der Messung am Oberarm in etwa auf Herzhöhe befindet.
Legen Sie die Manschette so auf einen flachen Untergrund, dass das Befestigungsband
nach unten zeigt.
Legen Sie die Manschette so um den Arm, dass sich der Rand der Manschette ca.
2~3 cm über dem Ellbogen befindet.
Drücken Sie auf die Oberfläche der Manschette um sicherzustellen, dass diese fest
angelegt ist.
ANLEGEN DER MANSCHETTE siehe fig.3
seite 4
seite 4
RICHTIGE KÖRPERHALTUNG siehe fig.2
Stellen Sie den Monat mit den Tasten M1 und M2 ein.
Drücken Sie die Taste ON/OFF,und die
Stundenanzeige blinkt.
Die Uhr arbeitet im 24-Stunden-Modus.
Stellen Sie mit den Tasten M1 und M2 ein.
Drücken Sie die Taste ON/OFF,und die Minutenanzeige
blinkt.
Stellen Sie mit den Tasten M1 und M2 ein.
Drücken Sie die Taste ON/OFF.
Die Uhrzeit ist eingestellt, und das Gerät ist
ausgeschaltet.
Die Uhrzeit wird bei ausgeschaltetem Gerät angezeigt.
1
2
3
9
10
11
12
13
14
Siehe hierzu die Abbildungen und die eingekreisten Zahlen
bis
auf dem Faltbild nach der Titelseite.
1 13
- 19 -

Atmen Sie tief und entspannen Sie sich.
Vermeiden Sie Bewegung, Gespräche oder Druck auf
Arm oder Handgelenk während des Messvorgangs.
Stecken Sie den SCHLAUCHSTECKER
in das
LUFT-VERBINDUNGSSTÜCK
.
Drücken Sie den EIN/AUS-TASTE
.
Die Aufblasmarkierung "
" blinkt, und der Monitor startet den automatischen
Aufblasvorgang.
Der Aufblasvorgang stoppt, und der Druck beginnt abzusinken.
Der Puls wird durch das Herzzeichen "
" angezeigt.
Der minimale und maximale Blutdruck und der
Puls werden angezeigt.
Die Deflationsmarkierung "
" erscheint, und das Gerät lässt automatisch die
Luft aus der Manschette ab.
Drücken Sie eine der MEMORY-Tasten M1
oder
M2
.
Die angezeigte Speicherbanknummer wechselt beim Tastendruck um.
Das Ergebnis wird in der gewählten Bank
gespeichert.
Das Ergebnis wird in der Bank gespeichert, die beim Ausschalten des Geräts
gewählt ist. Bei fehlerhafter Messung wird das Ergebnis nicht gespeichert.
Drücken Sie die EIN/AUS-TASTE zum Ausschalten.
Wenn Sie vergessen, das Gerät nach der Messung auszuschalten, schaltet das
Gerät automatisch nach 3 Minuten aus.
ANLEGEN DER MANSCHETTE
seite 5
MESSVERFAHREN siehe fig.4
1
2
3
4
Messung abbrechen
Drücken Sie den EIN/AUS-
TASTE
,und das Gerät
beendet das Aufblasen, lässt
schnell Luft ab und schaltet
sich anschließend ab.
Automatische erneute Unter-Druck-
Setzung
Wenn der ausgeübte Druck in der frühen Phase
der Messung als unzureichend empfunden wird
oder wenn es während der Messung zu einer
Bewegung von Hand oder Handgelenk kommt,
bläst sich das Gerät erneut bis zu einem etwa
30 mmHg höheren Wert auf.Die automatische
erneute Unter-Druck-Setzung wird wiederholt,
bis eine Messung erfolgt. Dieser Vorgang ist
aber unproblematisch.
Um für jede Messung eine erneute Unter-Druck-
Setzung durchzuführen, halten Sie den EIN/AUS-
TASTE unmittelbar nach Beginn des Aufblasens
herunter gedrückt und lassen Sie ihn los,wenn
der Druck einen Wert erreicht, der 50 mmHg
über dem erwarteten Höchstdruck liegt. Wenn
der Druckwert den Vorgabewert überschritten
hat, hört der Aufblasvorgang auf,wenn die Taste
losgelassen wird. Der Druck kann auf ca. 300
mmHg erhöht werden.
11
2
5
3
4
2
Wenn Sie die Manschette um den Arm legen, wickeln Sie sie so locker um den Arm herum, dass zwei Finger
zwischen Manschette und Arm passen. Wenn die Manschette fester oder loser gewickelt ist, könnte dies
zu fehlerhaften Anzeigen des Blutdrucks führen.
Ein enges Hemd oder ein hochgekrempelter Ärmel kann den Blutkreislauf im Oberarm hemmen und durch
den behinderten Blutfluß zu ungenauen Meßergebnissen führen.
- 20 -
Table of contents
Languages:
Other Nissei Blood Pressure Monitor manuals
Nissei
Nissei ds-1902 User manual

Nissei
Nissei DSK-1031 User manual
Nissei
Nissei DS-10 User manual
Nissei
Nissei WSK-1011 User manual

Nissei
Nissei DS-137 User manual

Nissei
Nissei WSK-1011 User manual
Nissei
Nissei DSK-1011 User manual
Nissei
Nissei DS-S10 User manual
Nissei
Nissei DSK-1011J User manual
Nissei
Nissei DS-B10 User manual
Nissei
Nissei DS-10a User manual

Nissei
Nissei DSK-1031 User manual

Nissei
Nissei DSK-1031 User manual

Nissei
Nissei DSK-1011 User manual

Nissei
Nissei DS-10 User manual

Nissei
Nissei WSK-1011 User manual
Nissei
Nissei DS-500 User manual
Nissei
Nissei DS-1011 User manual

Nissei
Nissei WS-820 User manual

Nissei
Nissei WS-820 User manual


