Nissei DS-10 User manual

http://www.nissei-kk.co.jp/english/
http://www.nissei-kk.co.jp/english/
¨É¾Ï˾ž×Æо*1 *1¥¾×ÆоÌÐÐÀØÎÂÆÌ¿ÃÈÐÆÏÂƾÊÃÐØÎÍÌÀÃÕÃÌÐÊÊËÝʾž×ÆоÌÐÍÎÌËÆÈÀ¾ËÃ
˾ÐÃÕËÌÏÐ
Stopień ochrony IP
: IP20. Ochrona przed ciałami
stałymi o średnicy większej niż
12,5 mm, brak ochrony przed
przedostawaniem się do
wewnątrz cieczy.
DS-10/DS-10a
GB
INSTRUCTION MANUAL FOR DIGITAL BLOOD PRESSURE MONITOR DS-10/DS-10a
PARTS NAME AND PRODUCT COMPONENTS
DISPLAYS
INSTALLING BATTERY
CONNECTING THE CUFF
WRAPPING THE CUFF
CORRECT MEASURING POSTURE
MAKING A MEASUREMENT
A127683-1_2

http://www.nissei-kk.co.jp/english/
http://www.nissei-kk.co.jp/english/
Nivel protecţie IP : IP20. Protecţie de corpuri dure,
cu diametrul mai mare de
12,5mm, nu este rezistent la
apă.
Stupeň krytí (IP) : IP 20. Odolnost proti tvrdým
předmětům s průměrem nad
12,5 mm. Není chráněn před
proniknutím tekutin.
PART NAMES AND PRODUCT COMPONENTS (fig.1)
MAIN UNIT DISPLAY START/STOP BUTTON AC ADAPTOR JACK
AIR CONNECTOR BATTERY COMPARTMENT
CUFF METAL RING AIR HOSE AIR PLUG
POUCH
AA (LR6) BATTERIES
INSTRUCTIONS
DISPLAYS (fig.2)
PULSE RATE MARK MEMORY BANK SYMBOL
BATTERY REPLACEMENT INDICATION BODY MOTION SYMBOL
IRREGULAR PULSE RHYTHM SYMBOL INFLATION SYMBOL
DEFLATION SYMBOL SYSTOLIC
DIASTOLIC PULSE RATE
GENERAL INFORMATION
This manual is intended to assist you in the safe and efficient operation of BLOOD PRESSURE MONITOR
DS-A10. The product must be used in accordance with the procedures contained in this manual and must
not be used for purposes other than those described herein. It is important to read and understand the
entire manual. In particular, please read carefully and become familiar with the section entitled “TIPS ON
TAKING YOUR BLOOD PRESSURE”.
INDICATIONS FOR USE
This product is intended for noninvasive measurement of systolic and diastolic blood pressure,
determination of pulse rate and calculation of pulse pressure in adults in a home healthcare
environment. The product is not designed for neonatal use. Please consult with your doctor or physician
to use this product to take blood pressure of child or person in pregnancy or under pre-eclamptic
condition.
METHOD OF MEASUREMENT
This product employs the oscillometric method for measurement of blood pressure and pulse rate. The
cuff is connected to the main unit and wrapped around the arm. Circuits within the cuff sense the small
oscillations in pressure against the cuff produced by the expansion and contraction of the arteries in the
arm in response to each heart beat. The amplitude of each pressure waves is measured, converted to
millimeters of mercury, and displayed on the LCD as a digital value.
PRODUCT SPECIFICATIONS
This device complies with EN1060-1:1995+A2:2009 Non-invasive sphygmomanometers
Part 1: General requirements, EN1060-3:1997+A2:2009 Non-invasive sphygmomanometers
Part 3: Supplementary requirements for electro-mechanical blood pressure measuring system and EMC
(IEC60601-1-2:2007).
*Accuracy is guaranteed with the measured values that are within the measuring range.
Specifications are subject to change without notice due to improvements in performance.
PRECAUTIONS AND CONTRAINDICATIONS
s $ONOT USETHIS PRODUCTWITHOUT CONSULTATIONWITH YOURDOCTOR IF YOUARE UNDERDIALYSIS THERAPYOR ON
anticoagulants, antiplatelets or steroids. Use of this instrument under such conditions could cause
internal bleeding.
s For specific information on your blood pressure, contact your physician. Never make any judgment on
your own regarding measurement results.
s $O NOTUSE THIS PRODUCT ALONG WITHIMPLANTABLE AND WEARABLE MEDICAL ELECTRICALEQUIPMENT SUCH AS
pacemaker, defibrillator, or electrocardiographic monitor. This product is not also intended to be used
with HF surgical equipment.
s $O NOT USE THIS PRODUCT IN AN EXPLOSIVE ENVIRONMENT SUCH AS NEAR FLAMMABLE ANESTHETICS OR INSIDE
oxygen chamber.
s 4HESYSTEMMAY FAILTO YIELDSPECIFIEDMEASUREMENT ACCURACYIFOPERATED ORSTOREDIN TEMPERATUREOR
humidity conditions outside the limits stated in the specifications section of this manual.
s Do not use cuffs or accessories other than those specified by the manufacturer. Otherwise, correct
measurement readings cannot be obtained.
s 5SE OF THIS PRODUCT IN AREAS NEAR MOBILE PHONES MICROWAVE OVENS OR OTHER DEVICES WITH STRONG
electromagnetic field may cause malfunctions. Maintain a minimum distance of 3 m from such devices
when using this unit.
s $O NOT APPLY THE CUFF OVER WOUNDED ARM ARM UNDER AN INTRAVASCULAR ACCESS OR THERAPY OR AN
arterio-venous shunt, or arm on the side of a mastectomy. Otherwise injury may be resulted.
s -AKESURETHAT INFLATIONOFTHE CUFFISNOT CAUSINGPROLONGEDIMPAIRMENT OFBLOODCIRCULATION !LSOBE
cautious about temporary loss of the functions of any other medical equipment if any monitoring
equipment is used on the same limb with the blood pressure measuring cuff.
s 4OAVOIDHARMFULINJURYDUETOINTERFEREDBLOODFLOWFROMCUFFINFLATION
- Make sure that AIR HOSE is not kinking before measurement. Otherwise, cuff inflation may not be
conducted properly and prolonged, and
- Do not make measurements repeatedly.
s To avoid any possibility of accidental strangulation, keep this product away from children and do not drape
AIR HOSE around your neck.
s The unit contains small parts which could be swallowed by children. It should therefore be kept out of the
reach of children at all times.
s "ECAUSETHEPRODUCT INCLUDESPRECISIONPARTSAVOID EXTREMETEMPERATUREVARIATIONS HUMIDITYSHOCK
dust, and direct sunlight. Do not drop or strike the product. Make sure not to expose it to moisture. This
product is not water resistant.
s $ONOTPRESSTHEDISPLAYANDOPERATIONKEYSORPLACETHEUNITWITHDISPLAYFACEDOWN
s $ONOTTAKEOUTBATTERIESORUNPLUG THE!#ADAPTORWHENTHEUNITISTURNED ON-AKESURETOSWITCHOFF
the unit before removing batteries or AC adaptor.
s $ONOTTOUCHTHEOUTPUTPLUGOF!#ADAPTORDURINGMEASUREMENT
s $ONOTDISASSEMBLEORMODIFYTHEPRODUCT
s $ONOTINFLATETHECUFFWHENITISNOTWRAPPEDAROUNDYOURARM
TIPS ON TAKING YOUR BLOOD PRESSURE
Blood pressure is the force exerted by the heart in pumping the blood through the arteries and the
resistance by the veins in this flow.
Blood pressure varies all the time, influenced by mental and physical factors, and is never
constant.
In general, blood pressure is highest during the working hours and gradually decreases during the
afternoon and evening hours. It is low during sleep and increases at a relatively fast rate after arising
from bed.
Causes for Changes in Blood Pressure
s"ODYMOVEMENT s#ONVERSATION s-ENTAL4ENSION s.ERVOUSNESS
s%MOTIONS s%ATING s$RINKING!LCOHOL s3MOKING
s2ECENT5RINATIONOR"OWEL-OVEMENT s2OOMTEMPERATURE
s#HANGESINTHESURROUNDINGSSUCHASMOVEMENTORNOISEETC
Blood pressure measured at home tends to be lower than when measured in a hospital, clinic or doctor's
office.
This is because you are tense at the hospital and relaxed at home. It is important to know your stable
normal blood pressure at home.
Let a qualified physician interpret your blood pressure readings.
Depending on your age, weight and general condition, blood pressure can be slightly different. Consult
with your doctor on determining what blood pressure is normal for you.
Before taking blood pressure, rest for approximately five minutes and take your blood
pressure while relaxed in a quiet environment.
Measure blood pressure using the correct posture and do not move or speak during
measurement.
Avoid exercise, eating, drinking alcohol, smoking and other activities that affect your blood
pressure right before a measurement.
Take your blood pressure at the same time every day.
The ambient temperature should be approximately 20˚C when you take your blood pressure.
Reading may vary slightly, depending on posture, whether sitting or lying.
INSTALLING BATTERIES (fig.3)
1.OPENING THE BATTERY COMPARTMENT
Remove the cover of the battery compartment on the underside of the unit.
2.INSERTING BATTERIES
Install four “AA” type batteries into the compartment, observing proper polarity (marking in battery
compartment).
3.CLOSING THE BATTERY COMPARTMENT
Close the battery compartment by clipping the battery cover back into the unit.
4.OPERATION WITH AC ADAPTOR
Connect the designated AC adaptor to the AC ADAPTOR JACK located at the right side of the unit.
It is suggested to take out the batteries when using the adapter.
CONNECTING THE CUFF (fig.4)
Connect the AIR PLUG to the AIR CONNECTOR at the left side of the unit.
Accurate measurement is not possible if the AIR PLUG is unplugged or loose. Make sure that the AIR PLUG
is inserted firmly.
WRAPPING THE CUFF (fig.5)
1.Place the cuff on your left arm with the air hose positioned toward your hand.
2.Wrap the cuff around your arm with the edge of the cuff approximately 2~3 cm above the elbow.
AIR HOSE should be on the palm side of the arm.
3.Press the surface of the cuff to make sure that the hook & loop fastens securely.
When wrapping the cuff, wrap it loosely enough around the arm so that two fingers can be
placed between the cuff and the arm. If the cuff is wrapped more tightly or loosely than this,
inaccurate blood pressure readings may result.
If you are wearing a shirt that might restrict circulation in your upper arm or you roll your
sleeve up over the upper arm, the blood flow will be restricted, preventing accurate
measurement.
CORRECT MEASURING POSTURE (fig.6)
Sit at the table and let the table support your arm as you take the blood pressure measurement.
Make sure that the measurement location on the upper arm is at approximately the same height
as the heart, and that the forearm is extended naturally on the table and does not move.
You may lie on your back and take the measurement. Look at the ceiling, stay calm, and do not move your
neck or body during the measurement. Again, make sure that the measurement location on the arm is at
approximately the same height as the heart.
Measured data may vary slightly depending on the posture during measurement. If the cuff is
lower (higher) than the heart, the measured reading tends to become larger (smaller).
8
910
5 6
7
14
2
2
3
3
4
5
gh
e
abc
d
1
Model : DS-A10
Operating Principle
: Oscillometric method
Indicator : 9 digits liquid crystal display
Pressure Indicating Range
: 3 to 300 mmHg (cuff pressure)
Measuring Range :
50 to 250 mmHg (systolic), 40 to 180 mmHg
(diastolic), 40 to 180 bpm (pulse rate)
Accuracy* : ±3 mmHg (cuff pressure), ±5% of
reading (pulse rate)
Inflation : Automatic inflation
Exhaust : Automatic exhaust valve
Power Supply : Four 1.5 volt LR6 (AA alkaline) batteries
or AC adaptor ADP-W5 series
Power Consumption : 4W (max.)
Electric Rating : DC6V/4W, with four LR6 batteries
Adaptor; AC100-240V, 50/60Hz, 0.12A,
Unit; DC6V, 500mA, with designated AC
adaptor
Atmospheric pressure range
: 700hPa to 1060hPa
Operating Condition : +10˚C to +40˚C, 15% to 85% RH
(noncondensing)
Transportation/Storage Condition
: -20˚C to +60˚C, 10% to 85% RH
(noncondensing)
Cuff : Coverage arm circumference; 22 to 32
cm, applied part; BF
Main Unit : Weight; Approx. 250 g (without batteries)
Size; 116.5 x 122.2 x 69.9 mm (W x D x H)
Protection against electric shock
: Internally powered equipment/Class II
equipment, Type BF applied part
Mode of operation
: Continuous operation
Classification : Internally powered equipment/Class II
Protection class IP
: IP 20: Protected against solid foreign
particles with a diameter of more than
12.5 mm, no protection against water.
Key to symbols
: Type BF applied part
: Class II equipment
: Refer to instruction manual/booklet.
: The used electrical and electronic
products are not household waste.
Follow your national/local recycling
rules to dispose of them properly. In the
EU countries, please refer to waste
management symbol(s) marked on the
package or the instrument.
MAKING A MEASUREMENT (fig.7)
Press START/ STOP BUTTON.
1.After the full display appears and disappears, deflation
mark flashes and the calibration is adjusted to the
ambient air pressure.
2.If measurement has been done after installing batteries,
the previous reading is displayed while deflation mark
flashes.
3.Automatic inflation starts and inflation mark flashes.
4.Inflation mark disappears and measurement begins.
5.Heart mark flashes as pulse is detected.
The unit automatically exhausts the air from the cuff as the measurement is complete.
6.Blood pressures and pulse rate are displayed.
The reading is automatically saved in the bank.
Press START/STOP BUTTON to turn off the power.
If you forget to turn off the unit, it will be automatically turned off after 3 minutes.
Do not execute repeated measurements for congestion of blood could result in false
measurement. Let your arm rest for at least 5 minutes.
CARE AND MAINTENANCE
Keep the product clean. Inspect its cleanliness after use. To clean, use only a soft dry cloth. Do not use
gasoline, paint thinner, or other strong solvents. Since the cuff may absorb perspiration and other fluids,
inspect it for stain and discoloration after each use.
When cleaning the cuff, use a synthetic detergent and gently rub the surface. Air dry thoroughly. Make
sure fluid never gets in AIR HOSE. Do not machine wash or scrub it.
When storing the product, do not place heavy objects on it. Do not fold or bend the cuff forcibly. To
disconnect the cuff from the main unit, do not pull AIR HOSE but hold AIR PLUG and unplug it. Do not coil
AIR HOSE too tightly. When the product has been stored
at a temperature below the freezing point, keep it for at least 1 hour in a warm place before using. Remove
the batteries if the product is to be stored for an extended period of time. Keep the batteries out of reach
of children.
We suggest that you have your blood pressure monitor checked every 2 years. This operation may only be
performed by the manufacturer or by firms authorized by the manufacturer.
TROUBLESHOOTING
Blood pressure is extremely high or low.
Measurement is not taken with correct posture or the cuff is wrapped incorrectly.
Reconfirm the measurement procedures.
The reading was effected from moving or talking. Remain still and quiet during measurement.
Measurement was taken right after exercise or other activities influencing the reading. Measure again
after resting for more than 5 minutes. See TIPS ON TAKING YOUR BLOOD PRESSURE.
Measured values vary all the time.
Mental and physical condition or measurement condition is influencing blood pressure. Make
measurement under the same condition.
Measured value is different from that taken at a hospital.
Mental condition such as nervousness at a hospital or relaxed feeling at home is influencing blood
pressure. Take records of blood pressure taken at home and consult with your doctor.
Blood pressure is changing 24 hours a day in relation with mental and physical conditions. Eating,
drinking, smoking, exercising or bathing will alter blood pressure. Blood pressure will be also
influenced by mental condition such as feeling tensed or relieved and health condition It is important
to know the tendency of blood pressure by making measurement regularly. Make your own rules
including conditions and time to make measurement and take blood pressure everyday.
[Err 300] is displayed.
Over pressure: blood pressure could not be taken due to moving or speaking although the cuff was
inflated to the maximum pressure. Do not move or speak during measurement.
[Err -1] is displayed.
Blood pressure could not be taken due to moving or speaking. Do not move or speak during
measurement.
[Err -2] is displayed.
The cuff is not securely connected to the unit. Secure the air connector.
The cuff is not wrapped appropriately. Reconfirm how to put the cuff on your arm.
[ ] is displayed.
Batteries are weak. Replace all batteries with new ones.
Nothing is displayed.
Batteries are depleted. Replace all batteries with new ones.
Batteries are inserted incorrectly. Reinsert the batteries correctly.
Battery terminals are not clean. Clean the terminals with dry cloth.
AC adaptor is not connected. Connect AC adaptor.
Touching the keys with tip of finger or nail is touching the key. Touch the key with the plane of your
finger.
[0 0] is displayed.
“START/STOP” KEY was being touched when batteries are being installed or when AC adaptor is being
plugged in. Turn off the unit once with “START/STOP” KEY.
Cuff end is loosened.
Putthe cuff with its hook and loop fastener side down. Put the cuff end through the metal ring. Fold back
the cuff at the metal ring.
If you cannot get correct measurement with the methods above, contact your dealer. Do not disassemble
or tamper with the internal mechanism.
WARRANTY
This equipment is guaranteed for the period of 2 years after the date of purchase against manufacturing
defects when returned along with the proof of date of purchase to the dealer from whom the purchase was
made. During this period, the unit will be repaired or replaced free of charge if the failure is attributable to
faulty design or manufacture. This warranty does not cover damage or malfunctions caused by improper
handling or use contrary to the instructions in this manual. Please contact your dealer for additional
warranty provisions which may remain effective after the manufacturer's warranty period has expired.
Manufacturer: NIHON SEIMITSU SOKKI CO., LTD.
2508-13 Nakago Shibukawa Gunma 377-0293 Japan
EC-Representative: Nissei Healthcare (UK) Ltd.
Henfield, BN5 9SJ UK
web site http://www.nissei-kk.co.jp/english/
To stop measurement
Press START/STOP BUTTON and
inflation stops, air is exhausted, and
unit turns off.
regular pulse rhythm
An example of irregular pulse rhythm
compared to regular pulse rhythm
BODY MOTION SYMBOL
Blood pressure value taken while moving cannot be said to be the correct value because body
movement can affect blood pressure.
This product analyzes pulse wave and displays [ ] when body motion is detected.
[ ] indicates the results might be affected by body movement.
IRREGULAR PULSE RHYTHM INDICATION
Pulse rhythm can be disturbed from talking,
moving or arrhythmias.
This product displays [ ], indicating irregular
pulse rhythm.
Although continuous appearance of the indication
under quiet measurements may suggest
arrhythmias, do not make any judgment on your
own before consulting with your doctor.
f
GB
Other manuals for DS-10
1
This manual suits for next models
1
Other Nissei Blood Pressure Monitor manuals
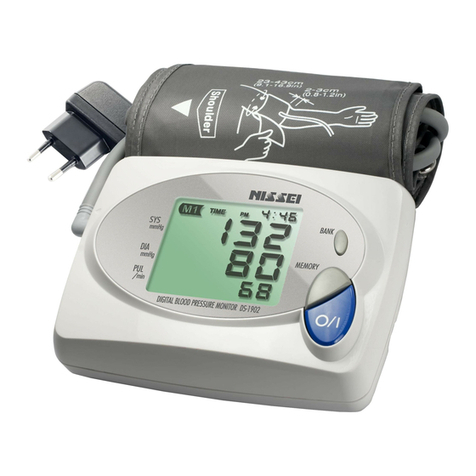
Nissei
Nissei ds-1902 User manual

Nissei
Nissei DS-137 User manual
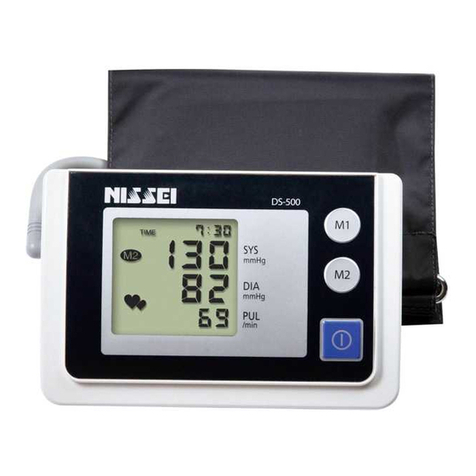
Nissei
Nissei DS-500 User manual

Nissei
Nissei WS-820 User manual
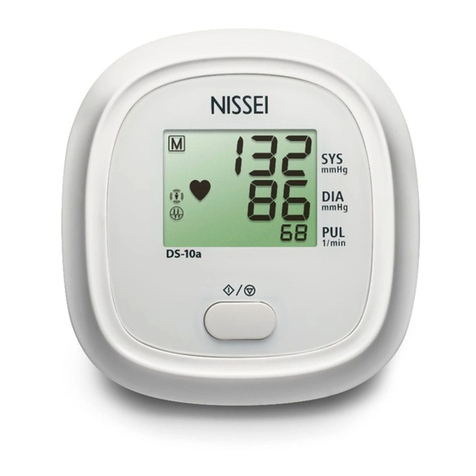
Nissei
Nissei DS-10a User manual

Nissei
Nissei WS-1300 User manual
Nissei
Nissei WSK-1011 User manual

Nissei
Nissei WS-1011 User manual

Nissei
Nissei WSK-1011 User manual

Nissei
Nissei DSK-1031 User manual
Nissei
Nissei DS-B10 User manual

Nissei
Nissei WS-820 User manual
Nissei
Nissei DS-1011 User manual
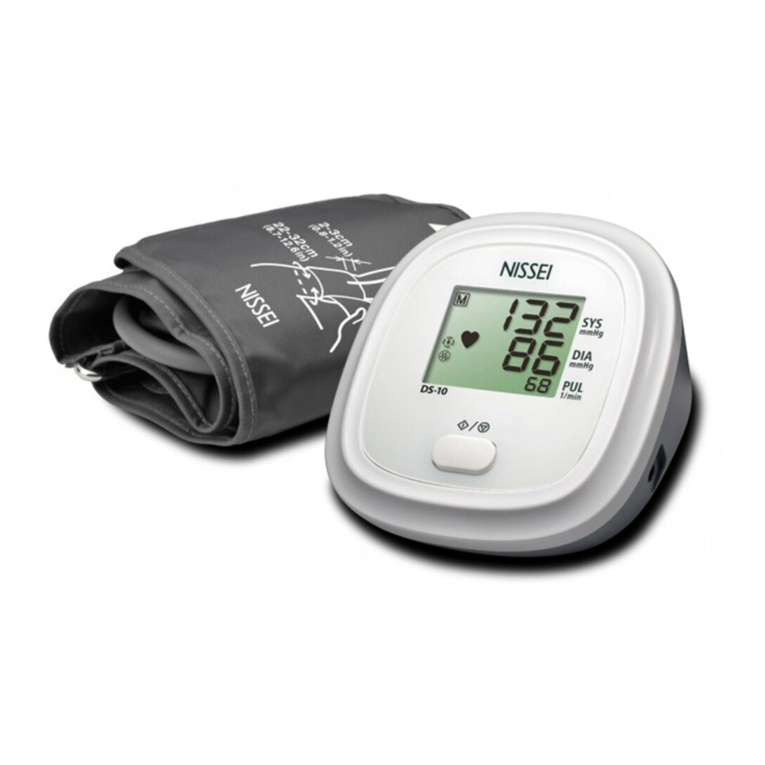
Nissei
Nissei DS-10 User manual

Nissei
Nissei DS-400 User manual
Nissei
Nissei DSK-1011J User manual
Nissei
Nissei DSK-1011 User manual
Nissei
Nissei DS-1873 User manual

Nissei
Nissei DSK-1011 User manual

Nissei
Nissei DSK-1031 User manual

