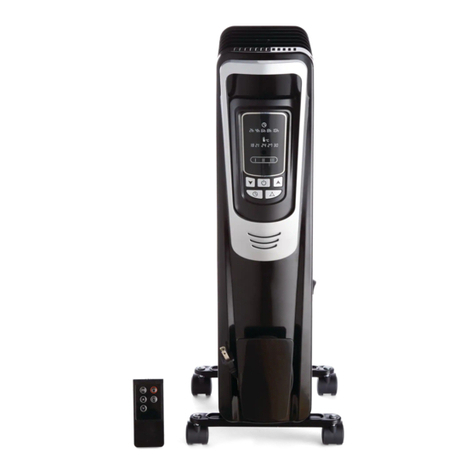
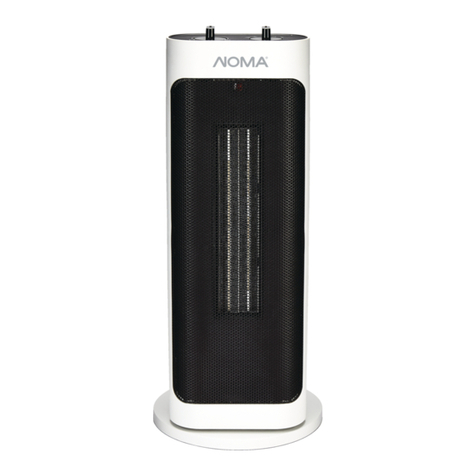
NOMA 043-7364-0 User manual

OSCILLATING DIGITAL CERAMIC
TOWER HEATER WITH REMOTE CONTROL
Instruction Manual
model no. 043-7364-0 (24" Tower Heater)/043-7365-8 (30" Tower Heater)
Toll free: 1-866-827-4985
IMPORTANT: Please read this manual carefully
before running this air purifier and save it for reference.

Table of ContentsSpecifications
2
model no. 043-7364-0 (24" Tower Heater)/043-7365-8 (30" Tower Heater) | contact us: 1.866.827.4985
Specifications
Safety
Key Parts Diagram
Assembly
Operation
Protection System
Maintenance & Storage
Troubleshooting
Warranty
2
3
5
6
7
9
10
10
11
Model
Voltage
Frequency
Watt
Coverage Area
Net Weight
Dimension (L x W x H)
043-7364-0 (24" Tower Heater)/043-7365-8 (30" Tower Heater)
120 V AC
60 Hz
900 Watts (Low), 1500 Watts (High)
100 to 250 sq. ft. (9 to 23 m2)
24"–6 lb (2.7 kg) / 30"–7 lb (3.2 kg)
24"–5 7/8 x 5 7/8 x 24 1/2” (15 x 15 x 62.5 cm)
30"–5 7/8 x 5 7/8 x 30 3/4” (15 x 15 x 78 cm)

Safety
3
PLEASE READ ALL INSTRUCTIONS BEFORE USING THIS HEATER. WHEN USING
ELECTRICAL APPLIANCES, BASIC PRECAUTIONS SHOULD ALWAYS BE FOLLOWED
TO REDUCE RISK OF FIRE, ELECTRICAL SHOCK AND INJURY TO PERSONS OR
PROPERTY, INCLUDING THE FOLLOWING
When switching on the appliance for the first time, allow it to run at full power for
about two hours to get rid of the unpleasant smell. Make sure that the room in
which the appliance is located is well ventilated during this operation. It is normal for
the appliance to emit small crackling sounds when you turn it on for the first time.
1. Read all instructions before using this heater.
2. This heater is hot when in use. To avoid burns, do not let bare skin touch hot
surfaces. Use handle when moving the unit. Keep combustible materials, such as
furniture, pillows, bedding, papers, clothes and curtains at least 3 feet
(0.9 meters) from the front and top of the heater and keep them away from the
sides and rear. Keep the rear grille away from walls or drapes so as not to block
the air intake.
3. Extreme caution and supervision is necessary when any heater is used near
children or by persons with reduced physical, sensory or mental capabilities and
whenever the heater is left operating and unattended.
4. Always unplug heater when not in use.
5. Do not operate any heater with a damaged cord or plug or after the heater
malfunctions, has been dropped or damaged in any manner. Discard heater, or
return the heater to an authorized service facility for examination, electrical or
mechanical adjustment or repair.
6. Do not use outdoors.
7. This heater is not intended for use in bathrooms, laundry areas and similar indoor
locations. Never locate heater where it may fall into a bathtub or other water
container.
8. Do not place power cord under carpeting. Do not cover power cord with throw
rugs, runners or the like. Do not route power cord under furniture or appliances.
Arrange power cord away from trac area and where it will not be tripped over.
9. To disconnect the heater, turn controls to OFF, then remove the plug from the
outlet.
10. Connect to properly polarized outlets only.
11. Do not insert or allow foreign objects to enter any ventilation or exhaust opening
as this may cause electric shock, fire or damage to the heater.

Safety
4
model no. 043-7364-0 (24" Tower Heater)/043-7365-8 (30" Tower Heater) | contact us: 1.866.827.4985
SAVE THESE INSTRUCTIONS
PLEASE READ ALL INSTRUCTIONS BEFORE USING THIS HEATER. WHEN USING
ELECTRICAL APPLIANCES, BASIC PRECAUTIONS SHOULD ALWAYS BE FOLLOWED
TO REDUCE RISK OF FIRE, ELECTRICAL SHOCK AND INJURY TO PERSONS OR
PROPERTY, INCLUDING THE FOLLOWING
When switching on the appliance for the first time, allow it to run at full power for
about two hours to get rid of the unpleasant smell. Make sure that the room in
which the appliance is located is well ventilated during this operation. It is normal for
the appliance to emit small crackling sounds when you turn it on for the first time.
1. Read all instructions before using this heater.
2. This heater is hot when in use. To avoid burns, do not let bare skin touch hot
surfaces. Use handle when moving the unit. Keep combustible materials, such as
furniture, pillows, bedding, papers, clothes and curtains at least 3 feet
(0.9 meters) from the front and top of the heater and keep them away from the
sides and rear. Keep the rear grille away from walls or drapes so as not to block
the air intake.
3. Extreme caution and supervision is necessary when any heater is used near
children or by persons with reduced physical, sensory or mental capabilities and
whenever the heater is left operating and unattended.
4. Always unplug heater when not in use.
5. Do not operate any heater with a damaged cord or plug or after the heater
malfunctions, has been dropped or damaged in any manner. Discard heater, or
return the heater to an authorized service facility for examination, electrical or
mechanical adjustment or repair.
6. Do not use outdoors.
7. This heater is not intended for use in bathrooms, laundry areas and similar indoor
locations. Never locate heater where it may fall into a bathtub or other water
container.
8. Do not place power cord under carpeting. Do not cover power cord with throw
rugs, runners or the like. Do not route power cord under furniture or appliances.
Arrange power cord away from trac area and where it will not be tripped over.
9. To disconnect the heater, turn controls to OFF, then remove the plug from the
outlet.
10. Connect to properly polarized outlets only.
11. Do not insert or allow foreign objects to enter any ventilation or exhaust opening
as this may cause electric shock, fire or damage to the heater.
DANGER: High temperatures may be generated under certain abnormal
conditions. Do not partially or fully cover or obstruct the front of this heater.
CAUTION: This appliance has a polargzed plus (one blade is wider than the
other). To reduce the risk of electric shock, this plug is intended to fit in a
polarized outlet only one way. If the plug does not fit fully in the outlet,
reverse the plug. If it sill does not fit, contact a qualified electrician. Do not
attempt to defeat this safety feature.
12. To prevent possible fire, do not block air intakes or exhaust in any manner. Do not
use on soft surfaces, like a bed, where openings may become blocked.
13. A heater has hot or arcing or sparking parts inside. Do not use it in areas where
gasoline, paint or flammable liquids are used or stored.
14. Use this heater only as described in this manual. Any other use not recommended by
the manufacturer may cause fire, electric shock, injury to persons or other damage to
property.
15. To prevent overload and blown fuses, be sure that no other appliance is plugged into
the same outlet (receptacle) or into another outlet (receptacle) wired into the same
circuit.
16. It is normal for the heater’s plug and cord to feel warm to the touch. A plug or cord
which becomes hot to the touch or becomes distorted in shape may be a result of a
worn electrical outlet. Worn outlets or receptacles should be replaced prior to further
use of the heater. Plugging heater into a worn outlet/receptacle may result in
overheating of the power cord or fire.
17. Ensure the heater is on a stable, secure surface to eliminate the potential of it tipping
over.
18. Always plug heaters directly into a wall outlet/receptacle. Never use with an extension
cord or relocatable power tap (outlet/power strip).
19. Be sure that the plug is fully inserted into an appropriate receptacle. Please
remember that receptacles also deteriorate due to aging and continuous use: check
periodically for signs of overheating or deformations evidenced on the plug. Do not
use the receptacle and CALL your electrician.
20. Check that neither the appliance nor the power cord has been damaged in any way
during transportation.
21. Make sure that no pieces of polystyrene or other packaging material have been left
between elements of the appliance. It may be necessary to clean the appliance with a
vacuum cleaner.
!
Key Parts Diagram
5
1.
2.
3.
4.
5.
6.
Control Panel
LED Display
Safety Grille
Base
Remote Control
Power Light
1
2
3
5
6
4

Assembly
6
model no. 043-7364-0 (24" Tower Heater)/043-7365-8 (30" Tower Heater) | contact us: 1.866.827.4985
1. Unscrew three (3) locking screws from
the bottom of the heater body (Figure 1)
and save them.
3. Press two halves of the base, as in
Figure 3, to interlock them together.
(Figure 3)
2. Align two screw bosses and
boss holes on back of two
halves of base according to
Figure 2.
5. Secure the base to the heater body
with the locking screws from Figure 1.
Tighten the locking screws firmly with
a screw driver. (Figure 5)
4. Align power cord to the slot on
the top side of the base.
(Figure 4)
Figure 1
Figure 2
Figure 4
Figure 3
Figure 5
Screw Bosses
Boss Holes

Operation
7
High Temperature Setting Button
Low Temperature Setting Button
Timer Button
Power Button
H/L Heat Button
Oscillation Button
Symbols
1. Turning unit ON/OFF
a. Press the POWER ( ) button once to turn on heater at the HI output setting and the
LED screen will display HI.
b. Press the button again: The heater will be turned o, the fan stop operating in 30 sec.
2. Selecting heating power
Press HI/LOW ( ) button to select LOW or HI heating power. LED screen will display
HI or Lo.
3. Oscillation
a. Press Oscillation ( ) button once. The heater will begin oscillating to provide
heat dispersion.
b. Press again to turn the oscillation o.
4. AUTO-OFF TIMER
When the heater is in use, you can set the timer to turn the unit o at a pre-set time.
Press TIMER ( ) button, the LED screen will display the default timer setting value
“0h” or the last time setting value. To set the timer, keep pressing button to set the
timer between 0 to 8 hours in 1 hour interval.
To cancel TIME OFF setting:
1. Select time 0H
2. Turn the heater o and then turn on again.
5. Temperature setting (Thermostat mode)
When the heater is working, you can press ( or ) buttons to select thermostat
mode. Auto indicator will illuminate. The LED screen will display and flash the default
temperature 75°F (24°C) or the last time setting value for 5 seconds.
1. If you press ( or ) buttons again within 5 seconds, you can change the current
set temperature. Keep pressing ( or ) buttons, and the temperature will be
changed in 1°F (1°C) between 41°–90°F (5°–32°C) (holding the or buttons
down will change the temperature quickly). The temperature will be set and stop
flashing after 5 seconds and the screen will display the current temperature once
you stop pressing the buttons.
2. While holding down both and buttons at the same time, for about two
seconds, led display can be switched from Fahrenheit temperature to Celsius
temperature.
Celsius mode:
1. If room temperature is ≤ -1°C than set temperature, output power is HI at all times.
2. If room temperature is ≥ +1°C than set temperature, the heater will stop heating
and the fan will stop operating in 30 seconds.
Fahrenheit mode:
1. If room temperature is ≤ -2°F than set temperature, output power is HI at all times.
2. If room temperature is ≥ +2°F than set temperature, the heater will stop heating
and the fan will stop operating in 30 seconds.
Control Panel Remote
LED Screen

Operation
8
model no. 043-7364-0 (24" Tower Heater)/043-7365-8 (30" Tower Heater) | contact us: 1.866.827.4985
1. Turning unit ON/OFF
a. Press the POWER ( ) button once to turn on heater at the HI output setting and the
LED screen will display HI.
b. Press the button again: The heater will be turned o, the fan stop operating in 30 sec.
2. Selecting heating power
Press HI/LOW ( ) button to select LOW or HI heating power. LED screen will display
HI or Lo.
3. Oscillation
a. Press Oscillation ( ) button once. The heater will begin oscillating to provide
heat dispersion.
b. Press again to turn the oscillation o.
4. AUTO-OFF TIMER
When the heater is in use, you can set the timer to turn the unit o at a pre-set time.
Press TIMER ( ) button, the LED screen will display the default timer setting value
“0h” or the last time setting value. To set the timer, keep pressing button to set the
timer between 0 to 8 hours in 1 hour interval.
To cancel TIME OFF setting:
1. Select time 0H
2. Turn the heater o and then turn on again.
5. Temperature setting (Thermostat mode)
When the heater is working, you can press ( or ) buttons to select thermostat
mode. Auto indicator will illuminate. The LED screen will display and flash the default
temperature 75°F (24°C) or the last time setting value for 5 seconds.
1. If you press ( or ) buttons again within 5 seconds, you can change the current
set temperature. Keep pressing ( or ) buttons, and the temperature will be
changed in 1°F (1°C) between 41°–90°F (5°–32°C) (holding the or buttons
down will change the temperature quickly). The temperature will be set and stop
flashing after 5 seconds and the screen will display the current temperature once
you stop pressing the buttons.
2. While holding down both and buttons at the same time, for about two
seconds, led display can be switched from Fahrenheit temperature to Celsius
temperature.
Celsius mode:
1. If room temperature is ≤ -1°C than set temperature, output power is HI at all times.
2. If room temperature is ≥ +1°C than set temperature, the heater will stop heating
and the fan will stop operating in 30 seconds.
Fahrenheit mode:
1. If room temperature is ≤ -2°F than set temperature, output power is HI at all times.
2. If room temperature is ≥ +2°F than set temperature, the heater will stop heating
and the fan will stop operating in 30 seconds.

OperationProtection System
9
Remote Control
1. The remote control uses two (2) "AAA" batteries (not included)
for operation.
2. All the functions performed using the Remote Control work
identically to the Manual Controls.
Note: Change the batteries with new and of the same type if the
remote control does not work. Remove batteries if the remote
control will not be used for long periods. Leaving batteries in when
not being used for long periods may damage the remote control.
Note: Do not mix old and new batteries. Do not mix alkaline,
standard (carbon-zinc), or rechargeable (nickel-cadmium) batteries.
Battery Disposal - Please dispose of used batteries per municipal or
provincial law.
Tip-over Switch
This heater is designed to automatically shut o when tipped forward or backward. When
returned to normal upright position, the heater can be operated again. This is a safety
feature to avoid possibility of fire should the unit be accidentally tipped over.
Thermal Protection System
This heater includes an Overheat Protection System that shuts the unit o when a
potential overheat temperature is reached. If this occurs, the heater can only resume its
normal operation after resetting it. To reset the heater:
1. Unplug the heater and wait 10 minutes for the unit to cool down.
2. After 10 minutes, plug the heater in again and operate normally.
1. Turning unit ON/OFF
a. Press the POWER ( ) button once to turn on heater at the HI output setting and the
LED screen will display HI.
b. Press the button again: The heater will be turned o, the fan stop operating in 30 sec.
2. Selecting heating power
Press HI/LOW ( ) button to select LOW or HI heating power. LED screen will display
HI or Lo.
3. Oscillation
a. Press Oscillation ( ) button once. The heater will begin oscillating to provide
heat dispersion.
b. Press again to turn the oscillation o.
4. AUTO-OFF TIMER
When the heater is in use, you can set the timer to turn the unit o at a pre-set time.
Press TIMER ( ) button, the LED screen will display the default timer setting value
“0h” or the last time setting value. To set the timer, keep pressing button to set the
timer between 0 to 8 hours in 1 hour interval.
To cancel TIME OFF setting:
1. Select time 0H
2. Turn the heater o and then turn on again.
5. Temperature setting (Thermostat mode)
When the heater is working, you can press ( or ) buttons to select thermostat
mode. Auto indicator will illuminate. The LED screen will display and flash the default
temperature 75°F (24°C) or the last time setting value for 5 seconds.
1. If you press ( or ) buttons again within 5 seconds, you can change the current
set temperature. Keep pressing ( or ) buttons, and the temperature will be
changed in 1°F (1°C) between 41°–90°F (5°–32°C) (holding the or buttons
down will change the temperature quickly). The temperature will be set and stop
flashing after 5 seconds and the screen will display the current temperature once
you stop pressing the buttons.
2. While holding down both and buttons at the same time, for about two
seconds, led display can be switched from Fahrenheit temperature to Celsius
temperature.
Celsius mode:
1. If room temperature is ≤ -1°C than set temperature, output power is HI at all times.
2. If room temperature is ≥ +1°C than set temperature, the heater will stop heating
and the fan will stop operating in 30 seconds.
Fahrenheit mode:
1. If room temperature is ≤ -2°F than set temperature, output power is HI at all times.
2. If room temperature is ≥ +2°F than set temperature, the heater will stop heating
and the fan will stop operating in 30 seconds.
6. Over-temperature protection
When the temperature sensor detects that the current room temperature is more than
50°C (122°F), the unit will turn o. The power indicator will flash and a buzzer will
sound.
Note: There may be a trace of smoke or odour when unit is first turned on. Do not be
alarmed. This indicates some oil may have dropped on the heating coil during the
manufacturing process. It will quickly evaporate and should not re-occur.

Maintenance & StorageTroubleshooting
CAUTION: DO NOT ALLOW WATER TO RUN INTO THE INTERIOR OF THE
HEATER AS THIS COULD CREATE A FIRE OR ELECTRIC SHOCK HAZARD.
WARNING: ANY OTHER SERVICING SHOULD BE PERFORMED BY AN
AUTHORIZED SERVICE REPRESENTATIVE.
!
10
model no. 043-7364-0 (24" Tower Heater)/043-7365-8 (30" Tower Heater) | contact us: 1.866.827.4985
Maintenance
1. Before any cleaning, make sure that:
a. The heater is turned OFF.
b. Disconnect power supply by removing plug from power outlet.
2. Cleaning:
a. Interior dust can often be removed by using a vacuum cleaner with a crevice tool
attachment.
b. Do not use cleaning liquids or other chemicals to clean or spray on the unit.
c. To clean enclosure, use a clean, soft and lightly damp cloth to gently wipe o the
dirt from the surface of the unit. Be sure not to wet the Heating Element and the
switches. Allow the unit to dry completely before using it.
Storage
1. Perform the cleaning procedures described above.
2. Wipe all parts to dry.
3. Pack the heater and the power cord in a plastic bag and store it in a cool, dry place.
Please check the following list before having it repaired.
Problem Solution
Your heater fails to operate • Make sure the electrical outlet or circuit breaker
is working.
• Check for obstructions. If you find an
obstruction, turn the heater OFF, and UNPLUG
THE UNIT. Carefully remove the obstruction and
follow the reset instructions.

Warranty
11
This Noma®product carries a one (1) year repair warranty against defects in
workmanship and materials. At its discretion, Noma Canada agrees to have any
defective part(s) repaired or replaced free of charge within the stated warranty
period, when returned with proof of purchase. This product is not guaranteed
against wear or breakage due to misuse and/or abuse.

Made in China
Imported by Noma Canada, Toronto, Canada M4S 2B8

RADIATEUR VERTICAL CÉRAMIQUE
OSCILLANT AVEC TÉLÉCOMMANDE
Guide d’utilisation
Nº de modèle : 043-7364-0 (radiateur vertical de 24po)
043-7365-8 (radiateur vertical de 30po)
Numéro sans frais : 1 866 827-4985
IMPORTANT: Veuillez lire attentivement ce guide
d’utilisation avant de faire fonctionner ce radiateur
et le conserver à titre de référence.

Table des matièresFiche technique
2
Nº de modèle: 043-7364-0 (radiateur vertical de 24po)/043-7365-8 (radiateur vertical de 30po)
Communiquez avec nous au 1866827-4985
Fiche technique
Sécurité
Schéma des pièces clés
Assemblage
Utilisation
Système de protection
Entretien et entreposage
Dépannage
Garantie
2
3
5
6
7
9
10
10
11
Nº de modèle
Alimentation
Fréquence
Puissance
Zone de couverture
Poids net
Dimension (long. x larg. x H.)
043-7364-0 (radiateur vertical de 24po)
043-7365-8 (radiateur vertical de 30po)
120 V AC
60 Hz
900 W (basse), 1 500 W (haute)
100 à 250 pi2(9 à 23 m2)
6 lb (2,7 kg) (24po)/7 lb (3,2 kg) (30po)
5 7/8 x 5 7/8 x 24 1/2po (15 x 15 x 62,5 cm)
5 7/8 x 5 7/8 x 30 3/4po (15 x 15 x 78 cm)

Sécurité
3
VEUILLEZ LIRE TOUTES LES CONSIGNES AVANT D’UTILISER CE RADIATEUR. LORS
DE L’UTILISATION D’APPAREILS ÉLECTRIQUES, DES PRÉCAUTIONS DE BASE
DOIVENT TOUJOURS ÊTRE RESPECTÉES, AFIN DE RÉDUIRE LE RISQUE D’INCENDIE,
DE CHOC ÉLECTRIQUE, DE BLESSURES OU DE DOMMAGES CORPORELS OU
MATÉRIELS, Y COMPRIS CE QUI SUIT:
Lorsque vous allumez l’appareil pour la première fois, laissez-le fonctionner à pleine
puissance pendant environ deux heures afin de vous débarrasser de l’odeur
désagréable qui en émane. Assurez-vous que la pièce dans laquelle se trouve
l’appareil est bien ventilée pendant cette opération. Il est normal que l'appareil
émette de petits crépitements lorsque vous l'allumez pour la première fois.
1. Lisez attentivement toutes les instructions avant d'utiliser ce radiateur.
2. Ce radiateur devient chaud quand il fonctionne. Pour ne pas vous brûler, évitez
tout contact de la peau avec les surfaces chaudes. Si cet article est doté d’une
poignée, utilisez-la pour déplacer l’appareil. Gardez les matériaux combustibles,
comme les meubles, les oreillers, la literie, le papier, les vêtements et les rideaux,
à au moins 3 pi (0,9 m) du devant du radiateur, et gardez-les éloignés des côtés
et de l’arrière de l’appareil. Gardez la grille arrière éloignée des murs ou des
rideaux pour ne pas bloquer l'entrée d'air.
3. Soyez très prudent et surveillez de près les enfants ou les animaux lorsque le
radiateur est en marche, ou lorsque le radiateur est laissé en marche sans
surveillance.
4. Débranchez toujours le radiateur lorsque vous ne l'utilisez pas.
5. N’utilisez pas un radiateur dont une fiche ou un cordon électrique est
endommagé ou si l’appareil a subi une défaillance, a fait une chute ou a été
endommagé de quelque façon. Jetez le radiateur ou retournez-le dans un centre
de réparation agréé afin qu’il soit examiné et/ou réparé.
6. Ne l'utilisez pas à l'extérieur.
7. Cet appareil de chauage n'est pas conçu pour être utilisé dans la salle de bains,
la buanderie, ni tout autre endroit intérieur similaire. Ne placez jamais le radiateur
où ce dernier pourrait tomber dans une baignoire ou un autre récipient
contenant de l'eau.
8. Ne placez pas le cordon d’alimentation sous un tapis. Ne couvrez pas le cordon
d’alimentation avec un tapis ou tout article similaire. Ne faites pas passer le
cordon sous des meubles ou des appareils. Placez le cordon d’alimentation de
sorte qu’il n’entrave pas la circulation et que personne ne risque de trébucher
dessus.

Sécurité
4
Nº de modèle: 043-7364-0 (radiateur vertical de 24po)/043-7365-8 (radiateur vertical de 30po)
Communiquez avec nous au 1866827-4985
CONSERVEZ CES CONSIGNES
VEUILLEZ LIRE TOUTES LES CONSIGNES AVANT D’UTILISER CE RADIATEUR. LORS
DE L’UTILISATION D’APPAREILS ÉLECTRIQUES, DES PRÉCAUTIONS DE BASE
DOIVENT TOUJOURS ÊTRE RESPECTÉES, AFIN DE RÉDUIRE LE RISQUE D’INCENDIE,
DE CHOC ÉLECTRIQUE, DE BLESSURES OU DE DOMMAGES CORPORELS OU
MATÉRIELS, Y COMPRIS CE QUI SUIT:
Lorsque vous allumez l’appareil pour la première fois, laissez-le fonctionner à pleine
puissance pendant environ deux heures afin de vous débarrasser de l’odeur
désagréable qui en émane. Assurez-vous que la pièce dans laquelle se trouve
l’appareil est bien ventilée pendant cette opération. Il est normal que l'appareil
émette de petits crépitements lorsque vous l'allumez pour la première fois.
1. Lisez attentivement toutes les instructions avant d'utiliser ce radiateur.
2. Ce radiateur devient chaud quand il fonctionne. Pour ne pas vous brûler, évitez
tout contact de la peau avec les surfaces chaudes. Si cet article est doté d’une
poignée, utilisez-la pour déplacer l’appareil. Gardez les matériaux combustibles,
comme les meubles, les oreillers, la literie, le papier, les vêtements et les rideaux,
à au moins 3 pi (0,9 m) du devant du radiateur, et gardez-les éloignés des côtés
et de l’arrière de l’appareil. Gardez la grille arrière éloignée des murs ou des
rideaux pour ne pas bloquer l'entrée d'air.
3. Soyez très prudent et surveillez de près les enfants ou les animaux lorsque le
radiateur est en marche, ou lorsque le radiateur est laissé en marche sans
surveillance.
4. Débranchez toujours le radiateur lorsque vous ne l'utilisez pas.
5. N’utilisez pas un radiateur dont une fiche ou un cordon électrique est
endommagé ou si l’appareil a subi une défaillance, a fait une chute ou a été
endommagé de quelque façon. Jetez le radiateur ou retournez-le dans un centre
de réparation agréé afin qu’il soit examiné et/ou réparé.
6. Ne l'utilisez pas à l'extérieur.
7. Cet appareil de chauage n'est pas conçu pour être utilisé dans la salle de bains,
la buanderie, ni tout autre endroit intérieur similaire. Ne placez jamais le radiateur
où ce dernier pourrait tomber dans une baignoire ou un autre récipient
contenant de l'eau.
8. Ne placez pas le cordon d’alimentation sous un tapis. Ne couvrez pas le cordon
d’alimentation avec un tapis ou tout article similaire. Ne faites pas passer le
cordon sous des meubles ou des appareils. Placez le cordon d’alimentation de
sorte qu’il n’entrave pas la circulation et que personne ne risque de trébucher
dessus.
DANGER: Certaines conditions anormales peuvent causer une hausse de
température. Ne couvrez pas de façon partielle ou totale, ni n’obstruez l’avant
de ce radiateur.
ATTENTION: Cet appareil comporte une fiche polarisée (une broche est plus
large que l'autre). Pour réduire le risque de choc électrique, cette fiche est
conçue pour une insertion dans une prise polarisée que dans un sens. Si la
fiche ne s’insère pas complètement dans la prise, inversez la fiche. Si la fiche
n’entre toujours pas dans la prise, communiquez avec un électricien qualifié.
Ne tentez pas d'annuler ce dispositif de sécurité.
9. Pour débrancher le radiateur, tournez les boutons de commande vers la position OFF
(arrêt), puis retirez la fiche de la prise d'alimentation.
10. Ne branchez l’appareil que dans des prises correctement polarisées.
11. Évitez d'insérer des objets ou de permettre leur insertion dans les fentes du
ventilateur, car cela pourrait entraîner un risque de choc électrique, d'incendie ou des
dommages au radiateur.
12. Pour prévenir tout incendie potentiel, n'obstruez pas les entrées et les sorties d'air. Ne
l'utilisez pas sur des surfaces molles telles qu'un lit où les ouvertures risquent de
devenir bloquées.
13. Un radiateur comporte des pièces chaudes et des pièces qui produisent des arcs ou
des étincelles à l'intérieur. N'utilisez pas cet appareil dans des endroits où de
l'essence, de la peinture ou des matériaux inflammables sont utilisés ou rangés.
14. Utilisez ce radiateur uniquement selon les consignes de ce manuel. Tout autre usage
non recommandé par le fabricant peut causer un incendie, un choc électrique, des
blessures à des personnes ou autres dommages matériels.
15. Pour éviter des surcharges et des fusibles sautés, assurez-vous qu'il n'y a pas d'autres
appareils branchés dans la même prise électrique ou dans une autre prise électrique
sur le même circuit.
16. La fiche et le cordon du radiateur peuvent sembler chauds au toucher. Ceci est
normal. Une fiche ou un cordon qui devient très chaud au toucher ou devient
déformé peuvent être un résultat d'une prise électrique usée. Les prises électriques
usées doivent être remplacées avant une utilisation ultérieure du radiateur. Brancher
le radiateur dans une prise électrique usée peut entraîner une surchaue du cordon
d'alimentation ou un incendie.
!

SécuritéSchéma des pièces clés
5
1.
2.
3.
4.
5.
6.
Panneau de commande
Acheur à DEL
Grille de protection
Base
Télécommande
Voyant d'alimentation
VEUILLEZ LIRE TOUTES LES CONSIGNES AVANT D’UTILISER CE RADIATEUR. LORS
DE L’UTILISATION D’APPAREILS ÉLECTRIQUES, DES PRÉCAUTIONS DE BASE
DOIVENT TOUJOURS ÊTRE RESPECTÉES, AFIN DE RÉDUIRE LE RISQUE D’INCENDIE,
DE CHOC ÉLECTRIQUE, DE BLESSURES OU DE DOMMAGES CORPORELS OU
MATÉRIELS, Y COMPRIS CE QUI SUIT:
Lorsque vous allumez l’appareil pour la première fois, laissez-le fonctionner à pleine
puissance pendant environ deux heures afin de vous débarrasser de l’odeur
désagréable qui en émane. Assurez-vous que la pièce dans laquelle se trouve
l’appareil est bien ventilée pendant cette opération. Il est normal que l'appareil
émette de petits crépitements lorsque vous l'allumez pour la première fois.
1. Lisez attentivement toutes les instructions avant d'utiliser ce radiateur.
2. Ce radiateur devient chaud quand il fonctionne. Pour ne pas vous brûler, évitez
tout contact de la peau avec les surfaces chaudes. Si cet article est doté d’une
poignée, utilisez-la pour déplacer l’appareil. Gardez les matériaux combustibles,
comme les meubles, les oreillers, la literie, le papier, les vêtements et les rideaux,
à au moins 3 pi (0,9 m) du devant du radiateur, et gardez-les éloignés des côtés
et de l’arrière de l’appareil. Gardez la grille arrière éloignée des murs ou des
rideaux pour ne pas bloquer l'entrée d'air.
3. Soyez très prudent et surveillez de près les enfants ou les animaux lorsque le
radiateur est en marche, ou lorsque le radiateur est laissé en marche sans
surveillance.
4. Débranchez toujours le radiateur lorsque vous ne l'utilisez pas.
5. N’utilisez pas un radiateur dont une fiche ou un cordon électrique est
endommagé ou si l’appareil a subi une défaillance, a fait une chute ou a été
endommagé de quelque façon. Jetez le radiateur ou retournez-le dans un centre
de réparation agréé afin qu’il soit examiné et/ou réparé.
6. Ne l'utilisez pas à l'extérieur.
7. Cet appareil de chauage n'est pas conçu pour être utilisé dans la salle de bains,
la buanderie, ni tout autre endroit intérieur similaire. Ne placez jamais le radiateur
où ce dernier pourrait tomber dans une baignoire ou un autre récipient
contenant de l'eau.
8. Ne placez pas le cordon d’alimentation sous un tapis. Ne couvrez pas le cordon
d’alimentation avec un tapis ou tout article similaire. Ne faites pas passer le
cordon sous des meubles ou des appareils. Placez le cordon d’alimentation de
sorte qu’il n’entrave pas la circulation et que personne ne risque de trébucher
dessus.
17. Assurez-vous que le radiateur est placé sur une surface stable et sécurisée afin
d'éliminer la possibilité de le renverser.
18. Branchez toujours le radiateur directement dans une prise murale. N'utilisez jamais
une rallonge ou une prise d'alimentation amovible (barre d'alimentation/multiprise).
19. Vérifiez le cordon d’alimentation et les branchements de la fiche. Une prise mal fixée
peut provoquer une surchaue de la fiche ou un incendie. Assurez-vous que la fiche
est fermement branchée dans la prise. Pendant l’utilisation du radiateur, vérifiez
fréquemment que la fiche et la prise ne sont pas chaudes. Si c’est le cas, cessez
l’utilisation du radiateur et faites remplacer la prise par un électricien qualifié.
20. Vérifiez que ni l'appareil ni le cordon d'alimentation n'ont été endommagés de
quelque manière pendant le transport.
21. Assurez-vous qu'aucune pièce de polystyrène ou autre matériau d'emballage n'a été
laissée entre les éléments de l'appareil. Il peut être nécessaire de nettoyer l’appareil.
1
2
3
5
6
4

Assemblage
6
/043-7365-8
Communiquez avec nous au
1. Retirez les trois (3) vis cruciformes de la
partie basse du radiateur (Figure 1) et
mettez-les de côté.
3. Appuyez sur les deux moitiés de la
base afin de les faire s’emboîter.
(Figure 3)
2. Alignez deux bossages pour vis
et deux trous pour bossages
derrière les deux moitiés de la
base comme illustré. (Figure 2)
5. Fixez la base du radiateur à l’aide des
vis cruciformes utilisées dans la figure
1. Serrez les vis cruciformes
fermement à l’aide d’un tournevis
cruciforme. (Figure 5)
4. Alignez le cordon d’alimentation
à la fente de la partie supérieure
de la base. (Figure 4)
Figure 1
Figure 2
Figure 4
Figure 3
Figure 5
Bossages pour vis
Trous des bossages

Utilisation
7
Bouton de réglage de la température HAUTE
Bouton de réglage de la température BASSE
Bouton de minuterie
Bouton Marche/Arrêt
Bouton de chauage H/B
Bouton d’oscillation
Symboles
1. Mise en MARCHE/ARRÊT
a. Appuyez une fois sur le bouton MARCHE ( ) pour allumer le radiateur et le mettre
en pleine puissance et l’acheur à DEL indiquera HAUTE.
b. Si vous appuyez une nouvelle fois sur le bouton, le radiateur s’éteindra et le
ventilateur arrêtera de fonctionner au bout de 30 secondes.
2. Sélection de la puissance de chauage
Appuyez sur le bouton HAUTE/BASSE ( ) pour sélectionner la puissance de
chauage HAUTE ou BASSE. L'acheur à DEL indiquera HAUTE ou BASSE.
3.Oscillation
a. Appuyez une fois sur le bouton Oscillation ( ) . Le radiateur commencera à
osciller afin disperser la chaleur.
b. Appuyez à nouveau pour désactiver la fonction d'oscillation.
4. Minuterie d'arrêt automatique
Lorsque le radiateur fonctionne, vous pouvez régler la minuterie pour éteindre
l'appareil à une heure prédéfinie. Appuyez sur le bouton MINUTERIE ( ) et
l’acheur à DEL indiquera la valeur de réglage de la minuterie par défaut de « 0 h »
ou la dernière heure qui a été réglée. Pour régler la minuterie, maintenez enfoncé le
bouton pour régler la minuterie entre 0 et 8 heures par intervalle d'une heure.
Pour annuler le réglage de la minuterie d’arrêt automatique, procédez comme suit:
1. Sélectionnez l'heure 0 H
2. Éteignez l'appareil puis rallumez-le.
5. Réglage de la température (mode thermostat)
Lorsque le radiateur est en marche, vous pouvez appuyer sur les boutons ( ou )
pour sélectionner le mode thermostat. L'indicateur automatique s'allumera.
L’acheur à DEL s’allumera et fera clignoter la valeur par défaut de 75 ° F (24 ° C) ou
la dernière heure qui a été réglée, pendant 5 secondes.
1. Si vous appuyez à nouveau sur les boutons ( ou ) dans les 5 secondes qui
suivent, vous pourrez modifier le réglage de la température existant . Continuez à
appuyer sur les boutons ( ou ), et la température sera modifiée de 1 ° F (1 ° C)
entre 41 ° –90 ° F (5 ° et 32 ° C). Si vous maintenez les boutons ou vers le bas,
la température changera rapidement. La température sera réglée et arrêtera de
clignoter au bout de 5 secondes et l'écran achera la température actuelle une
fois que vous arrêterez d'appuyer sur les boutons.
2. Si vous maintenez enfoncés les boutons et simultanément pendant environ
deux secondes, l’acheur à DEL passera des degrés Fahrenheit aux degrés Celsius.
Mode Celsius :
1. Si la température ambiante est inférieure de 1 ° C par rapport à la température
réglée, la puissance restera HAUTE en tout temps.
2. Si la température ambiante est supérieure de 1 ° C par rapport à la température
réglée, le radiateur arrêtera de chauer et le ventilateur cessera de fonctionner
dans les 30 secondes qui suivront.
Mode Fahrenheit :
1. Si la température de la pièce est inférieure de 2 ° F par rapport à la température
réglée, la puissance restera HAUTE en tout temps.
2. Si la température ambiante est supérieure de 2 ° F par rapport à la température
réglée, le chauage cessera de chauer et le ventilateur cessera de fonctionner
dans les 30 secondes qui suivront.
Panneau de commande Télécommande
Acheur à DEL
MINUTERIE
VOYANT
D'ALIMENTATION
AUTO

Utilisation
8
Nº de modèle: 043-7364-0 (radiateur vertical de 24po)/043-7365-8 (radiateur vertical de 30po)
Communiquez avec nous au 1866827-4985
1. Mise en MARCHE/ARRÊT
a. Appuyez une fois sur le bouton MARCHE ( ) pour allumer le radiateur et le mettre
en pleine puissance et l’acheur à DEL indiquera HAUTE.
b. Si vous appuyez une nouvelle fois sur le bouton, le radiateur s’éteindra et le
ventilateur arrêtera de fonctionner au bout de 30 secondes.
2. Sélection de la puissance de chauage
Appuyez sur le bouton HAUTE/BASSE ( ) pour sélectionner la puissance de
chauage HAUTE ou BASSE. L'acheur à DEL indiquera HAUTE ou BASSE.
3.Oscillation
a. Appuyez une fois sur le bouton Oscillation ( ) . Le radiateur commencera à
osciller afin disperser la chaleur.
b. Appuyez à nouveau pour désactiver la fonction d'oscillation.
4. Minuterie d'arrêt automatique
Lorsque le radiateur fonctionne, vous pouvez régler la minuterie pour éteindre
l'appareil à une heure prédéfinie. Appuyez sur le bouton MINUTERIE ( ) et
l’acheur à DEL indiquera la valeur de réglage de la minuterie par défaut de « 0 h »
ou la dernière heure qui a été réglée. Pour régler la minuterie, maintenez enfoncé le
bouton pour régler la minuterie entre 0 et 8 heures par intervalle d'une heure.
Pour annuler le réglage de la minuterie d’arrêt automatique, procédez comme suit:
1. Sélectionnez l'heure 0 H
2. Éteignez l'appareil puis rallumez-le.
5. Réglage de la température (mode thermostat)
Lorsque le radiateur est en marche, vous pouvez appuyer sur les boutons ( ou )
pour sélectionner le mode thermostat. L'indicateur automatique s'allumera.
L’acheur à DEL s’allumera et fera clignoter la valeur par défaut de 75 ° F (24 ° C) ou
la dernière heure qui a été réglée, pendant 5 secondes.
1. Si vous appuyez à nouveau sur les boutons ( ou ) dans les 5 secondes qui
suivent, vous pourrez modifier le réglage de la température existant . Continuez à
appuyer sur les boutons ( ou ), et la température sera modifiée de 1 ° F (1 ° C)
entre 41 ° –90 ° F (5 ° et 32 ° C). Si vous maintenez les boutons ou vers le bas,
la température changera rapidement. La température sera réglée et arrêtera de
clignoter au bout de 5 secondes et l'écran achera la température actuelle une
fois que vous arrêterez d'appuyer sur les boutons.
2. Si vous maintenez enfoncés les boutons et simultanément pendant environ
deux secondes, l’acheur à DEL passera des degrés Fahrenheit aux degrés Celsius.
Mode Celsius :
1. Si la température ambiante est inférieure de 1 ° C par rapport à la température
réglée, la puissance restera HAUTE en tout temps.
2. Si la température ambiante est supérieure de 1 ° C par rapport à la température
réglée, le radiateur arrêtera de chauer et le ventilateur cessera de fonctionner
dans les 30 secondes qui suivront.
Mode Fahrenheit :
1. Si la température de la pièce est inférieure de 2 ° F par rapport à la température
réglée, la puissance restera HAUTE en tout temps.
2. Si la température ambiante est supérieure de 2 ° F par rapport à la température
réglée, le chauage cessera de chauer et le ventilateur cessera de fonctionner
dans les 30 secondes qui suivront.
This manual suits for next models
1
Table of contents
Languages:
Other NOMA Heater manuals

NOMA
NOMA 043-6078-8 User manual

NOMA
NOMA 043-6174-8 User manual

NOMA
NOMA 043-5116-4 User manual

NOMA
NOMA 043-8416-2 User manual

NOMA
NOMA 043-5997-6 User manual

NOMA
NOMA 52-2533-6 User manual

NOMA
NOMA 043-8411-2 User manual

NOMA
NOMA 043-7363-2 User manual

NOMA
NOMA 043-5999-2 User manual

NOMA
NOMA 043-8410-4 User manual