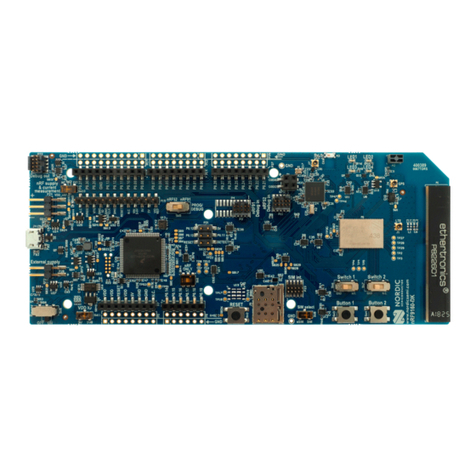
Nordic nRF5 Series: nRF52 User manual

nRF5 Series: Developing with
SEGGER Embedded Studio
Getting Started Guide
v1.1
1159720_163 v1.1 / 2018-10-16

Contents
Revision history.................................. iii
1Introduction................................... 4
2Minimum requirements............................ 5
3Related documentation.............................6
4Development kits, boards, and chips..................... 7
5SoftDevices................................... 8
6Running a first test............................... 9
7Setting up your toolchain........................... 10
7.1 Nordic tools and downloads ........................... 10
7.2 Setting up the nRF5 SDK ............................. 13
7.3 Installing SEGGER tools ..............................13
7.4 Installing the nRF5x Command Line Tools ...................... 14
8Programming an application......................... 15
8.1 Erasing the board ................................ 15
8.2 Importing Keil projects .............................. 16
8.3 Compiling the application ............................ 20
8.4 Configuring placement of the SoftDevice ...................... 21
8.5 Programming the firmware ............................ 24
8.6 Adding files .................................. 24
8.6.1 Adding source files ............................. 24
8.6.2 Including header files ............................ 25
9Communicating with the board....................... 27
9.1 Connecting via RTT ............................... 27
9.1.1 Connecting via RTT on Windows ........................ 27
9.1.2 Connecting via RTT on Linux ..........................28
9.2 Connecting via CDC-UART ............................ 28
10 Testing the application............................ 30
10.1 Testing with a mobile device ........................... 30
10.2 Testing with a computer ............................ 31
11 Debugging................................... 33
Glossary ..................................... 34
Acronyms and abbreviations............................35
Legal notices................................... 36
1159720_163 v1.1 ii
1Introduction
This guide will help you get started with your nRF5 Series Development Kit (DK) and developing your
application with SEGGER Embedded Studio (SES).
If you have worked with any of Nordic Semiconductor's products before, you are probably familiar with
the required software tools. In this case, this guide will mostly provide reference information.
If this is your first time developing software for a Nordic Semiconductor System on Chip (SoC), this guide
will help you set up your development toolchain and guide you through all the steps that are necessary to
develop, program, test, and debug your application.
This guide describes how to work with SES. SES is a cross-platform Integrated Development Environment
(IDE), so you can run it on different operating systems. For use with Nordic Semiconductor devices, you
can get a free license that has no limitations.
There are two Getting Started Guides that show how to work with different IDEs:
•nRF5 Series: Developing with SEGGER Embedded Studio (this document)
•nRF5 Series: Developing on Windows with ARM Keil MDK
Check out the Nordic DevZone for additional setup information and help.
1159720_163 v1.1 4

2Minimum requirements
Ensure that you have all the required hardware and that your computer fulfills the software requirements.
Hardware requirements
• One of the following nRF5 Series development kits:
• nRF52840 DK
• nRF52 DK
• nRF51 DK
• Micro-USB 2.0 cable
• Personal computer (PC) or Mac
• Smartphone or tablet that supports Bluetooth® Low Energy
• Optional: nRF52840 Dongle or nRF51 Dongle
Software requirements
One of the following operating systems:
• Windows 7, Windows 8, or Windows 10
• macOS
• Linux
1159720_163 v1.1 5

3Related documentation
This guide is a starting point and gives essential information for getting started with software development
on nRF5 Series devices. For more detailed information, check the documentation of the separate
components and tools.
Development Kit User Guides
nRF52840 Development Kit
nRF52 Development Kit
nRF51 Development Kit
Dongle User Guides
nRF52840 Dongle
nRF51 Dongle
Compatibility Matrices
nRF52840 Compatibility Matrix
nRF52832 Compatibility Matrix
nRF52810 Compatibility Matrix
nRF51 Series Compatibility Matrix
nRF5 SDK documentation
nRF5 SDK
Tools User Guides
nRF5x Command Line Tools
nRF Connect Bluetooth Low Energy
1159720_163 v1.1 6

4Development kits, boards, and chips
Each nRF5 Series DK contains a board, which in turn contains a chip. Some of Nordic Semiconductor's tools
target the chip, while others target the development board or the development kit. Therefore, you must
be aware of the relation between the different components.
You can find all compatibility information in the compatibility matrix for each chip. The following table
summarizes the information that you must be aware of for programming your development board.
Development kit Development board Chip
nRF52840 DK PCA10056 nRF52840
nRF52840 Dongle PCA10059 nRF52840
nRF52 DK PCA10040 nRF52832
Note: This kit is also used for
nRF52810 development. See
nRF52810 Development Kit for
more information.
nRF51 DK PCA10028 nRF51422
nRF51 Dongle PCA10032 nRF51422
Table 1: Relation between development kits, boards, and chips
1159720_163 v1.1 7

5SoftDevices
A SoftDevice is a wireless protocol stack that complements an nRF5 Series SoC. Nordic Semiconductor
provides them as qualified, precompiled binary files. While it is possible to build applications without
using a SoftDevice, all nRF5 SDK example applications that use Bluetooth Low Energy or ANT™ require a
SoftDevice.
See the compatibility matrices for detailed information about which SoftDevice versions are supported for
each chip. The following table summarizes the usage scenarios for each SoftDevice.
Protocol Role Chip SoftDevice
• nRF51422
• nRF51822
S110Peripheral
• nRF52810
• nRF52832
S112
Central or Peripheral • nRF51422
• nRF51822
S120
• nRF51422
• nRF51822
S130
• nRF52832 S132
Bluetooth Low Energy
Central and Peripheral
• nRF52840 S140
• nRF51422 S210
ANT
• nRF52832 S212
Peripheral • nRF51422 S310
Bluetooth Low Energy and ANT
Central and Peripheral • nRF52832 S332
Table 2: SoftDevice overview
1159720_163 v1.1 8

6Running a first test
Before you start developing, program and run a simple application on your development board to
ensure that the board functions as expected and the communication between your computer and your
development board works.
Before you begin, download the latest compatible version of the nRF5 SDK. For information about which
SDK supports which IC revisions, check the compatibility matrices.
The nRF5 SDK contains precompiled HEX files of the most common examples. Extract the zip file into a
folder of your choosing.
1. Power up the nRF5 Series development board:
a) Connect one end of a micro-USB 2.0 cable to the USB connector on the board and the other end to
one of your PC's USB host ports.
b) Slide the power switch to "ON".
Observe that LED1 starts blinking.
2. Open a file explorer and confirm that the development board has appeared as a removable drive
named "JLINK".
3. In the folder where you extracted the nRF5 SDK, navigate to examples\peripheral\blinky
\hex.
4. Select the HEX file that corresponds to your development board and copy it to the JLINK drive.
The development board will now restart and run the application.
If the LEDs on the board start blinking, you have successfully programmed your first application! Next,
continue to set up your development toolchain and program a more advanced application.
1159720_163 v1.1 9

7Setting up your toolchain
Before you can start developing, you must install the required software. This software includes tools
to connect to your development board, an IDE for developing your application, and the nRF5 SDK that
provides libraries and example applications.
See Nordic tools and downloads on page 10 for an overview of available tools and the links to
download the latest versions for your operating system.
The following tools are required:
•nRF5 SDK
•SEGGER Embedded Studio (SES)
•SEGGER J-Link Software and Documentation Pack
The following tools are optional:
• nRF5x Command Line Tools for Windows, Linux32, Linux64, or macOS (all including nrfjprog)
See the following sections for installation instructions.
7.1 Nordic tools and downloads
This overview lists all available Nordic Semiconductor tools and supported IDEs. Not all of these tools are
required. To help you pick the IDE and tools you want to use, see the following sections for common setup
scenarios.
Development IDE
Pick one of the IDEs with a compiler supported by Nordic:
IDE Windows Linux OSX
SEGGER Embedded
Studio (SES)
Yes Yes Yes
MDK-ARM Keil µVision Yes No No
GNU/GCC Yes Yes Yes
IAR Yes No No
SES is the recommended platform. It is free for use with nRF devices.
Essential tools
You need to download these Nordic tools to develop with our devices.
1159720_163 v1.1 10

Setting up your toolchain
Tool Description Download Documentation Protocol
SDK
(Software
Development
Kit)
Application
examples, source
files, SoftDevices
Windows/Linux nRF5 SDK
nRF5 SDK for Mesh
nRF5 SDK for Thread
and Zigbee
BLE/ANT
Bluetooth
Mesh
Thread and
Zigbee
nRF5x
Command
Line Tools
Collection of
command line
tools, like nrfjprog,
mergehex
nRF5x Tools Windows32
nRF5x Tools Linux32
nRF5x Tools Linux64
nRF5x Tools OSX
nRF5x Command Line
Tools
BLE/ANT
Optional tools
These tools are not essential, but we recommend that you use them.
1159720_163 v1.1 11

Setting up your toolchain
Tool Description Download Documentation Protocol
SoftDevice Wireless protocol
stack
Click the Download
tab on:
nRF52840 Product
page
nRF52832 Product
page
nRF52810 Product
page
nRF51822 Product
page
nRF51422 Product
page
nRF52 Series SDS
nRF51 Series SDS
BLE/ANT
nRF Connect for
Desktop
Expandable desktop
tool with several apps,
including:
• Peer device
emulator
• Power Profiler
• Programmer
• Cloud Gateway
nRF Connect for OS-X
nRF Connect for
Ubuntu Linux
nRF Connect for
Windows
nRF Connect
Bluetooth Low Energy
BLE
nRF Connect for
Mobile
Peer device emulator
app for smartphones
Android v4.3 or later
IOS v8 or later
BLE
Nordic nRF Toolbox
app
App that contains all
the Nordic apps
Android v4.3 or later
IOS v8 or later
Windows Phone v8.1
or later
BLE
nRF5x pynrfjprog Simple Python
interface for the
nrfjprog DLL
nRF5x pynrfjprog nRF5x pynrfjprog BLE/ANT
ANTware II Peer device emulator
for the ANT protocol
running on computers
ANTware II ANTware II ANT
nRF Sniffer App for monitoring on-
air traffic
nRF Sniffer download nRF Sniffer BLE
nRF Thread Topology
Monitor
Tool for visualizing
Thread mesh network
topology in real time
nRF Thread Topology
Monitor for Ubuntu
Linux 64-bit
nRF Thread Topology
Monitor for Windows
nRF Thread Topology
Monitor
Thread
Thread Border
Router
Gateway for
connecting Thread
Thread Border Router Thread Border Router Thread
1159720_163 v1.1 12

Setting up your toolchain
Tool Description Download Documentation Protocol
network to the
Internet
See also Nordic mobile apps for a list of available Bluetooth Low Energy and Mesh mobile apps for iOS,
Android and Windows Phones.
7.2 Setting up the nRF5 SDK
The nRF5 SDK does not require installation. You only need to download and extract the files.
If you followed the instructions in Running a first test on page 9, you already downloaded and extracted
the nRF5 SDK files and are all set up.
To set up your SDK environment:
1. Download the nRF5 SDK zip file.
If you have an nRF52 device, select the latest version. For nRF51 devices, select the latest version with
support for nRF51 (currently, v12.3.0). For information about which SDK supports which IC revisions,
check the compatibility matrices.
2. Extract the zip file to the directory that you want to use to work with the SDK.
This folder will be referred to as SDK_dir in the following documentation.
Note: Compilers tend to run into problems with long path names. Therefore, place the folder as
close to the root level of your file system as possible (for example, at C:/Nordic/SDK). Also,
avoid using spaces in the file path and folder name.
7.3 Installing SEGGER tools
Download and install the most recent releases of SES and the J-Link Software and Documentation Pack.
1. Download the software packages for your operating system from SEGGER downloads.
You need the following packages:
• Embedded Studio for ARM (version 3.30 or later)
• J-Link Software and Documentation Pack (version 6.10g or later)
2. Install both packages.
3. Obtain and activate your free license for SES:
a) Open SES.
SES will automatically load a test project.
b) Click Build > Build and Debug.
A window asking for a license will pop up. SES is free of charge for use with Nordic Semiconductor
devices, but you still need to request and activate a license.
c) Select Activate Your Free License and fill in your information to request a license.
Note: In SES versions before 3.34, this option was called Get a Free License.
The license is sent to you in an email.
d) After you receive your license key, enter it to activate the license.
1159720_163 v1.1 13

Setting up your toolchain
7.4 Installing the nRF5x Command Line Tools
The nRF5x Command Line Tools are used for developing, programming, and debugging of Nordic
Semiconductor's nRF5x SoCs (System on Chip).
When installing on macOS or Linux, the SEGGER software must be installed in its default location, or the
shared library must be placed so that dlopen() can find it. The default location is:
• On macOS: /Applications/SEGGER/JLink
• On Linux: /opt/SEGGER/JLink
The SEGGER software can be installed by downloading and running the installer from SEGGER Software.
When installing the nRF5x Command Line Tools on Windows, SEGGER software is automatically installed in
addition to the tools.
Complete the following steps to install the nRF5x Command Line Tools:
1. Download the software for your operating system:
• Windows: nRF5x-Command-Line-Tools for Win32
• Linux 32-bit: nRF5x-Command-Line-Tools-Linux-i386
• Linux 64-bit: nRF5x-Command-Line-Tools-Linux-x86_64
• macOS: nRF5x-Command-Line-Tools for Os X
2. Install the software by running the installer and following the given instructions, or by extracting the
.tar archive anywhere on your file system and adding the extracted folders to your path.
3. Enter the following command in a command line to make sure that nrfjprog is installed correctly:
nrfjprog --version
If you get an error message that the command cannot be found, nrfjprog must be manually added to
the PATH. On Windows:
a) Go to the Windows Advanced system settings and click Environment Variables.
b) Select the Path variable and click Edit.
c) Add the following text at the end of the variable value: ;C:\Program Files (x86)\Nordic
Semiconductor\nrf5x\bin
Make sure that you add a semicolon (;) between entries in the PATH values: path1;path2
d) Click OK twice.
On Linux, assuming that you have extracted the .tar archive into /opt/nrfjprog:
a) Add the following command to the configuration file for your command line, for example, to
~/.bashrc:
export PATH=$PATH:/opt/nrfjprog
Open a new command prompt and repeat the command. It should now succeed.
1159720_163 v1.1 14

8Programming an application
After setting up the required toolchain, you are ready to compile your application and program (or "flash")
it to your development board.
Starting with v14.1.0, the nRF5 SDK supplies SEGGER Embedded Studio projects. If you are using an older
version of the nRF5 SDK (for example, nRF5 SDK v12.3.0, which supports nRF51 Series devices), you must
import and convert the Keil µVision projects.
There is a series of video tutorials that show how to get started with SEGGER Embedded Studio in
combination with the nRF5 SDK. Check them out here: Getting started with SEGGER Embedded Studio and
the nRF5 SDK
8.1 Erasing the board
Before you program an example to the development board, you should erase the contents of the board.
There are different ways to erase the board. You can, for example, use SES or the command line tool
nrfjprog (part of the nRF5x Command Line Tools).
• To erase the contents of the board with SES, complete the following steps:
a) Select Target > Connect J-Link.
b) After the connection is established, select Target > Erase All.
• To erase the contents of the board with nrfjprog, enter the following command:
1159720_163 v1.1 15

Programming an application
• For nRF51 devices: nrfjprog --family nRF51 --eraseall
• For nRF52 devices: nrfjprog --family nRF52 --eraseall
8.2 Importing Keil projects
If you are using a version of the SDK that supports SES, thus nRF5 SDK v14.1.0 or later, you should open
one of the supplied SES projects and skip this step. If you are using an older version of the SDK, for
example, nRF5 SDK v12.3.0 for nRF51 Series devices, you must create your own SES projects based on the
supplied Keil projects.
Before you begin, install the CMSIS-CORE Support Package. To do so, open SES, go to Tools > Package
Manager, and select and install CMSIS-CORE Support Package.
Figure 1: SES Package Manager
Complete the following steps to import a Keil project into SES:
1. Select File > Import Project > Import Keil MDK Project.
In SES versions before 3.40, this option was located under File > Import IAR EWARM / Keil MDK
Project.
2. Navigate to the folder that contains the nRF5 SDK and select the example that you want to import.
Use the *.uvprojx file that is located in the arm5_no_packs folder.
3. In the Import Build Configuration window that appears, select Internal Toolchain.
1159720_163 v1.1 16

Programming an application
4. If the project that you imported contains a Target for flashing the SoftDevice, delete this Target in SES:
a) Select Project > Build Configurations.
b) Under Public Configurations, select the Target (for example, flash_s130_nrf51_2.0.1_softdevice).
c) Click the - symbol to remove the Target.
The build configuration should now look similar to this:
5. Add the nRF5 MDK files that are required for startup and system setup.
In Keil µVision, these files are provided by the nRF_DeviceFamilyPack. Since this pack is not available
for SES, you must add them manually to the SES project.
a) Download ses_nrf51_startup.s and ses_nrf52_startup.s and save them in a new folder SDK_dir/
components/toolchain/embedded_studio.
b) In the Project Explorer, navigate to Internal Files and remove the Cortex_M_Startup.s file.
c) Right-click Internal Files and select Add Existing File.
d) Browse to the SDK_dir/components/toolchain/ folder and select the .c file that
corresponds to your device (for example, system_nrf52.c).
e) Right-click Internal Files and select Add Existing File again. This time, select the startup file that
you downloaded, for example, SDK_dir/components/toolchain/embedded_studio/
ses_nrf51_startup.s.
1159720_163 v1.1 17

Programming an application
The Project Explorer should now look similar to this:
6. Include the device header files in the project:
a) Right-click your project and select Edit Options.
b) Select Preprocessor.
c) Add the following path to the User Include Directories field: ../../../../../../
components/device
The user include directories should now look similar to this:
1159720_163 v1.1 18

Programming an application
7. If your project uses modules that require section variables (for example, the Peer Manager, Flash Data
Storage, or Flash Storage), define where in the flash information from these modules should be stored.
a) Download the flash_placement.xml and place it in your project directory.
Files are provided for the following versions of the nRF5 SDK:
• For nRF5 SDK v12.x.x: flash_placement.xml
• For nRF5 SDK v13.x.x and nRF5 SDK v14.0.0: flash_placement.xml
b) Right-click on your project in the Project Explorer and select Import Section Placement.
1159720_163 v1.1 19

Programming an application
c) Confirm that you want to use the section placement for the current build configuration.
8.3 Compiling the application
You can compile the application from a SES project provided by the nRF5 SDK v14.2.0 or later, or from the
project that you created based on an older SDK example.
1. Open your project in SES.
In nRF5 SDK v14.2.0 or later, SES projects are located in the ses subfolder of the example folder, for
example, SDK_dir/examples/ble_peripheral/ble_app_uart/pca10040/s132/ses.
2. Select Build > Build project_target.
Alternatively, press F7. Make sure that there are no build errors.
The output should look similar to this:
1159720_163 v1.1 20
This manual suits for next models
2
Table of contents
Other Nordic Microcontroller manuals

Nordic
Nordic nRFgo nRF6700 User manual

Nordic
Nordic nRF5340 User manual

Nordic
Nordic PCA63511 User manual

Nordic
Nordic nRFgo nRF8002 User manual

Nordic
Nordic 51822 Technical manual

Nordic
Nordic nRF9160 User manual

Nordic
Nordic nRF51822 User manual

Nordic
Nordic nRF8001 User manual

Nordic
Nordic nRF51822 User manual