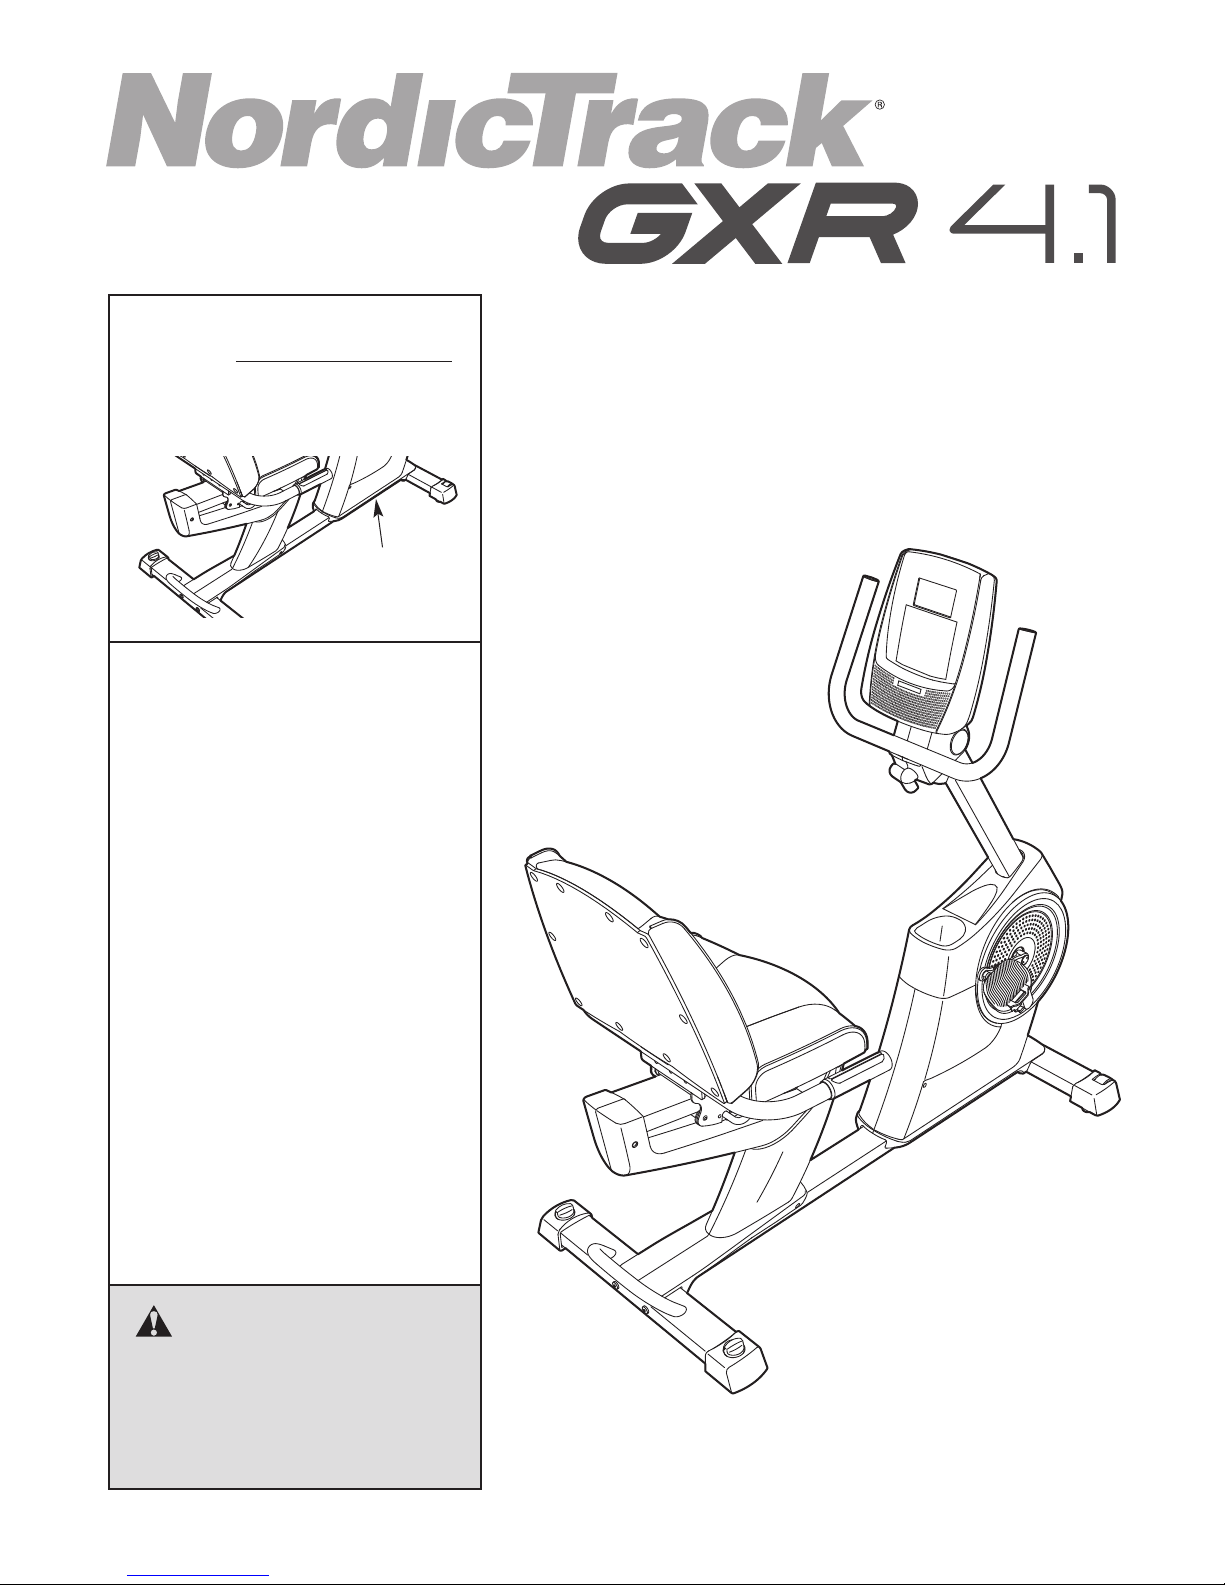
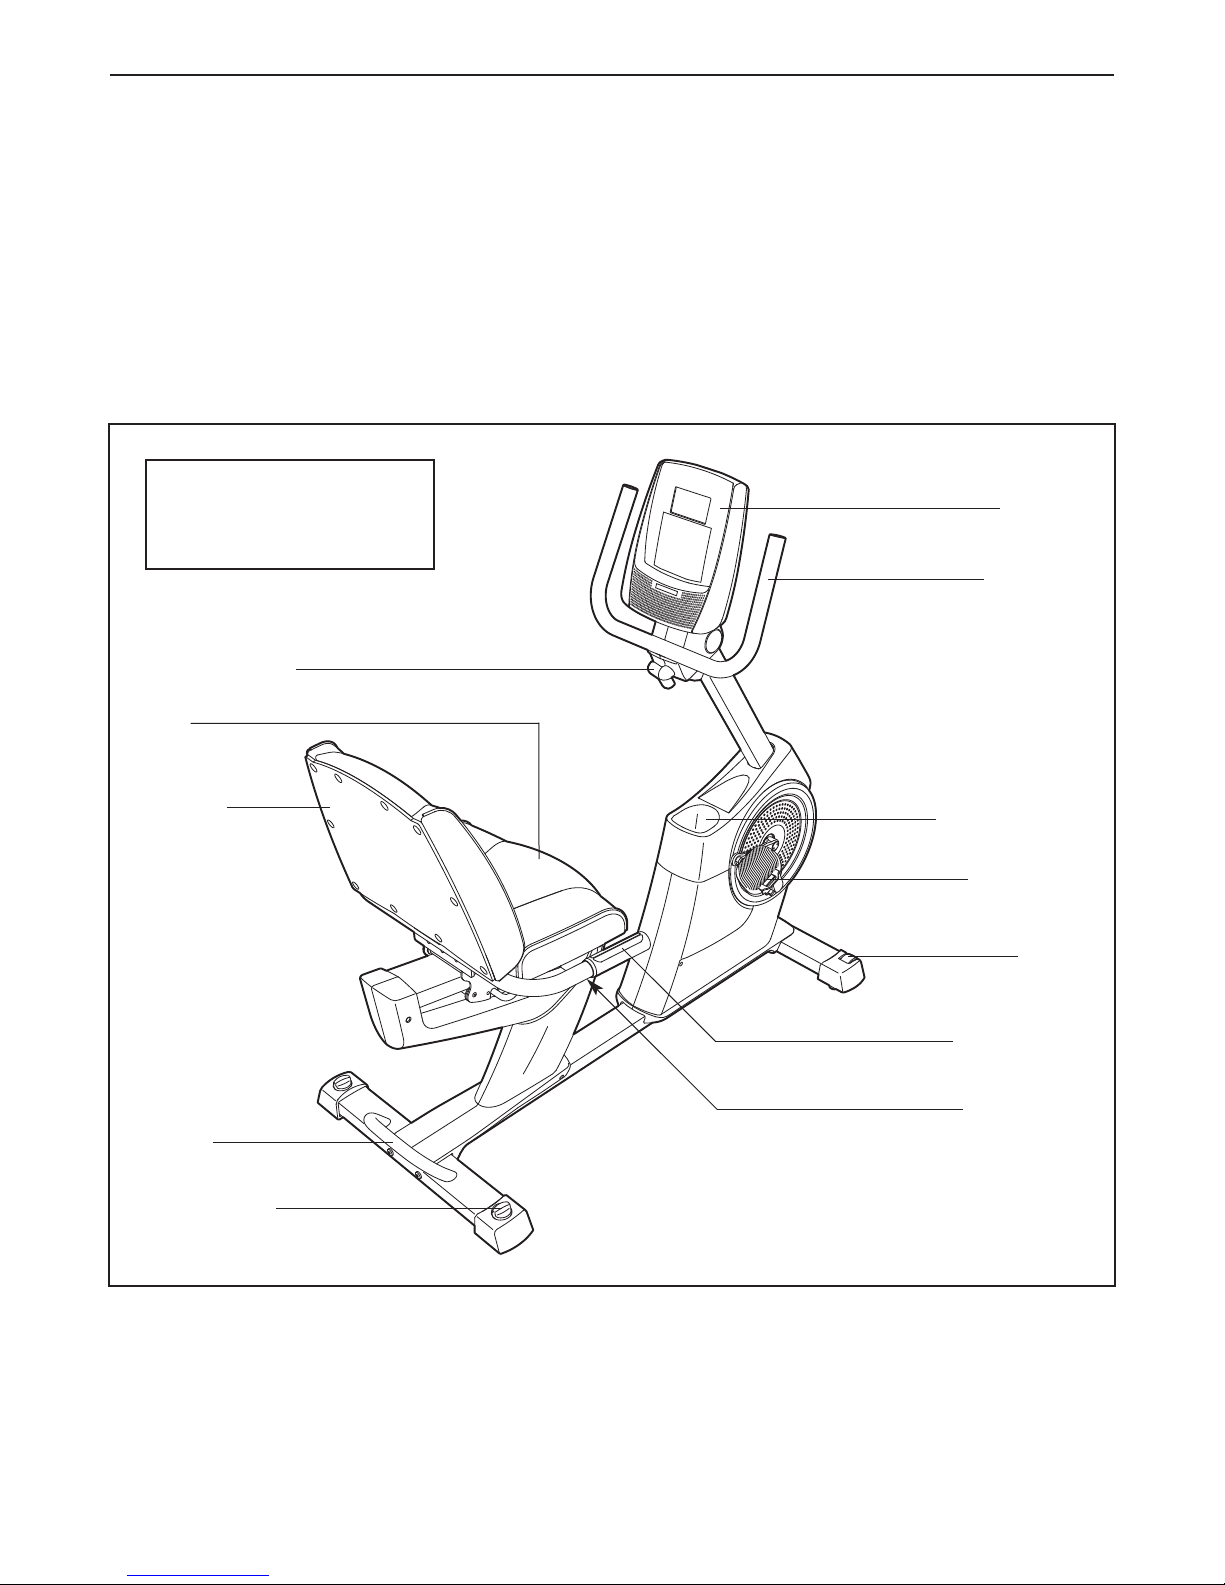
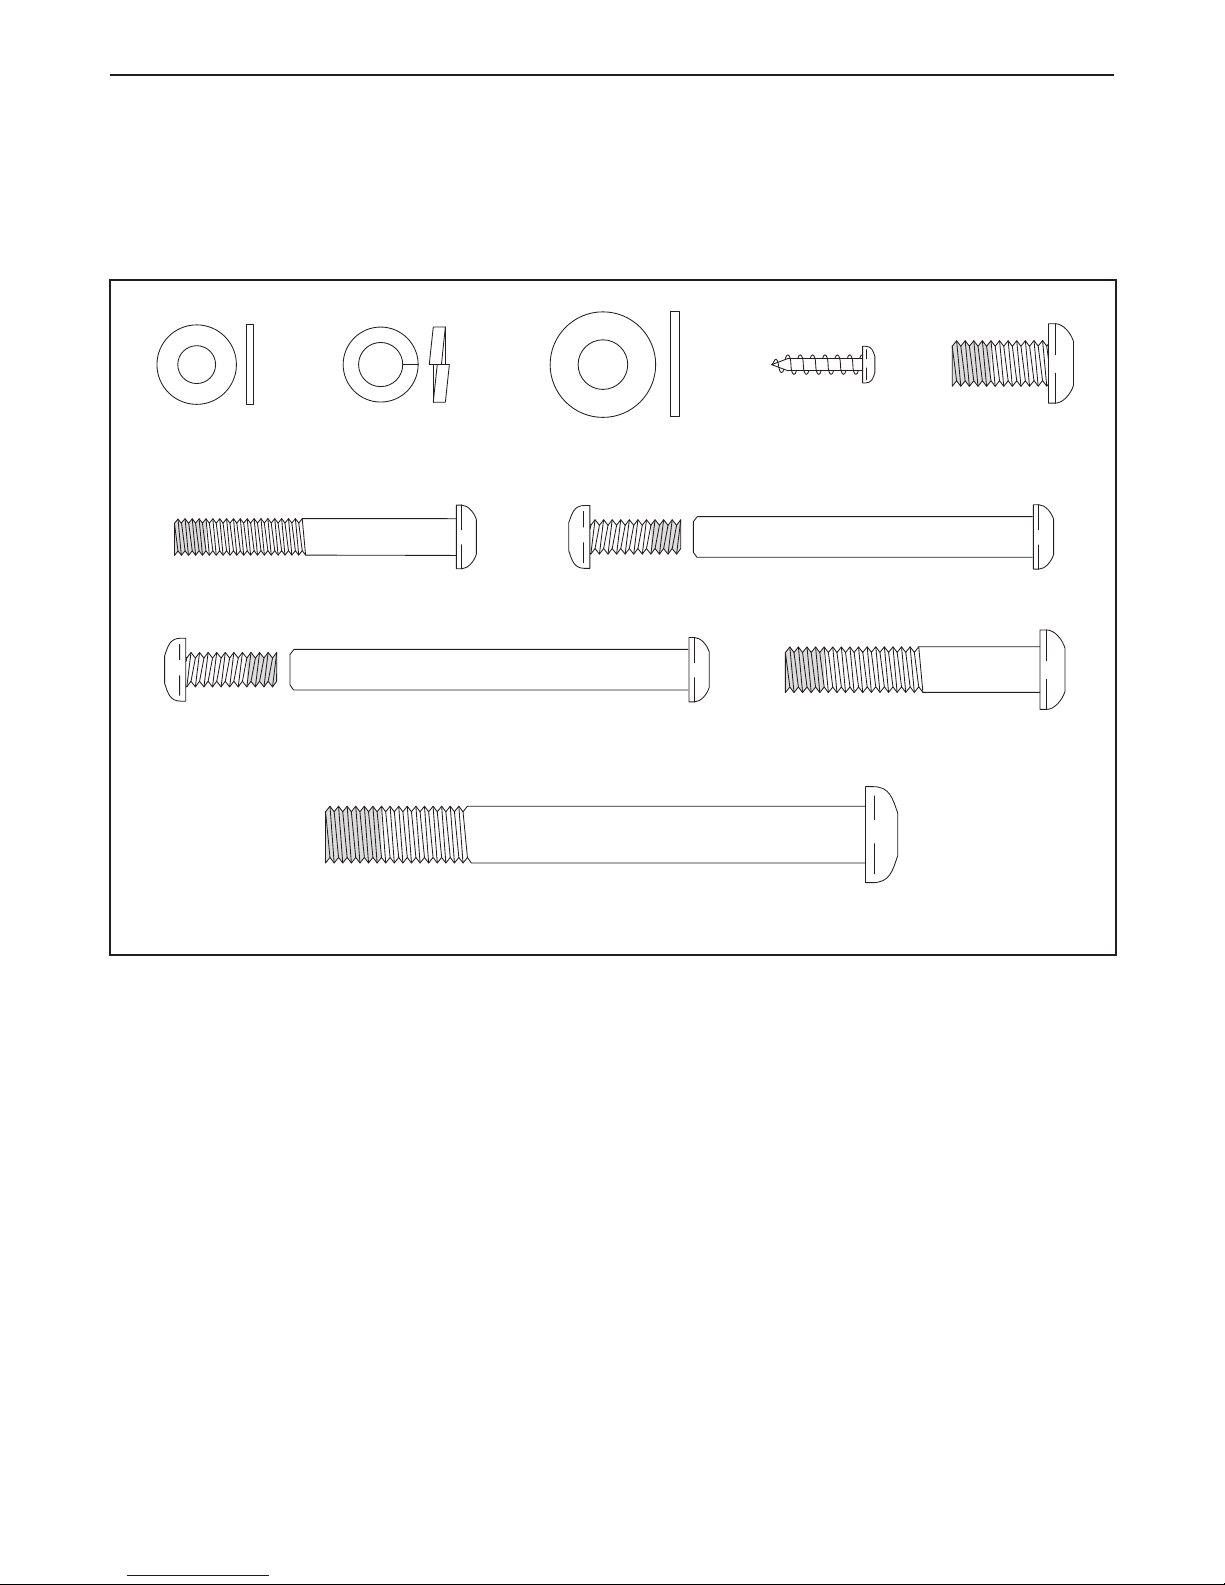
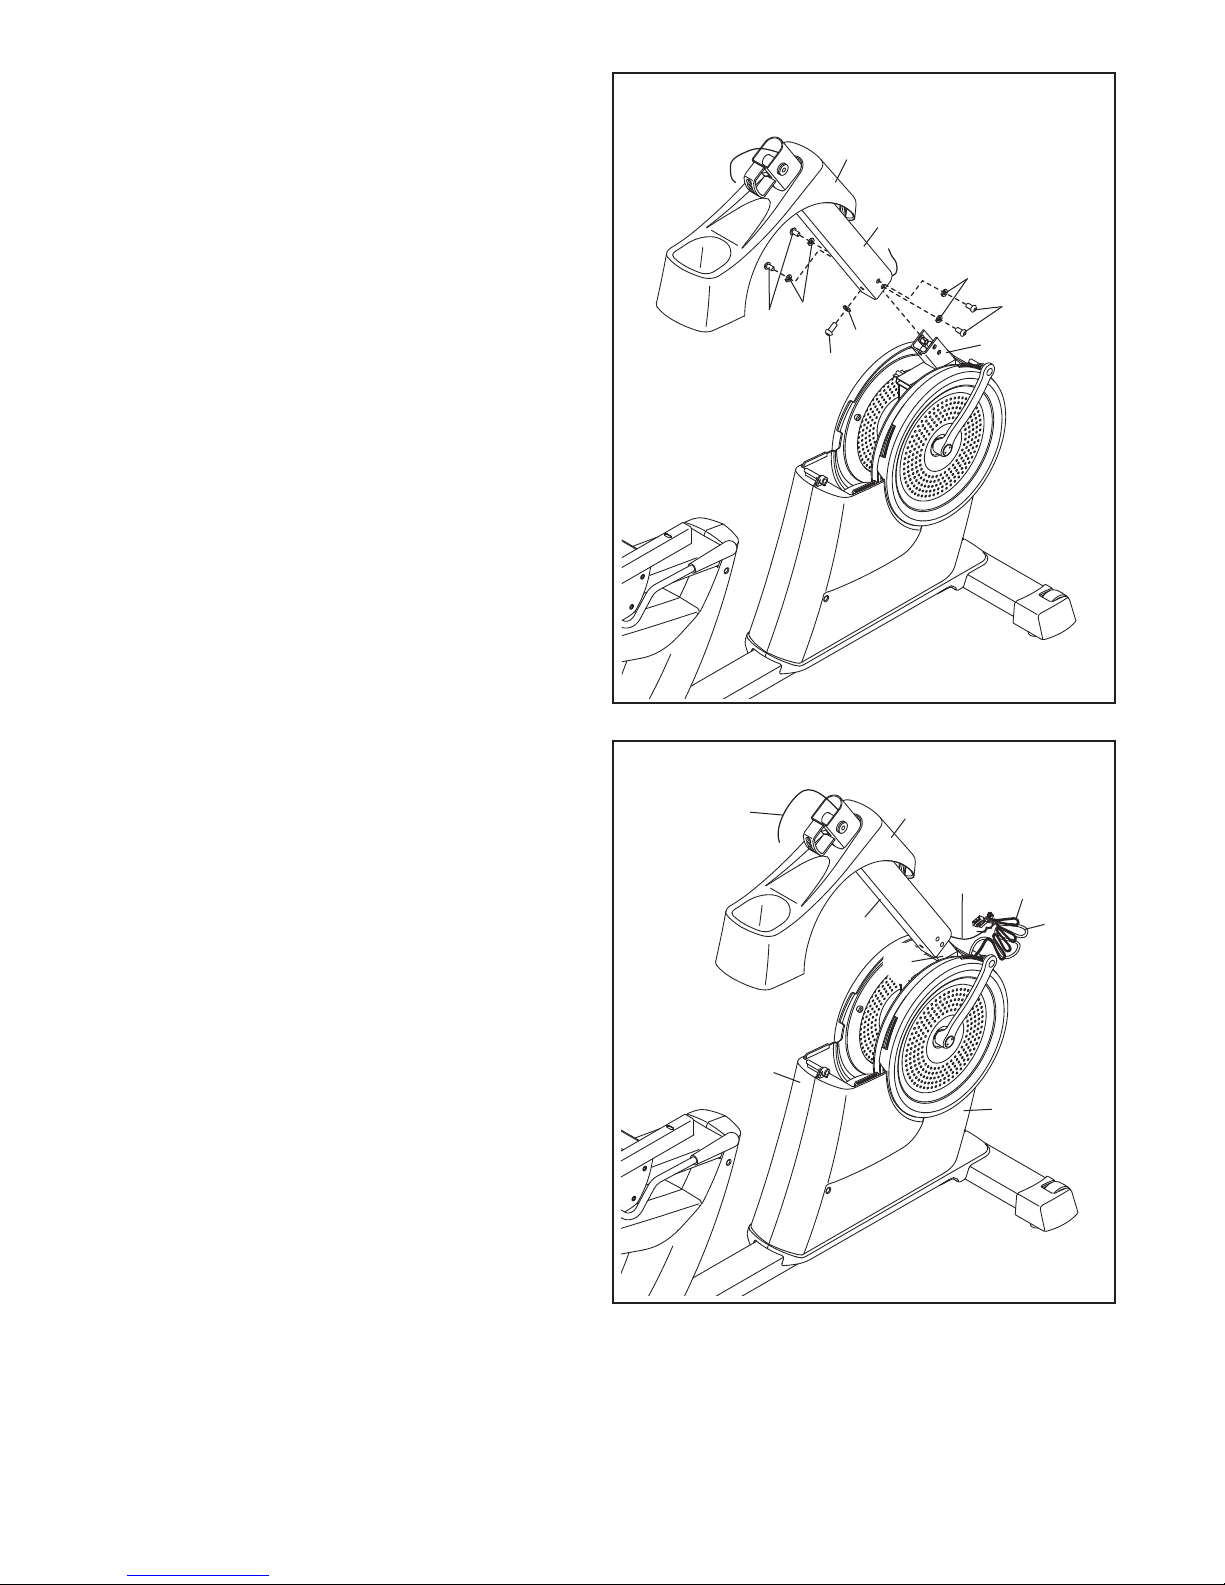
NordicTrack Gxr4.1 Bike User manual
Other NordicTrack Exercise Bike manuals

NordicTrack
NordicTrack Gx 3.0 Gw Bike Reference guide

NordicTrack
NordicTrack Sl850 Bike Operating and maintenance manual

NordicTrack
NordicTrack NTEX71017.2 User manual

NordicTrack
NordicTrack C7 Zl Bike Setup guide

NordicTrack
NordicTrack NTEX4196.2 User manual

NordicTrack
NordicTrack Gxr 4.2 Bike User manual

NordicTrack
NordicTrack NTCCEX04900 User manual

NordicTrack
NordicTrack NTCCEX04901 User manual

NordicTrack
NordicTrack Gx 3.0 Gw Bike User manual

NordicTrack
NordicTrack E125 Bench User manual

NordicTrack
NordicTrack E200 Bench Setup guide

NordicTrack
NordicTrack Gx 3.0 Gw Bike User manual

NordicTrack
NordicTrack SL 700 NTC59021 User manual

NordicTrack
NordicTrack Gx4.1 Bike null

NordicTrack
NordicTrack NTEVEX79913.0 User manual

NordicTrack
NordicTrack Gx 3.0 Gw Bike User manual

NordicTrack
NordicTrack Gx5.1 Bike Specification sheet

NordicTrack
NordicTrack NTC07940 User manual

NordicTrack
NordicTrack Gxr4.1 Bike User guide

NordicTrack
NordicTrack C3 Si Bike User manual


 Service manual")