manuals.online logo
Brands
  1. Home
  2. •
  3. Brands
  4. •
  5. Nordson
  6. •
  7. Controllers
  8. •
  9. Nordson Spectra 30 HMI User manual

Nordson Spectra 30 HMI User manual

Other Nordson Controllers manuals

Nordson 7197PCP-DIN User manual

Nordson

Nordson 7197PCP-DIN User manual

Nordson 765104 User manual

Nordson

Nordson 765104 User manual

Nordson Vantage Reference guide

Nordson

Nordson Vantage Reference guide
Nordson Rhino XD3 User manual

Nordson

Nordson Rhino XD3 User manual

Nordson iTrax Reference guide

Nordson

Nordson iTrax Reference guide

Nordson Smart-Coat 107 000A User manual

Nordson

Nordson Smart-Coat 107 000A User manual

Nordson Pro-Flo Parts list manual

Nordson

Nordson Pro-Flo Parts list manual

Nordson ValveMate 7100 User manual

Nordson

Nordson ValveMate 7100 User manual

Nordson 1006453A Reference guide

Nordson

Nordson 1006453A Reference guide

Nordson CoolWave 2 User manual

Nordson

Nordson CoolWave 2 User manual

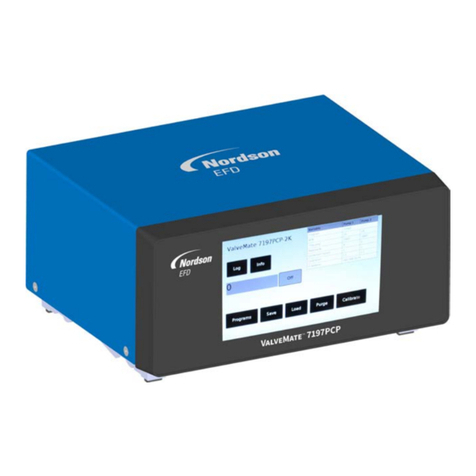
Nordson ValveMate 7197PCP-2K User manual

Nordson

Nordson ValveMate 7197PCP-2K User manual

Nordson CoolWave 2 User manual

Nordson

Nordson CoolWave 2 User manual

Nordson ValveMate 8000 User manual

Nordson

Nordson ValveMate 8000 User manual

Nordson ValveMate 7197PCP-2K User manual

Nordson

Nordson ValveMate 7197PCP-2K User manual

Nordson ValveMate 8000 User manual

Nordson

Nordson ValveMate 8000 User manual

Nordson Encore Guide

Nordson

Nordson Encore Guide

Nordson Encore Reference guide

Nordson

Nordson Encore Reference guide

Nordson IPS10A User manual

Nordson

Nordson IPS10A User manual

Nordson Gun Controller User manual

Nordson

Nordson Gun Controller User manual

Nordson Encore Enhance Reference guide

Nordson

Nordson Encore Enhance Reference guide

Nordson PCI User manual

Nordson

Nordson PCI User manual

Nordson Spectra 30 User manual

Nordson

Nordson Spectra 30 User manual

Nordson Sure Coat Parts list manual

Nordson

Nordson Sure Coat Parts list manual
Nordson Encore Parts list manual

Nordson

Nordson Encore Parts list manual
Popular Controllers manuals by other brands

Sunricher SR-ZV9003T3-RGBW-US Installation

Sunricher

Sunricher SR-ZV9003T3-RGBW-US Installation

Ksenia intro Installation and configuration manual

Ksenia

Ksenia intro Installation and configuration manual

Inovance CAN200 Series manual

Inovance

Inovance CAN200 Series manual

Gauzy LC6 FLEX Controller Installation and operation guide

Gauzy

Gauzy LC6 FLEX Controller Installation and operation guide

Viking SLP-1 Technical practice

Viking

Viking SLP-1 Technical practice

CKD KBX-30E-U Series instruction manual

CKD

CKD KBX-30E-U Series instruction manual

Sharp Energy Sun Flux User manual & installation guide

Sharp Energy

Sharp Energy Sun Flux User manual & installation guide

Yamaha RCX40 user manual

Yamaha

Yamaha RCX40 user manual

AB Quality PowerFlex 400 Frames D-H Service bulletin

AB Quality

AB Quality PowerFlex 400 Frames D-H Service bulletin

Yamaha MJC8 owner's manual

Yamaha

Yamaha MJC8 owner's manual

AL-KO ATC operating instructions

AL-KO

AL-KO ATC operating instructions

Savant SmartControl 2 Deployment guide

Savant

Savant SmartControl 2 Deployment guide

GameSir T3S user manual

GameSir

GameSir T3S user manual

Kostal inveor operating manual

Kostal

Kostal inveor operating manual

Emerson Yarway 20-55 Operating and safety instructions

Emerson

Emerson Yarway 20-55 Operating and safety instructions

CoCo ACM-LV24 Quick installation guide

CoCo

CoCo ACM-LV24 Quick installation guide

Brooks SLA5810/20 Installation and operation manual

Brooks

Brooks SLA5810/20 Installation and operation manual

SIGMA TEK SR 011 Technical manual

SIGMA TEK

SIGMA TEK SR 011 Technical manual

manuals.online logo
manuals.online logoBrands
  • About & Mission
  • Contact us
  • Privacy Policy
  • Terms and Conditions

Copyright 2025 Manuals.Online. All Rights Reserved.

Instruction Sheet P/N 1123825 10/2014
Spectra 30 HMI Kit - P/N 1123817
This instruction sheet describes how to replace the touch screen panel in
the Spectra 30 pattern controller.
WARNING: Risk of personal injury or equipment damage! Refer to
the safety information provided in the melter manual before servicing
the melter. Failure to comply with the safety information provided can
result in personal injury, including death.
Required Tools:
4mmhexkey
Large flat screwdriver
Touch Screen Panel
Replacing the Touch Screen Panel
Continue
1. Turn off the pattern controller switch and disconnect the
input power supply.
2. Unfasten the four captive screws (see ain
Figure 1) to remove the pattern controller front cover.
Allow only personnel with appropriate training and experience to
operateorservicetheequipment.Theuseofuntrainedor
inexperienced personnel to operate or service the equipment can
result in injury, including death, to themselves and others, and
damage to the equipment.
Warning:
ab
Figure 1
a: Four captive screws
Figure 2
a
3. Remove the display ribbon cable (see cin Figure 2)
by lifting up the cable connector lock tabs and carefully
pulling it out.
4. Unfasten the two captive screws that hold the
touch screen panel to the base panel (see din
Figure 2).
5. Unfasten the two screws (see ein Figure 2)
that hold the touch screen panel to the metal plate
holder.
c
d
a: Touch screen panel b: Standoffs
c: Ribbon cable d: Two captive screws
e: Screws
6. Remove the touch screen panel (see ain
Figure 2) by compressing the standoffs (see b
in Figure 2).
e
7. Disconnect the following cables:
Figure 3
a: USB cable b: Network cable c: Touch screen panel power connector
b
a
c
Replacing the Touch Screen Panel,contd.
1. Re-connect the following cables:
Figure 4
Re-installing the Touch Screen Panel
SUSB cable (see ain Figure 3)
Snetwork cable (see bFigure 3)
Stouch screen panel power connector (see cFigure 3)
SUSB cable (see ain Figure 3)
Snetwork cable (see bFigure 3)
Stouch screen panel power connector (see cFigure 3)
2. Install the new touch screen panel by pressing it back into
the standoffs (see bin Figure 2).
3. Re-fasten the two screws to securely hold the touch screen
panel to the metal plate holder (see ein Figure 2).
b
a
a: Two screws b: Touch screen panel
4. Re-connect the display ribbon cable (see cin Figure 2). Make
sure to lock the ribbon cable in place by pressing down the cable
connector.
Sground wire
Sground wire
5. Re-fasten the two captive screws to securely hold the
touch screen panel to the base panel (see din Figure 2).
6. Re-install the front cover by re-fastening four captive
screws (see ain step 2) in Replacing the Touch Screen
Panel.
7. Turn on the input power supply.