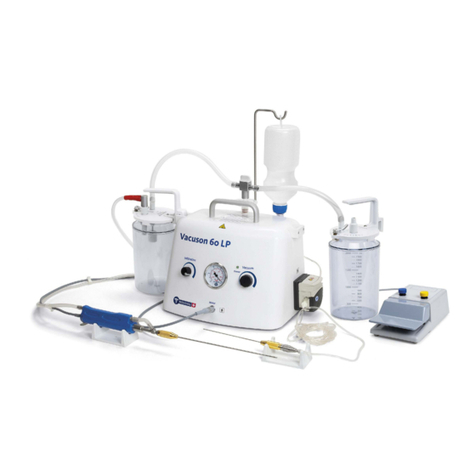
Vacuson 40/60
Operating Instructions, Vacuson 40/60, REF 31997, V35/17 17
EN
Automatic cleaning and
disinfection
Equipment: Washer-disinfector with a special load carrier that ensures the connection of tubes to the
washer-disinfector for rinsing. Use only neutral cleaning agents for this purpose.
1. Place silicone tubes in the load carrier.
2. Set a cleaning cycle that offers sufficient cleaning and rinsing. Perform the final rinse with fully
deionized water.
3. Perform a 10-minutes rince cycle at 93°C to facilitate thermal disinfection.
4. When removing, check silicone tubes, to verify whether soiling is still visible. If necessary, repeat
the cycle or clean manually.
Manual cleaning
Equipment: Neutral cleaning agent, soft brush, running, demineralized water (< 38°C)
Procedure:
1. Rinse off and brush away surface soiling from the silicone tubes.
2. Rinse silicone tubes thoroughly under running water.
Manual disinfection For manual disinfection, submerge silicone tubes in chlorinefree disinfection solution.
Drying Allow silicone tubes to dry sufficiently in a drying cabinet.
Inspection and mainte-
nance
Perform a visual inspection to check for damage, corrosion and wear.
Packaging Individual: Pack silicone tubes in individual packaging for sterile items.
Sets: Sort silicone tubes on trays intended for this purpose or place them on allpurpose sterilization
trays.
Sterilization Autoclave in vacuum autoclave at 135°C for at least 5 minutes. When sterilizing several items during
one sterilization cycle, do not exceed the maximum sterilizer load. A drying cycle must be added in
case of autoclaves without a post-vacuum function. Allow the silicone tubes to dry in the bag for at
least one hour at room temperature with the paper side facing upwards.
* Temperature exposure times are based on country-specific guidelines and standards.
Storage No special requirements. If sterilized silicone tubes are not used immediately after sterilization, the
material packaging must be labeled with the sterilization date. Including a sterility indicator is rec-
ommended.
The effectiveness of the sterilization instructions provided above for reprocessing this medical product has been validated by Nouvag AG. The user is responsible for
ensuring that the sterilization procedure performed achieves the required results. This requires validation and routine monitoring of the procedure. The staff member
who completes the procedure bears sole responsibility for any deviation on his part from the instructions provided. Deviations necessitate revalidation of the effec-
tiveness of the procedure as well as of the technical resilence of the reprocessed items with regard to the modified sterilization process.
• The tube set REF 6024 (optional) is delivered in sterile condition. It is determined for single use and may
not be resterilized!
• Contaminated tube sets have to be disposed of expertly!
8.6 Cannulas and cannula handlebar
The optional cannulas and the cannula hadlebare are in contact with the patient and therefore have to be
reprocessed adequately.
The reprocessing instructions are in the operation instructions, delivered together with the cannula and
handlebar.
8.7 Quiver
Clean quiver from debris and soiling. Use a clean, damp cloth and/or an appropriate brush with disinfection
agent.
1. Attention, it’s important to use a disinfection agent compatibel with polycarbonate.
2. Pack quiver in individual packaging for sterile items (siehe DIN 58953).
3. Autoclave wrapped quiver at 135°C for at least 5 minutes*.
4. A drying cycle must be added in case of autoclaves without a post-vacuum function. Allow quiver to dry in
the bag for at least one hour at room temperature with the paper side facing upwards.
If sterilized quiver is not used immediately after sterilization, the material packaging must be labeled with
the sterilization date. Including a sterility indicator is recommended.
* Temperature exposure times are based on country-specific guidelines and standards.


