OPERATION MANUAL
STALLION 12 SC CARPET EXTRACTOR
SAVE THESE INSTRUCTIONS
ALL REPAIR SERVICE MUST BE PERFORMED
BY AN NSS AUTHORIZED DISTRIBUTOR /
ERVICE STATION USING ONLY NSS ORIGINAL EQUIPMENT PARTS.
ICE STATION USING ONLY NSS ORIGINAL EQUIPMENT PARTS.
S
IMPORTANT SAFETY INSTRUCTIONSIMPORTANT SAFETY INSTRUCTIONS
Read all instructions before using or servicing machine.Read all instructions before using or servicing machine.
WARNING: Shock or electrocution hazard.WARNING: Shock or electrocution hazard.
ALWAYS unplug machine before
performing any maintenance or service.
ALWAYS unplug machine before
performing any maintenance or service.
WARNING: Shock or electrocution hazard.WARNING: Shock or electrocution hazard.
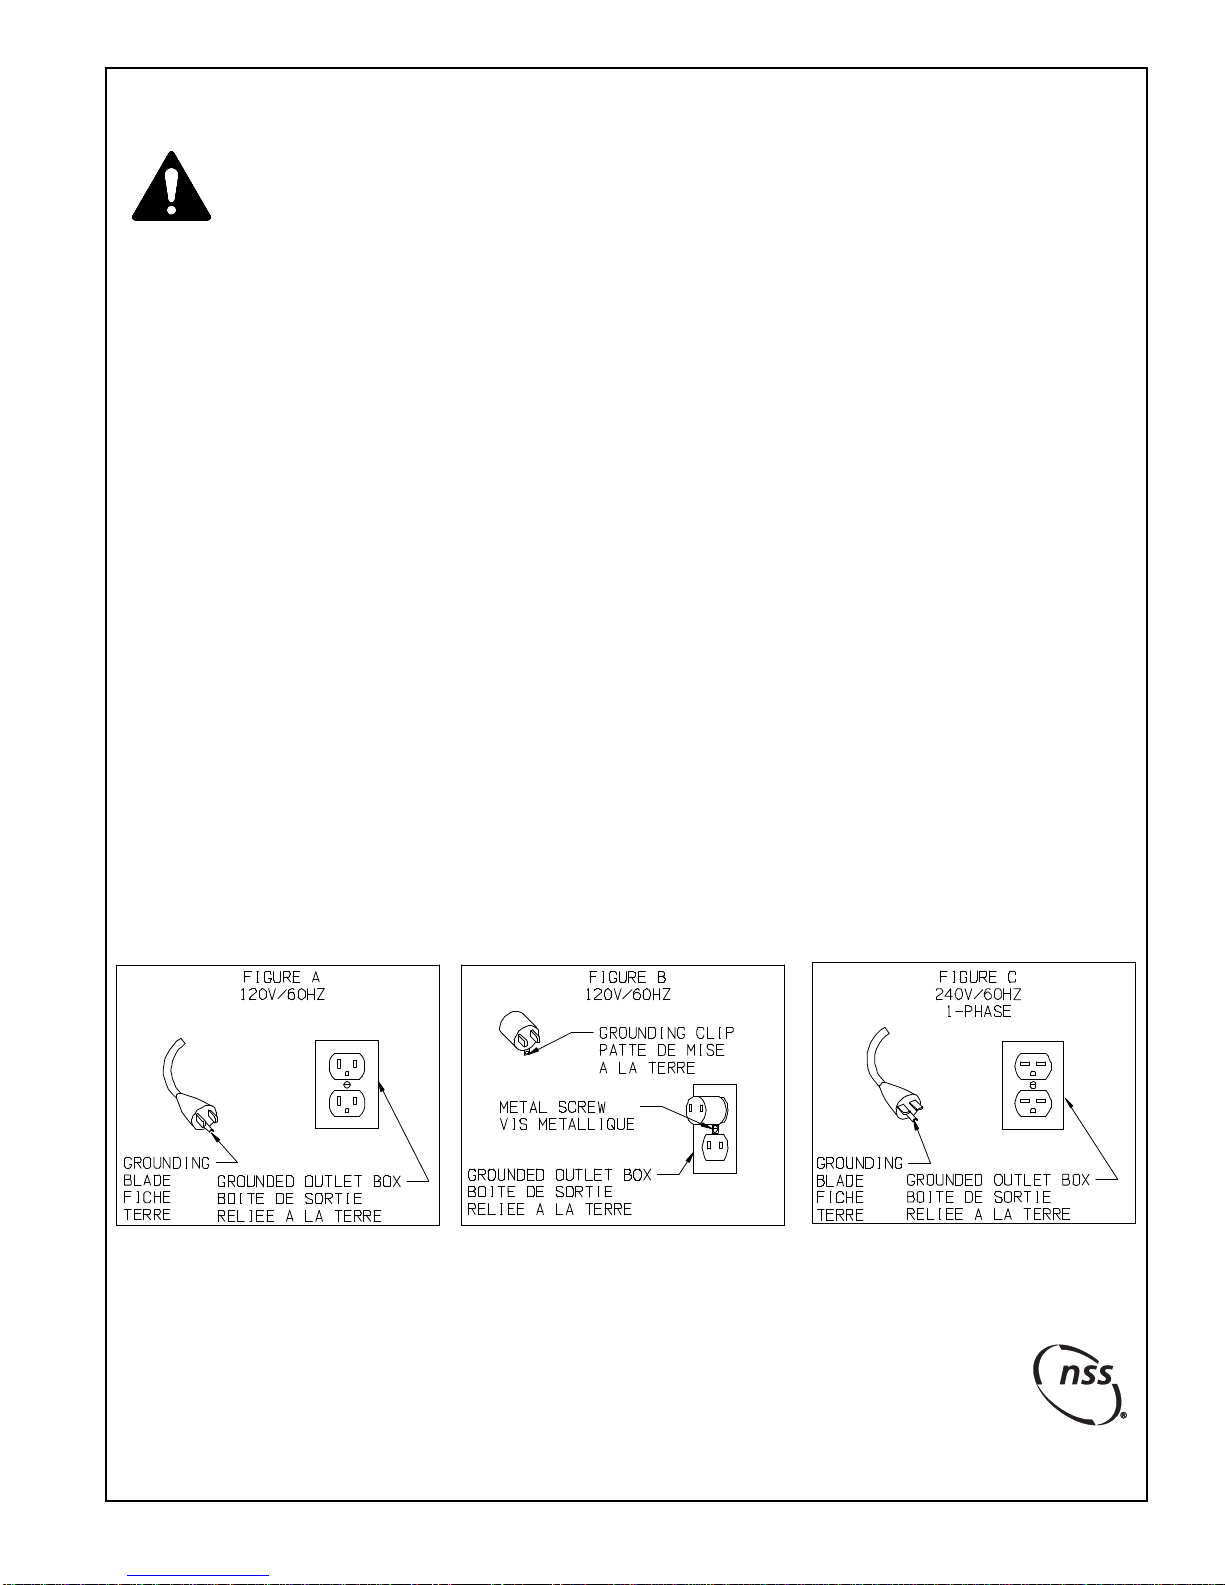
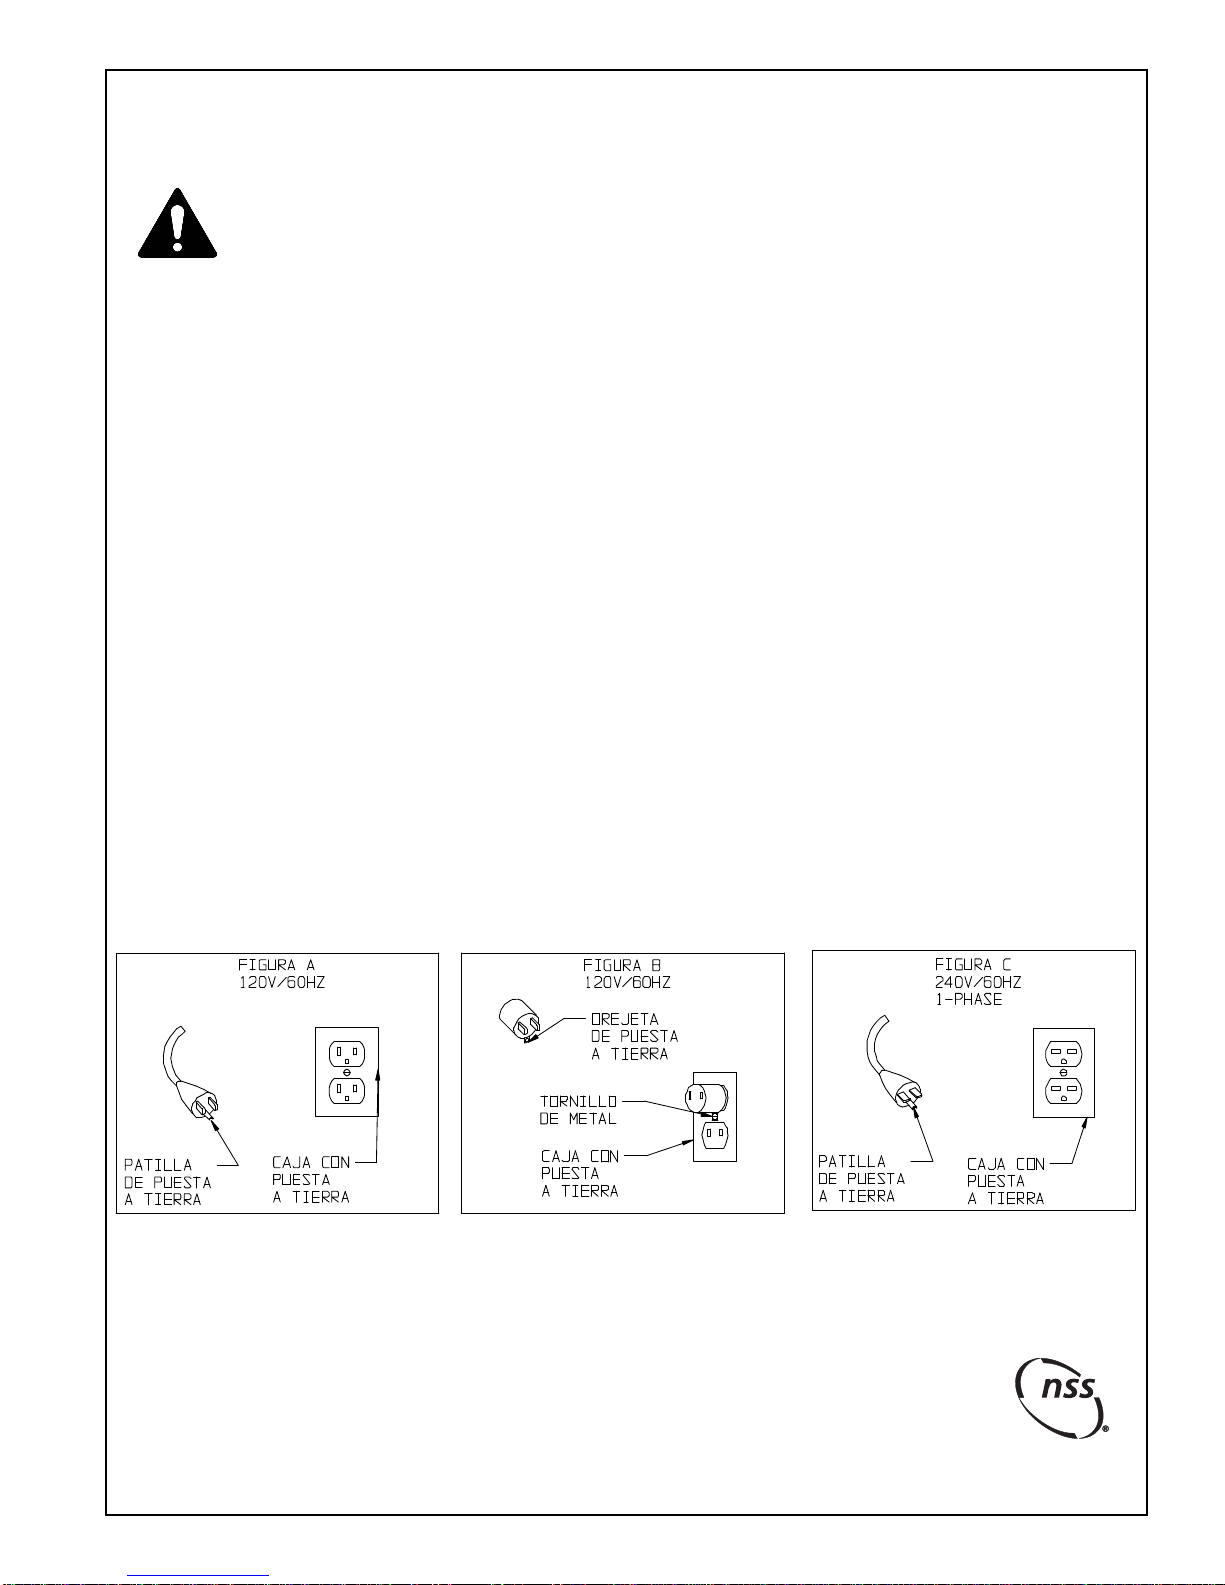
NEVER connect this machine to an
electrical outlet that is not properly
grounded. See grounding instructions.
NEVER connect this machine to an
electrical outlet that is not properly
grounded. See grounding instructions.
WARNING: Fire or explosion hazard.
NEVER use to pick up flammable or
combustible liquids, or any thing that is
burning or smoking, such as cigarettes,
matches or hot ashes.
WARNING: Fire or explosion hazard.
NEVER use to pick up flammable or
combustible liquids, or any thing that is
burning or smoking, such as cigarettes,
matches or hot ashes.
NEVER operate this machine in an
explosive atmosphere (grain dust,
flammable liquids or fumes, etc…)
NEVER operate this machine in an
explosive atmosphere (grain dust,
flammable liquids or fumes, etc…)
WARNING:To reduce the risk of fire, electric shock, or injury:WARNING:To reduce the risk of fire, electric shock, or injury:
INTENDED USEINTENDED USE
The Stallion 12 SC Carpet Extractor is intended for
commercial use, cleaning and extracting floors, furniture,
draperies and automobile interiors in an indoor
environment. This machine is intended for Wet pickup
only. NSS does not recommend using these machines
for any other purpose.
The Stallion 12 SC Carpet Extractor is intended for
commercial use, cleaning and extracting floors, furniture,
draperies and automobile interiors in an indoor
environment. This machine is intended for Wet pickup
only. NSS does not recommend using these machines
for any other purpose.
When Using An Electrical Appliance, Basic
Precautions Should Always Be Followed,
Including The Following:
When Using An Electrical Appliance, Basic
Precautions Should Always Be Followed,
Including The Following:
•ALWAYS read and understand all instructions before
operating or servicing machine.
•ALWAYS read and understand all instructions before
operating or servicing machine.
•ALWAYS use this machine ONLY as described in this
manual.
•ALWAYS use this machine ONLY as described in this
manual.
•NEVER attempt to operate this machine unless you
have been trained in its operation.
•NEVER attempt to operate this machine unless you
have been trained in its operation.
•NEVER allow an untrained person to operate this
machine.
•NEVER allow an untrained person to operate this
machine.
•NEVER leave the machine plugged in to the electrical
outlet when not in use.
•NEVER leave the machine plugged in to the electrical
outlet when not in use.
•NEVER unplug the machine from an electrical outlet
until after the machine is turned off.
•NEVER unplug the machine from an electrical outlet
until after the machine is turned off.
•If appliance is not working as it should, has been
dropped, damaged, left outdoors, or dropped into
water, return it to a service center.
•If appliance is not working as it should, has been
dropped, damaged, left outdoors, or dropped into
water, return it to a service center.
•NEVER operate this machine in standing water.•NEVER operate this machine in standing water.
•NEVER disconnect or modify any switches or safety
devices.
•NEVER disconnect or modify any switches or safety
devices.
•NEVER operate this machine if the cord and / or plug
has been damaged, broken, cut, abraded or taped.
•NEVER operate this machine if the cord and / or plug
has been damaged, broken, cut, abraded or taped.
•ALWAYS replace the entire cord when the cord or
plug is damaged in any way.
•ALWAYS replace the entire cord when the cord or
plug is damaged in any way.
•NEVER handle the machine, cord, or plug with wet
hands.
•NEVER handle the machine, cord, or plug with wet
hands.
•NEVER drop or insert any object into any machine
opening.
•NEVER drop or insert any object into any machine
opening.
•NEVER operate this machine with any air opening
blocked. Keep all air openings free of dust, lint, hair,
etc.
•NEVER operate this machine with any air opening
blocked. Keep all air openings free of dust, lint, hair,
etc.
•NEVER pull or carry the machine by its electrical
supply cord, use the cord as a handle, close a door on
the cord, pull the cord around sharp edges or corners,
expose to heated surfaces, run machine over cord, or
set heavy or sharp objects on the cord.
•NEVER pull or carry the machine by its electrical
supply cord, use the cord as a handle, close a door on
the cord, pull the cord around sharp edges or corners,
expose to heated surfaces, run machine over cord, or
set heavy or sharp objects on the cord.
•NEVER unplug by pulling on the cord. To unplug the
cord from the outlet, grasp the plug, not the cord.
•NEVER unplug by pulling on the cord. To unplug the
cord from the outlet, grasp the plug, not the cord.
•NEVER allow this machine to be used as a toy. Close
attention is necessary when used by or near children.
•NEVER allow this machine to be used as a toy. Close
attention is necessary when used by or near children.
•ALWAYS keep face, fingers, hair or any other body
part or loose clothing away from any machine opening
or moving part.
•ALWAYS keep face, fingers, hair or any other body
part or loose clothing away from any machine opening
or moving part.
•ALWAYS use extreme care when cleaning on stairs
or when machine is placed on stairs.
•ALWAYS use extreme care when cleaning on stairs
or when machine is placed on stairs.
•NEVER operate the machine without the filters in
place.
•NEVER operate the machine without the filters in
place.
•ALWAYS place this machine on a firm flat surface.•ALWAYS place this machine on a firm flat surface.
•NEVER use any attachments other than the
manufacturers recommended attachments.
•NEVER use any attachments other than the
manufacturers recommended attachments.
•NEVER spray this machine with water or any liquids.•NEVER spray this machine with water or any liquids.
•NEVER operate this machine outdoors.•NEVER operate this machine outdoors.
•NEVER expose the machine to rain, snow, or extreme
temperatures.
•NEVER expose the machine to rain, snow, or extreme
temperatures.
•NEVER use this machine for dry vacuuming.•NEVER use this machine for dry vacuuming.
•ALWAYS store this machine indoors in a dry, cool
area.
•ALWAYS store this machine indoors in a dry, cool
area.
Stallion 12 SC O
eration Manual Ori
. 05-07 9094813