NSS champ 2929 rb User manual

OPERATION MANUAL
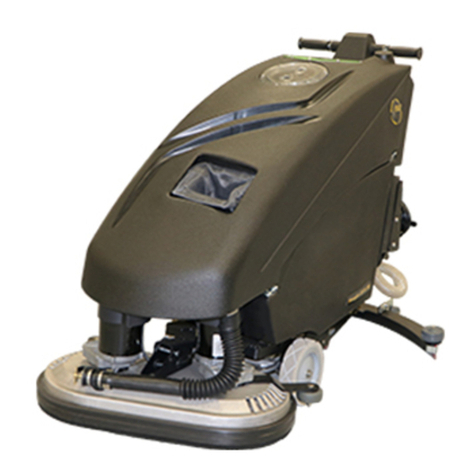
CHAMP 2929 RB Scrubber-Dryer

IMPORTANT SAFETY INSTRUCTIONS
SAVE THESE ORIGINAL INSTRUCTIONS (EN)
WARNING Read these original instructions prior
to initial use of the machine.
This appliance has been approved for normal cleaning
use on surfaces with gradients up to 2%.
Maximum transport climbing grade 13%, do not
park on slopes greater than 2%.
Safety Equipment
This appliance is equipped with devices to protect the user,
and must not be rendered inoperable or bypassed.
Emergency Stop Button
To halt all functions immediately, press the emergency stop
button.
•The machine will come to a sudden halt.
•All functions will stop.
•Twist the emergency stop button to return it to normal
operation.
Operator Presence Device
•Disables drive functions if the user is not seated on the
machines seat.
INTENDED USE
This machine is intended for indoor COMMERCIAL USE, for
example in hotels, schools, hospitals, factories, shops, offices
and rental businesses. NSS does not recommend using these
machines for any other purpose.
GENERAL DESCRIPTION OF MACHINE
Ride on floor scrubber-dryer with traction drive.
Symbols used in these instructions
Operation Manual
DANGER – Immediate danger that can cause severe
injury or even death.
WARNING – Possible hazard that could lead to severe
injury or event death.
CAUTION – Possible hazard that could lead to mild injury
or damage to property.
Read the Operator Manual.
No smoking, open flames, or sparks near batteries.
Batteries - acid and hydrogen gas.
Poison. Causes severe burns. Avoid contact.
Recycle packaging.
Dispose of equipment through suitable collection
systems.
IMPORTANT SAFETY INSTRUCTIONS
ALL REPAIR SERVICE MUST BE PERFORMED BY AN NSS
AUTHORIZED DISTRIBUTOR / SERVICE STATION USING
ONLY NSS ORIGINAL EQUIPMENT PARTS.
This machine is not intended for use by persons (including
children) with reduced physical, sensory or mental
capabilities, or lack of experience and knowledge.
Children should be supervised to ensure that they do not
play with the appliance.
Machines left unattended shall be secured against
unintentional movement – switch off and remove the key.
Remove the key to prevent unauthorized use.
WARNING Operators shall be adequately instructed on the
use of this machine.
WARNING Disconnect the battery connector when
performing cleaning, maintenance, part replacements, or
repairs.
WARNING Do not use for cleaning purposes on surfaces
having a gradient exceeding that marked on the machine.
ALWAYS be sure that the ramp is secured to the vehicle
before attempting to load / unload.
ALWAYS use extreme caution when operating the machine
on a ramp or loading / unloading this machine into or out of
a truck / trailer. Use extreme caution if the ramp is wet, oily,
or covered with cleaning chemicals.
NEVER stop or turn the machine on a ramp or incline.
CAUTION Turn off key switch before changing
pads/brushes.
WARNING: This product contains a chemical known to the
state of California to cause cancer and birth defects or other
reproductive harm.
NEVER attempt to operate this machine if it is not working
properly or has been damaged in any manner.
NEVER disconnect or modify any switches or safety devices
(circuit breaker).
NEVER drop or insert any object into any machine opening.
NEVER operate this machine with any air opening blocked.
Keep all air openings free of dust, lint, hair, etc.
NEVER pick up anything that is burning or smoking, such as
cigarettes, matches or hot ashes.
NEVER spray this machine with water or any liquids.
NEVER allow the vacuum motor or battery charging plug to
get wet or a short may occur.
NEVER operate this machine when the battery charger is
plugged in.
NEVER operate this machine with the side skirt removed.
NEVER turn on machine unless sitting in the operator’s seat.
NEVER climb on machine when it is turned on.
NEVER use machine to transport passengers other than the
operator.
ALWAYS wear clean tennis shoes or “non-slip” shoes.
Leather soled shoes will be extremely slippery when wet.
ALWAYS keep face, fingers, hair or any other body part or
loose clothing away from any machine opening or moving
part (revolving brush, pad driver, or vacuum motor).
Use only OEM accessories and spare parts.
USAGE:
CAUTION This machine is for inside use only.
This machine is only to be used for the cleaning of hard
surfaces that are not sensitive to moisture or polishing
operations.
This machine is not suitable for cleaning frozen surfaces
(cold storage).
Do not operate this machine in water exceeding 3/8 in (1
cm) depth.
This machine is not intended for use in public traffic
routes/roads.
Do not use this machine on surfaces that are sensitive to
pressure.
WARNING: Fire or explosion hazard. Never operate this
machine in an explosive atmosphere (grain dust, flammable
liquids or fumes, etc.).

WARNING: Fire or explosion hazard. Never attempt to pick
up flammable or combustible materials or use such
materials in tanks.
Orange Oil (D-limonene) is not compatible with the plastics
used in NSS automatic scrubbers and the Sidekick
Chemical Metering System. Use of D-limonene may result
in damage to the machine.
WARNING Do not use flammable liqids.
Only use cleaning detergents free from solvents,
hydrochloric acid and hydroflouric acid.
Do not use high foaming detergents.
STORAGE:
CAUTION This machine shall be stored indoors only.
NEVER park or store the machine near a dock, on ramps,
near a furnace, boiler, open flame, or other high heat
source.
NEVER allow this machine to freeze.
NEVER expose the machine to rain, snow, or extreme
temperatures.
NEVER store any items on the machine.
Operating temperature range: 40°- 104°F (5° - 40°C)
Personal Protective Equipment:
o Follow safety instructions provided with the cleaning
detergents.
o Follow detergent manufacturer’s instructions regarding
Personal Protective Equippment.
BATTERIES SAFETY INFORMATION
WARNING Failure to observe these warnings can cause
personal injury to machine, operator, or bystanders.
WARNING Batteries emit hydrogen, which can cause fire or
explosion.
NEVER smoke, light a match, or cause a spark during
operation or charging.
ALWAYS charge in a well-ventilated area away from open
flame.
ALWAYS read and understand all instructions before
installing or charging batteries.
NEVER attempt to install or charge batteries unless you
have been trained to do so.
NEVER allow an untrained person to install or charge
batteries.
ALWAYS wear eye protection and protective clothing to
avoid contact with battery acid.
ALWAYS remove all jewelry when working on or near the
batteries.
ALWAYS turn off all switches during installation and
service.
ALWAYS disconnect the battery leads before performing
any service or repair.
NEVER Lay anything on top of batteries as arcing may
occur.
IF CONTACT WITH BATTERY ACID OCCURS, follow
these instructions:
SKIN – rinse area with water.
EYES – Flush with water for 15 minutes.
INTERNAL – Drink water or milk. Follow with Milk of
Magnesia, beaten egg or vegetable oil. Call a physician
immediately.
BATTERY INSTALLATION
ALWAYS use two people to install, as batteries are heavy.
ALWAYS turn off all machine switches.
ALWAYS position batteries as shown on the machine
installation decal to maintain machine balance.
ALWAYS connect batteries as shown on the machine
installation decal to avoid shorting out the batteries and the
electrical system.
BATTERY CHARGING SAFETY
ALWAYS read instructions carefully.
ALWAYS use the NSS supplied charger with proper voltage
rating.
ALWAYS plug the charger into an earthed socket outlet.
NEVER charge a frozen battery.
NEVER touch uninsulated portion of output connector or
uninsulated battery terminal.
ALWAYS disconnect the AC supply before making or
breaking the connections to the battery while charging.
NEVER operate charger if the AC supply cord is damaged
or if the charger has received a sharp blow, been dropped,
or otherwise damaged in any way.
For Flooded lead acid batteries only, (does not apply
sealed maintenance free batteries).
ALWAYS check to ensure the battery water level covers
the battery plates before charging.
ALWAYS check water level after charging and add distilled
water if necessary to bring level to the bottom of the fill
hole.
NEVER
overfill batteries as battery
and machine damage may result.
ALWAYS wipe any acid from the top
of batteries using a soap solution.
ALWAYS study battery manufacturers’ specific precautions
such as recommended rates of charge.
ALWAYS reattach caps to batteries. Do not charge with
caps loose or removed.
ADD only distilled water.
GROUNDING OF ELECTRICAL EQUIPMENT
BATTERY CHARGER
WARNING: Improper connection of the equipment–
grounding conductor can result in a risk of electric shock.
Check with a qualified electrician or service person if you are in
doubt as to whether the outlet is properly grounded. Do not
modify the plug provided with the charger. If outlet is not
suitable for safe use; have a properly grounded outlet installed
by a qualified electrician.
Always use a properly grounded 3-wire extension cord, which
has male and female plugs. If 25 foot [7.6m] extension cords
are used, the electrical carrying capacity should be no less
than 14-3 ST., 50 foot [15.2m] extension cords no less than
12-3 ST
GROUNDING INSTRUCTIONS
This charger shall be grounded while in use to protect the
operator from electric shock. The charger is provided with a
three-conductor cord and a three-contact grounding type
attachment plug. The plug must be plugged into an
appropriate outlet that is properly installed and grounded in
accordance with all local codes and ordinances. The green
conductor in the cord is the ground wire. Never connect this
wire to other than the grounding pin of the attachment plug.
Check nameplate on the charger to be sure voltage and cycle
stated is the same as the electrical outlet. Do not attempt to
plug a 120-volt charger into a 240-volt outlet or a 240-volt
charger into a 120-volt outlet. If the cord provided with the
charger has an attachment plug as shown in Figure A. below, it
is intended for use on a nominal 120-volt circuit. If a properly
grounded receptacle as shown in Figure A is not available, an
adapter may be installed as shown in Figure B if the outlet box
that houses the receptacle is grounded. Be sure to fasten the

grounding tab (the green colored rigid ear, lug or the like
extending from the adapter) with a metal faceplate screw.
If the cord provided with the charger has an attachment plug
as shown in Figure C, it is intended for use on a nominal 240-
volt circuit (single phase only). Changes to the attachment
plug or use of adaptors to other plug types must be done in
accordance with local regulations.
Figure A.
Figure B
NOTE: In Canada, the use of a temporary adaptor may not be
permitted by Canadian electrical code.
Scrapping
Contact a qualified scrapping service provider to dispose of the
machine.
Ensure the following materials are scrapped according to the
Laws in force:
Batteries
Plastic containing components
Electrical and electronic components
MARKINGS
California
Prop 65 Warning.
Battery Connections.
Clean Water Strainer.
Warning-Configure battery
charger when replacing batteries.
Warning-Do not use flammable or combustible
liquids. Do not use in any explosive atmosphere.
Fuse rating 2 amperes.
Main Circuit Breaker
Scrub Deck Actuator Circuit Breaker
Squeegee Actuator Circuit Breaker
Horn
Clean Water/Solution Flow Control
Read the Operator Manual

MACHINE INSPECTION
Now that the machine is unpacked remember to recycle
all packing materials.
Inspect the machine for damage or missing
components. If damage is found, contact the local freight
company to file a freight claim.
Inspect squeegee assembly for concealed damage.
MACHINE COMPONENTS
CONTROL PANEL
The operator control panel is located to the left of the
operator’s seat. This panel has components that control
various machine functions.
See diagram below.
1 Key Switch - key must be turned to the right to activate
machine.
2 Brush Switch - 3 positions, 3 functions:
Up is on, lowering brushes to light pressure.
Middle is off, raising brushes.
Down is on, lowering brushes to heavy
pressure.
Brushes only come on when machine is moving in
forward or reverse.
3 Traction Speed Switch - 2 Positions:
Down is high speed.
Up is low speed.
4 Emergency Stop Button
Push for off.
Turn for on.
5 Vacuum Switch - 2 positions; 2 functions:
Up is on, lowering squeegee.
Down is off, raising squeegee.
Squeegee automatically rises in reverse.
6 LCD Push Button - Toggles between display
screens. Defaults to screen 1 when turned on
LCD Display Screen - brightly lit to work in all lighting
situations.
Sidekick Chemical Metering System (optional)
Controls for chemical dispensing are located on the
Pump Control Panel.
THE DISPLAY SCREENS
There are many symbols that can be displayed on the LCD.
Therefore, the LCD Push Button can be used to toggle
between pre-defined screens (see Control Panel for
Details).
1
2
3
4
5
6

MACHINE OPERATION
General Information
The CHAMP 2929 is very maneuverable and is designed to
clean as you drive the machine. Follow these steps to prepare
the machine for daily operation.
Always sweep or dust mop the floor of debris before
scrubbing. You may also need to preclean some types of
spills or stains before scrubbing.
Plan your work so that you make long, straight paths with the
fewest number of turns as possible.
Remove as many obstacles as possible from the area to be
cleaned.
Place “Wet Floor” warning signs in area being cleaned.
Consult your local NSS distributor for more complete
procedures and chemical advice.
Preparing the Machine for use
Prepare the Solution Tank:
Never use water over 140° F (60° C).
Pour all liquids through the mesh filter at the left side of the
solution tank.
Fill with clean water, up to 29 gallons [110 L].
Add the cleaning chemicals to the solution tank.
Prepare the Recovery Tank:
Always use a defoamer to protect the vacuum motor of this
machine. We recommend that you add at least 4 to 6
ounces [120mL to 175mL] of defoamer chemical.
Vacuum the defoamer into the recovery tank through the vac
hose.
Make sure that the drain plug of the recovery tank hose is
closed tightly.
Install a Pad Driver and Pad:
There is a wide range of pads or brushes available for the
many cleaning applications of this machine. See the
“Accessories” page in the Parts List manual.
Pull pin and open skirt.
Turn the pad driver upside down on the floor and remove the
pad holding cup.
Remove the center cutout of the 15” [38cm] pad and place
the pad on the face of the pad driver.
The pad must be centered on the driver to prevent wobbling
or bouncing.
Install and secure the pad holding cup to the pad driver.
Turn the pad driver over so that the pad faces the floor.
Raise the brush motor into the transport position (center
position of switch).
Align the lugs of the pad driver with notches of the drive
casting.
Turn the pad driver to lock onto the drive casting.
Close the locking latch.
Close the skirt.
Repeat for the other side.
Install a Brush:
Pull pin and open skirt.
Raise the brush motor into the transport position.
Align the lugs of the brush with the notches of the drive
casting.
Turn the brush to lock onto the drive casting.
Close the locking latch.
Close the skirt.
Install the Squeegee Assembly:
Loosen the two mounting knobs and slide the squeegee
assembly onto the mounting plate.
Hand-tighten the mounting knobs. Do not use pliers to
tighten the knobs, as this will defeat the“breakaway” design.
As the machine is used, the squeegee blades wear out, and
need to be replaced due to damage.
Squeegee blades should lie over (like a window squeegee)
whenever the machine is moving forward.
Do not add any weights or other pressure to the squeegee
mechanism; it will not improve the performance or service
life.
The squeegee rises automatically when the machine is in
reverse.
Squeegee springs add pressure to floor. There are 3
adjustments available by moving the end of the spring
closest to the frame from hole to hole. More pressure is
added the further away the hole is from the center point.
When changing the pressure always move both sides, using
the same distance (hole) on each side.
It is recommended that, with new blades, the rear wheels be
adjusted to their lowest position. Loosen the two screws on
the bracket rotate the bracket downward as far as it will go,
then tighten the screws. Perform this adjustment on both
wheels/brackets.
When the squeegee becomes worn, and the wiping edge no
longer contacts the floor properly, further use may be
possible by adjusting the rear wheels upward enough to
restore proper engagement of the blades wiping edge with
the floor. Be sure to adjust the wheels back down fully when
a new blade is installed.
NOTE: Remove squeegee, brushes or pad drivers, and
side skirts if transporting to different places or loading /
unloading into a truck or trailer.
Install the batteries:
Turn off all switches and tilt the battery compartment lid open
to expose battery compartment.
Batteries are heavy - use two people to install.
Refer to wiring diagram inside the battery compartment.
Align batteries in compartment as shown on diagram.
Install battery cables as shown on wiring diagram.
Tighten bolts and hex nuts with a wrench.
Caution: Do not touch two terminals with a wrench.
Loose or improper battery connections will cause battery or
machine damage and possible personal injury.
Charge the batteries before use!
Battery Charging
To recharge the batteries plug the charger cord, located at
the rear of the machine, into an electrical outlet
(100/115/230 50/60 HZ VAC).
CAUTION: Make sure the battery type LED on the
charger matches the type of battery installed in your
machine! EXCEPTION-CROWN AND TROJAN AGM’S
TO BE CHARGED WITH GEL SETTING.
When the cord is plugged into an outlet the machine will
become disabled.
See Battery Charger section for more details.
Prepare the Sidekick Chemical Metering System (if
equipped)
***CAUTION: Purging the Sidekick lines may dispense a
small amount of the chemical directly onto the floor.
If using wax stripper or harsh chemicals, purge the
lines in an area that cannot be damaged by the
chemical in use.

Place a container filled with the desired cleaning
chemical into the bottle holder located at the front of the
machine.
oThe bottle holder accepts F-style rectangular containers,
and some smaller round containers.
oEmpty F-style containers are available from NSS, order
part #9590171.
Ensure all hose fittings are tight, then insert the suction
tube into the chemical bottle, and tighten the cap.
Turn on the Scrubber then press the ON button on the
Sidekick. The ON indicator will illuminate.
Press and hold the PURGE button on the Sidekick until
you see the supply line to the pump filled with the
chemical.
Select the desired dilution ratio as recommended by the
chemical manufacturer.
The Sidekick is ready for use.
To Change Chemicals
Loosen the cap on the chemical bottle, and remove the
suction line from the chemical bottle.
Dispose or store any remaining chemical according to
local and federal regulations.
Place the suction line into a container of clean water.
With the machine over a floor drain, press and hold the
purge button until the clean water is drawn thru the pump
and dispensed at the brushes.
Remove the suction line from the container of clean
water. Replace the container of clean water with a
container of the desired chemical, and install the suction
line.
Press and hold the Purge button until chemical is seen
being drawn up to the pump, and pumping down the tube
from the pump to the tee fitting below the machine.
After each use, always flush the Sidekick lines with
clean water to prevent dried chemical from accumulating
in the lines.
MACHINE MAINTENANCE
Daily Maintenance
You must recharge the batteries when indicated by the
battery meter, and after every use. Read the battery
meter while the machine is in use.
*350 AH batteries normally require 14 ½ -16 1/2 hours to
fully charge.
NEVER let the batteries sit overnight after the machine
has been run for more than 1 hr since last recharge.
See Battery Charger section.
Battery Electrolyte (Liquid) Level (Flooded only)
Add only distilled water to the cell of a battery (Flooded only)
to adjust the liquid level. Do not use well or tap water.
Before charging, add only enough water to ensure the top of
the plates are covered. After charging, add only enough
water to bring the level to the bottom of the fill tube.
Do not overfill the battery liquid level, this will cause
electrolyte (acid) spill. Spilled electrolyte (acid) can cause
machine damage and personal injury. Clean up and dispose
of all spills immediately.
If machine is equipped with battery Auto-Fill system, fill
batteries prior to charging.
Empty and rinse clean the recovery tank.
Remove and rinse clean the squeegee assembly. ***NOTE:
prolonged exposure to some wax stripper brands may
degrade the squeegee material. Rinsing after use in a
wax floor stripping application is highly recommended.
Remove and rinse clean the pad driver and / or brush.
Inspect the machine components for wear or damage. Call
authorized service center for repairs.
Wipe machine down; NEVER spray this machine with water
or any liquids.
Inspect the squeeze tube in the Sidekick Chemical
Metering System for cracks or leaks.
Sidekick Chemical Metering System
Purge the lines with clean water after each use.
The squeeze tube under the see-through cover on top of
the pump requires periodic replacement approximately
every 500 hrs (depending on chemicals used).
To replace the squeeze tube:
1.Remove ferrule nuts from pump
2.Unscrew pump cover, exposing the squeeze tube.
3.Remove damaged squeeze tube and replace with new
squeeze tube.
4.A screwdriver can be inserted in the spinner hub and
rotated as the tube is being replaced to ease insertion.
It is important not to twist the tube as it is being
inserted and the fittings should be inserted “flat side
up”
5.Add grease from the included packet.
6.Re-install cover and resume normal operation
Weekly Maintenance (Every 20 Hours)
Verify that all daily maintenance has been performed.
Inspect the battery liquid level; using only distilled water,
adjust to the proper level as needed. (Flooded only)
NOTE: If optional auto fill system is installed, follow the
directions that come with this system.
Check all battery terminal and cable connections. Tighten
as deemed necessary.
Clean any corrosion from the battery terminals and cables.
Check the solution flow to the pad driver and / or brush.
Flush clean the solution tank and hose with a mixture of 8
oz. (250ml.) of white vinegar to 1 gallon (4 liter) of warm
water.
Inspect filters.
****CAUTION****
Inspect and replenish battery water in every cell in every
battery weekly. Failure to maintain proper electrolyte level in
every cell of every battery will cause premature failure, and
void the warranty.
Monthly Maintenance (Every 100 Hours)
Verify that all daily and weekly maintenance has been
performed.
Equalize your batteries (Flooded only). To equalize the
batteries, after they have been fully charged, unplug the
charger (from the wall outlet), and plug it back in. The
charger will skip thru the first few phases of the charge cycle,
and run thru the finish phase. This will balance out all the
cells in the batteries, and provide maximum battery life.
THIS STEP IS ESPECIALLY IMPORTANT IF YOU
PRACTICE OPPORTUNITY CHARGING (see page 9).
Clean filters by rinsing with cool, clear water. Dry
Completely.
After every 750 Hours of Operation:
Inspect the drive motor carbon brushes for wear. Replace
the brushes when they are 3/8 in. (9mm.) in length.

Inspect the brush drive motor carbon brushes for wear.
Replace the brushes when they are 1/2 in. (13mm.) in
length.
Inspect the vacuum motor carbon brushes for wear.
Replace the brushes when they are 7/16 in. (11mm.) in
length.
Battery Replacement Notes
Entire Pack.
It is always recommended to replace all batteries in the
pack at the same time.
One or more batteries out of the pack. This is not
recommended. Replacing just one or two batteries out of
the pack can lead to the following:
Overcharging the new, or the remaining original, batteries.
Undercharging the new, or remaining original, batteries.
Over discharging either the new or the remaining original
batteries.
If you wish to only replace some of the batteries in the pack,
follow these steps for best results:
Replacement batteries must always be of the same battery
manufacturer, model, and amp-hour rating as the
remaining batteries in the pack.
Never mix batteries from different manufacturers in the
same pack.
Fully charge both the new battery, and the remaining
original batteries. (specific gravity = 1.265 minimum, use a
hydrometer)
Use a replacement battery that is close to the same age as
the remaining original ones.
Do not run the machine as long for about 20 cycles. For
example, if you used to get 4 hrs runtime, only run it for 2.5
hrs, and then charge the batteries completely.
Opportunity charge whenever possible.
Equalize after 30 days. (Flooded only)
Battery Charger
The onboard battery charger supplied with this machine is
capable of charging lead acid batteries from 185 to 350ah
capacity. There is no need to change algorithms or settings
based on battery manufacturer, or battery size.
The charger can also be set to charge flooded (wet) cell,
AGM, or Gel batteries. LED’s on the charger indicate which
type of battery the charger is set to charge. One setting is
for Flooded and (most) AGM batteries, the other setting is
only for Crown and Trojan AGM and GEL batteries.
Depending on the battery charger model, the charger can
operate on 100/115/230 VAC 1ph 50/60 HZ power, and will
automatically detect these input voltages. Before
connecting the battery charger to power, check the label on
the battery charger to verify the proper input power.
Determining Your Battery Type
CAUTION: DIFFERENT BATTERY TYPES HAVE
DIFFERENT CHARGING REQUIREMENTS. FAILURE TO
PROPERLY IDENTIFY YOUR BATTERY TYPE AND SET
THE CHARGER ACCORDINGLY WILL RESULT IN
BATTERY DAMAGE, AND VOID THE WARRANTY.
Your machine may have been ordered with batteries
installed at the NSS factory. The standard battery type,
normally supplied by NSS, is the Flooded (wet) cell lead
acid battery. Gel and AGM sealed batteries may also be
available at customer request.
Flooded (wet) batteries can be easily identified by the
removable cell caps. Removing the caps allows inspection
of the liquid electrolyte (sulfuric acid) level in each cell.
AGM (Absorbed Glass Mat) batteries are sealed,
maintenance free batteries. The do not have cell caps
intended for removal. Look for “AGM” printed on the tops
or sides of the batteries.
Gel (gelled electrolyte) batteries are also sealed,
maintenance free batteries. The do not have cell caps
intended for removal. Look for “GEL” printed on the tops
or sides of the batteries.
Battery Charger Indicator LED’s
Your battery charger is equipped with LEDs that indicate
the following:
Battery Type Setting. Either of these two LEDs will be
illuminated, anytime the charger is plugged in, to signal
which type(s) of batteries the charger is configured to
charge. The two options available are:
oWet / AGM: When this LED is illuminated, the
charger is configured to charge either flooded (wet),
or AGM batteries.
oGel Cell. When this LED is illuminated, the charger is
configured to charge Gel batteries ONLY.
EXCEPTION: Crown and Trojan AGMs are to be
charged with the Gel setting.
State of Charge Indicators. Four additional LEDs provide
information about the charge level of the batteries during
charging.
o30%, 60%, 90% and 100%.
Fault Indications. During charging, the charger provides
feedback about the charge process and any problems
detected. It will provide feedback and signal the type of
problem by flashing LEDs as described below:

Changing the Battery Type Setting
The standard setting for the onboard battery charger is
Flooded/AGM. EXCEPTION: If your machine was
ordered from NSS equipped with Crown AGM or Gel
batteries, then the charger was configured for Gel
batteries at the factory.
Configuring the Charger for Gel batteries:
1.Remove the top cover.
2.
3.Pull the jumper off the 2-pin connector (position 1),
and then move the jumper to position 2 on only
one pin of the 2-pin connector. See photo below.
4.Reinstall the top cover.
Configure the Charger for Flooded/AGM batteries
1.Remove the top cover
2.Pull the jumper from the 2-pin connector, and install
the jumper at position 1 (on both pins of 2-pin
connector).
3.Reinstall the top cover.
Position 1
For Wet Cell
(Default)
(Jumper on
both pins)
Position 2
For Gel Cell
(Jumper on 1
Pin of 2-Pin
Connector)
Top cover
screws
Jumper
Location

Operating the Battery Charger
CAUTION: DIFFERENT BATTERY TYPES HAVE
DIFFERENT CHARGING REQUIREMENTS. FAILURE
TO PROPERLY IDENTIFY YOUR BATTERY TYPE
AND SET THE CHARGER ACCORDINGLY WILL
RESULT IN BATTERY DAMAGE, AND VOID THE
WARRANTY.
The battery charger is fully automatic. Simply plug the
charger into a suitable wall outlet, and the charger will
charge the batteries. The green 100% LED will be
continuously illuminated when the charge cycle is
complete.
A bubbling, or boiling sound coming from the batteries
during the last few hours of the charge is normal. The
batteries may be warm, but not too hot to touch.
Equalizing the batteries (Flooded only)
The batteries should be equalized once every 30 days
to ensure maximum battery life.
To equalize the batteries:
Plug in the charger, and fully charge the batteries
(until the green 100% LED is on continuously).
Unplug the charger from the wall outlet, then plug it
back in.
The charger will run for 2 hours, holding the batteries
at a constant voltage, and equalizing each cell.
Battery Do’s and Don’ts:
a. You do not have to fully discharge the batteries
before charging. They do not have a “memory”.
b. Plug the charger in anytime the machine is not in
use.
c. NEVER let the electrolyte level fall below the tops of
the plates (flooded cell batteries). This will damage
your batteries almost immediately, and void the
battery warrantee. It will be evident if this has
happened.
d. NEVER refill the batteries with well or tap water
(flooded cell batteries).
e. NEVER overfill the batteries (flooded cell batteries).
f. NEVER let the batteries sit discharged overnight (or
between shifts).
g. ALWAYS check the electrolyte level about every 3 or
4 charge/discharge cycles BEFORE CHARGING.
h. ALWAYS refill the batteries with distilled water (if
needed) AFTER CHARGING.
i. ALWAYS fully recharge the batteries after use (until
the green LED stays on).
j. ALWAYS equalize the batteries every 30 days
(Flooded only).
k. NEVER OVER DISCHARGE!
l. NEVER charge GEL batteries with the charger set to
FLOODED/AGM.
m. NEVER charge FLOODED/AGM batteries with the
charger set to GEL. EXCEPTION-CROWN AND
TROJAN AGM’S TO BE CHARGED WITH GEL
SETTING.
Opportunity Charging
Opportunity charging is charging the batteries when an
opportunity presents itself, such as during breaks, and is
done in addition to a full charge cycle.
Opportunity charging is recommended, as this extra
charging time will help raise the operating voltage of the
batteries, and will help ensure maximum cycle life.
NOTE: Crown and Trojan AGM batteries should be
charged with the GEL setting.
**The charger has been tested on batteries from the
following manufacturers:
Crown flooded cell
Trojan flooded cell
US Battery flooded cell
Deka flooded cell
Crown gel
Concord gel
Discover AGM
Notes on LED indications per DoE compliance:
When first connected to DC (AC not connected), the LEDs
will display one or more of the following:
The LEDs will flash the charger’s ID code (this is for PCS
internal use only). Once the LEDs flash the ID, they will
only display one yellow LED. This configuration will
remain until AC is detected and a charge cycle is in
progress.
There is also a possibility the LEDs will not flash their ID
code and only show a yellow LED.
Lastly, the LEDs may not flash their ID code and may not
show any LEDs until AC is detected.
If the AC line and neutral wires are reversed, the unit will
wait 2 minutes before starting a charge. NOTE: The 2-
minute wait period will also be a factor if the charger is
being powered by anything other than normal grid AC such
as a conventional generator, inverter, etc.
If the AC plug is disconnected during charge, the unit will
turn off as expected. The user may hear some clicking
noise, but should not be alarmed. This is the Powered by
Battery/DOE functionality checking for AC connection.
TABLE 1
Battery Types
NSS Part
Number
Crown
Part
Number
Battery Volts
System Volts
Amp Hour
Battery Type
Setting
4491061 1-1470 12 36 215 Flooded/AGM
3390361 1-1435 6 24 & 36 235 Flooded/AGM
2392111 1-1427 12 24 115 SPE CURVE 0
6393651 1-1428 12 24 130 SPE CURVE 0
2392731 1-12145 12 24 100 SPE CURVE 1
6491931 1-1437 6 24 & 36 200 Gel
2691501 1-1450 6 36 350 Flooded/AGM

How to read charging data from a battery charger
equipped with DeltaView® Link
DeltaView Link
DeltaView Link is a system that allows you to read data
from your battery charger using an app on your
smartphone. The battery charger transmits data to your
phone’s Bluetooth receiver.
These instructions apply to Dual Pro battery chargers
manufactured after 11/29/16. The manufacturing date is
located on the barcode tag attached to the pigtail cord
coming out of the charger. This battery charger is found
on Champ Rider Scrubbers, Wrangler 3330, Wrangler
2730, Wrangler 2625, some Wrangler 2016 models, and
Charger battery burnishers.
Instructions
Step 1. Download the Pro Charging Systems
“DeltaView Link” app
For Apple iPhones: Go to the app store and search for
“DeltaView Link” by Pro Charging Systems, LLC.
For Android Phones: Go to the play store and search
for “DeltaView Link” by Pro Charging Systems, LLC.
Step 2. Turn on your phone’s Bluetooth function. If
your Bluetooth is off, the app will turn it on for you when
it starts. Answer “yes” when prompted to turn on
Bluetooth.
Step 3. Locate the “DeltaView Link” icon on your phone
and press it to start the app.
Step 4. A list of all battery chargers that are connected
to AC power within range of your phone will appear.
Tap on a battery charger to select it.
Step 5. Follow the app prompts to read through the
data on your charger. You will find detailed information
about the last 100 charge cycles.

TRIO+: Scrubber S
y
stem Dia
g
nostic Codes
Scrubber System Faults External to TRIO+
Code Fault Description Corrective Action
0810 Throttle fault-1.0 For all Throttle Diagnostic Codes:
0811 Throttle max wiper difference error. 1- Check the throttle wiring for shorts or opens. Repair or replace as necessary.
0812 Throttle max pull down difference error. 2- If Diagnostic Code is not cleared, then replace throttle (Potentiometer).
0813 Throttle max pull safe difference error. " " " "
0814 Throttle reference error. " " " "
0815 Throttle lo reference error. " " " "
0816 Throttle hi reference iso error. " " " "
0817 Throttle lo reference iso error. " " " "
0818 Throttle error both have readings. " " " "
1310 Excessive current trip. High Voltage - Battery Voltage exceeds Controller Parameters.
1311 Soft aux 1 over current occurred. Brush Lift Actuator exceeded current limit.
Check limit switch settings, wiring, or replace.
1312 Soft aux 2 over current occurred. Squeegee Lift Actuator exceeded current limit.
Check limit switch settings, wiring, or replace.
1313 Soft aux 3 over current occurred. Solution Solenoid exceeded current limit. Check wiring, or replace.
1314 Soft aux 4 over current occurred. Overhead Light or Head Light exceeded current limit.
Check wiring (diodes), or replace device.
1318 Soft brake light over current occurred. Horn circuit exceeded current limit.
Check wiring (diodes) or replace device.
131C Soft alarm over current occurred. Beeper circuit exceeded current limit. Check wiring or replace device.
1321 Aux 1 over current 2 occurred. Brush Lift Actuator exceeded current limit.
Check limit switch settings, wiring, or replace.
1322 Aux 2 over current 2 occurred. Vac Lift Actuator exceeded current limit.
Check limit switch settings, wiring, or replace.
1411 Error aux 1 positive shorted - low. Check Brush Lift Actuator and wiring.
Repair or replace as necessary.
1412 Error aux 1 negative shorted - low. Check Brush Lift Actuator and wiring.
Repair or replace as necessary.
1413 Error aux 2 positive shorted - low. Check Squeegee Lift Actuator and wiring.
Repair or replace as necessary.
1414 Error aux 2 negative shorted - low. Check Squeegee Lift Actuator and wiring.
Repair or replace as necessary.
1501 Brake fault 2. Check Brake circuit wiring and brake.
Repair or replace as necessary.
1507 Brake over current error. Check Brake circuit wiring and brake.
Repair or replace as necessary.
1600 High battery error. Battery is overcharged or damaged. Replace battery.
1D02 Front-end spec change trip. Drive parameters have been reprogrammed.
Cycle power with key switch.
1E03 Inhibit activated. Fix whatever condition is causing Inhibit signal.
1E04 Inhibit activated 2. Fix whatever condition is causing Inhibit signal.
1E06 Inhibit input out of range. Invalid Inhibit signal. Check wiring and device.
Repair or replace as necessary.
2C00 Low battery error. Battery Charge too low. Recharge battery.
2C01 Low battery error 2. Battery Charge too low. Recharge battery.
2C02 Soft battery lockout occurred. Battery Charge too low. Recharge battery.
2C03 Soft battery lockout 2 occurred. Battery Charge too low. Recharge battery.
2F01 Tiller displaced error. Throttle displaced on Power-up. Release throttle and then
Re-engage throttle. Check Potentiometer settings (neutral).
3A00 Bad settings. Illegal program parameter settings.
7000 Startup with push selected. N/A
7001 Push activated in drive mode. N/A
7500 Tiller comms timeout. Problem with LCD Module or wiring. Check cable connection between controller and
LCD. Repair or replace as necessary.
7600 Soft brush motor disconnected error. Check Brush Motor wiring and connections.
7601 Soft brush current fold back. Check Brush Motor for excessive amp draw. Check for locked rotor conditions (debris
caught in brushes, gear box locked up, etc.). Repair or Replace as necessary.
7602 Soft brush current fold back 2. Check Brush Motor for excessive amp draw. Check for locked rotor conditions (debris
caught in brushes, gear box locked up, etc.). Repair or Replace as necessary.

7603 Soft brush current fold back 3. Check Brush Motor for excessive amp draw. Check for locked rotor conditions (debris
caught in brushes, gear box locked up, etc.). Repair or Replace as necessary.
7604 Soft brush inhibit. Check Brush Motor for excessive amp draw when starting.
Repair or Replace as necessary.
7605 Brush startup over current detection. Check Brush Motor for excessive amp draw. Check for locked rotor conditions (debris
caught in brushes, gear box locked up, etc.). Repair or Replace as necessary.
7700 Soft vacuum motor disconnected error Check Vac Motor wiring, connections and carbon brushes.
7701 Soft vacuum current fold back. Check Vac Motor for excessive amp draw.
Repair or Replace as necessary.
7702 Soft vacuum current fold back 2. Check Vac Motor for excessive amp draw.
Repair or Replace as necessary.
7703 Soft vacuum current fold back 3. Check Vac Motor for excessive amp draw.
Repair or Replace as necessary.
7800 Traction motor fault -1. Check Drive Motor wiring, connections.
7801 Traction motor over current error. Check Drive Motor for excessive amp draw. Release Parking Break. Replace as
necessary.
7802 Soft traction motor in fold back state. Traction Motor being overloaded or Fold back parameters set too low.
7803 Motor line voltages instability timeout. Check Drive Motor wiring, Controller wiring, connections.
7880 Traction speed input out of range. Check Drive Motor wiring, Controller wiring, connections.
7900 Emergency stop error. N/A
7901 Soft belly button activated. N/A
8000 Service mode. N/A
9000 Brushes not Installed N/A
TROUBLE SHOOTING – SIDEKICK CHEMICAL METERING SYSTEM
PROBLEM CAUSE SOLUTION
Sidekick pump not operating
Turned off, water valve is off, brushes
turned off
Ensure pump, solution valve, and
brushes are on.
Improper wiring Inspect/repair by qualified technician
Sensor plugged
Remove sensor and blow air (5psi
[34kPa] max) thru in the opposite
direction as the arrow on the part to clear
the obstruction.
Sidekick operating, but not pumping
chemical
Vacuum leak at fittings on bottle cap,
Squeeze tube cracked, chemical bottle
empty
Check fittings at bottle cap for leaks.
Replace squeeze tube if cracked. Fill
chemical bottle.
Possible Internal TRIO+ Faults
Code Code Code Code Corrective Action
0003 1800 3104 3603 For All Internal TRIO + Diagnostic Codes:
0100 1802 3105 3608 1 - Turn Off Key switch and disconnect batteries.
0204 1B20 3200 3609 2 - Wait 1 minute.
0705 1B21 3201 360a 3 - Reconnect Batteries and turn On Key switch.
0706 2102 3210 360b 4 - If Diagnostic Code is not cleared, then replace TRIO+.
0A01 2103 3211 360c
0B02 2D01 3212 360d
0B0B 3100 3213 360e
1704 3101 3214 7501
1705 3102 3601
1706 3103 3602

TROUBLE SHOOTING
–
CHAMP SCRUBBER
No Solution Flow.
The solution valve is closed. Open the solution valve.
Water solenoid valve not open. Charge the battery.
Obstruction in the solution hose. Remove the obstruction.
Solution valve or cable damaged. Repair / replace the valve cable.
Solution tank is empty. Fill the tank.
Solution valve is dirty. Clean the solution valve.
Damaged seat and washer in valve. Replace valve.
Will Not Pick Up Any Water From The
Floor.
Squeegee is up. Lower squeegee.
Vac motor switch is “off”. Turn vac motor switch “on”.
Recovery tank is full. Empty tank.
Vacuum shut-off float is stuck. Remove obstruction.
Hole in squeegee hose. Replace hose.
Vac motor is not running. Have an authorized serviceman repair.
Drain plug not in tight. Tighten drain plug.
Porthole cover is missing. Replace porthole cover.
Squeegee blade is worn / damaged. Reverse / replace squeegee blade.
Obstruction / damage in the squeegee,
squeegee hose or standpipe Remove obstruction / repair damage.
Runtime is less than when new
Tops of batteries are dirty / wet. Clean/dry and clean terminals.
Battery terminals are dirty / damaged. Clean terminals, and connectors, replace
damaged cables.
Electrolyte level is too low. Add distilled water and charge.
Batteries are not fully charged. Charge batteries until green led on.
Charger is damaged. Have an authorized serviceman repair.
Battery is defective.
Check for fault codes on the battery
charger. Check specific gravities after
discharged & charged.
Wrong size battery. Replace with larger batteries.
Batteries are sulfated. Don’t let low
batteries sit overnight without charging.
Equalizing the batteries, maybe 2 or 3
times, will help reduce the sulfation.
Batteries may need replaced.
Cleaning Is Not Even.
Brush / pads are worn. Replace.
Damage to brush assembly or solution
valve. Have an authorized serviceman repair.
Motor is not running.
Check circuit breakers. Reset if
necessary, replace carbon brushes,
r
epair wiring, replace switch.
Not enough or uneven water. Check solution hose for blockage.
Machine Does Not Run. Check circuit breaker. Reset circuit breaker.
Check battery connections.
Code on control panel. Contact authorized repair service center.
NOTE: If problems remain after taking the above steps, contact your local authorized service station for further
evaluation and repair.

TECHNICAL SPECIFICATIONS
Champ 29 Champ 29 Whiske
r
Width
(excl. squeegee)
mm
(in)
820
(32.3)
826
(32.5)
Width
(squeegee)
mm
(in)
983
(38.7)
983
(38.7)
Height mm
(in)
1351
(53.2)
1351
(53.2)
Length mm
(in)
1676
(66)
2113
(83.2)
GVW kg
(lb)
235AH 350AH
682 770
(1503) (1698)
235AH 350AH
736 824
(1622) (1817)
Empty Weight kg
(lb)
325
(716)
397
(875)
Transport Weight kg
(lb)
586
(1292)
658
(1451)
Temperature
Rating
°C
(°F)
5-40
(40-104)
5-40
(40-104)
Protection
Rating IPx3 IPx3
Rated Voltage V 36 36
Frequency Hz ⎓ ⎓
Rated Power W 3191 4091
Brush Motor
Power
W
(hp)
1492
(2.0)
1492
(2.0)
Vacuum Motor
Power
W
(hp)
560
(0.75)
560
(0.75)
Wheel
Pressure on floor
N/mm2
(lb/in2)
Rear 1.2 (167)
Front 0.6 (80)
Rear 1.1 (156)
Front 0.7 (105)
IEC/UL 60335-2-72
Sound pressure
level LpA dB(A) ≤70 ≤70
Sound power
level LWA+KWA dB(A) ≤80 ≤80
Vibration-Hand-
arm m/s2 0.507 0.507
Vibration-Whole
body m/s2 ≤0.5 ≤0.5
Stopping
Distance
m
(ft)
<1.74
(5.7)
<1.74
(5.7)

MANUEL D'UTILISATION
CHAMP 2929 RB
(FR) Une Traduction Des Instructions Originales

(FR) INSTRUCTIONS DE SÉCURITÉ IMPORTANTES
CONSERVEZ CES INSTRUCTIONS
AVERTISSEMENT Lire ces instructions
d’origine avant la première utilisation de l’appareil de la
machine.
Cet appareil a été approuvé pour l’utilisation sur
des surfaces avec une pente maximale de 2%.
Pente maximale d'escalade de transport de
13%, ne stationnez pas sur des pentes supérieures à 2%.
Équipement de sécurité
Cet appareil est équipé de dispositifs pour protéger l’utilisateur,
qui ne doivent pas être rendus inutilisables ou contournés.
Emergency Stop Button (Bouton d’arrêt d’urgence)
Pour arrêter immédiatement toutes les fonctions, appuyer sur
le bouton d’arrêt d’urgence.
•La machine s’arrêtera soudainement.
•Toutes les fonctions s’arrêteront.
•Tourner le bouton d’arrêt d’urgence pour reprendre un
fonctionnement normal.
Dispositif de présence de l’opérateur
•Désactive les fonctions de conduite si l’utilisateur n’est pas
assis sur le siège de la machine.
Utilisation prevue
L’Scrubber est destinée à une utilisation commerciale, pour le
nettoyage mouillé des planchers à niveau dans un milieu
intérieur, par exemple les hôtels, les écoles, les hôpitaux, les
usines, les ateliers, les bureaux et les entreprises de location.
DESCRIPTION GÉNÉRALE DE LA MACHINE
Laveuse-sécheuse à plancher avec entraînement par traction.
Symboles utilisés dans ces instructions
Manuel D'Utilisation
DANGER – Danger immédiat qui peut causer des
blessures graves ou même la mort.
AVERTISSEMENT – Danger potentiel qui peut mener à
des blessures graves ou même la mort.
ATTENTION – Danger potentiel qui peut mener à des
blessures légères ou à des dommages aux biens.
Lire le manuel d’utilisation.
Ne pas fumer près des batteries et éloigner les flammes
nues ainsi que les étincelles.
Batteries - acide et hydrogène gazeux.
Toxique. Cause des brûlures graves. Éviter le contact.
Recycler l’emballage.
Mettre l’équipement au rebut grâce à des systèmes de
collecte appropriée.
Instructions de sécurité importantes
TOUT SERVICE DE RÉPARATION DOIT ÊTRE EFFECTUÉ
PAR UN DISTRIBUTEUR OU UNE STATION DE SERVICE
AUTORISÉE PAR NSS, UTILISANT DES PIÈCES
ORIGINALES NSS.
Cette machine n’est pas destinée à une utilisation par des
personnes (y compris les enfants) à capacité physique,
sensorielle ou mentale réduite, ou n’ayant pas d’expérience
ou de connaissance.
Les enfants doivent être surveillés afin d’assurer qu’ils ne
jouent pas avec l’appareil.
Les machines non surveillées doivent être protégées contre
les mouvements involontaires: éteignez et retirez la clé.
TOUJOURS retirer les clés en laissant la machine seule.
AVERTISSEMENT Les opérateurs doivent recevoir des
instructions adéquates sur l'utilisation de cette machine.
AVERTISSEMENT Débrancher le connecteur de la batterie
lors du nettoyage, de l'entretien, du remplacement des
pièces ou des réparations.
AVERTISSEMENT Ne pas utiliser pour le nettoyage sur
des surfaces dont la pente est supérieure à celle indiquée
sur la machine.
Assurez-vous TOUJOURS que la rampe est bien fixée au
véhicule avant d'essayer de charger ou de décharger.
TOUJOURS faire preuve d'une extrême prudence lorsque
vous utilisez la machine sur une rampe ou lorsque vous
chargez la machine sur un camion ou une remorque ou que
vous la déchargez. Soyez extrêmement prudent si la
rampe est humide, huileuse ou couverte de produits
chimiques de nettoyage.
NE JAMAIS arrêter ou tourner la machine sur une rampe
ou une pente.
ATTENTION: Éteignez l'interrupteur à clé avant de changer
les disques ou les brosses.
AVERTISSEMENT: Ce produit contient un produit chimique
reconnu par l'État de Californie pour causer le cancer et des
malformations congénitales ou d'autres problèmes de
reproduction.
NE JAMAIS de faire fonctionner cette machine si elle ne
fonctionne pas correctement ou si elle est endommagée de
quelque façon que ce soit.
NE JAMAIS débrancher ou modifier tout interrupteur ou
dispositif de sécurité (disjoncteurs).
NE JAMAIS déposez ou insérez des objets dans n'importe
quelle ouverture de la machine.
NE JAMAIS faire fonctionner cette machine avec une
ouverture d'air bloquée. Gardez toutes les ouvertures d'air
exemptes de poussière, de peluches, de poils, etc.
NE JAMAIS Soulevez tout ce qui brûle ou fume, comme les
cigarettes, les allumettes ou les cendres chaudes.
NE JAMAIS pulvériser cette machine avec de l'eau ou des
liquides.
NE JAMAIS laissez le moteur d'aspiration ou le bouchon de
charge de la batterie se mouiller ou un court-circuit peut se
produire.
NE JAMAIS utilisez cette machine lorsque le chargeur de
batterie est branché.
NE JAMAIS faites fonctionner cette machine sans la jupe
latérale.
NE JAMAIS allumer la machine sauf si vous êtes assis dans
le siège de l'opérateur.
NE JAMAIS monter sur la machine quand elle est allumée.
NE JAMAIS utiliser la machine pour transporter des
passagers autres que l'opérateur.
TOUJOURS porter des chaussures de tennis propres ou
des chaussures «antidérapantes». Les chaussures à
semelles en cuir seront extrêmement glissantes lorsqu'elles
sont mouillées.
TOUJOURS éloigner le visage, les doigts, les cheveux ou
toute autre partie de votre corps ou de vos vêtements
amples de toute partie mobile ou en mouvement de
l'appareil (brosse rotative, lecteur de disque ou moteur
d'aspirateur).
Utilisez uniquement des pièces de rechange d'origine et des
accessoires du fabricant.

USAGE:
ATTENTION: Cette machine est uniquement destinée à une
utilisation en intérieur.
Cette machine ne doit être utilisée que pour nettoyer des
surfaces dures qui ne sont pas sensibles à l'humidité ou aux
opérations de polissage.
Cette machine ne convient pas au nettoyage de surfaces
gelées (stockage à froid).
Ne pas utiliser cette machine dans l'eau d'une profondeur
supérieure à 1 cm (3/8 po).
Cette machine n'est pas conçue pour être utilisée dans les
rues ou les routes de transport en commun.
N'utilisez pas cette machine sur des surfaces sensibles à la
pression.
AVERTISSEMENT: Risque d'incendie ou d'explosion.
N'utilisez pas cette machine dans des environnements
potentiellement dangereux (poussière provenant de grains,
de liquides ou de vapeurs inflammables, etc.).
AVERTISSEMENT: Risque d'incendie ou d'explosion.
N'essayez jamais de collecter des matériaux inflammables
ou combustibles ou d'utiliser de tels matériaux dans des
réservoirs.
L'huile d'orange (D-limonène) n'est pas compatible avec les
plastiques utilisés dans cette machine. L'utilisation de D-
limonène peut endommager la machine.
AVERTISSEMENT Ne pas utiliser de liquides inflammables.
N'utilisez pas de détergent contenant des solvants, de
l'acide chlorhydrique ou de l'acide fluorhydrique.
N'utilisez pas de détergents à haute teneur en mousse.
ESPACE DE RANGEMENT:
ATTENTION Cette machine doit être entreposée à l'intérieur
seulement.
NE JAMAIS stationner ou entreposer la machine près d'un
quai, sur des rampes, près d'une fournaise, d'une
chaudière, d'une flamme nue ou d'une autre source de
chaleur élevée.
NE JAMAIS cette machine geler.
N'exposez JAMAIS la machine à la pluie, à la neige ou à
des températures extrêmes.
Ne stockez JAMAIS d'objets sur la machine.
Plage de température de fonctionnement: 40°-104°F (5°-
40°C)
Équipement de protection individuelle:
oSuivez les instructions de sécurité fournies avec les
détergents de nettoyage.
oSuivez les instructions du fabricant de détergent
concernant l'équipement de protection individuelle.
RENSEIGNEMENTS SUR LA SÉCURITÉ DES
BATTERIES
AVERTISSEMENT Le non-respect de ces avertissements
peut entraîner des blessures à la machine, à l'opérateur ou
à des personnes se trouvant à proximité.
AVERTISSEMENT Les batteries émettent de l'hydrogène,
ce qui peut provoquer un incendie ou une explosion.
NE JAMAIS fumer, allumer une allumette ou provoquer une
étincelle pendant le fonctionnement ou la charge.
TOUJOURS charger dans un endroit bien ventilé à l'écart
des flammes nues.
TOUJOURS lire et comprendre toutes les instructions avant
d'installer ou de charger les batteries.
N'essayez JAMAIS d'installer ou de charger des batteries
à moins d'avoir été formé pour le faire.
NE JAMAIS permettre à une personne non formée
d'installer ou de charger des batteries.
TOUJOURS porter des lunettes de protection et des
vêtements de protection pour éviter tout contact avec l'acide
de la batterie.
TOUJOURS retirer tous les bijoux lorsque vous travaillez
sur ou près des batteries.
TOUJOURS éteindre tous les interrupteurs pendant
l'installation et l'entretien.
Débranchez TOUJOURS les câbles de la batterie avant
toute intervention ou réparation.
NE JAMAIS poser quoi que ce soit sur le dessus des
batteries car un arc peut se produire.
SI LE CONTACT AVEC L'ACIDE DE LA BATTERIE SE
PRODUIT, suivez ces instructions:
oPEAU - rincer la zone avec de l'eau.
oYEUX - Rincer à l'eau pendant 15 minutes.
oINTERNE - Buvez de l'eau ou du lait. Suivez avec du lait
de magnésie, de l'œuf battu ou de l'huile végétale.
Appelez un médecin immédiatement.
INSTALLATION DE LA BATTERIE
TOUJOURS utiliser deux personnes pour installer, car les
batteries sont lourdes.
TOUJOURS éteindre tous les interrupteurs de la machine.
Positionnez TOUJOURS les batteries comme indiqué sur
l'autocollant d'installation de la machine pour maintenir
l'équilibre de la machine.
TOUJOURS brancher les batteries comme indiqué sur
l'autocollant d'installation de la machine pour éviter de
court-circuiter les batteries et le système électrique.
SÉCURITÉ DE CHARGE DE LA BATTERIE
TOUJOURS lire attentivement les instructions.
TOUJOURS utiliser le chargeur fourni par NSS avec une
tension nominale appropriée.
TOUJOURS brancher le chargeur dans une prise de
courant reliée à la terre.
NE JAMAIS charger une batterie gelée.
NE JAMAIS toucher une partie non isolée du connecteur de
sortie ou une borne de batterie non isolée.
TOUJOURS débrancher l'alimentation CA avant d'effectuer
ou de couper les connexions à la batterie pendant la charge.
NE JAMAIS utiliser le chargeur si le cordon d'alimentation
CA est endommagé ou si le chargeur a reçu un coup violent,
s'il est tombé ou s'il a été endommagé de quelque façon que
ce soit.
Pour les batteries plomb-acide inutilisées uniquement
(ne pas appliquer de batteries scellées sans entretien):
TOUJOURS vérifier que le niveau d'eau de la batterie
recouvre les plaques de la batterie avant de la charger.
TOUJOURS vérifier le niveau d'eau après la charge et
ajouter de l'eau distillée si nécessaire pour amener le niveau
au fond du trou de remplissage.
NE JAMAIS trop remplir les
batteries car cela pourrait
endommager la batterie et la machine.
TOUJOURS essuyer tout acide du haut des batteries en
utilisant une solution savonneuse.
TOUJOURS étudier les précautions spécifiques des
fabricants de batteries telles que les taux de charge
recommandés.
Remettez TOUJOURS les capuchons sur les batteries. Ne
pas charger avec des bouchons desserrés ou enlevés.
AJOUTER uniquement de l'eau distillée.
MISE À LA TERRE D'ÉQUIPEMENT ÉLECTRIQUE
CHARGEUR DE BATTERIE
AVERTISSEMENT: Une mauvaise connexion du
conducteur de mise à la terre de l'équipement peut entraîner
un risque d'électrocution. Vérifiez auprès d'un électricien
qualifié ou d'une personne de service si vous avez des doutes
quant à la mise à la terre de la prise de courant. Ne modifiez

pas la fiche fournie avec le chargeur. Si la prise n'est pas
adaptée à une utilisation sûre; avoir une prise correctement
mise à la terre installée par un électricien qualifié.
Utilisez toujours une rallonge à 3 fils correctement mise à la
terre, avec des fiches mâles et femelles. Si des rallonges de
25 pieds [7.6m] sont utilisées, la capacité de transport
électrique ne doit pas être inférieure à 14-3 ST., 50 pieds
[15.2m] de rallonges pas moins de 12-3 ST
INSTRUCTIONS DE MISE À LA TERRE
Ce chargeur doit être mis à la terre pendant l'utilisation pour
protéger l'opérateur contre les chocs électriques. Le chargeur
est fourni avec un cordon à trois conducteurs et un connecteur
de mise à la terre de type à trois contacts. La fiche doit être
branchée dans une prise appropriée correctement installée et
mise à la terre conformément à tous les codes et règlements
locaux. Le conducteur vert dans le cordon est le fil de terre. Ne
connectez jamais ce fil à un autre que la broche de mise à la
terre de la fiche de fixation.
Vérifiez la plaque signalétique sur le chargeur pour vous
assurer que la tension et le cycle indiqués sont les mêmes que
ceux de la prise électrique. Ne tentez pas de brancher un
chargeur de 120 volts dans une prise de 240 volts ou un
chargeur de 240 volts dans une prise de 120 volts. Si le
cordon fourni avec le chargeur est muni d'une fiche de
branchement, tel qu'illustré à la figure A ci-dessous, il doit être
utilisé sur un circuit nominal de 120 volts. Si un réceptacle
correctement mis à la terre tel que montré à la figure A n'est
pas disponible, un adaptateur peut être installé tel qu'illustré à
la figure B si la boîte de prise qui abrite le réceptacle est mise
à la terre. Assurez-vous de bien fixer la languette de mise à la
terre (l'oreille rigide, la cosse ou tout autre objet semblable à la
couleur verte qui s'étend de l'adaptateur) à l'aide d'une vis à
plaque métallique.
Si le cordon fourni avec le chargeur a une fiche de connexion
comme illustré à la figure C, il est destiné à être utilisé sur un
circuit nominal de 240 volts (monophasé seulement). Les
modifications apportées à la prise d'accessoire ou l'utilisation
d'adaptateurs sur d'autres types de prises doivent être
effectuées conformément aux réglementations locales.
Figure A.
Figure B
REMARQUE : Au Canada, l'utilisation d'un adaptateur
temporaire peut ne pas être autorisée par le code canadien de
l'électricité.
Mise au rebut
Contactez un prestataire de service de mise à la ferraille
qualifié pour vous débarrasser de la machine.
Assurez-vous que les matériaux suivants sont mis au rebut
conformément aux lois en vigueur:
Batteries
Composants contenant du plastique
Composants électriques et électroniques
MARQUAGES
California
Prop 65 Avertissement.
Connexions de batterie.
Filtre à eau propre.
Avertissement-Configurer le chargeur de
batterie lors du remplacement des batteries.
Avertissement-N'utilisez pas de liquides inflammables
ou combustibles. Ne pas utiliser dans une atmosphère
explosive.
Indice de fusible 2 ampères.
Disjoncteur principal.
Disjoncteur d'actionneur de plateau de récurage.
Raclette Disjoncteur d'actionneur.
Klaxon.
Eau propre / Contrôle de débit de solution.
Lisez le manuel d'utilisation

INSPECTION DE LA MACHINE
Maintenant que la machine est déballé n'oubliez pas de
recycler tous les matériaux d'emballage.
Inspecter la machine pour les dommages ou les
composants absents. S'il est endommagé, contacter la
compagnie de transport locale pour déposer une demande
de fret.
Inspectez racloir pour dommages cachés.
Composants de la Machine
Panneau de Configuration
Le panneau de commande de l'opérateur se trouve à la
gauche du siège de l'opérateur. Ce panneau comporte des
éléments qui contrôlent diverses fonctions de la machine. Voir
schéma ci-dessous.
1 Interrupteur à clé - clé doit être tournée vers la droite
pour activer la machine.
2 Interrupteur de la brosse - 3 positions, 3 fonctions:
Jusqu'à est sur, l'abaissement des brosses à
une légère pression.
Moyen est éteint, ce qui soulève des brosses.
Down est sur, l'abaissement des brosses à
forte pression.
Brosses ne viennent que lorsque la machine se déplace
en marche avant ou arrière.
3 Vitesse de traction Switch - 2 positions:
Down est haute vitesse.
Jusqu'à est faible vitesse.
4 Bouton d'arrêt d'urgence
poussoir pour arrêt.
Tournez pour sur.
5 Interrupteur à vide - 2 positions; 2 fonctions:
Jusqu'à est sur, l'abaissement de la raclette.
Bas est éteint, ce qui soulève la raclette.
Raclette se soulève automatiquement en sens inverse.
6 Bouton poussoir - Bascule entre les écrans
d'affichage. Par défaut, l'écran 1 lorsqu'ils sont sous
tension.
Ecran LCD - éclairée de travailler dans toutes les
situations d'éclairage.
Sidekick Système de mesure chimique (facultatif)
Commandes pour distribution chimique sont situés sur
le Panneau de configuration de la pompe.
Les écrans d'affichage
Il ya beaucoup de symboles qui peuvent être affichés sur
l'écran LCD. Par conséquent, le bouton-poussoir LCD peut
être utilisé pour basculer entre les écrans prédéfinis (voir
Panneau de configuration pour plus de détails).
1
2
3
4
5
6
Other manuals for champ 2929 rb
2
This manual suits for next models
2
Table of contents
Languages:
Other NSS Scrubber manuals

NSS
NSS CHAMP ZS 35 User manual

NSS
NSS WRANGLER 2616 DB User manual

NSS
NSS eForce 26 User manual

NSS
NSS CXC 200 User manual

NSS
NSS Wrangler 3330 DB User manual

NSS
NSS Wrangler 3330 DB User manual

NSS
NSS WRANGLER 1708CE User manual

NSS
NSS Wrangler 2012 AB User manual

NSS
NSS CHAMP 2417 RB User manual

NSS
NSS WRANGLER 1708CB User manual
Popular Scrubber manuals by other brands

Clarke
Clarke Vantage 17 Battery Service manual

Nilfisk-Advance
Nilfisk-Advance 48 LPG instruction manual

Axminster
Axminster WORKSHOP AW118CE Original instructions

Truvox International
Truvox International Cimex Cyclone CR38 user manual

diversey
diversey TASKI Swingo 2500 manual

Comet
Comet Push Series manual