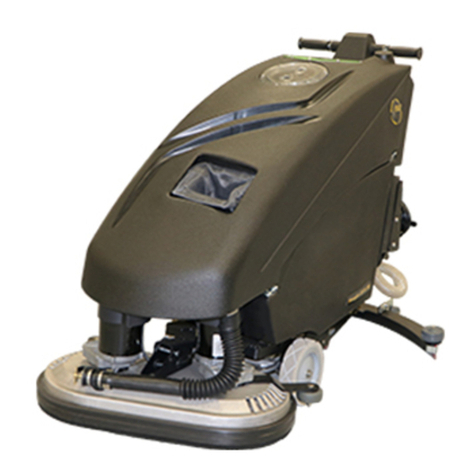
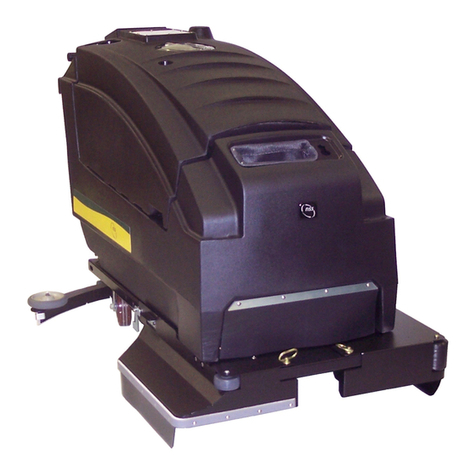
NSS Wrangler 3330 DB User manual

OPERATION MANUAL
WRANGLER 2730 DB & 3330 DB
Original Instructions
Instructions D'origine
Instrucciones Originales

OPERATION MANUAL
WRANGLER 2730 DB & 3330 DB
IMPORTANT SAFETY INSTRUCTIONS
WARNING: Failure to observe these instructions can cause personal
injury to machine operator or bystanders.
WARNING: Fire or explosion hazard.
NEVER operate this machine in an
explosive atmosphere (grain dust,
flammable liquids or fumes, etc.).
WARNING: Fire or explosion hazard.
NEVER attempt to pick up flammable or
combustible materials or use such materials
in tank.
WARNING: Orange Oil (D-limonene) is not compatible with the plastics used in NSS
automatic scrubbers and the Sidekick Chemical Metering System. Use of D-limonene
may result in damage to the machine.
WARNING: This product contains a chemical known to the state of California to cause
cancer and birth defects or other reproductive harm.
INTENDED USE
This machine is designed for commercial use,
scrubbing floors in an indoor environment. NSS does
not recommend using this machine for any other
purpose.
FOR SAFETY:
ALWAYS read and understand all instructions
before operating or servicing machine.
ALWAYS use this machine ONLY as described in
this manual.
NEVER attempt to operate this machine unless
you have been trained in its operation.
NEVER allow an untrained person to operate this
machine.
NEVER attempt to operate this machine if it is not
working properly or has been damaged in any
manner.
NEVER disconnect or modify any switches or
safety devices (circuit breaker).
NEVER drop or insert any object into any machine
opening.
NEVER operate this machine with any air opening
blocked. Keep all air openings free of dust, lint,
hair, etc.
NEVER pick up anything that is burning or
smoking, such as cigarettes, matches or hot
ashes.
NEVER spray this machine with water or any
liquids.
NEVER allow the vacuum motor or battery-
charging plug to get wet or a short may occur.
NEVER operate this machine when the battery
charger is plugged in.
NEVER operate this machine with the side skirt
removed.
NEVER allow this machine to be used as a toy.
Close attention is necessary when used near
children.
ALWAYS wear clean tennis shoes or “non-slip”
shoes. Leather soled shoes will become extremely
slippery when wet.
ALWAYS keep face, fingers, hair or any other body
part or loose clothing away from any machine
opening or moving part (revolving brush, pad
driver, or vacuum motor).
ALWAYS turn the machine off when attaching
pads or brushes.
ALWAYS remove keys when this machine is left
unattended.
ALWAYS be sure that the ramp is secured to the
vehicle before attempting to load / unload.
ALWAYS use extreme caution when operating the
machine on a ramp or loading / unloading this
machine into or out of a truck / trailer. Use extreme
caution if the ramp is wet, oily, or covered with
cleaning chemicals.
NEVER stop or turn the machine on a ramp or
incline.
NEVER attempt to climb a grade or operate this
machine on a ramp or incline of more than 8°.
NEVER park or store the machine near a dock, on
ramps, near a furnace, boiler, open flame, or other
high heat source.
NEVER allow this machine to freeze.
NEVER expose the machine to rain, snow, or
extreme temperatures.
NEVER store any items on this machine.
ALWAYS store this machine indoors in a dry, cool
area.
ALL REPAIR SERVICE MUST BE PERFORMED BY AN NSS AUTHORIZED DISTRIBUTOR/
SERVICE STATION USING ONLY NSS ORIGINAL EQUIPMENT PARTS.
SAVE THESE INSTRUCTIONS

IMPORTANT SAFETY INSTRUCTIONS
BATTERY POWERED EQUIPMENT WITH ON BOARD CHARGERS
WARNING: Failure to observe these instructions can cause personal
injury to machine operator or bystanders.
GENERAL
ALWAYS read and understand all instructions
before installing or charging batteries.
NEVER attempt to install or charge batteries
unless you have been trained to do so.
NEVER allow an untrained person to install or
charge batteries.
ALWAYS remove all jewelry when working on or
near the batteries.
ALWAYS turn off all switches during installation
and service.
ALWAYS disconnect the battery leads before
performing any service or repair.
ALWAYS wear eye protection and protective
clothing to avoid contact with battery acid.
NEVER lay anything on top of batteries as arcing
may occur.
IF CONTACT WITH BATTERY ACID OCCURS,
follow these instructions:
SKIN – rinse area with water.
EYES – Flush with water for 15 minutes.
INTERNAL – Drink water or milk. Follow with
Milk of Magnesia, beaten egg or vegetable oil.
Call a physician immediately.
BATTERY INSTALLATION
ALWAYS
use two people to install, as batteries are
heavy.
ALWAYS turn off all machine switches.
ALWAYS position batteries as shown on the machine
installation decal to maintain machine balance.
ALWAYS connect batteries as shown on the machine
installation decal to avoid shorting out the batteries
and the electrical system.
BATTERY CHARGING
ALWAYS read instructions on charger carefully.
ALWAYS use the NSS supplied charger with proper
voltage rating.
For lead acid batteries only, (does not apply to
maintenance free batteries).
ALWAYS check to ensure the battery water level
covers the battery plates before charging.
ALWAYS check water level
after charging and add distilled
water if necessary to bring level
to the bottom of the fill hole.
NEVER
overfill batteries as battery
and machine
damage may result.
ALWAYS wipe any acid from the top of batteries
using a soap solution.
ALWAYS reattach caps to batteries. Do not charge
with caps loose or removed.
ADD only distilled water.
For all types of batteries:
NEVER charge a frozen battery.
ALWAYS plug the charger into an earthed socket
outlet.
NEVER touch uninsulated portion of output connector
or uninsulated battery terminal.
ALWAYS disconnect the AC supply before making or
breaking the connections to the battery while charging.
NEVER operate charger if the AC supply cord is
damaged or if the charger has received a sharp blow,
been dropped, or otherwise damaged in any way.
Read and understand all
instructions before installing
or charging batteries.
No smoking, open
flames, or sparks while
working with batteries.
Contains acid.
Avoid contact Poison. Causes
severe burns. Avoid
contact.
WARNING: Batteries emit hydrogen, which can cause fire or explosion.
NEVER smoke, light a match, or cause a spark during operation or charging.
ALWAYS char
g
e in a well-ventilated area awa
y
from o
p
en flame.
ALL REPAIR SERVICE MUST BE PERFORMED BY AN NSS AUTHORIZED DISTRIBUTOR/
SERVICE STATION USING ONLY NSS ORIGINAL EQUIPMENT PARTS

IMPORTANT SAFETY INSTRUCTIONS
GROUNDING OF ELECTRICAL EQUIPMENT - BATTERY CHARGER
WARNING: Improper connection of the equipment–grounding
conductor can result in a risk of electric shock. Check with a qualified
electrician or service person if you are in doubt as to whether the outlet
is properly grounded. Do not modify the plug provided with the
charger. If outlet is not suitable for safe use; have a properly grounded
outlet installed by a qualified electrician.
Always use a properly grounded 3-wire extension cord, which has
male and female plugs. If 25 foot [7.6m] extension cords are used, the
electrical carrying capacity should be no less than 14-3 ST., 50 foot
[15.2m] extension cords no less than 12-3 ST
GROUNDING INSTRUCTIONS
This charger shall be grounded while in use to protect the operator from electric shock. The charger is
provided with a three-conductor cord and a three-contact grounding type attachment plug. The plug must be
plugged into an appropriate outlet that is properly installed and grounded in accordance with all local codes
and ordinances. The green conductor in the cord is the ground wire. Never connect this wire to other than
the grounding pin of the attachment plug.
Check nameplate on the charger to be sure voltage and cycle stated is the same as the electrical outlet. Do
not attempt to plug a 120-volt charger into a 240-volt outlet or a 240-volt charger into a 120-volt outlet. If the
cord provided with the charger has an attachment plug as shown in Figure A. below, it is intended for use on a
nominal 120-volt circuit. If a properly grounded receptacle as shown in Figure A is not available, an adapter
may be installed as shown in Figure B if the outlet box that houses the receptacle is grounded. Be sure to
fasten the grounding tab (the green colored rigid ear, lug or the like extending from the adapter) with a metal
faceplate screw.
If the cord provided with the charger has an attachment plug as shown in Figure C, it is intended for use on a
nominal 240-volt circuit (single phase only). Changes to the attachment plug or use of adaptors to other plug
types must be done in accordance with local regulations.
NOTE: In Canada, the use of a temporary adaptor may not be permitted by Canadian electrical code.
ALL REPAIR SERVICE MUST BE PERFORMED BY AN NSS AUTHORIZED DISTRIBUTOR/
SERVICE STATION USING ONLY NSS ORIGINAL EQUIPMENT PARTS.
SAVE THESE INSTRUCTIONS

NOISE AND VIBRATION
MACHINE INSPECTION
Now that the machine is unpacked remember to
recycle all packing materials.
Inspect the machine for damage or missing
components. If damage is found, contact the local
freight company to file a freight claim.
MACHINE COMPONENTS
Solution Tank
The solution tank is the lower part of the machine body.
It has a capacity of 30 gallons (114 liters).
The amount of water in the tank is measured by the
solution gage, which is located in the clear plastic
tube at the right rear corner of the tank. This tube is
also used to empty the tank.
Recovery Tank
The recovery tank is the upper part of the machine
body. It has a capacity of 33 gallons (125 liters).
A round clear view lid assembly closes off the
recovery tank’s opening.
The recovery tank has a foam sensitive float shut-off
assembly. As the water level rises, the float ball will
rise into the tube and shut off the airflow of the
vacuum. NOTE: The float shut-off assembly does
not shut off the vacuum motor.
Operator Control Panel
The operator control panel is located at the upper rear
area of the machine. This panel has components that
control various machine functions.
In the middle of the panel are two (2) rubber twist
grips. These grips rotate forward and backward to
control the direction and speed of the machine. The
farther the grips are rotated, the faster the machine
will move. These twist grips have a feature that
returns the machine to the neutral position when the
handles are released.
The left toggle switch turns on and off the vacuum
motor.
The red button is the EMERGENCY STOP switch.
Pushing this button removes power from all motors.
The master power switch must be turned off, then
turned back on, to resume machine operation.
The right toggle switch (or optional key switch) is the
Master Power Switch.
Battery Meter
The battery meter is located on the right side of the
operator control panel and shows the state of charge of
batteries during operation and recharge.
When the batteries are fully charged, all of the bars
will be lighted.
Normal working range is from fully charged down to
only red bars lighted.
Operation can continue into the red zone; however,
the controller will turn off the brush and vacuum
motors once battery drops to a minimum level. The
machine can then be driven to a convenient charging
location.
Rear Panel
The solution control lever is located on the left of the
rear panel. This lever controls the solution valve and
the amount of liquids put on the floor while cleaning.
Pull up on the handle to open the valve. Push down
on the handle to close the valve.
The top circuit breaker (25 A) is for the drive motor.
The next circuit breaker (25 A) is for the vacuum
motor.
The next two circuit breakers (30 A) are for the brush
motors.
The bottom circuit breaker (25 A) is for the main
power to the controller.
The right lift arm is used to raise and lower the brush
motor assembly. Brushes automatically turn on when
lowered, and the twist grips are moved.
Battery Compartment Drain Hose
This hose is located on the left side of the machine
inside the rear panel. The hose uses a pinch clamp to
hold the hose closed. This hose collects any spilled
liquids from the battery compartment area.
Inspect hose for liquid level on a weekly basis.
Dispose of liquids according to your local and federal
regulations.
Canister / Strainer Assembly
Attached to the valve, under the left side of the solution
tank is a canister strainer. It is designed to stop debris
from entering the solution solenoid.
If the water and chemical stops flowing during
operation:
Turn off solution control valve on rear panel.
Remove the canister and screen, and remove all
debris.
Replace the screen and canister. Check for any liquid
leaks.
Solution Solenoid
Attached to the top of the brush deck is a solenoid valve
designed to stop solution flow when the machine is not
moving. If the water and chemical stops flowing:
Check canister / strainer assembly for debris.
Check manual lever.
Sidekick Chemical Dispensing (optional)
On board chemical dispensing is available either
factory installed, or as a retrofit kit.
Controls for chemical dispensing are located on the
Operator Control Panel.
NOISE
Sound pressure level at Operator
position
(
ISO 11201
)
66 dB(A)
VIBRATION
Weighted RMS acceleration value
(
ISO 5349
)
.367 m/s2

Drive Motor
This machine is powered forward and reverse by a
36-volt drive motor.
The speed is electronically controlled for smooth
increase and decrease of speed.
The motor moves the drive wheels through a chain
and sprocket system.
This motor has carbon brushes that must be serviced
on a regular basis. The carbon brushes have an
expected life of 2,000 operating hours. Refer to the
maintenance section later in this book.
Brush Gear Motor
This machine has two (2) 36-volt brush motors located
at the front of the machine. The motors are attached to
a gearbox to turn the pad drivers or brushes.
The left motor rotates clockwise.
The right motor rotates counterclockwise.
These motors have carbon brushes that must be
serviced on a regular basis. The carbon brushes
have an expected life of 2,000 operating hours.
Refer to the maintenance section later in this book.
Vacuum Motor
This machine has a 36-volt vacuum motor.
The vacuum motor is attached to the underside of the
top tank.
This motor has carbon brushes that must be serviced
on a regular basis. The carbon brushes have a
maximum expected life of 700 operating hours.
Refer to the maintenance section later in this book.
Squeegee Assembly
The squeegee assembly is available in both straight
and curved. The straight squeegee uses a dual (2)
Linatex blade system. The “curved” squeegee has a
Linatex rear blade and a neoprene front blade.
Side Skirt Assemblies
This machine is equipped with left and right side skirt
assemblies. The side skirt assemblies are designed to
contain the liquids in the cleaning area under the
machine; they channel the liquids toward the squeegee,
and prevent splashing on the outside of the machine.
PREPARING THE MACHINE
Installing the Batteries:
Turn off all switches (except the EMERGENCY
STOP) and tilt the recovery tank open to expose the
battery compartment.
Batteries are heavy - use two people to install.
Refer to the wiring diagram inside the battery
compartment. Align batteries in the compartment as
shown on the diagram.
Install battery cables as shown on the wiring diagram.
Tighten bolts and hex nuts with a wrench.
Caution: Do not short across two terminals with a
wrench.
Loose or improper battery connections will cause
battery or machine damage and possible personal
injury.
Battery Charging
To recharge the batteries, plug the charger cord,
located at the rear of the machine, into an electrical
outlet (100/115/230 50/60 HZ VAC).
CAUTION: Make sure the battery type LED on the
charger matches the type of battery installed in
your machine! EXCEPTION-CROWN AND TROJAN
AGM’S TO BE CHARGED WITH GEL SETTING.
When the cord is plugged into an outlet the machine
will become disabled.
See Battery Charger section for more details.
Preparing the Solution and Recovery Tanks:
Never use water over 140°F (60°C) degrees.
Excessively hot water may damage components
such as the tanks.
Put 1 to 2 gallons [3.8L to 7.6L] of clean water into the
solution tank first to help dilute the chemicals and
prevent excess suds. Dilute the cleaning chemicals
according to the manufacturer’s instructions. See
Sidekick instructions if equipped with on-board
dilution control.
Fill the tank by pouring the water and cleaning
chemicals through the mesh filter that covers the
opening at the front of the solution tank, or you may
use the hose holder cutout.
Make sure the drain plug of the recovery tank is
closed tightly and in its holding clip.
Always use a defoamer to protect the vacuum motor.
Consult your local distributor for complete chemical
advice.
Install a Pad Driver and Pad:
There is a wide range of pads or brushes available for
the many cleaning applications. Consult your NSS
authorized distributor for recommendations.
Turn the pad drivers upside down on the floor and
remove the pad holding cup.
Remove the center cutout of the pad, 14" (35.5 cm.)
Wrangler 2730, 17” (43 cm) pad Wrangler 3330.
Place the pad on the face of the pad driver.
The pad must be centered on the driver to prevent
wobbling or bouncing.
Install and secure the pad holding cup to the pad
driver. Turn the pad driver over so that the pad faces
the floor.
Raise the brush motors into the transport position.
Align the lugs of the pad driver with the slots of the
drive casting.
Turn the lugs of the pad driver toward the latch; close
the latch around the lugs to lock them onto the drive
casting.
Install a Brush:
Raise the brush motors into the transport position.
Align the lugs of the brush with the slots on the drive
casting.
Turn the lugs of the brush toward the latch; close the
latch around the lugs to lock them onto the drive
casting.

Install the Squeegee Assembly:
Place the squeegee lift arm in the storage (up)
position.
The squeegee assembly mounts to a metal bracket at
the bottom center of the machine, using two (2)
mounting knobs. Loosen the mounting knobs and
slide the squeegee assembly onto the mounting plate.
The squeegee assembly has two (2) small wheels to
prevent “rollover” while in reverse. The roller wheels
must face the operator. Hand tighten the mounting
knobs. Do not use pliers to tighten knobs, as this will
defeat the “break-away” design.
Do not add any weights or other pressure to the
squeegee mechanism. This will not improve the
performance and will shorten the life of the blades.
It is recommended that, with new blades, the rear
wheels be adjusted to their lowest position. Loosen
the two screws on the bracket rotate the bracket
downward as far as it will go, then tighten the screws.
Perform this adjustment on both wheels/brackets.
When the squeegee becomes worn, and the wiping
edge no longer contacts the floor properly, further use
may be possible by adjusting the rear wheels upward
enough to restore proper engagement of the blades
wiping edge with the floor. Be sure to adjust the
wheels back down fully when a new blade is installed.
Install the Side Skirts:
Position the skirts at the front left and right sides of
the machine.
Remove the skirt retaining pins from the mounting
bracket.
Align the side skirt holes with mounting bracket holes,
insert and secure with retaining pins. Close side
skirts around machine and secure with skirt retaining
latch.
Prepare the Sidekick Chemical dispenser (if
equipped)
***CAUTION: Purging the Sidekick lines may
dispense a small amount of the chemical directly
onto the floor. If using wax stripper or harsh
chemicals, be sure to purge the lines in an area
that cannot be damaged by the chemical in use.
Place a container filled with the desired cleaning
chemical into the bottle holder located at the front of
the machine.
o The bottle holder accepts F-style rectangular
containers, and some smaller round containers.
o Empty F-style containers are available from NSS,
order part #9590171.
Ensure all hose fittings are tight, then insert the
suction tube into the chemical bottle, and tighten the
cap.
Turn on the Scrubber then press the “ON” button on
the Sidekick. The ON indicator will illuminate.
Press and hold the PURGE button on the Sidekick
until you see the supply line to the pump filled with the
chemical.
Select the desired dilution ratio as recommended by
the chemical manufacturer.
The Sidekick Chemical dispenser is ready for use.
Operating the Machine
Do not operate the machine with the battery meter
needle in the red zone.
The Wrangler 2730 has the brush motors offset to the
right side of the machine. This offset allows you to
clean the edge of the floor or obstructed areas (walls or
shelving) with the right side of the machine. The 3330
have the brush motors centered but the offset feature is
part of the skirt design.
Normal Cleaning
Sweep and dust mop the floor to remove dirt and
debris before scrubbing. Accumulations of dirt or
debris on the floor will reduce cleaning performance.
You may also need to pre-clean some types of spills
or stains before scrubbing.
Plan your work so that you make long, straight paths
with the fewest amount of turns possible, overlapping
each cleaning path about 2 in. (5 cm.) to prevent
streaking and dirty areas.
Move machine to area to be cleaned.
Place warning signs “Wet Floor” in area.
Turn on master switch.
Turn on vacuum motor switch.
Lower the brush motors and squeegee assembly into
the operating position on the floor. Brush motors will
automatically turn on when lowered and moving in
forward or reverse.
Lift solution valve handle to start liquid flow to floor.
Adjust amount of flow as needed. Close the solution
valve completely 10 ft. (3m.) before turning at the end
of each cleaning path. This reduces the amount of
liquid on the floor when you make the turn.
Reopen the solution valve when you have started
your next cleaning path. Repeat this procedure on
each path.
NOTE: Solution will not flow until brushes turn on.
Watch the level of liquid in the recovery tank and
listen for the float shut-off to change of the sound of
the vacuum motor. When the vacuum airflow stops,
you must turn off the vacuum motor, and empty the
recovery tank.
Take the machine to an approved disposal drain and
turn off all switches.
Raise the rubber flap at the front of the machine and
pull out the flexible rubber drain hose. Raise the end
of the hose above the level of the recovery tank,
loosen and remove the hose drain plug. Carefully
lower and direct the drain hose into the drain.
When the recovery tank is empty, replace and tighten
the drain plug. Place the drain hose back into the
machine and secure the plug end in the clamp. Do
not obstruct the lift mechanism or brush motors.
Special Cleaning
This machine may be used to perform special cleaning
jobs other than “normal” scrubbing.
Double Scrubbing
This procedure provides deeper cleaning on heavily
soiled floors. One or more cleaning passes are made
before picking up the chemicals with the squeegee.
This allows dwell time. Best results are achieved by
placing the brush motors in the heavy scrub position.
Caution: The floor surface becomes extremely slippery
in this operation. This machine should be operated only
in slow to medium speed and great care should be
taken when walking on this wet surface.
Stripping
This procedure is used to remove moderate build-up
of floor finish from the floor. The most aggressive
pads or grit brushes are used in this procedure.
The stripper solution is applied to the floor with a mop
and then double scrubbed as above. Stripping
solution should not be put into the solution tank.
Clean water from the solution tank is applied to the
floor to keep the chemicals and finish in a “liquid”
condition. The floor surface becomes extremely
slippery in this operation. This machine should be
operated only in slow to medium speed and great
care should be taken when walking on this wet
surface.
If equipped, the scrubber may be used to apply the
wax stripper using the Sidekick Chemical dispenser.
Set the dilution ratio to the rate recommended by the
chemical manufacturer. If the wax stripper you are
using requires dilutions stronger than 20:1, then you
will need to apply the stripper with a mop.
After applying the stripper, thoroughly purge the
Sidekick Chemical dispenser lines with clean water to
remove all traces of wax stripper. Purge the lines
while the scrub brushes are positioned over a floor
drain. Purging the Sidekick’s lines will dispense
chemical thru the scrub pads and onto the floor.
Sidekick Chemical Dispenser Operation
***CAUTION: Purging the Sidekick lines may
dispense a small amount of the chemical directly
onto the floor. If using wax stripper or harsh
chemicals, be sure to purge the lines in an area
that cannot be damaged by the chemical in use,
such as over a floor drain.
See Preparing the Machine for instructions on how to
connect the chemical bottle, and purge the lines.
After proper connection of the chemical supply line and
purging, the Sidekick Chemical Dispenser provides fully
automatic chemical dilution during scrubbing
operations. The Sidekick measures the amount of
water flowing out of the solution tank, and pumps the
correct amount of chemical into the water line to provide
the ratio of water to chemical according to the dilution
ratio selected on the control panel.
The pump will not operate unless water is flowing from
the solution tank (except when the purge button is
pressed). This means the Solution Control valve must
be on, and the brushes must be spinning.
Basic Operation
Turn on the Scrubber.
Turn on the Sidekick Chemical Dispenser.
Select the desired dilution ratio by pressing the Select
Dilution button until the light next to the desired ratio
is illuminated.
The scrubber can be turned off, and when the
scrubber is turned back on, the Sidekick will recall the
last dilution setting.
During use, the Purge button may be pressed to
provide and extra dose of chemical for heavily soiled
areas (always follow chemical manufacturer’s usage
directions).
To Change Chemicals
Loosen the cap on the chemical bottle, and remove
the suction line from the chemical bottle.
Dispose or store any remaining chemical according to
local and federal regulations.
Place the suction line into a container of clean water.
With the machine over a floor drain, press and hold
the purge button until the clean water is drawn thru
the pump and dispensed at the brushes.
Remove the suction line from the container of clean
water. Replace the container of clean water with a
container of the desired chemical, and install the
suction line.
Press and hold the Purge button until chemical is
seen being drawn up to the pump, and pumping down
the tube from the pump to the tee fitting below the
machine.
After each use, always flush the Sidekick lines
with clean water to prevent dried chemical from
accumulating in the lines.
MACHINE MAINTENANCE
Routine maintenance is critical to ensure proper
machine operation and cleaning performance. Perform
all maintenance procedures as follows.
Always turn OFF all machine switches (except the
EMERGENCY STOP) before performing any
maintenance.
Adjusting the Squeegee Assembly:
Turn the vacuum motor ON and open the water valve
slightly.
Squeegee blades should lie over slightly (like a
window squeegee) when the machine is moving.
If adjustment is required adjust the blade angle by
removing the rear bolt of the top squeegee arm, turn
the arm into or out of the ball joint to change the angle
as needed.
Adjust Side Skirt Wiper Blades:
Install the side skirts on the machine.
Loosen the retaining strip screws.

Pull down evenly on the entire length of the wiper
blade so that it firmly touches the floor.
Tighten all screws and test run machine for splashing
under the blades.
Do not adjust blades too low, as it will cause damage
and excessive wear to the blades.
Replace Side Skirt Wiper Blades:
Remove the side skirt assembly from the machine.
Remove the retaining strip and screws.
Remove the old wiper blade and replace with a new
blade.
Replace the retaining strip, and screws, do not
tighten.
Pull down evenly on the entire length of wiper blade
so that it firmly touches the floor.
Tighten all screws and test run the machine for liquid
splashing under the blades.
Do not adjust blades too low, as it will cause damage
and excessive wear to the blades.
Sidekick Chemical Dispenser
Purge the lines with clean water after each use.
The squeeze tube under the see-through cover on top
of the pump requires periodic replacement
approximately every 500 hours (depending on
chemicals used).
To replace the squeeze tube:
1. Remove ferrule nuts from pump
2. Unscrew the pump cover, exposing the
squeeze tube.
3. Remove the damaged squeeze tube and
replace with a new squeeze tube.
4. A screwdriver can be inserted in the spinner
hub and rotated as the tube is being replaced to
ease insertion. It is important not to twist the
tube as it is being inserted and the fittings
should be inserted “flat side up”
5. Add grease from the included packet.
6. Re-install cover and resume normal operation.
Daily Maintenance
Battery Charging
The master power switch and all other switches
(except the EMERGENCY STOP) must be turned
OFF.
You must recharge the batteries when indicated by
the battery meter, and after every use. Read the
battery meter while the machine is in use.
*350 AH batteries normally require 14 ½ -16 1/2 hours
to fully charge.
NEVER let the batteries sit overnight after the
machine has been run for more than 1 hour since last
recharge.
See Battery Charger section.
Battery Electrolyte (Liquid) Level (Flooded only)
Inspect the electrolyte level of at least one cell in each
battery before charging. The liquid must be visible
above the internal plates. Do not charge the batteries if
the liquid is below the plates.
Add only distilled water to the cell of a battery to
adjust the liquid level. Do not use well or tap water.
Before charging, add only enough water to cover the
top of the internal plates. After charging, add only
enough water to bring the level to the bottom of the fill
tube.
Do not overfill the battery liquid level, this will cause
electrolyte (acid) spill. Spilled electrolyte (acid) can
cause machine damage and personal injury. Clean
up and dispose of all spills immediately.
See the battery-warning sheet (page 3) for more
details.
If machine is equipped with battery Auto-Fill system,
fill batteries prior to charging.
Battery Packages
The Wrangler 2730 or 3330 is a 36-volt system and is
available with two battery packages:
Six (6) 6-volt, 235 Amp Hour Batteries.
Six (6) 6-volt, 350 Amp Hour Batteries.
Consult your local NSS authorized distributor for
application recommendations
Solution and Recovery Tanks
The recovery tank is emptied through a large rubber
hose at the front of the machine. Remove the plug
and drain the liquids according to your local and
federal regulations.
Every time you empty the recovery tank, we
recommend that you add at least 4 to 6 ounces
[120mL to 175mL] of defoamer chemical into the
recovery tank before resuming work. Vacuum the
defoamer into the empty recovery tank through the
squeegee vacuum hose.
At the end of the day empty all liquids from both
solution and recovery tanks. Rinse both tanks with
clean water to prevent chemical residue build-up,
allow to air - dry to prevent odors.
Remove any residue from screen and float ball to
ensure proper operation. Replace float assembly in
recovery tank.
Check clear lid for airtight seal.
Check the drain hose for damage.
Inspect and clean the vacuum filter located under the
top metal plate. Every 50 hours.
Pad Drivers or Brushes
Remove either pad drivers or brushes from machine
after use.
Rinse with clean water to prevent chemical residue
build-up. ***NOTE: prolonged exposure to some wax
stripper brands may degrade the material. Rinsing
after use in a wax floor stripping application is highly
recommended.
Allow to air-dry by installing in drying position on front
of solution tank, on a peg or upside down on a shelf.
Inspect for wear or damage. Repair or replace as
needed.
Squeegee Assembly
Remove squeegee assembly from machine.
Rinse with clean water to prevent chemical residue
build-up. ***NOTE: prolonged exposure to some wax
stripper brands may degrade the squeegee material.

Rinsing after use in a wax floor stripping application is
highly recommended.
Allow to air dry, it can be stored on top of the machine
for drying.
Inspect the squeegee assembly, linkage, and vacuum
hose, for wear, damage or obstruction. Repair or
replace as needed.
Remove debris from squeegee hose and entrance to
recovery tank.
Weekly Maintenance (20 Hours)
Verify all daily maintenance has been performed.
Check all battery terminal and cable connections.
Tighten as needed. Loose connections are dangerous
and can cause personal injury and machine damage.
Clean any corrosion from battery terminals and
cables.
Drain all liquids from battery compartment. Dispose
of according to local and federal regulations.
Check solution flow to pad drivers / brushes. Remove,
inspect and clean the solution filter assembly.
Flush clean solution tank and hoses with a mixture of
8 oz. (250ml.) white vinegar to one-gallon (4 liter)
warm water.
Repair or replace any worn or damaged components
as needed.
Inspect the squeeze tube in the Sidekick Chemical
dispenser for cracks or leaks.
****CAUTION**** Inspect and replenish water in every
cell of every battery weekly. Failure to maintain proper
electrolyte level in all cells will cause premature battery
failure and void the warranty.
Monthly Maintenance (100 Hours)
Verify all daily and weekly maintenance has been
performed.
Inspect vacuum motor filter under metal plate on top
of recovery tank. Clean or replace as necessary.
Check casters for wear or damage.
Grease both pillow block bearings on the drive axle
and the caster swivel bearings. Use a hand held
grease gun and a high grade of water resistant lithium
base grease.
Lubricate the drive chain and sprockets with a
foaming spray type lubricant. A motorcycle spray
type chain lube would be appropriate.
Do not use your finger to apply lubricant.
Check chain tension, and adjust as needed. Check
chain tension by squeezing the chain midway
between the sprockets. The chain should flex 1/4”
(6mm) on each side.
Adjust chain tension by loosening the four (4) hex
bolts of the drive motor mount. Slide the drive motor
toward the drive wheel to loosen chain. Slide drive
motor away from the drive wheel to tighten the chain.
Tighten all four hex bolts.
Inspect all mechanical linkages, pivot points and ball
joints for freedom of movement. Use a penetrating
spray lubricant that is water resistant. Do not use
WD 40 lubricant.
Check Return Spring of the twist grip handles. If it
appears weak or does not return the twist grips to the
neutral position, replace spring.
Inspect all fasteners (bolts, screws, nuts) at
mechanical linkages, pivot points and ball joints for
tightness. Tighten as needed.
Equalize the batteries (flooded cell only).
Clean polyethylene body components to remove
chemical and liquid residue and maintain a “like new”
appearance.
Remove top cover plate and clean the filter. Replace
filter as required.
Repair or replace any worn or damaged components.
Tighten and Lube the drive motor chain.
Mandatory Periodic Maintenance
It is mandatory that the following maintenance
procedure be performed at the described interval.
Failure to perform this procedure may result in poor
machine performance, machine component damage
and failure. This procedure should be performed by an
NSS authorized distributor or service center. Repairs
performed by an unauthorized company will void the
machine warranty. If you require assistance finding an
authorized service center, please contact NSS
Enterprises, Inc.
After every 450-500 hours of operation you must
inspect vacuum motor carbon brushes for wear.
Replace the vacuum motor carbon brushes when they
are 7/16in. (11mm) in length.
After every 650-700 hours of operation you must
inspect drive motor carbon brushes for wear
Replace the drive motor carbon brushes when they are
3/8in. (9mm) in length.
After every 650-700 hours of operation you must
inspect brush motor carbon brushes for wear
Replace the brush motor carbon brushes when they are
1/2in. (13mm) in length.
Battery Replacement Notes
Entire Pack.
o It is always recommended to replace all batteries in
the pack at the same time.
One or more batteries out of the pack. This is not
recommended. Replacing just one or two batteries
out of the pack can lead to the following:
Overcharging the new, or the remaining original,
batteries.
Undercharging the new, or remaining original,
batteries.
Over discharging either the new or the remaining
original batteries.
If you wish to only replace some of the batteries in
the pack, follow these steps for best results:
Replacement batteries must always be of the
same battery manufacturer, model, and amp-
hour rating as the remaining batteries in the pack.
Never mix batteries from different manufacturers
in the same pack.

Fully charge both the new battery, and the
remaining original batteries. (specific gravity =
1.265 minimum, use a hydrometer)
Use a replacement battery that is close to the
same age as the remaining original ones.
Do not run the machine as long for about 20
cycles. For example, if you used to get 4 hrs
runtime, only run it for 2.5 hrs, and then charge
the batteries completely.
Opportunity charge. Equalize after 30 days.
The above steps will provide the best opportunity
for the new battery(s) to join the pack.
ACTIVATION OF DRY CHARGED
BATTERIES
NSS supplies some batteries in a “dry charged”
condition without any acid (electrolyte) in the battery.
The batteries cannot be used in this condition; they
must be activated by the addition of the battery acid
(electrolyte). Failure to follow this procedure will cause
severe damage to the batteries.
Materials Required
1.265 Specific Gravity, Sulfuric Acid, to fill batteries.
Rubber gloves and safety eye protection handling
Sulfuric acid.
Plastic funnel to pour Sulfuric acid into batteries.
Adjustable wrench and pliers to install battery cables.
Filling Procedure
Remove the cap from each cell of the batteries.
Fill each cell with Sulfuric acid fully to the bottom of
the access hole.
Allow the batteries to absorb the acid for a period of
one hour. During this time the acid level in each cell
will drop and the batteries will become warm.
Refill each cell with Sulfuric acid to a point 1/4” (6mm)
below the bottom of the access hole.
Replace the cap in each cell of the batteries.
Neutralize any spilled acid with bicarbonate of soda.
Rinse the battery case clean with clean water and dry
the battery case.
Batteries are heavy - use two people to install.
Refer to wiring diagram inside the battery
compartment. Align batteries in compartment as
shown on diagram.
Install battery cables as shown on wiring diagram
Tighten bolts and hex nuts with a wrench.
Caution: Do not short across two terminals with a
wrench.
Loose or improper battery connections will cause
battery or machine damage and possible personal
injury.
Connect the charger to the machine and allow it to
perform one complete charging cycle, (8 – 12 hours).
Liquid level adjustment during the life of the batteries
should be made with distilled water.
If dry charged batteries have been filled with acid
(electrolyte) and are placed in storage, the batteries
must be recharged every 30 days to prevent damage.
BATTERY AUTO-FILL INSTRUCTIONS
WARNING: When working with Lead-Acid batteries
and Battery Acid observe all battery manufacturers’
safety precautions.
Caution: This option is not for well or tap water.
Connect the regulated hose system to water supply.
Aim the purge into drain or bucket and turn on water
supply. When air is removed from the system
disconnect quick coupler by pushing the button
labeled CPC.
Check the system for leaks by connecting the
regulated hose system quick connect to the Auto-Fill
quick connect. After connection the red balls in the
flow indicator will spin indicating water flow. When
the balls stop spinning check the system for leaks and
IMMEDIATELY disconnect the quick coupler.
Place the dust cover over the male quick coupler on
the Auto Fill system. Turn off water supply and
remove the regulated hose system. Reinstall the
purge quick coupler and store in a safe place.
We recommend you remove the hose swivel and
valve from one cell to check the electrolyte level after
the first fill.
Battery Charger
The onboard battery charger supplied with this machine
is capable of charging lead acid batteries from 185 to
350ah capacity. There is no need to change algorithms
or settings based on battery manufacturer, or battery
size.
The charger can also be set to charge flooded (wet)
cell, AGM, or Gel batteries. LED’s on the charger
indicate which type of battery the charger is set to
charge. One setting is for Flooded and (most) AGM
batteries, the other setting is only for Crown and Trojan
AGM and GEL batteries.
Depending on the battery charger model, the charger
can operate on 100/115/230 VAC 1ph 50/60 HZ power,
and will automatically detect these input voltages.
Before connecting the battery charger to power, check
the label on the battery charger to verify the proper
input power.
Determining Your Battery Type
CAUTION: DIFFERENT BATTERY TYPES HAVE
DIFFERENT CHARGING REQUIREMENTS. FAILURE
TO PROPERLY IDENTIFY YOUR BATTERY TYPE
AND SET THE CHARGER ACCORDINGLY WILL
RESULT IN BATTERY DAMAGE, AND VOID THE
WARRANTY.
Your machine may have been ordered with batteries
installed at the NSS factory. The standard battery type,
normally supplied by NSS, is the flooded (wet) cell lead
acid battery. Gel and AGM sealed batteries may also
be available at customer request.

Flooded (wet) batteries can be easily identified by the
removable cell caps. Removing the caps allows
inspection of the liquid electrolyte (sulfuric acid) level in
each cell.
AGM (Absorbed Glass Mat) batteries are sealed,
maintenance free batteries. The do not have cell caps
intended for removal. Look for “AGM” printed on the
tops or sides of the batteries.
Gel (gelled electrolyte) batteries are also sealed,
maintenance free batteries. They do not have cell caps
intended for removal. Look for “GEL” printed on the
tops or sides of the batteries.
Battery Charger Indicator LED’s
Your battery charger is equipped with LEDs that
indicate the following:
Battery Type Setting. Either of these two LEDs will
be illuminated, anytime the charger is plugged in, to
signal which type(s) of batteries the charger is
configured to charge. The two options available are:
Wet / AGM: When this LED is illuminated, the
charger is configured to charge either flooded
(wet), or AGM batteries.
Gel Cell. When this LED is illuminated, the
charger is configured to charge Gel batteries
ONLY. EXCEPTION: Crown and Trojan AGMs
are to be charged with the Gel setting.
State of Charge Indicators. Four additional LEDs
provide information about the charge level of the
batteries during charging.
o 30%, 60%, 90% and 100%.
Fault Indications. During charging, the charger
provides feedback about the charge process and any
problems detected. It will provide feedback and
signal the type of problem by flashing LEDs as
described below:

Changing the Battery Type Setting
The standard setting for the onboard battery charger is
Flooded/AGM. EXCEPTION: If your machine was
ordered from NSS equipped with Crown AGM or Gel
batteries, then the charger was configured for Gel
batteries at the factory.
Configuring the Charger for Gel batteries:
1. Remove the top cover.
2. Pull the jumper off the 2-pin connector (position 1),
and then move the jumper to position 2 on only one
pin of the 2-pin connector. See photo below.
3. Reinstall the top cover.
Configure the Charger for Flooded/AGM batteries
1. Remove the top cover
2. Pull the jumper from the 2-pin connector, and install
the jumper at position 1 (on both pins of 2-pin
connector).
3. Reinstall the top cover.
Operating the Battery Charger
CAUTION: DIFFERENT BATTERY TYPES HAVE
DIFFERENT CHARGING REQUIREMENTS. FAILURE
TO PROPERLY IDENTIFY YOUR BATTERY TYPE
AND SET THE CHARGER ACCORDINGLY WILL
RESULT IN BATTERY DAMAGE, AND VOID THE
WARRANTY.
The battery charger is fully automatic. Simply plug the
charger into a suitable wall outlet, and the charger will
charge the batteries. The green 100% LED will be
continuously illuminated when the charge cycle is
complete.
A bubbling, or boiling sound coming from the batteries
during the last few hours of the charge is normal. The
batteries may be warm, but not too hot to touch.
Equalizing the batteries (Flooded only)
The batteries should be equalized once every 30 days
to ensure maximum battery life.
To equalize the batteries:
Plug in the charger, and fully charge the batteries
(until the green 100% LED is on continuously).
Unplug the charger from the wall outlet, then plug it
back in.
The charger will run for 2 hrs, holding the batteries
at a constant voltage, and equalizing each cell.
Battery Do’s and Don’ts:
a. You do not have to fully discharge the batteries
before charging. They do not have a “memory”.
b. Plug the charger in anytime the machine is not in
use.
c. NEVER let the electrolyte level fall below the tops of
the plates (flooded cell batteries). This will damage
your batteries almost immediately, and void the
battery warranty. They can tell if this happened.
d. NEVER refill the batteries with well or tap water
(flooded cell batteries).
e. NEVER overfill the batteries (flooded cell batteries).
f. NEVER let the batteries sit discharged overnight (or
between shifts).
g. ALWAYS check the electrolyte level about every 3
or 4 charge/discharge cycles BEFORE CHARGING.
h. ALWAYS refill the batteries with distilled water (if
needed) AFTER CHARGING.
i. ALWAYS fully recharge the batteries after use (until
the green LED comes on).
j. ALWAYS equalize the batteries (Flooded only)
every 30 days.
k. NEVER OVER DISCHARGE!
l. NEVER charge GEL batteries with the charger set to
FLOODED/AGM.
m. NEVER charge FLOODED/AGM batteries with the
charger set to GEL. EXCEPTION-CROWN
ANDTROJAN AGM’S TO BE CHARGED WITH
GEL SETTING.
Opportunity Charging
Opportunity charging is charging the batteries when an
opportunity presents itself, such as during breaks, and
is done in addition to a full charge cycle.
Opportunity charging is recommended, as this extra
charging time will help raise the operating voltage of the
batteries, and will help ensure maximum cycle life.
Top cover
screws
Position 1
For Wet
Cell
(Default)
(Jumper on
both pins)
Position 2
For Gel Cell
(Jumper on 1
Pin of 2-Pin
Connector
)
Jumper
Location

NOTE: Crown and Trojan AGM batteries should be charged with the GEL setting.
**The charger has been tested on batteries from the following manufacturers:
Trojan flooded cell
US Battery flooded cell
Deka flooded cell
Crown gel
Concord gel
Discover AGM
Notes on LED indications per DoE compliance:
When first connected to DC (AC not connected), the LEDs will display one or more of the following:
The LEDs will flash the charger’s ID code (this is for PCS internal use only). Once the LEDs flash the ID, they will
only display one yellow LED. This configuration will remain until AC is detected and a charge cycle is in progress.
There is also a possibility the LEDs will not flash their ID code and only show a yellow LED.
Lastly, the LEDs may not flash their ID code and may not show any LEDs until AC is detected.
If the AC line and neutral wires are reversed, the unit will wait 2 minutes before starting a charge. NOTE: The 2-
minute wait period will also be a factor if the charger is being powered by anything other than normal grid AC such
as a conventional generator, inverter, etc.
If the AC plug is disconnected during charge, the unit will turn off as expected. The user may hear some clicking
noise, but should not be alarmed. This is the Powered by Battery/DOE functionality checking for AC connection.
TABLE 1 Batter
y
T
y
pes
NSS Part
Number
Crown Part
Number
Battery
Volts
System
Volts
Amp
Hour
BATTERY TYPE
SETTING
4491061 1-1470 12 36 215 Flooded/AGM
3390361 1-1435 6 24 & 36 235 Flooded/AGM
2392111 1-1427 12 24 115 SPE CURVE 0
6393651 1-1428 12 24 130 SPE CURVE 0
2392731 1-12145 12 24 100 SPE CURVE 1
6491931 1-1437 6 24 & 36 200 Gel
2691501 1-1450 6 36 350 Flooded/AGM

TROUBLE-SHOOTING
PROBLEM CAUSE SOLUTION
No Solution Flow.
Solution tank is empty. Fill the tank.
Clo
gg
ed filter. Clean filter.
The solution valve is closed. Open the solution valve.
Obstruction in the solution hose. Remove the obstruction.
Solution valve or linka
g
e dama
g
ed. Repair / replace the valve linka
g
e.
Solution hose kinked. Check for kinks and remove.
Solution Flow Does
Not Stop.
Solution solenoid is damaged. Inspect wire connections and valve, repair / replace
the solenoid.
Solution valve or linka
g
e dama
g
e. Repair / replace the valve linka
g
e.
Dama
g
ed seat and washer in valve. Replace valve.
The valve stem is dirt
y
. Clean and lubricate valve stem.
Hose disconnected or dama
g
ed. Reinstall or replace hose.
Will Not Pick Up Any
Water From Floor.
Squee
g
ee is up. Lower squee
g
ee.
Squee
g
ee hose is off. Reinstall hose.
Vacuum motor switch is off. Turn vacuum motor switch “on”.
Recover
y
tank is full. Empt
y
tank.
Vacuum shut-off float is stuck. Clean screen and remove obstruction.
Obstruction / damage in the
squeegee, squeegee hose or
standpipe.
Remove obstruction / repair damage.
Leakin
g
over
g
asket. Remove old
g
asket / replace.
Vacuum motor is not running. Have an authorized serviceman repair.
Recovery drain hose not plugged
properl
y
. Install drain hose plug properly.
Will Not Pick Up All Of
The Water From The
Floor.
Debris on squeegee blades.
Squeegee blade is worn / damaged.
Clean squeegee.
Reverse / replace squee
g
ee blade.
Obstruction / damage in the
squeegee, squeegee hose, or
standpipe.
Remove obstruction / repair damage.
Squeegee angle needs adjustment.
A
d
j
ust an
g
le.
Vacuum motor worn out. Repair / replace vacuum motor.
Recovery tank drain hose damaged. Repair / replace recover
y
drain hose.
Vacuum filter clogged. Clean vacuum filter under top metal plate.
Runtime is less than
when new
Electrolyte level is too low.
A
dd distilled water and char
g
e.
Batteries are not fully charged.
A
llow char
g
er to run a full c
y
cle.
Battery terminals are dirty / damaged. Clean terminals and connectors
Batteries are sulfated. Don’t let low
batteries sit overnight without
char
g
in
g
.
Equalizing the batteries, maybe 2 or 3 times, will help
reduce the sulfation.
Battery is defective or worn out.
Check for fault codes on the battery charger while the
battery charger is operating. Have an authorized
serviceman test the batteries (s.g./charged volts/load
test
)
.
Tops of batteries are dirty / wet. Clean / dr
y
, & clean terminals
Charger is damaged. Have an authorized serviceman repair.
Cleaning Is Not Even.
Brush / pad is worn. Replace brush / pads.
Damage to brush assembly; casters
or solution valve. Have an authorized serviceman repair.
Hoses may be kinked or obstructed Repair / remove obstruction
Machine does not run.
Battery cables loose or not connected.
Check and connect or ti
g
hten.
Circuit breaker tripped. Reset circuit breaker.
Batteries not charged. Char
g
e batteries.

Battery meter is
flashing code
LED’s scroll left to right = throttle pot
ad
j
. Throttle pot neutral not set to2.50kohm
All LED’s flash = estop button pushed Release estop button.
Brushes will not shut
off.
Brush deck switch arm may be bent or
broken.
Bend the arm on the switch upward, or replace the
switch.
Sidekick pump not
operating
Turned off, water valve is off, brushes
turned off. Ensure pump, solution valve, and brushes are on.
Improper wiring.
Sensor plugged.
Inspect/repair by qualified technician
Remove sensor and blow air (5psi [.03MPa] max)
thru in the opposite direction as the arrow on the part
to clear the obstruction.
Sidekick operating,
but not pumping
chemical
Vacuum leak at fittings on bottle cap,
Squeeze tube cracked, chemical
bottle empt
y
.
Check fittings at bottle cap for leaks.
Replace squeeze tube if cracked. Fill chemical bottle.
NOTE: If any problems remain after taking the above steps, contact your local authorized
distributor / service station for further evaluation and repair.

Wrangler 2730 & 3330 Diagnostic Codes:
Below is a list of self-help actions. Try to use this list before you contact your local authorized distributor / service
station. Go to the number in the list which matches the number of flashing bars and follow the instructions.
The battery needs charging, there is a bad connection to the battery or dependent on
programming, may indicate that the battery lockout function is active and the controller is in a
restricted mode of operation. Check the connections to the battery. If the connections are good,
try charging the battery.
There is a bad connection to the motor. Check all connections between the motor and the
controller.
The motor has a short circuit to a battery connection. Contact your local authorized distributor /
service station for further evaluation and repair.
The battery charge level has fallen below the Battery Lockout Level and the controller is inhibiting
certain machine functions.
Charge the battery.
Not used.
The controller is being inhibited from driving; this may be because the battery charger is connected.
A throttle fault is indicated. Make sure that the throttle is in the rest position before switching on the
machine.
A controller fault is indicated. Make sure that all connections are secure.
The parking brakes have a bad connection. Check the parking brake and motor connections.
Make sure the controller connections are secure.
An excessive voltage has been applied to the controller. This is usually caused by a poor battery
connection. Check the battery connections.

How to read charging data from a battery charger
equipped with DeltaView® Link
DeltaView Link
DeltaView Link is a system that allows you to read
data from your battery charger using an app on your
smartphone. The battery charger transmits data to
your phone’s Bluetooth receiver.
These instructions apply to Dual Pro battery chargers
manufactured after 11/29/16. The manufacturing
date is located on the barcode tag attached to the
pigtail cord coming out of the charger. This battery
charger is found on Champ Rider Scrubbers,
Wrangler 3330, Wrangler 2730, Wrangler 2625,
some Wrangler 2016 models, and Charger battery
burnishers.
Instructions
Step 1. Download the Pro Charging Systems
“DeltaView Link” app
For Apple iPhones: Go to the app store and search
for “DeltaView Link” by Pro Charging Systems, LLC.
For Android Phones: Go to the play store and search
for “DeltaView Link” by Pro Charging Systems, LLC.
Step 2. Turn on your phone’s Bluetooth function. If
your Bluetooth is off, the app will turn it on for you
when it starts. Answer “yes” when prompted to turn
on Bluetooth.
Step 3. Locate the “DeltaView Link” icon on your
phone and press it to start the app.
Step 4. A list of all battery chargers that are
connected to AC power within range of your phone
will appear. Tap on a battery charger to select it.
Step 5. Follow the app prompts to read through the
data on your charger. You will find detailed
information about the last 100 charge cycles.

MANUEL D'UTILISATION
WRANGLER 2730 DB & 3330 DB
Translation from Original Instructions
Une Traduction Des Instructions Originales
Traducción de las Instrucciones Originales

MANUEL D'UTILISATION
WRANGLER 2730 DB & 3330 DB
CONSERVER CES INSTRUCTIONS
CONSIGNES DE SÉCURITÉ IMPORTANTES
AVERTISSEMENT: Le non-respect de ces instructions peut causer des blessures à
l'opérateur de la machine ou les spectateurs.
AVERTISSEMENT: Danger
d'incendie ou d'explosion.
NE JAMAIS utiliser cet appareil dans
une atmosphère explosive (poussière
de grain, liquides ou vapeurs
inflammables, etc.).
AVERTISSEMENT: Danger d'incendie ou
d'explosion.
NE JAMAIS tenter de ramasser des
matériaux inflammables ou combustibles ou
d'utiliser ces matériaux dans le réservoir.
AVERTISSEMENT: Huile d'orange (D-limonène) n'est pas compatible avec les matières
plastiques utilisées dans NSS autolaveuses et le système de mesure chimique Sidekick.
L'utilisation de D-limonène peut entraîner des dommages à la machine.
AVERTISSEMENT: Ce produit contient un produit chimique connu dans l'état de
Californie pour provoquer des cancers et des malformations congénitales ou d'autres
problèmes de reproduction.
UTILISATION
Cette machine est conçue pour brosser les sols dans un
environnement intérieur. NSS ne recommande pas d'utiliser
cet appareil à d'autres fins.
POUR VOTRE SÉCURITÉ:
TOUJOURS lire et comprendre toutes les instructions avant
d'utiliser ou d'entretenir la machine.
TOUJOURS utiliser cette machine uniquement comme décrit
dans ce manuel.
NE JAMAIS tenter de faire fonctionner cette machine, sauf si
vous avez été formé dans son fonctionnement.
NE JAMAIS laisser une personne non formée à fonctionner
cette machine.
NE JAMAIS tenter de faire fonctionner cette machine si elle
ne fonctionne pas correctement ou s'il a été endommagé de
quelque façon.
NE JAMAIS déconnecter ou modifier des interrupteurs ou
des dispositifs de sécurité (disjoncteur).
NE JAMAIS laisser tomber ou insérer un objet dans les
ouvertures de la machine.
NE JAMAIS utiliser cette machine avec une ouverture d'air
bloqué. Gardez toutes les ouvertures d'air libres de
poussière, les peluches, les cheveux, etc.
NE JAMAIS ramasser tout ce qui brûle ou qui fume, comme
des cigarettes, des allumettes ou des cendres chaudes.
NE JAMAIS pulvériser cette machine avec de l'eau ou des
liquides.
NE JAMAIS laisser le moteur d'aspiration ou la prise de
charge de la batterie à se mouiller ou un court peut se
produire.
NE JAMAIS utiliser cette machine lorsque le chargeur de
batterie est branché.
NE JAMAIS utiliser cette machine avec la jupe latérale
enlevé.NE JAMAIS laissez cette machine pour être utilisé
comme un jouet. Une attention particulière est nécessaire
lorsqu'il est utilisé par ou près des enfants.
TOUJOURS portez des chaussures de tennis propres ou
chaussures " anti-dérapant". Cuir à semelles des
chaussures vont devenir très glissant lorsqu'il est mouillé.
TOUJOURS garder le visage, les doigts, les cheveux ou
toute autre partie du corps ou des vêtements amples loin
de toute ouverture de la machine ou d'une partie mobile
(renouvelable brosse, pilote de la tablette, ou un moteur à
vide).
TOUJOURS mettre l'appareil hors tension lors de la
fixation des tampons ou des pinceaux.
TOUJOURS retirer les touches lorsque cette machine est
laissée sans surveillance.
TOUJOURS s'assurer que la rampe est fixée au véhicule
avant de charger / décharger.
TOUJOURS utiliser une extrême prudence lors de
l'utilisation de la machine sur une rampe ou de
chargement / déchargement de cette machine dans ou
hors d'un camion / remorque. Soyez extrêmement prudent
si la rampe est humide, grasse, ou recouverts de produits
chimiques de nettoyage.
NE JAMAIS arrêter ou faire tourner la machine sur une
rampe ou pente.
NE JAMAIS tenter de monter un grade ou d'utiliser cette
machine sur une rampe ou pente de plus de 8°.
NE JAMAIS stationner ou remiser la machine près d'un
quai , sur des rampes , à proximité d'un four, de la
chaudière , de la flamme nue , ou de toute autre source
de chaleur élevée.
NE JAMAIS laissez cette machine à geler.
NE JAMAIS exposer la machine à la pluie, la neige ou
des températures extrêmes.
NE JAMAIS entreposer tous les articles de cette machine.
TOUJOURS rangez cet appareil à l'intérieur dans un
endroit frais et sec.
TOUT SERVICE réparations doivent être effectuées par un distributeur OU STATION SERVICE
AUTORISÉ NSS utilisant uniquement NSS PIECES DE MATERIEL DE ORIGINAL.
Other manuals for Wrangler 3330 DB
1
This manual suits for next models
1
Table of contents
Languages:
Other NSS Scrubber manuals

NSS
NSS CHAMP 2417 RB User manual

NSS
NSS eForce 26 User manual

NSS
NSS CXC 200 User manual

NSS
NSS Wrangler 3330 DB User manual

NSS
NSS champ 2929 rb User manual

NSS
NSS CHAMP ZS 35 User manual

NSS
NSS WRANGLER 2616 DB User manual

NSS
NSS Rally 55 User manual

NSS
NSS WRANGLER 1708CB User manual

NSS
NSS WRANGLER 1708CE User manual
Popular Scrubber manuals by other brands

Clarke
Clarke Vantage 17 E Instructions for use

Raidon
Raidon InTANK Series Quick installation guide

Numatic
Numatic HGB 3045/55 Owner's instructions

Ghibli
Ghibli ROUND 45 E 55 TOUCH Use and maintenance

Nilfisk-Advance
Nilfisk-Advance FLOORTEC R 670 P Instructions for use

Parish
Parish PANTHER 15B owner's manual