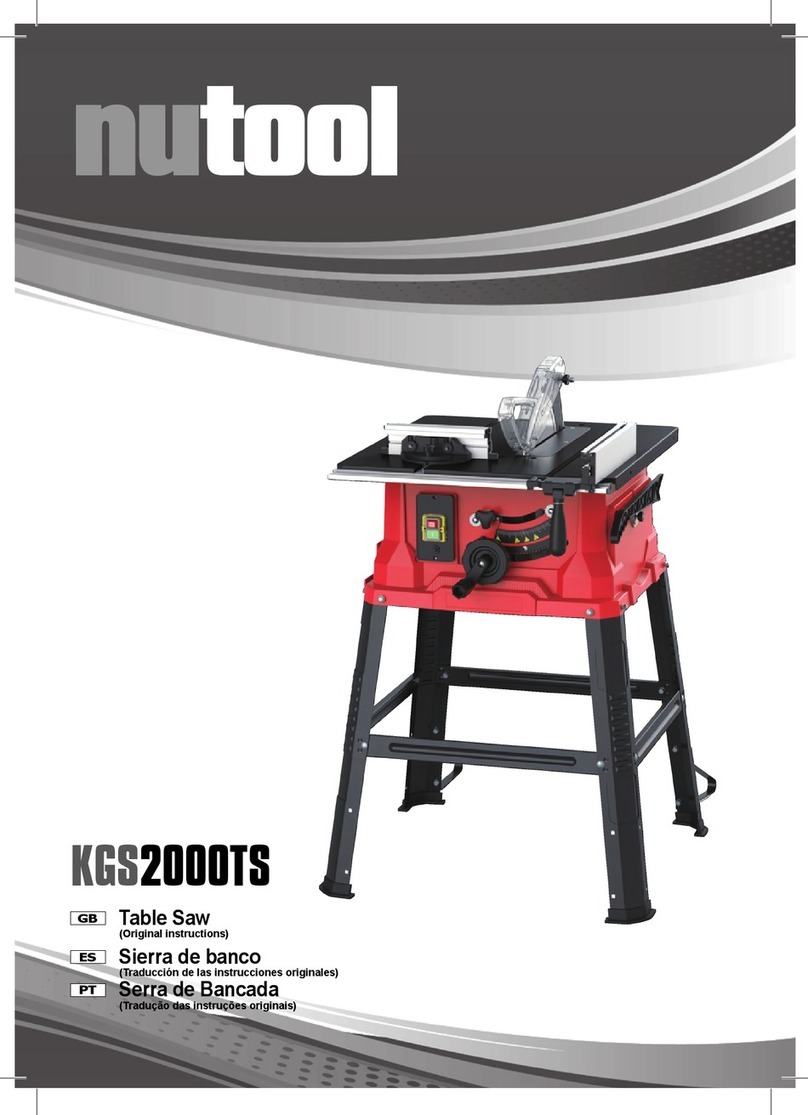
NUTOOL NTS1500 User manual

NTS1500
Table Saw
GB
(Original instructions)
LV
Zāģēšanas darba galds
(Oriģinālās instrukcijas tulkojums)
PL
Piła stołowa
(Tłumaczenie oryginalnej instrukcji)
LT
Pjūklo stalas
(Originalių instrukcijų vertimas)

IT Conservare questo manuale d’istruzioni per poterlo consultare in futuro
GB Preserve this handbook for future reference
FR Conserver le présent manuel pour pouvoir le consulter ultérieurement
DE Diese Bedienungsanleitung für späteres Nachschlagen sorgfältig aufbewahren
ES Conservar este manual de instrucciones para poder consultarlo en el futuro
PT Guardar este manual de instruções para o poder consultar no futuro
NL Bewaar deze handleiding voor toekomstige raadpleging
DK Opbevar denne brugsanvisning således, at det altid er muligt at indhente oplysninger på et senere tidspunkt
SE Förvara denna bruksanvisning för framtida konsultation
FI Säilytä ohjekirja voidaksesi etsiä siitä tarvittaessa ohjeita
GR Φυλάξτετοπαρόνεγχειρίδιοοδηγιώνγιαμελλοντικήχρήση
PL Przechowywaćniniejszypodręcznikinstrukcjiobsługitak,abymożnabyłokorzystaćzniegowprzyszłości
HR Sačuvajteovajpriručniksuputamadabistegamoglikonzultiratiubudućnosti
SI Skrbnoshranitetapriročnik
HU Őrízzemegakézikönyvetajövőbenvalótanulmányozáshoz
CZ Uložtetutopříručkuspokynypropoužitínavhodnémmístě,abystejimohlikdykolipoužít
SK Uschovajtetútopríručkuspokynminaobsluhuprístrojatak,abystemohlidonejkedykoľveknahliadnúť
RU Сохраняйтеданноеруководствовтечениевсегопериодаэксплуатациикомпрессора
NO Du må oppbevare denne bruksanvisningen slik at du kan slå opp i den ved senere behov
TR Bukullanımkılavuzunugelecektedanışmakiçinmuhafazaediniz
RO Păstraţimanualuldeinstrucţiunipentrua-lputeacitişipeviitor
BG Запазететоваръководствопоексплоатацията,задаможетедагоизползватеивбъдеще
RS Sačuvajteovajpriručniksuputstvimadabimoglidagakonsultujeteiubudućnosti
LT Saglabātinstrukcijurokasgrāmatu,laivarētuizmantotnepieciešamībasgadījumā
EE Hoidke käesolevat kasutusjuhendit alles, et saaksite seda tulevikus kasutada
LV Išsaugotišiąinstrukcijųknygutętam,kadateityjegalėtumėtejojepasikonsultuoti

3
Leggere attentamente il manuale d’istruzioni prima dell’uso
Before use, read the handbook carefully
Lire attentivement le Manuel Opérateur avant toute utilisation
Vor Inbetriebnahme Gebrauchsanleitung aufmerksam lesen
Leer atentamente el manual de instrucciones antes de usar el equipo
Ler com atenção o manual de instruções antes do uso
Leesvóórgebruikaandachtigdehandleidingdoor
Læs omhyggeligt instruktionsmanualen før brug
Läs bruksanvisningen noggrant före användning
Lue käyttöopas huolellisesti ennen käyttöä
Διαβάστεπροσεκτικάτοεγχειρίδιοοδηγιώννπριναπότηχρήση
Przedużyciemnależydokładniezapoznaćsięzinstrukcjamiobsługi
Prijeupotrebepažljivopročitajteuputezaupotrebo
Pred uporabo, pazljivo preberite navodila za uporabo
Használatelőttfigyelmesenolvassaelakézikönyvet
Předzahájenímprácesipozorněpřečtětepříručkupropoužití.
Predpoužívanímvýrobkusipozorneprečítajtenávodnajehopoužitie.
Передтем,какприступитькработе,внимательнопрочитайте
инструкциюпоэксплуатации
Les nøye bruksanvisningen før bruk
Kullanımdanöncekullanımkılavuzunudikkatliceokuyunuz.
Citiţicuatenţiemanualuldeinstrucţiuniînaintedeutilizare!
Внимателнопрочететеръководствотопоексплоатацияпредиупотреба
Preupotrebepažljivopročitajtepriručniksuputstvima
Priešimdamiesidarboatidžiaiperskaitykitenaudojimovadovėlį
Ennekasutamistlugegekasutamisjuhendtähelepanelikultläbi.
Uzmanīgiizlasietizmantošanasinstrukcijupirmsproduktalietošanas
Pericolo, usare prudenza
Danger, take care
Danger: agir avec prudence
Vorsicht, Gefahr
Peligro,actuarconprecaución
Perigo, tomar cuidado
Gevaar, wees voorzichtig
Fare, vær forsigtig
Fara-varförsiktig!
Vaara, noudata varovaisuutta
Κίνδυνος,χρησιμοποιήστετομεπροσοχή
Ostrożnie,niebezpieczeństwo
Pažnja,opasnost
Pozor, nevarnost
Veszélyhelyzet,legyenóvatos
Nebezpečí,postupujteopatrně!
Nebezpečenstvo,pracujteopatrne!
Опасно,будьтеосторожны
Fare, vær forsiktig
Tehlike,dikkatlekullanınız
Pericol!Acţionaţicuprudenţă!
Опасност,бъдетевнимателни
Opasnost, budite na oprezu
Pavojinga,būkiteatsargus
Ohtlik, olge ettevaatlik
Esietuzmanīgi-lietojietproduktupiesardzīgi
IT-I rifiuti diapparecchiature elettriche edelettroniche (RAEE) nonpossono essere
trattaticomeinormalirifiutidomestici.Provvederealricicloladdoveesistonoimpianti
adeguati.Consultarel’entelocaleoilrivenditoreperconsiglisuraccoltaesmaltimento.
GB - Waste electrical and electronic equipment (WEEE), should not be disposed of
with household waste. Please recycle where facilities exist. Check with your Local
Authority or retailer for recycling advice.
FR-Lesdéchetsd’équipements électriques etélectroniques(DEEE)nepeuvent
pasêtretraitéscommedesdéchetsdomestiquesnormaux.Procéderaurecyclage
dansdeslieuxprévusàceteffet.Serenseignerauprèsdel’entrepriselocaleoudu
revendeurpourêtreconseillésurlacollecteetl’élimination.
DE - Die Kennzeichnung auf dem Produkt gibt an, dass es nach seiner Lebensdauer
nicht mit dem normalen Hausmüll entsorgt werden darf, dieses Produkt muss in
zugelassenen Anlagen umweltgerecht recycelt werden. Bitte erkundigen Sie sich bei
der örtlichen Behörde oder beim Vertragshändler über Müllsammlung und -entsorgung.
ES-Losresiduosdeaparatoseléctricosyelectrónicos(RAEE)nopuedentratarse
como residuos domésticos normales. Proceda a reciclarlos siempre que existan
instalaciones adecuadas. Consulte a las autoridades locales o al minorista si
necesitainformaciónsobrelarecogidayreciclaje.
PT - Resíduos de aparelhagens elétricas e eletrônicas (RAEE) não podem ser
tratados da mesma forma que o lixo normal de casa. Providenciar a reciclagem do
lixo caso existam equipamentos adequados para tal fim. Consultar o órgão local ou
revendedor para obter orientações sobre a coleta e eliminação do lixo.
NL -Afgedankte Elektrische en Elektronische Apparaten (AEEA) mogen niet als
normaal huishoudelijk afval worden behandeld. Zorg voor hergebruik indien er
geschiktevoorzieningenzijn.Raadpleegzorgvuldigdeplaatselijkeautoriteitenofde
verkopervoordeinzamelingenontzorging.
DK - Affald fra elektriske og elektroniske apparater (WEEE) kan ikke håndteres
som almindeligt husholdningsaffald. Sørg for, at aflevere det til de dertil beregnede
affaldscentraler. Kontakt de lokale myndigheder eller salgsstedet for at indhente råd
om affaldssortering og tilintetgørelse.
SE - Elektriskt och Elektroniskt avfall (WEEE) skulle inte hanteras som vanligt
hushållsavfall.Varvänligochåtervinnavidlämpligaåtervinningscentraler.Frågatill
IT LEGENDA SEGNALETICA DI SICUREZZA SUI PRODOTTI
GB KEY TO PRODUCT SAFETY SIGNS
FR LEGENDE DES PICTOGRAMMES DE SECURITE
FIGURANT SUR LES PRODUITS
DE ERKLÄRUNG DER SICHERHEITSKENNZEICHNUNG AN
DEN PRODUKTEN
ES INSCRIPCIÓN DE LA SEÑALIZACIÓN DE SEGURIDAD
COLOCADA EN LOS PRODUCTOS
PT LEGENDA DA SINALÉTICA DE SEGURANÇA NOS
PRODUTOS
NL VERKLARING WAARSCHUWINGSSYMBOLEN OP
PRODUCTEN
DK SIGNATURFORKLARING TIL PRODUKTERNES
SIKKERHEDSSKILTNING
SE FÖRKLARING TILL SÄKERHETSSYMBOLER PÅ
PRODUKTERNA
FI TUOTTEITA KOSKEVAT TURVAMERKIT
GR ΥΠOΜΝΗΜΑ ΣΗΜΑΤΩΝ ΑΣΦΑΛΕΙΑΣ ΣΤΑ ΠΡΟΪΟΝΤΑ
PL LEGENDA ZNAKÓW OSTRZEGAWCZYCH NA WYROBACH
HR ZNAKOVI ZA UPOZORENJE NA PROIZVODIMA
SI OPOZORILNI ZNAKI NA PROIZVODIH
HU A TERMÉKEKEN TALÁLHATÓ BIZTONSÁGI JELZÉSEK
LISTÁJA
CZ BEZPEČNOSTNÍ ZNAČENÍ NA VÝROBCÍCH
SK LEGENDA: BEZPEČNOSTNÉ OZNAČENIA NA
VÝROBKOCH
RU УСЛОВНЫЕ ПРЕДУПРЕДИТЕЛЬНЫЕ ЗНАКИ ПО
БЕЗОПАСНОСТИ РАБОТЫ С ИЗДЕЛИЯМИ
NO SIKKERHETSTEGNFORKLARING PÅ PRODUKTENE
TR ÜRÜNLER HAKKINDA GÜVENLİK TALİMATLARI LEJANDI
RO LEGENDA INDICATOARELOR DE SECURITATE APLICATE
PE PRODUSE
BG
ЛЕГЕНДА НА ЗНАЦИТЕ ЗА БЕЗОПАСНОСТ ВЪРХУ ИЗДЕЛИЯТА
RS UPOZORAVAJUĆE NAZNAKE O BEZBEDNOSTI
PROIZVODA
LT SUTARTINIAI ĮSPĖJAMIEJI ŽENKLAI DĖL DARBO
SAUGUMO SU GAMINIAIS
EE OHUTUSNÕUDED
LV PRODUKTU DROŠĪBAS NORĀDĪJUMA ZĪMJU SARAKSTS
IT
GB
FR
DE
ES
PT
NL
DK
SE
FI
GR
PL
HR
SI
HU
CZ
SK
RU
NO
TR
RO
BG
RS
LT
EE
LV
IT
GB
FR
DE
ES
PT
NL
DK
SE
FI
GR
PL
HR
SI
HU
CZ
SK
RU
NO
TR
RO
BG
RS
LT
EE
LV
4
delokalaMyndigheternaellertilleråterförsäljareomåtervinningsråd.
FI - Sähkö- ja elektroniikkaromua ei saa hävittää tavallisten kotitalousjätteiden
mukana, vaan se on toimitettava sille tarkoitettuihin keräyspisteisiin kierrätystä
varten. Lisätietoja saat paikallisilta viranomaisilta tai jälleenmyyjältä.
GR-Τααπόβληταειδώνηλεκτρικούκαιηλεκτρονικούεξοπλισμού(ΟδηγίαWEEE)δεν
μπορούνναδιαχειριστούνωςκοινάοικιακάαπόβλητα.Προβλέψτεστηνανακύκλωση
τουςεκείόπουυπάρχουνκατάλληλεςεγκαταστάσεις.Συμβουλευτείτετοντοπικόφορέα
ήτομεταπωλητήγιαπληροφορίεςσχετικάμετησυγκέντρωσηκαιτηναπόσυρση.
PL - Zużyty sprzęt elektryczny i elektroniczny (WEEE) nie może być zarządzany jak
zwykłe odpady domowe. Przystąpić do recyrkulacji odpadów w miejscach, gdzie
istnieją odpowiednie warunki. Skonsultować się z lokalnymi władzami lub sprzedawcą
w celu uzyskania informacji dotyczących gromadzenia i likwidacji odpadów.
HR-Oznakanaproizvoduupozoravadaseproizvodnakonistekaživotnogvijekane
smijeuklanjatizajednosuobičajenimotpadomizdomaćinstva.Ovajproizvodsemora
recikliratiuprimjerenimpogonimananačinprihvatljivzaokoliš.InformirajtesekodVašeg
komunalnog poduzeća ili ovlaštenog zastupnika o sakupljanju i uklanjanju otpada.
SI - Označba na proizvodu navaja, da ga po njegovi življenjski dobi ne smete
odvreči med gospodinjske odpadke, omenjen izdelek je potrebno reciklirati okolju
prijazno v atestiranih napravah. Prosimo, da se pri lokalnih upravnih organih ali
pri pooblaščenih trgovcih pozanimate glede zbiranja in shranjevanja odpadkov.
HU-Avillamos-éselektronikaiberendezésekbőlszármazóhulladékokat(WEEE)
nem lehet a háztartási hulladékkal azonos módon kezelni. Ahol erre megfelelő
berendezések vannak, ott lehetőség van az újrafelhasználásra. A hulladék
gyűjtésévelésfeldolgozásávalkapcsolatbankérjenfelvilágosítástahelyiszervektől
vagyaviszonteladótól.
CZ - S odpadními elektrickými a elektronickými zařízeními (OEEZ) se nesmí
nakládat jako s komunálním odpadem. V případě, že jsou k dispozici vhodné
podniky zajištěte jejich recyklaci a opětovné zpracování. Rady o sběru a zpracování
poskytne obecní úřad nebo prodejce.
SK - S odpadmi z elektrických a elektronických zariadení (OEEZ) sa nesmie
zaobchádzať ako s domovým odpadom. Ak sú k dispozícii vhodné podniky,
zabezpečte ich recykláciu. Rady o zbere a likvidácii zariadení vám poskytnú
miestneúradyapredajcovia.
RU - Утилизация отходов производства электрического и электронного
оборудования (WEEE) не должна выполняться таким же образом, как
утилизация обыкновенных отходов домашнего хозяйства. Пожалуйста,
перерабатывайте отходы там, где существует адекватное оборудование.
Посоветуйтесь с Местным Управлением или дистрибьютором насчёт
указаний по переработке отходов.
NO - Elektrisk og elektronisk avfall, (EE-avfall), skal ikke kastes sammen med
van husholdningsavfall. Resirkulere der dette er mulig. Ta kontakt med lokale
myndigheterellerforhandlerforrådomresirkulering.
TR - Elektrik ve elektronik tüketim atıkları (EETA), ev atıkları ile beraber atılmamalıdır.
Lütfen uygun olan geri dönüşüm olanaklarını kullanınız. Geri dönüşüm tavsiyeleri
için, mevcut lokal yetkililerin veya satıcıların olup olmadığını araştırınız.
RO-Deşeurileelectrice,electroniceşielectrocasnice(DEEE)nupotfitratateca
oricarealtedeşeuri domestice. Reciclaţicâtmai mult posibilunde există facilităţi
înacestscop.Consultaţiautorităţilelocalesaupuncteledecolectareadeşeurilor
pentrusfaturidereciclare.
BG - Отпадъците от електрическо и електронно оборудване (ОЕЕО)
не могат да бъдат третирани като обикновени домакински отпадъци.
Погрижете се за рециклирането там, където съществуват подходящи
инсталации. Консултирайте се с местните власти или с продавача за
съвет относно събирането и изхвърлянето.
RS- Oznakana proizvoduupozorava dase proizvod nakon isteka životnog
doba ne sme uklanjati zajedno sa običnim otpacima iz domaćinstva. Ovaj
proizvod se mora reciklirati u odgovarajučim pogonima na način prihvatljiv
za okolinu. Informirajte se kod Vašeg komunalnog poduzeća ili ovlaštenog
zastupnikaoskupljanjuisklanjanjuotpadka.
LT - Elektroninių ir elektros įrenginių negalima utilizuoti kaip buitinių atliekų. Šias
atliekas būtina šalinti specializuotuose surinkimo punktuose. Norėdami gauti
išsamesnės informacijos apie atliekų šalinimą bei jų perdirbimą, susisiekite su
kompetetingomis vietos institucijomis.
EE-Elektri-jaelektroonikaseadmetejääkidestvabanemineeisaatoimudasarnaselt
majapidamisjääkidest vabanemisele. Vastavate seadmete olemasolu korral
korraldatagu nende ümbertöötlemine. Ümbertöötlemisega seotud informatsiooni
saamisekspöördugekohalikevõimudevõiedasimüüjapoole.
LV - Elektrisko iekārtu un elektronisko iekārtu ražošanas atkritumu utilizācija (WEEE)
nevar veikt kopā ar parasto mājas saimniecības atkritumu utilizāciju. Lūdzam
pārstrādāt atkritumus tur, kur ir piemērots aprīkojums. Konsultēties ar Vietējo
Priekšniecību vai mazumtirgotāju par atkritumu pārstrādāšanas ieteikumiem.
Attenzionecorrenteelettrica
Dangerous voltage
Attention:présencedecourantélectrique
Achtung,elektrischeSpannung
Atención,corrienteeléctrica
Atençãocorrenteeléctrica
Attentie,elektrischestroom
Advarselelektriskstrøm
Varning-elektricitet
Huom.vaarallinenjännite
Προσοχήηλεκτρικόρεύμα
Uwaga,niebezpieczeństwoporażeniaprądemelektrycznym
Pažnja,električninapon
Pozor,električnanapetost
Figyelem,elektromosáram
Pozor-elektrickénapětí!
Pozor-elektrickýprúd!
Рискэлектрическогонапряжения
Forsiktig elektrisk strøm
Dikkatelektrikakımı
Atenţie!Pericolelectric
Внимание:електричекиток
Pažnjaelektričnastruja
Elektrosįtamposrizika
Ettevaatust-elektrivool
Esietuzmanīgi-elektrībasplūsma
Protezione obbligatoria dell’udito, della vista e delle vie respiratorie
Hearing, sight and respiratory protection must be worn
Port obligatoire de protections auditives, oculaires et des voies respiratoires
Gehörschutz,AugenschutzundAtemschutzsindobligatorischvorgeschrieben
Protecciónobligatoriadelosoídos,delavistaydelasvíasrespiratorias
Protecçãoobrigatóriadoouvido,davistaedasviasrespiratórias
Verplichte bescherming van oren, ogen en luchtwegen
Obligatorisk beskyttelse af hørelse, syn og luftveje
Hörselskydd, skyddsglasögon och andningsmask obligatoriskt
Käytettävä kuulosuojaimia, suojalaseja ja hengityksensuojaimia
Υποχρεωτικόπροστατευτικόακοής,όρασηςκαιτουαναπνευστικούσυστήματος
Obowiązkowozabezpieczyćsłuch,wzrokidrogioddechowe
Obaveznazaštitaočiju,dišnihputevaisluha
Obveznazaščitaoči,dihalinsluha
Alégutak,alátásésahallásvédelmekötelező
Povinnostchránitsluch,očiadýchacícesty.
Povinnáochranasluchu,zrakuadýchacíchciest!
Обязательнаязащитаушей,лицаидыхательныхпутей
Obligatorisk å ta i bruk hørselsvern, vernebriller og pustemaske
Mecburiişitme,görmevesolunumyollarıkoruması
Echipamentdeprotecţieobligatoriupentruurechi,ochişicăirespiratorii
Задължителнисредствазазащитанаслуха,зрениетоидихателнитепътища
Obaveznazaštitasluha,vidaidišnihputeva
Privalomaausų,veidoirkvėpavimotakųapsauga
Kuulmis-,nägemis-ninghingamisteedekaitseonkohustuslik.
Obligātadzirdes,redzesunelpošanasceļuaizsardzība
IT
GB
FR
DE
ES
PT
NL
DK
SE
FI
GR
PL
HR
SI
HU
CZ
SK
RU
NO
TR
RO
BG
RS
LT
EE
LV
IT
GB
FR
DE
ES
PT
NL
DK
SE
FI
GR
PL
HR
SI
HU
CZ
SK
RU
NO
TR
RO
BG
RS
LT
EE
LV

5
NON toccare la lama in movimento
Do NOT touch the moving blade
NEPAStoucherlalameenmouvement
Das laufende Messer NICHT berühren
NO tocar la hoja en movimiento
NÃOtocaralâminaemmovimento
RaakNIEThetbewegendemesaan
RørIKKEknivenibevægelse
RörINTEklingannärdenärirörelse
ÄLÄ kosketa liikkuvaa terää
ΜΗΝαγγίζετετηνκινούμενηλάμα
NIEdotykaćostrzawruchu
OkretajučinoževiNEdirajte
VrtečinožiNEdotikajtese
NEnyúljonamozgásbanlévőlapokhoz
NEDOTÝKEJTESEřezacíchkotoučůvpohybu.
NEDOTÝKAJTEsareznýchkotúčov,keďsúvpohybe!
НЕприкасатьсякдвижущемусялезвию
IKKE ta på bladet i bevegelse
Harekethalindekibıçağadokunmayınız
NUatingeţilamaînmişcare
НЕдокосвайтевъртящотосеострие
NE dodirivati list u kretanju
NEliestijudančioašmens
ÄRGEpuudutageliikuvattera
NEaiztiecietkustīguasmeni
NON avvicinarsi alle macchine con abiti svolazzanti
Do NOT approach the machine with loose clothing
NEPASserapprocherdesmachineslorsqu’onportedesvêtementslarges
NICHT mit losen Kleidungsstücken in die Nähe der Maschine kommen
NOacercarsealasmáquinasconropassueltas
NÃOseaproximardasmáquinascomvestuáriosesvoaçantes
Kom NIET in de buurt van de machines met loshangende kleding
Kom IKKE i nærheden af maskinen med løstsiddende tøj
Gå INTE i närheten av maskinerna med vida kläder
ÄLÄ käytä liehuvia vaatteita koneiden läheisyydessä
ΜΗΝπλησιάζετεταμηχανήματαμεφαρδιάρούχα
NIEzbliżaćsiędomaszynwpowiewającejodzieży
NEprebližavajtesestrojusaopuštenimodjelom
NEpribližujtesestrojuzohlapnimideliobleke
NEtartózkodjonagépközelébenhanemtestrefeszülőruhátvisel
NEPŘIBLIŽUJTESEknástrojisvolnýmoblečením.
NEPRIBLIŽUJTEsakstrojomsvoľnepovievajúcimoblečením!
НЕстоятьрядомсмашинойвраспахнутойодежде
IKKE gå i nærheten av maskinene med vide og flagrende klær
Makineyeuçuşangiysilerleyaklaşmayınız.
NUvăapropiaţidemaşinăcuhainelargi
НЕседоближавайтедомашинатасразвяващиседрехи
NEpribližavajtesemašinamasalepršavomodećom
NEstovėtipriemašinossubesiplaikstančiaisdrabužiais
ÄRGElähenegemasinalelahtisesriietuses.
NEtuvojietiesierīčutuvumāarplīvojošiemapğērbugabaliem
IT NON rimuovere le protezioni e i dispositivi di sicurezza a macchina in moto
GB Do NOT remove safety guards and devices with the machine operating
FR NEPASretirerlesprotectionsetlesdispositifsdesécuritépendantque
la machine tourne
DE DieSchutz-undSicherheitsvorrichtungenNICHTentfernen,solangedie
Maschine läuft
ES NO retirar las protecciones ni los dispositivos de seguridad con la
máquinaenmovimiento
PT NÃO remover as protecções e os dispositivos de segurança com a
máquinaemmovimento
NL Verwijder NIET de beschermingen en veiligheidsvoorzieningen terwijl de
machine loopt
DK Bevæg IKKE beskyttelsesskærmene og sikkerhedsanordningerne, når
maskinen kører
SE AvlägsnaINTEskyddenochsäkerhetsanordningarnanärmaskinenäridrift
FI
ÄLÄ poista suojia tai turvalaitteita, kun laite on toiminnassa
GR ΜΗΝαφαιρείτεταπροστατευτικάκαιτιςδιατάξειςασφαλείαςότανημηχανήκινείται
PL NIEusuwaćosłoniurządzeńzabezpieczającychpodczaspracymaszyny
HR NEsklanjajtesigurnostnezaščtitedokjestrojupokretu
SI
NEodstranjujtevarnostnezaščitedoklerstrojobratuje
HU NEvegyeleavédelmeketésabiztonságiberendezéseketamikoragép
működésbenvan
CZ NEODNÍMEJTEochrannékrytyabezpečnostníprvkyzachodunástroje.
SK NEVYBERAJTEbezpečnostnéochranyazariadenia,keďjestrojvprevádzke!
RU
НЕснимайтезащитуизащитныедеталисработающеймашины
NO IKKEfjernbeskyttelses- og sikkerhetsanordningeneframaskinennår den eridrift
TR Harekethalindeykenmakineninmuhafazasınıvedonanımıyerlerinden
çıkartmayınız.
RO NUîndepărtaţiprotecţiileşidispozitiveledesiguranţăalemaşiniiînfuncţiune
BG НЕотстранявайтезащитнииобезопасяващиустройстваповреме
дадействиенамашината
RS
NEuklanjatištitnikeibezbednosneuređajesamašineukretanju
LT NEnuimkiteapsaugųirapsaugosdaliųnuodirbančiosmašinos
EE ÄRGEeemaldagekaitseseadmeidtöötavaltmasinalt.
LV NEpārvietojietdrošībasierīcesunmašīnu,tāsdarbībaslaikā
T NON pulire, lubrificare, riparare organi in moto
Do NOT clean, lubricate or repair while the machine is running
NEPASnettoyer,graisserouréparerd’organesenmarche
InBewegungbefindlicheMaschinenteilenichtreinigen,schmieren,reparieren
NOlimpiar,lubricarnirepararórganosenmovimiento
NÃOlimpar,lubrificar,repararórgãosemmovimento
Reinig,smeerenrepareerNIETbewegendeorganen
Rens,smørogreparerIKKEelementer,dereribevægelse
Rengör,smörjellerrepareraINTEdelarirörelse
ÄLÄ puhdista, voitele, korjaa liikkuvia osia
ΜΗΝκαθαρίζετε,λιπαίνετε,επισκευάζετεκινούμεναόργανα
NIEczyścić,niesmarować,aninienaprawiaćczęściwruchu
IzmeđuradastrojaNIJEdozvoljenočišćenje,podmazivanjeipopravljanje
MedobratovanjemstrojaNIdovoljenočiščenje,mazanjeinpopravljanje
NEtisztítsa,olajozza,javítsaamozgásbanlévőgépelemeket
NEPROVÁDĚJTEčištění,mazáníaopravynanástrojizajehochodu.
NEVYKONÁVAJTEčistenie,mazanieaopravynaústrojenstvách,keď
jestrojvchode!
Нечистите,несмазывайте,неремонтируйтедвижущиесядетали
IKKE rengjøre, smøre, reparere komponenter i bevegelse
Harekethalindeykentemizleme,yağlama,parçalarıonarımyapmayınız.
NUcurăţaţi,nulubrifiaţi,nureparaţiorganeleînmişcare
НЕизвършвайтепочистване,смазванеипоправканадвижещисеоргани
NEčistiti,podmazivati,popravljatidelovemašineukretanju
NEvalykite,netepkite,netaisykitejudančiųdalių
ÄRGEpuhastage,määrigeegaparandageliikuvaidosi.
NEtīriet,NEļļojiet,NElabojietmašīnassastāvdaļas,tāsdarbībaslaikā
IT
GB
FR
DE
ES
PT
NL
DK
SE
FI
GR
PL
HR
SI
HU
CZ
SK
RU
NO
TR
RO
BG
RS
LT
EE
LV
I
GB
FR
DE
ES
PT
NL
DK
SE
FI
GR
PL
HR
SI
HU
CZ
SK
RU
NO
TR
RO
BG
RS
LT
EE
LV
IT
GB
FR
DE
ES
PT
NL
DK
SE
FI
GR
PL
HR
SI
HU
CZ
SK
RU
NO
TR
RO
BG
RS
LT
EE
LV
6
IT Pericolo proiezione di schegge
GB Danger splinter casting
FR Danger projection de déchets d’ébranchage
DE Gefahr durch fliegende Späne
ES Peligroproyeccióndeastillas
PT Perigo projeção de estilhaços
NL Gevaar voor rondvliegende scherven/splinters
DK Fare: Springende splinter
SE Riskförflisor
FI Varo sinkoutuvia esineitä
GR Κίνδυνοςεκτόξευσηςθραυσμάτων
PL Ostrzeżenieprzedniebezpieczeństwemodprysków
HR Opasnost od lijetenja trijeski
SI Pozor–letečiostružki!
HU Amunkaközbenkeletkezőforgácspattanásánakveszélye
CZ Nebezpečíodhozenítřísek
SK Nebezpečenstvoodhodeniatriesok
RU Рискпопаданияосколков
NO Fare for sprut av splinter
TR Tehlike:Yansıyankıymıkparçalarından
RO Pericolprăbuşiridestânci
BG Внимание!-Хвърчащиискри
RS Opasnost od letenja iverica
LT Skeveldrųpavojus
EE Pindude paiskumise oht
LV Šķembutrāpījumabriesmas

(1)
11
15
6
12
8
9
43
2
14
13
10
1
7
7

4
8
(2) (3)
(4)
6)(5)
11
12
13
17 18
8
16
22
16A
9
19 20A 20
20B
21A
16B
15
21B
7
8 1
16
22
4

26
4
25
6
4
9
(6.1) (7)
(7.1) (8)
(9) (10)
(11) (12)
16
16A
16
17 18
16B
16 23
3 6
2
max. 3-5mm
24
2

31
33
32
34
7
31
315
30
14
28
29
27
9
10
(13) (14)
(15) (16)
(17) (18)
(19) (20)
21A
21B 12
13
11
27
15
4
3

6
31B
31A
15
11
(21) (22)
(23)

12
IMPORTANT! Read all safety warnings, instructions, illustrations and specifications provided with this
power tool.
TÄRKEÄÄ! Lue tarkkaavaisesti kaikki tämän työkalun kanssa toimitetut varoitukset, ohjeet ja
spesifikaatiot, ja katso lisäksi kuvat.
VIKTIGT! Läs uppmärksamt alla varningar, instruktioner och specifikationer som bifogas med
detta verktyg och studera bilderna.
VIKTIG! Les nøye gjennom alle advarslene, instruksene og spesifikasjonene som følger med
verktøyet, og se på tegningene.
ВАЖНО! Пpoчтитe вce yкaзaния, инcтpyкции, иллюcтpaции и cпeцификaции, поставляемые
c электроинструментом.
TÄHTIS! Lugege läbi kõik elektrilise tööriista kohta esitatud ohuhoiatused ning tutvuge
tööriista jooniste ja tehniliste andmetega.
SVARĪGI! Izlasiet visus drošības brīdinājumus, instrukcijas, specifikācijas un apskatiet attēlus šī
elektroinstrumenta dokumentācijā.
SVARBU! Perskaitykite visus saugos įspėjimus, visas instrukcijas, paveikslėlius ir techninius
reikalavimus, pateikiamus su šiuo elektriniu įrankiu.

13
INTRODUCTION
Thankyou for purchasing this product which has
passed through our extensive quality assurance
process. Every care has been taken to ensure that it
reaches you in perfect condition.
SAFETY FIRST
Before attempting to operate this power tool the
following basic safety precautions should always be
taken to reduce the risk of fire, electric shock and
personal injury. It is important to read the instruction
manual to understand the application, limitations and
potential hazards associated with this tool.
CERTIFICATE OF GUARANTEE
This product is guaranteed for a period of 2 Years,
with effect from the date of purchase and applies only
to the original purchaser. This guarantee only applies
to defects arising from, defective materials and or
faulty workmanship that become evident during the
guarantee period only and does not include
consumable items. The manufacturer will repair or
replace the product at their discretion subject to the
following. That the product has been used in
accordance with the guide lines as detailed in the
product manual and that it has not been
subjected to misuse, abuse or used for a purpose for
which it was not intended. That it has not been taken
apart or tampered with in any way whatsoever or has
been serviced by unauthorised persons or has been
used for hire purposes. Transit damage is excluded
from this guarantee, for such damage the transport
company is responsible. Claims made under this
guarantee must be made in the first instance, directly
to the retailer within the guarantee period. Only under
exceptional circumstances should the product be
returned to the manufacturer. In these case it shall be
the consumer’s responsibility to return the product at
their cost ensuring that the product is adequately
packed to prevent transit damage and must be
accompanied with a brief description of the fault and
a copy of the receipt or other proof of purchase. The
manufacturer shall not be liable for any special,
exemplary, direct, indirect, incidental, or consequential
loss or damage under this guarantee. This guarantee
is in addition to and does not affect any rights, which
the consumer may have by virtue of the Sale of Goods
Act 1973 as amended 1975 and 1999.
STATUTORY RIGHTS
This guarantee is in addition to and in no way affects
your statutory rights.
PRODUCT DISPOSAL
When this product reaches the end of it’s life or is
disposed of for any other reason, it must not be
disposed of in household waste. In order to preserve
natural resources, and to minimise adverse
environmental impact, please recycle or dispose of
this product in an environmentally friendly way. It
should be taken to your local waste recycling centre
or other authorised collection and disposal facility.
If in doubt consult your local waste authority for
information regarding available recycling and / or
disposal options.
HEALTH ADVICE
Warning: When drilling, sanding, sawing or grinding,
dust particles will be produced. In some instances,
depending on the materials you are working with, this
dust can be particularly harmful to you (e.g. lead from
old gloss paint).You are advised to consider the risks
associated with the materials you are working with
and to reduce the risk of exposure.
You should:
Work in a well-ventilated area.
Work with approved safety equipment, such as dust
masks that are specially designed to filter microscopic
particles.
INTENDED USE
The bench-type circular saw is designed for the
slitting and cross-cutting of all types of timber,
commensurate with the machine’s size.
The machine is not to be used for cutting any type of
roundwood.
The machine is to be used only for its prescribed
purpose. Any use other than that mentioned is
considered to be a case of misuse.
The user/operator and not the manufacturer shall be
liable for any damage or injury resulting such cases of
misuse. The user/operator and not the manufacturer
shall be liable for any damage or injury resulting such
cases of misuse.
The machine is to be operated only with suitable saw
blades. It is prohibited to use any type of cutting-off
wheel. To use the machine properly you must also
observe the safety regulations, the assembly
instructions and the operating instructions to be found
in this manual. All persons who use and service the
machine have to be acquainted with this manual and
must be informed about its potential hazards. It is also
imperative to observe the accident prevention
regulations in force in your area. The same applies for
the general rules of occupational health and safety.
Important! When using the equipment, a few safety
precautions must be observed to avoid injuries and
damage. Please read the complete operating
instructions and safety regulations with due care.
Keep this manual in a safe place, so that the
information is available at all times. If you give the
equipment to any other person, hand over these
operating instructions and safety regulations as well.
We cannot accept any liability for damage or
accidents which arise due to a failure to follow these
instructions and the safety instructions.
The manufacturer shall not be liable for any changes
made to the machine nor for any damage resulting
from such changes.

14
Even when the machine is used as prescribed it is still
impossible to eliminate certain residual risk factors.
The following hazards may arise in connection with
the machine’s construction and design:
Contact with the saw blade in the uncovered saw
zone.
Reaching into the running saw blade (cut injuries).
Kick-back of workpieces and parts of workpieces
Saw blade fracturing.
Catapulting of faulty carbide tips from the saw blade.
Damage to hearing if essential ear-muffs are not worn.
Harmful emissions of wood dust when the machine is
used in closed rooms.
Please note that our equipment has not been
designed for use in commercial, trade or industrial
applications.
Our warranty will be voided if the machine is used in
commercial, trade or industrial businesses or for
equivalent purposes.
SPECIFIC SAFETY INSTRUCTIONS
Do not use saw blades which are damaged or
deformed.
Replace the table insert/access plate if worn.
Use only blades as recommended in this manual,
which conform to EN 847-1. When changing a saw
blade ensure that the width of the groove (kerf) cut by
the blade is slightly greater than the thickness of the
riving knife. Also the thickness of the blade body must
not be greater than the thickness of the riving knife.
Take care that the selection of the saw blade is
suitable for the material to be cut.
Wear suitable personal protective equipment when
necessary. This could include:
Hearing protection to reduce the risk of induced
hearing loss.
Respiratory protection to reduce the risk of inhalation
of harmful dust.
Wearing gloves when handling saw blades or rough
material.
Saw blades should be carried in a holder whenever
practicable.
Never perform any operation freehand. This means
using only your hands to support or guide the
workpiece. Always use either the fence or mitre gauge
to position and guide the work.
WARNING! Freehand cutting is a major cause of
accidents.
Never attempt to free a stalled blade without first
turning the saw off. Turn the power off immediately to
prevent damage to the motor.
Provide adequate support for long or wide
workpieces.
Avoid awkward operations and hand positions where
a slip could cause your hand to move into the blade.
Do not operate the appliance with a damaged cord or
plug. If the supply cord is damaged, it must be
replaced by the manufacturer or its service agent or a
similarly qualified person in order to avoid a hazard.
ADDITIONAL SPECIFIC SAFETY RULES FOR
TABLE SAWS
WARNING! Before using your table saw it is important
that you read and understand these safety rules.
Failure to follow these rules could result in serious
injury to the operator or damage to the table saw.
Always use the blade guard. The blade guard must
always be used in every operation.
Hold the work firmly. Against the mitre gauge or rip
fence.
Always use a push stick. Especially when rip cutting
narrow stock.
Keep guards in place and in working order. Always
ensure that the riving knife is fitted and correctly
adjusted. Inspect the riving knife regularly and replace
it if it is worn. Use only a genuine FXA riving knife as
this is a dedicated component for this machine.
Remove adjusting keys and wrenches. Form the habit
of checking to see that keys and adjusting wrenches
are removed from the machine before turning it on.
Do not use in dangerous environment. Do not use
power tools in damp or wet locations, or expose them
to rain. Keep work area well lit. Keep the area well
ventilated.
Keep children away. All children and visitors should be
kept at a safe distance from the work area.
Do not use High Speed Steel (HSS) blades. Ensure
that the correct blade is selected for the material
being cut.
The push stick or push block should always be stored
with the machine when not in use.
Connect the saw to a dust collection device when
sawing wood. The operator should be informed of the
factors that influence exposure to dust e.g. type of
material being cut and the importance of local
extraction (capture or source) and the proper
adjustment hoods/baffles/chutes.
Use a proper extension cord. Make sure any
extension cord is in good condition. When using an
extension cord, be sure to use one heavy enough to
carry the current your machine will draw. An
undersized cord will cause a drop in line voltage
resulting in loss of power and possible overheating.

15
Always use safety glasses. Also use a face or dust
mask if the cutting operation is dusty. Everyday
eyeglasses only have impact resistant lenses, they are
NOT safety glasses.
Maintain tools with care. Keep tools sharp and clean
for best and safest performance.
Disconnect from the power supply before servicing,
cleaning or and when changing accessories, such as
blades.
Check for damaged parts. Before further use of the
tool, a guard or other part that is damaged should be
carefully checked to determine that it will operate
properly and perform its intended function - check for
alignment of moving parts, binding of moving parts,
breakage of parts, mounting, and any other conditions
that may affect its operation. A guard or other part
that is damaged should be properly repaired or
replaced.
Keep hands out of the path of the saw blade.
Never reach around the saw blade.
Turn off machine and wait for saw blade to stop
before making any fence adjustments.
Never pull or carry the tool by the power cord.
Carrying or pulling the tool by the power cord could
cause damage to the insulation or the wire
connections resulting in the possibility of electric
shock or fire.
When transporting the machine use a transportation
device.
Never use the guards for handling or transportation.
During transportation the upper part of the saw blade
must be lowered fully and covered by the guard.
All operators using this machine must read the
instructions and familiarize themselves with the
machines workings.
Never leave the saw running and unattended. Do not
leave the saw until the saw has been switched OFF,
and the blade has come to a complete halt.
Only use saw blades for which the maximum
permissible speed is not lower than the maximum
spindle speed of table saws and which are suitable for
the material to be cut.
Do not cut rebates or grooves without fitting a suitable
guard, e.g. a tunnel-type guard, over the saw table.
Circular saws must not be used for slotting jobs
(cutting grooves which end in the workpiece).
The floor around the machine must be level, clean and
free of loose particles, such as chips and cutting
residues.
Always stand to the side of the saw blade when
working with the saw.
Do not remove any cutting residues or other parts of
workpieces from the cutting zone while the machine is
running and the saw unit is not at rest.
Make sure that the machine is always secured on a
workbench or a table if at all possible.
Support long workpieces (e.g. with a roller table) to
prevent them sagging at the end of a cut.
Attention! Never remove loose splinters, chips or
jammed pieces of wood while the saw blade is
running. Switch off the machine to troubleshoot or
remove jammed pieces of wood. - Disconnect the
main power plug.
Refitting, including adjusting and measuring works,
and cleaning must be carried out only when the motor
is switched off. - Disconnect the main power plug.
Before switching on again, ensure that keys and
adjustment tools have been removed.
WARNING! This electric tool generates an
electromagnetic field during operation. This field can
impair active or passive medical implants under
certain conditions. In order to prevent the risk of
serious or deadly injuries, we recommend that
persons with medical implants consult with their
physician and the manufacturer of the medical implant
prior to operating the electric tool.
SAFETY INSTRUCTIONS FOR THE HANDLING OF
SAW BLADES
Only use insertion tools if you have mastered their
use.
Observe the maximum speed. The maximum speed
specified on the insertion tool may not be exceeded. If
specified, observe the speed range.
Observe the motor / saw blade direction of rotation.
Do not use any insertion tools with cracks. Sort out
cracked insertion tools. Repairs are not permitted.
Clean grease, oil and water off of the clamping
surfaces.
Do not use any loose reducing rings or bushes for the
reducing of holes on saw blades.
Make sure that fixed reducer rings for securing the
insertion tool have the same diameter and have at
least 1/3 of the cutting diameter.
Make sure that fixed reducer rings are parallel to each
other.
Handle insertion tool with caution. They are ideally
stored in the originally package or special containers.
Wear protective gloves in order to improve grip and to
further reduce the risk of injury.
Prior to the use of insertion tools, make sure that all
protective devices are properly fastened.

16
Prior to use, make sure that the insertion tool meets
the technical requirements of this electric tool and is
properly fastened.
Only use the supplied saw blade for sawing
operations in wood, materials similar to wood, plastics
and non-ferrous metals (except for magnesium and
alloys containing magnesium).
RESIDUAL RISKS
The machine has been built according to the state of
the art and the recognised technical safety
requirements. However, individual residual risks can
arise during operation.
Health hazard due to electrical power, with the use of
improper electrical connection cables.
Furthermore, despite all precautions having been met,
some non-obvious residual risks may still remain.
Residual risks can be minimised if the „safety
instructions“ and the „Proper use“ are observed along
with the whole of the operating instructions.
Do not load the machine unnecessarily: excessive
pressure when sawing will quickly damage the saw
blade, which results in reduced output of the machine
in the processing and in cut precision.
When cutting plastic material, please always use
clamps: the parts which should be cut must always be
fixed between the clamps.
Avoid accidental starting of the machine: the
operating button may not be pressed when inserting
the plug in an outlet.
Use the tool that is recommended in this manual. In
doing so, your saw provides optimal performance.
Hands may never enter the processing zone when the
machine is in operation. Release the handle button
and switch off the machine prior to any operations.
Prior to any adjustment, maintenance or service work
disconnect the mains power plug!
GENERAL SAFETY RULES
WARNING! Read all instructions Failure to follow all
instructions listed below may result in electric shock,
fire and/or serious injury. The term "power tool" in all
of the warnings listed below refers to your mains
operated (corded) power tool or battery operated
(cordless) power tool.
SAVE THESE INSTRUCTIONS
1) WORK AREA
a) Keep work area clean and well lit. Cluttered and
dark areas invite accidents.
b) Do not operate power tools in explosive
atmospheres, such as in the presence of
flammable liquids, gases or dust. Power tools
create sparks which may ignite the dust or fumes.
c) Keep children and bystanders away while
operating a power tool. Distractions can cause you
to lose control.
2) ELECTRICAL SAFETY
a) Power tool plugs must match the outlet. Never
modify the plug in any way. Do not use any
adapter plugs with earthed (grounded) power
tools. Unmodified plugs and matching outlets will
reduce risk of electric shock.
b) Avoid body contact with earthed or grounded
surfaces such as pipes, radiators, ranges and
refrigerators.
There is an increased risk of electric shock if your
body is earthed or grounded.
c) Do not expose power tools to rain or wet
conditions. Water entering a power tool will
increase the risk of electric shock.
d) Do not abuse the cord. Never use the cord for
carrying, pulling or unplugging the power tool.
Keep cord away from heat, oil, sharp edges or
moving parts. Damaged or entangled cords
increase the risk of electric shock.
e) When operating a power tool outdoors, use an
extension cord suitable for outdoor use. Use of a
cord suitable for outdoor use reduces the risk of
electric shock.
3) PERSONAL SAFETY
a) Stay alert, watch what you are doing and use
common sense when operating a power tool. Do
not use a power tool while you are tired or under
the influence of drugs, alcohol or medication.
A moment of inattention while operating power
tools may result in serious personal injury.
b) Use safety equipment. Always wear eye
protection. Safety equipment such as dust mask,
non-skid safety shoes, hard hat, or hearing
protection used for appropriate conditions will
reduce personal injuries.
c) Avoid accidental starting. Ensure the switch is in
the off position before plugging in. Carrying power
tools with your finger on the switch or plugging in
power tools that have the switch on invites
accidents.
d) Remove any adjusting key or wrench before
turning the power tool on.
A wrench or a key left attached to a rotating part
of the power tool may result in personal injury.
e) Do not overreach. Keep proper footing and
balance at all times. This enables better control of
the power tool in unexpected situations.
f) Dress properly. Do not wear loose clothing or
jewellery. Keep your hair, clothing and gloves
away from moving parts. Loose clothes, jewellery
or long hair can be caught in moving parts.

17
g) If devices are provided for the connection of dust
extraction and collection facilities, ensure these
are connected and properly used. Use of these
devices can reduce dust related hazards.
4) POWER TOOL USE AND CARE
a) Do not force the power tool. Use the correct
power tool for your application. The correct power
tool will do the job better and safer at the rate for
which it was designed.
b) Do not use the power tool if the switch does not
turn it on and off. Any power tool that cannot be
controlled with the switch is dangerous and must
be repaired.
c) Disconnect the plug from the power source before
making any adjustments, changing accessories, or
storing power tools. Such preventive safety
measures reduce the risk of starting the power
tool accidentally.
d) Store idle power tools out of the reach of children
and do not allow persons unfamiliar with the
power tool or these instructions to operate the
power tool. Power tools are dangerous in the
hands of untrained users.
e) Maintain power tools. Check for misalignment or
binding of moving parts, breakage of parts and
any other condition that may affect the power
tools operation. If damaged, have the power tool
repaired before use. Many accidents are caused
by poorly maintained power tools.
f) Keep cutting tools sharp and clean. Properly
maintained cutting tools with sharp cutting edges
are less likely to bind and are easier to control.
g) Use the power tool, accessories and tool bits etc.,
in accordance with these instructions and in the
manner intended for the particular type of power
tool, taking into account the working conditions
and the work to be performed. Use of the power
tool for operations different from intended could
result in a hazardous situation.
5) SERVICE
a) Have your power tool serviced by a qualified repair
person using only identical replacement parts. This
will ensure that the safety of the power tool is
maintained.
COMPONENTS & CONTROLS (FIGS 1 - 4)
UNPACKING
Caution! This packaging contains sharp objects. Take
care when unpacking. Remove the machine, together
with the accessories supplied, from the packaging.
Check carefully to ensure that the machine is in good
condition and account for all the accessories listed in
this manual. Also make sure that all the accessories
are complete. If any parts are found to be missing, the
machine and its accessories should be returned
together in their original packaging to the retailer.
Do not throw the packaging away, keep it safe
throughout the guarantee period, then recycle if
possible, otherwise dispose of it by the proper means.
Do not let children play with empty plastic bags due
to the risk of suffocation.
1. Saw bench
2. Bench insert
3. Saw blade
4. Saw blade guard
5.
6. Riving knife
7. Transverse stop
8. Bench extension
9. Push stick
10. Underframe
11. On/Off switch
12. Hand wheel
13. Locking handle
14. Guide rail
15. Rip fence
16. Legs
16A. Rubber feet
16B. Support frame
17. Long crossbar
18. Short centre brace
19. Hexagon head bolt
20. Hexagon head nut
21. Saw blade spanner
21A. Spring ring
21B. Washer
22. Support strut

18
BEFORE STARTING THE EQUIPMENT
The equipment must be set up where it can stand
securely.
All covers and safety devices have to be properly
fitted before the equipment is switched on.
It must be possible for the blade to run freely.
When working with wood that has been processed
before, watch out for foreign bodies such as nails or
screws, etc.
Before you press the ON/OFF switch check that the
saw blade is fitted correctly. Moving parts must run
smoothly.
Before you connect the equipment to the power
supply make sure the data on the rating plate are
identical to the mains data.
ASSEMBLY
Note: Before carrying out any assembly or
disassembly of the unit please ensure that the unit is
not connected to the electrical supply.
Place all parts supplied on a flat surface. Grouping
equal parts.
Note: If compounds with a bolt (round head / or
hexagon), hex nuts and washers are backed up, the
washer must be fitted under the nut.
Insert screws each from outside to inside. Secure
connections with nuts on the inside.
Note: Tighten the nuts and bolts during assembly only
to the extent that they can not fall down.
If you tighten the nuts and bolts prior to final
assembly, final assembly can not be performed.
MOUNTING THE BENCH EXTENSION (FIG.5)
Turn the saw and place it on the floor with the bench
facing down.
Align the bench extension (8) flush with the saw bench
(1).
Push table extension (8) onto the sawing table (1)
using the hex bolts (19) and loosely fasten the spring
washers (20a), washers (20b) and hex nuts (20).
Repeat for the opposite side.
Screw the support struts (22) to the table extensions
(8) with the hex bolts (19), spring washer (20a), and
washers (20b).
Subsequently, tighten all screws.
MOUNTING RACK (FIGS 6 - 7)
Screw the four support legs (18) together with the
support struts (22) onto the saw with the hex bolts
(19), the spring rings (20a) and the washers (20b) (fig.
6). For this use the saw blade key (21a), part of the
delivery contents (Fig. 6).
Now place the rubber feet (16a) onto the support legs
(16) (Fig. 6.1).
Now, screw the long centre brace (18) and the short
centre brace (17) onto the legs (16) using the hexagon
head bolts (19) and the hexagon head nuts (20). Make
sure that the same braces face each other. The long
centre braces (18 - marked ‘B’) must be mounted
parallel to the operator‘s side of the saw. (Fig. 7).
Using two hex bolts (19) on each, loosely secure the
spring washers (20a), washers (20b) and hex nuts (20)
at the drill holes of the rear support legs of the
support frame (16b) (Fig. 7.1).
ATTENTION! Both support frames must be fastened
to the back of the machine!
Then, tighten all the nuts and bolts of the underframe.
SETTING/MOUNTING THE RIVING KNIFE
(FIGS 8 - 10)
Caution! Pull out the main plug!
The setting of the riving knife (6) must be checked
prior to commissioning. of the riving knife (6) must be
checked prior to commissioning.
Set the saw blade (3) to the max. cutting depth, bring
it to the 0° position and lock it.
Unfasten the bolt (23) from the bench insert (2) using a
Phillips screwdriver, and remove bench insert (22)
(Fig.8).
The distance between the saw blade (3) and the riving
knife (6) must be max. 5 mm. (Fig. 9)
Loosen the mounting bolt (24) in order to pull out the
splitting wedge (6) until the right distance is adjusted
(Fig. 10).
Tighten the mounting screw (24) again and mount the
bench insert (2).
MOUNTING/DISMOUNTING THE SAW BLADE
GUARD (FIGS 11 - 12)
Mount the saw blade guard (6) together with the bolt
(25) on top of the riving knife (6), so that the bolt is
firmly seated in the slot of the riving knife (6).
Do not screw in the bolt (25) too tightly; the saw blade
guard (6) must move freely.
Plug the suction hose (5) onto the suction adapter (26)
and the connecting piece of the saw blade guard (4).
Connect a suitable splint collector onto the suction
adapter (26).
Disassembly is performed in reverse order.
Caution! The saw blade guard (4) must be lowered
onto the workpiece before starting the sawing
operation.

19
REPLACING THE BENCH INSERT (FIG 8)
In case of wear or damage, the bench insert (2) must
be replaced; otherwise, there is an increased risk of
injury.
Unfasten the bolt (23) using a Phillips screwdriver.
Take out the worn bench insert (2).
The installation of the new bench insert is done in
reverse order.
INSTALLING/REPLACING THE SAW BLADE
(FIG 13)
Caution! Pull out the main plug and wear safety
gloves.
Dismount the saw blade guard (4).
Remove the bench insert (2).
Loosen the nut by placing a saw blade spanner (21a)
on the nut while holding up another saw blade
spanner (21b) on the motor shaft (see Fig. 13).
Caution! Turn the nut in the direction of rotation of the
saw blade.
Remove the outer flange and remove the old blade
inner flange.
Clean the saw blade flange thoroughly with a wire
brush before mounting the new saw blade.
Insert the new saw blade in reverse order and tighten.
Caution! Note the direction of run, the cutting slope of
the teeth must be in the direction of run, i.e. facing
forward.
Remount and adjust the bench insert (2) and saw
blade guard (4).
Before you start working again with the saw, check
proper functioning of the safety equipment.
USING THE SAW
ON/OFF SWITCH (FIG 14)
The saw can be switched on by pressing the green
pushbutton ‘I’. (11)
The red pushbutton ‘0’ (11) has to be pressed to
switch off the saw.
CUTTING DEPTH (FIG 14)
Turn the round handle (12) to set the blade (3) to the
required cutting depth.
- Anticlockwise: smaller cutting depth
- Clockwise: larger cutting depth
After each new adjustment it is advisable to carry out
a trial cut in order to check the set dimensions.
SETTING THE ANGLE (FIG 14)
With the table saw you can make diagonal cuts to the
left oriented to the stop bar from 0 ° to 45 °.
Caution: Check before each cut, that between the
stop bar (e), cross-stop (13) and the saw blade (5) a
collision is not possible.
Undo the fixing handle (13).
Set the desired angle on the scale by pressing and
turning the hand wheel (12).
Lock the fixing handle (13) again in the required angle
position.
WORKING WITH THE RIP FENCE
SETTING THE STOP HEIGHT (FIGS 15 - 16)
The stop rail (27) of the rip fence (15) has two guide
surfaces with different heights.
Depending on the thickness of the material to be cut,
the stop rail (27) as shown in Fig. 16 must be used for
thick material (about 25 mm workpiece thickness) and
that shown in Fig. 15 for thin material (less than 25
mm workpiece thickness).
TURNING THE STOP RAIL (FIGS 15 - 16)
Loosen the wing nuts (28) first for rotating the stop rail
(27).
Now, the stop rail (27) can be removed from the guide
rail (29) and pushed over it again using the
corresponding guide.
Tighten the wing nuts (28) again.
The stop rail (27) can be applied to the left or right of
the guide rail (29) as needed. To this end, only install
the bolts from the other side of the guide rail (29).
SETTING THE CUTTING WIDTH (FIG 17)
The rip fence (15) must be used for longitudinal
cutting of wood parts.
The rip fence (15) should be mounted on the right side
of the saw blade (3).
Set the rip fence (15) on top of the guide rail for rip
fence (14).
On the guide rail for rip fence (14), there are 2 scales
which indicate the distance between the rip fence (15)
and the saw blade (3).
Select the appropriate scale depending on whether
the stop rail (27) is rotated for processing thick or thin
material:
High stop rail (thick material):
Low stop rail (thin material):
Set the rip fence (15) to the desired level in the sight
glass and fix it with the eccentric lever for the rip
fence (30).
TRANSVERSE STOP (FIG 18)
Push the transverse stop (13) into a groove (31) of the
saw bench.
Loosen the handle screw (32).

20
Turn the cross stop (7) until the desired angle is set.
The arrow on the transverse stop is at the set angle.
Tighten the knurled screw (32) again.
The stop bar (34) can be moved on the transverse
stop (13). Loosen the nuts (33) and push the stop rail
(34) to the desired position. Tighten the nuts (34)
again.
Caution! Do not push the stop rail (34) too far towards
the saw blade.
The distance between the stop rail (34) and saw blade
(3) should be about 2 cm.
OPERATION
WORKING INSTRUCTIONS
After each new adjustment it is advisable to carry out
a trial cut in order to check the set dimensions. After
switching on the saw, wait for the blade to reach its
maximum speed of rotation before commencing with
the cut.
Secure long workpieces against falling off at the end
of the cut (e.g. with a roller stand etc.)
Take extra care when starting the cut!
Never use the equipment without the suction function.
Regularly check and clean the suction channels.
Suitability of the saw blades:
24 teeth: soft materials, large chip depth, coarse cut
profile.
48 teeth: hard materials, small chip depth, fine cut
profile.
MAKING LONGITUDINAL CUTS (FIG 19)
Longitudinal cutting (also known as slitting) is when
you use the saw to cut along the grain of the wood.
Press one edge of the workpiece against the parallel
stop (15) while the flat side lies on the saw table (1).
The blade guard (4) must always be lowered over the
workpiece.
When you make a longitudinal cut, never adopt a
working position that is in line with the cutting
direction.
Set the parallel stop (15) in accordance with the
workpiece height and the desired width.
Switch on the saw.
Place your hands (with fingers closed) flat on the
workpiece and push the workpiece along the parallel
stop (15) and into the blade (3).
Guide at the side with your left or right hand
(depending on the position of the parallel stop) only as
far as the front edge of the saw blade guard (4).
Always push the workpiece through to the end of the
splitter (6).
The offcut piece remains on the saw table (1) until the
blade (3) is back in its position of rest.
Secure long workpieces against falling off at the end
of the cut (e.g. with a roller stand etc.) (e.g. roller table
etc.)
CUTTING NARROW WORKPIECES (FIG 20)
Be sure to use a push stick (9) when making
longitudinal cuts in workpieces smaller than 120 mm
in width. A push block is supplied with the saw!
Replace a worn or damaged push stick immediately.
Adjust the parallel stop to the width of workpiece you
require.
Feed in the workpiece with two hands. Always use the
push stick (9) in the area of the saw blade.
Always push the workpiece through to the end of the
splitter.
Caution! With short workpieces, use the push stick
from the beginning.
MAKING ANGULAR CUTS (FIG 21)
Angular cuts must always be made using the parallel
stop (15).
Set the blade to the desired angle.
Set the parallel stop (15) in accordance with the
workpiece width and height.
Carry out the cut in accordance with the workpiece
width.
MAKING CROSS CUTS (FIG 22)
Slide the cross stop (7) into one of the grooves (31a/b)
in the table and adjust to the required angle. If you
also want to tilt the blade (3), use the groove (31a)
which prevents your hand and the cross stop from
making contact with the blade guard.
Use the stop rail.
Press the workpiece firmly against the cross stop (7).
Switch on the saw.
Push the cross stop (7) and the workpiece toward the
blade in order to make the cut.
Important: Always hold the guided part of the
workpiece. Never hold the part which is to be cut off.
Push the cross stop (7) forward until the workpiece is
cut all the way through.
Switch off the saw again. Do not remove the offcut
until the blade has stopped rotating.
CUTTING PARTICLE BOARDS
To prevent the cutting edges from cracking when
working with particle boards, you should not set the
saw blade (3) more than 5mm greater than the
thickness of the workpiece.
Other manuals for NTS1500
1
Table of contents
Other NUTOOL Saw manuals

NUTOOL
NUTOOL KGS2000TS User manual

NUTOOL
NUTOOL MC250N User manual

NUTOOL
NUTOOL NCS185 User manual

NUTOOL
NUTOOL NTS2000 User manual

NUTOOL
NUTOOL NMS1700R User manual

NUTOOL
NUTOOL NMS2000 User manual

NUTOOL
NUTOOL BTL212 User manual

NUTOOL
NUTOOL MP185 User manual

NUTOOL
NUTOOL Red NTS810R User manual

NUTOOL
NUTOOL NTS1500 User manual