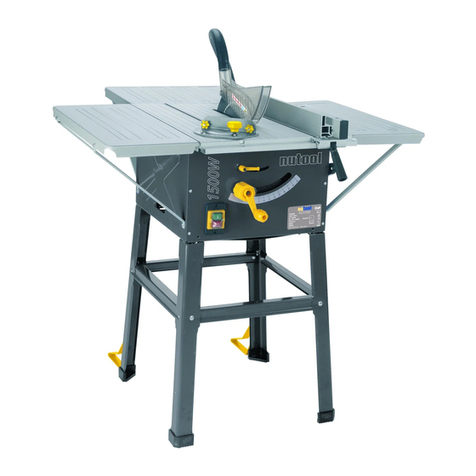
NUTOOL KGS2000TS User manual

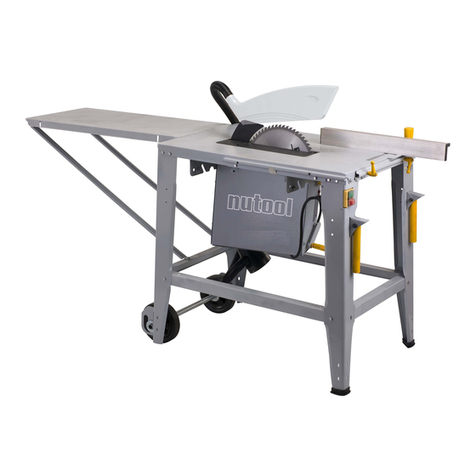
KGS2000TS
ES
Sierra de banco
(Traducción de las instrucciones originales)
GB
Table Saw
(Original instructions)
PT
Serra de Bancada
(Tradução das instruções originais)

IT Conservare questo manuale d’istruzioni per poterlo consultare in futuro
GB Preserve this handbook for future reference
FR Conserver le présent manuel pour pouvoir le consulter ultérieurement
DE Diese Bedienungsanleitung für späteres Nachschlagen sorgfältig aufbewahren
ES Conservar este manual de instrucciones para poder consultarlo en el futuro
PT Guardar este manual de instruções para o poder consultar no futuro
NL Bewaar deze handleiding voor toekomstige raadpleging
DK Opbevar denne brugsanvisning således, at det altid er muligt at indhente oplysninger på et senere tidspunkt
SE Förvara denna bruksanvisning för framtida konsultation
FI Säilytä ohjekirja voidaksesi etsiä siitä tarvittaessa ohjeita
GR Φυλάξτετοπαρόνεγχειρίδιοοδηγιώνγιαμελλοντικήχρήση
PL Przechowywaćniniejszypodręcznikinstrukcjiobsługitak,abymożnabyłokorzystaćzniegowprzyszłości
HR Sačuvajteovajpriručniksuputamadabistegamoglikonzultiratiubudućnosti
SI Skrbnoshranitetapriročnik
HU Őrízzemegakézikönyvetajövőbenvalótanulmányozáshoz
CZ Uložtetutopříručkuspokynypropoužitínavhodnémmístě,abystejimohlikdykolipoužít
SK Uschovajtetútopríručkuspokynminaobsluhuprístrojatak,abystemohlidonejkedykoľveknahliadnúť
RU Сохраняйтеданноеруководствовтечениевсегопериодаэксплуатациикомпрессора
NO Du må oppbevare denne bruksanvisningen slik at du kan slå opp i den ved senere behov
TR Bukullanımkılavuzunugelecektedanışmakiçinmuhafazaediniz
RO Păstraţimanualuldeinstrucţiunipentrua-lputeacitişipeviitor
BG Запазететоваръководствопоексплоатацията,задаможетедагоизползватеивбъдеще
RS Sačuvajteovajpriručniksuputstvimadabimoglidagakonsultujeteiubudućnosti
LT Saglabātinstrukcijurokasgrāmatu,laivarētuizmantotnepieciešamībasgadījumā
EE Hoidke käesolevat kasutusjuhendit alles, et saaksite seda tulevikus kasutada
LV Išsaugotišiąinstrukcijųknygutętam,kadateityjegalėtumėtejojepasikonsultuoti

3
Leggere attentamente il manuale d’istruzioni prima dell’uso
Before use, read the handbook carefully
Lire attentivement le Manuel Opérateur avant toute utilisation
Vor Inbetriebnahme Gebrauchsanleitung aufmerksam lesen
Leer atentamente el manual de instrucciones antes de usar el equipo
Ler com atenção o manual de instruções antes do uso
Leesvóórgebruikaandachtigdehandleidingdoor
Læs omhyggeligt instruktionsmanualen før brug
Läs bruksanvisningen noggrant före användning
Lue käyttöopas huolellisesti ennen käyttöä
Διαβάστεπροσεκτικάτοεγχειρίδιοοδηγιώννπριναπότηχρήση
Przedużyciemnależydokładniezapoznaćsięzinstrukcjamiobsługi
Prijeupotrebepažljivopročitajteuputezaupotrebo
Pred uporabo, pazljivo preberite navodila za uporabo
Használatelőttfigyelmesenolvassaelakézikönyvet
Předzahájenímprácesipozorněpřečtětepříručkupropoužití.
Predpoužívanímvýrobkusipozorneprečítajtenávodnajehopoužitie.
Передтем,какприступитькработе,внимательнопрочитайте
инструкциюпоэксплуатации
Les nøye bruksanvisningen før bruk
Kullanımdanöncekullanımkılavuzunudikkatliceokuyunuz.
Citiţicuatenţiemanualuldeinstrucţiuniînaintedeutilizare!
Внимателнопрочететеръководствотопоексплоатацияпредиупотреба
Preupotrebepažljivopročitajtepriručniksuputstvima
Priešimdamiesidarboatidžiaiperskaitykitenaudojimovadovėlį
Ennekasutamistlugegekasutamisjuhendtähelepanelikultläbi.
Uzmanīgiizlasietizmantošanasinstrukcijupirmsproduktalietošanas
Pericolo, usare prudenza
Danger, take care
Danger: agir avec prudence
Vorsicht, Gefahr
Peligro,actuarconprecaución
Perigo, tomar cuidado
Gevaar, wees voorzichtig
Fare, vær forsigtig
Fara-varförsiktig!
Vaara, noudata varovaisuutta
Κίνδυνος,χρησιμοποιήστετομεπροσοχή
Ostrożnie,niebezpieczeństwo
Pažnja,opasnost
Pozor, nevarnost
Veszélyhelyzet,legyenóvatos
Nebezpečí,postupujteopatrně!
Nebezpečenstvo,pracujteopatrne!
Опасно,будьтеосторожны
Fare, vær forsiktig
Tehlike,dikkatlekullanınız
Pericol!Acţionaţicuprudenţă!
Опасност,бъдетевнимателни
Opasnost, budite na oprezu
Pavojinga,būkiteatsargus
Ohtlik, olge ettevaatlik
Esietuzmanīgi-lietojietproduktupiesardzīgi
IT- Irifiutidi apparecchiatureelettriche edelettroniche(RAEE)non possono essere
trattaticomeinormalirifiutidomestici.Provvederealricicloladdoveesistonoimpianti
adeguati.Consultarel’entelocaleoilrivenditoreperconsiglisuraccoltaesmaltimento.
GB - Waste electrical and electronic equipment (WEEE), should not be disposed of
with household waste. Please recycle where facilities exist. Check with your Local
Authority or retailer for recycling advice.
FR- Lesdéchetsd’équipementsélectriquesetélectroniques(DEEE) nepeuvent
pasêtretraitéscommedesdéchetsdomestiquesnormaux.Procéderaurecyclage
dansdeslieuxprévusàceteffet.Serenseignerauprèsdel’entrepriselocaleoudu
revendeurpourêtreconseillésurlacollecteetl’élimination.
DE - Die Kennzeichnung auf dem Produkt gibt an, dass es nach seiner Lebensdauer
nicht mit dem normalen Hausmüll entsorgt werden darf, dieses Produkt muss in
zugelassenen Anlagen umweltgerecht recycelt werden. Bitte erkundigen Sie sich bei
der örtlichen Behörde oder beim Vertragshändler über Müllsammlung und -entsorgung.
ES-Losresiduosdeaparatoseléctricosyelectrónicos(RAEE)nopuedentratarse
como residuos domésticos normales. Proceda a reciclarlos siempre que existan
instalaciones adecuadas. Consulte a las autoridades locales o al minorista si
necesitainformaciónsobrelarecogidayreciclaje.
PT - Resíduos de aparelhagens elétricas e eletrônicas (RAEE) não podem ser
tratados da mesma forma que o lixo normal de casa. Providenciar a reciclagem do
lixo caso existam equipamentos adequados para tal fim. Consultar o órgão local ou
revendedor para obter orientações sobre a coleta e eliminação do lixo.
NL -Afgedankte Elektrische en ElektronischeApparaten (AEEA) mogen niet als
normaal huishoudelijk afval worden behandeld. Zorg voor hergebruik indien er
geschiktevoorzieningenzijn.Raadpleegzorgvuldigdeplaatselijkeautoriteitenofde
verkopervoordeinzamelingenontzorging.
DK - Affald fra elektriske og elektroniske apparater (WEEE) kan ikke håndteres
som almindeligt husholdningsaffald. Sørg for, at aflevere det til de dertil beregnede
affaldscentraler. Kontakt de lokale myndigheder eller salgsstedet for at indhente råd
om affaldssortering og tilintetgørelse.
SE - Elektriskt och Elektroniskt avfall (WEEE) skulle inte hanteras som vanligt
hushållsavfall.Varvänligochåtervinnavidlämpligaåtervinningscentraler.Frågatill
IT LEGENDA SEGNALETICA DI SICUREZZA SUI PRODOTTI
GB KEY TO PRODUCT SAFETY SIGNS
FR LEGENDE DES PICTOGRAMMES DE SECURITE
FIGURANT SUR LES PRODUITS
DE ERKLÄRUNG DER SICHERHEITSKENNZEICHNUNG AN
DEN PRODUKTEN
ES INSCRIPCIÓN DE LA SEÑALIZACIÓN DE SEGURIDAD
COLOCADA EN LOS PRODUCTOS
PT LEGENDA DA SINALÉTICA DE SEGURANÇA NOS
PRODUTOS
NL VERKLARING WAARSCHUWINGSSYMBOLEN OP
PRODUCTEN
DK SIGNATURFORKLARING TIL PRODUKTERNES
SIKKERHEDSSKILTNING
SE FÖRKLARING TILL SÄKERHETSSYMBOLER PÅ
PRODUKTERNA
FI TUOTTEITA KOSKEVAT TURVAMERKIT
GR ΥΠOΜΝΗΜΑ ΣΗΜΑΤΩΝ ΑΣΦΑΛΕΙΑΣ ΣΤΑ ΠΡΟΪΟΝΤΑ
PL LEGENDA ZNAKÓW OSTRZEGAWCZYCH NA WYROBACH
HR ZNAKOVI ZA UPOZORENJE NA PROIZVODIMA
SI OPOZORILNI ZNAKI NA PROIZVODIH
HU A TERMÉKEKEN TALÁLHATÓ BIZTONSÁGI JELZÉSEK
LISTÁJA
CZ BEZPEČNOSTNÍ ZNAČENÍ NA VÝROBCÍCH
SK LEGENDA: BEZPEČNOSTNÉ OZNAČENIA NA
VÝROBKOCH
RU УСЛОВНЫЕ ПРЕДУПРЕДИТЕЛЬНЫЕ ЗНАКИ ПО
БЕЗОПАСНОСТИ РАБОТЫ С ИЗДЕЛИЯМИ
NO SIKKERHETSTEGNFORKLARING PÅ PRODUKTENE
TR ÜRÜNLER HAKKINDA GÜVENLİK TALİMATLARI LEJANDI
RO LEGENDA INDICATOARELOR DE SECURITATE APLICATE
PE PRODUSE
BG
ЛЕГЕНДА НА ЗНАЦИТЕ ЗА БЕЗОПАСНОСТ ВЪРХУ ИЗДЕЛИЯТА
RS UPOZORAVAJUĆE NAZNAKE O BEZBEDNOSTI
PROIZVODA
LT SUTARTINIAI ĮSPĖJAMIEJI ŽENKLAI DĖL DARBO
SAUGUMO SU GAMINIAIS
EE OHUTUSNÕUDED
LV PRODUKTU DROŠĪBAS NORĀDĪJUMA ZĪMJU SARAKSTS
IT
GB
FR
DE
ES
PT
NL
DK
SE
FI
GR
PL
HR
SI
HU
CZ
SK
RU
NO
TR
RO
BG
RS
LT
EE
LV
IT
GB
FR
DE
ES
PT
NL
DK
SE
FI
GR
PL
HR
SI
HU
CZ
SK
RU
NO
TR
RO
BG
RS
LT
EE
LV
4
delokalaMyndigheternaellertilleråterförsäljareomåtervinningsråd.
FI - Sähkö- ja elektroniikkaromua ei saa hävittää tavallisten kotitalousjätteiden
mukana, vaan se on toimitettava sille tarkoitettuihin keräyspisteisiin kierrätystä
varten. Lisätietoja saat paikallisilta viranomaisilta tai jälleenmyyjältä.
GR-Τααπόβληταειδώνηλεκτρικούκαιηλεκτρονικούεξοπλισμού(ΟδηγίαWEEE)δεν
μπορούνναδιαχειριστούνωςκοινάοικιακάαπόβλητα.Προβλέψτεστηνανακύκλωση
τουςεκείόπουυπάρχουνκατάλληλεςεγκαταστάσεις.Συμβουλευτείτετοντοπικόφορέα
ήτομεταπωλητήγιαπληροφορίεςσχετικάμετησυγκέντρωσηκαιτηναπόσυρση.
PL - Zużyty sprzęt elektryczny i elektroniczny (WEEE) nie może być zarządzany jak
zwykłe odpady domowe. Przystąpić do recyrkulacji odpadów w miejscach, gdzie
istnieją odpowiednie warunki. Skonsultować się z lokalnymi władzami lub sprzedawcą
w celu uzyskania informacji dotyczących gromadzenia i likwidacji odpadów.
HR-Oznakanaproizvoduupozoravadaseproizvodnakonistekaživotnogvijekane
smijeuklanjatizajednosuobičajenimotpadomizdomaćinstva.Ovajproizvodsemora
recikliratiuprimjerenimpogonimananačinprihvatljivzaokoliš.InformirajtesekodVašeg
komunalnog poduzeća ili ovlaštenog zastupnika o sakupljanju i uklanjanju otpada.
SI - Označba na proizvodu navaja, da ga po njegovi življenjski dobi ne smete
odvreči med gospodinjske odpadke, omenjen izdelek je potrebno reciklirati okolju
prijazno v atestiranih napravah. Prosimo, da se pri lokalnih upravnih organih ali
pri pooblaščenih trgovcih pozanimate glede zbiranja in shranjevanja odpadkov.
HU-Avillamos-éselektronikaiberendezésekbőlszármazóhulladékokat(WEEE)
nem lehet a háztartási hulladékkal azonos módon kezelni. Ahol erre megfelelő
berendezések vannak, ott lehetőség van az újrafelhasználásra. A hulladék
gyűjtésévelésfeldolgozásávalkapcsolatbankérjenfelvilágosítástahelyiszervektől
vagyaviszonteladótól.
CZ - S odpadními elektrickými a elektronickými zařízeními (OEEZ) se nesmí
nakládat jako s komunálním odpadem. V případě, že jsou k dispozici vhodné
podniky zajištěte jejich recyklaci a opětovné zpracování. Rady o sběru a zpracování
poskytne obecní úřad nebo prodejce.
SK - S odpadmi z elektrických a elektronických zariadení (OEEZ) sa nesmie
zaobchádzať ako s domovým odpadom. Ak sú k dispozícii vhodné podniky,
zabezpečte ich recykláciu. Rady o zbere a likvidácii zariadení vám poskytnú
miestneúradyapredajcovia.
RU - Утилизация отходов производства электрического и электронного
оборудования (WEEE) не должна выполняться таким же образом, как
утилизация обыкновенных отходов домашнего хозяйства. Пожалуйста,
перерабатывайте отходы там, где существует адекватное оборудование.
Посоветуйтесь с Местным Управлением или дистрибьютором насчёт
указаний по переработке отходов.
NO - Elektrisk og elektronisk avfall, (EE-avfall), skal ikke kastes sammen med
van husholdningsavfall. Resirkulere der dette er mulig. Ta kontakt med lokale
myndigheterellerforhandlerforrådomresirkulering.
TR - Elektrik ve elektronik tüketim atıkları (EETA), ev atıkları ile beraber atılmamalıdır.
Lütfen uygun olan geri dönüşüm olanaklarını kullanınız. Geri dönüşüm tavsiyeleri
için, mevcut lokal yetkililerin veya satıcıların olup olmadığını araştırınız.
RO-Deşeurileelectrice,electroniceşielectrocasnice(DEEE)nupotfitratateca
oricarealtedeşeuridomestice.Reciclaţicâtmai mult posibil unde există facilităţi
înacestscop.Consultaţiautorităţilelocalesaupuncteledecolectareadeşeurilor
pentrusfaturidereciclare.
BG - Отпадъците от електрическо и електронно оборудване (ОЕЕО)
не могат да бъдат третирани като обикновени домакински отпадъци.
Погрижете се за рециклирането там, където съществуват подходящи
инсталации. Консултирайте се с местните власти или с продавача за
съвет относно събирането и изхвърлянето.
RS- Oznaka na proizvodu upozorava da seproizvod nakon istekaživotnog
doba ne sme uklanjati zajedno sa običnim otpacima iz domaćinstva. Ovaj
proizvod se mora reciklirati u odgovarajučim pogonima na način prihvatljiv
za okolinu. Informirajte se kod Vašeg komunalnog poduzeća ili ovlaštenog
zastupnikaoskupljanjuisklanjanjuotpadka.
LT - Elektroninių ir elektros įrenginių negalima utilizuoti kaip buitinių atliekų. Šias
atliekas būtina šalinti specializuotuose surinkimo punktuose. Norėdami gauti
išsamesnės informacijos apie atliekų šalinimą bei jų perdirbimą, susisiekite su
kompetetingomis vietos institucijomis.
EE-Elektri-jaelektroonikaseadmetejääkidestvabanemineeisaatoimudasarnaselt
majapidamisjääkidest vabanemisele. Vastavate seadmete olemasolu korral
korraldatagu nende ümbertöötlemine. Ümbertöötlemisega seotud informatsiooni
saamisekspöördugekohalikevõimudevõiedasimüüjapoole.
LV - Elektrisko iekārtu un elektronisko iekārtu ražošanas atkritumu utilizācija (WEEE)
nevar veikt kopā ar parasto mājas saimniecības atkritumu utilizāciju. Lūdzam
pārstrādāt atkritumus tur, kur ir piemērots aprīkojums. Konsultēties ar Vietējo
Priekšniecību vai mazumtirgotāju par atkritumu pārstrādāšanas ieteikumiem.
Attenzionecorrenteelettrica
Dangerous voltage
Attention:présencedecourantélectrique
Achtung,elektrischeSpannung
Atención,corrienteeléctrica
Atençãocorrenteeléctrica
Attentie,elektrischestroom
Advarselelektriskstrøm
Varning-elektricitet
Huom.vaarallinenjännite
Προσοχήηλεκτρικόρεύμα
Uwaga,niebezpieczeństwoporażeniaprądemelektrycznym
Pažnja,električninapon
Pozor,električnanapetost
Figyelem,elektromosáram
Pozor-elektrickénapětí!
Pozor-elektrickýprúd!
Рискэлектрическогонапряжения
Forsiktig elektrisk strøm
Dikkatelektrikakımı
Atenţie!Pericolelectric
Внимание:електричекиток
Pažnjaelektričnastruja
Elektrosįtamposrizika
Ettevaatust-elektrivool
Esietuzmanīgi-elektrībasplūsma
Protezione obbligatoria dell’udito, della vista e delle vie respiratorie
Hearing, sight and respiratory protection must be worn
Port obligatoire de protections auditives, oculaires et des voies respiratoires
Gehörschutz,AugenschutzundAtemschutzsindobligatorischvorgeschrieben
Protecciónobligatoriadelosoídos,delavistaydelasvíasrespiratorias
Protecçãoobrigatóriadoouvido,davistaedasviasrespiratórias
Verplichte bescherming van oren, ogen en luchtwegen
Obligatorisk beskyttelse af hørelse, syn og luftveje
Hörselskydd, skyddsglasögon och andningsmask obligatoriskt
Käytettävä kuulosuojaimia, suojalaseja ja hengityksensuojaimia
Υποχρεωτικόπροστατευτικόακοής,όρασηςκαιτουαναπνευστικούσυστήματος
Obowiązkowozabezpieczyćsłuch,wzrokidrogioddechowe
Obaveznazaštitaočiju,dišnihputevaisluha
Obveznazaščitaoči,dihalinsluha
Alégutak,alátásésahallásvédelmekötelező
Povinnostchránitsluch,očiadýchacícesty.
Povinnáochranasluchu,zrakuadýchacíchciest!
Обязательнаязащитаушей,лицаидыхательныхпутей
Obligatorisk å ta i bruk hørselsvern, vernebriller og pustemaske
Mecburiişitme,görmevesolunumyollarıkoruması
Echipamentdeprotecţieobligatoriupentruurechi,ochişicăirespiratorii
Задължителнисредствазазащитанаслуха,зрениетоидихателнитепътища
Obaveznazaštitasluha,vidaidišnihputeva
Privalomaausų,veidoirkvėpavimotakųapsauga
Kuulmis-,nägemis-ninghingamisteedekaitseonkohustuslik.
Obligātadzirdes,redzesunelpošanasceļuaizsardzība
IT
GB
FR
DE
ES
PT
NL
DK
SE
FI
GR
PL
HR
SI
HU
CZ
SK
RU
NO
TR
RO
BG
RS
LT
EE
LV
IT
GB
FR
DE
ES
PT
NL
DK
SE
FI
GR
PL
HR
SI
HU
CZ
SK
RU
NO
TR
RO
BG
RS
LT
EE
LV
5
NON toccare la lama in movimento
Do NOT touch the moving blade
NEPAStoucherlalameenmouvement
Das laufende Messer NICHT berühren
NO tocar la hoja en movimiento
NÃOtocaralâminaemmovimento
RaakNIEThetbewegendemesaan
RørIKKEknivenibevægelse
RörINTEklingannärdenärirörelse
ÄLÄ kosketa liikkuvaa terää
ΜΗΝαγγίζετετηνκινούμενηλάμα
NIEdotykaćostrzawruchu
OkretajučinoževiNEdirajte
VrtečinožiNEdotikajtese
NEnyúljonamozgásbanlévőlapokhoz
NEDOTÝKEJTESEřezacíchkotoučůvpohybu.
NEDOTÝKAJTEsareznýchkotúčov,keďsúvpohybe!
НЕприкасатьсякдвижущемусялезвию
IKKE ta på bladet i bevegelse
Harekethalindekibıçağadokunmayınız
NUatingeţilamaînmişcare
НЕдокосвайтевъртящотосеострие
NE dodirivati list u kretanju
NEliestijudančioašmens
ÄRGEpuudutageliikuvattera
NEaiztiecietkustīguasmeni
NON avvicinarsi alle macchine con abiti svolazzanti
Do NOT approach the machine with loose clothing
NEPASserapprocherdesmachineslorsqu’onportedesvêtementslarges
NICHT mit losen Kleidungsstücken in die Nähe der Maschine kommen
NOacercarsealasmáquinasconropassueltas
NÃOseaproximardasmáquinascomvestuáriosesvoaçantes
Kom NIET in de buurt van de machines met loshangende kleding
Kom IKKE i nærheden af maskinen med løstsiddende tøj
Gå INTE i närheten av maskinerna med vida kläder
ÄLÄ käytä liehuvia vaatteita koneiden läheisyydessä
ΜΗΝπλησιάζετεταμηχανήματαμεφαρδιάρούχα
NIEzbliżaćsiędomaszynwpowiewającejodzieży
NEprebližavajtesestrojusaopuštenimodjelom
NEpribližujtesestrojuzohlapnimideliobleke
NEtartózkodjonagépközelébenhanemtestrefeszülőruhátvisel
NEPŘIBLIŽUJTESEknástrojisvolnýmoblečením.
NEPRIBLIŽUJTEsakstrojomsvoľnepovievajúcimoblečením!
НЕстоятьрядомсмашинойвраспахнутойодежде
IKKE gå i nærheten av maskinene med vide og flagrende klær
Makineyeuçuşangiysilerleyaklaşmayınız.
NUvăapropiaţidemaşinăcuhainelargi
НЕседоближавайтедомашинатасразвяващиседрехи
NEpribližavajtesemašinamasalepršavomodećom
NEstovėtipriemašinossubesiplaikstančiaisdrabužiais
ÄRGElähenegemasinalelahtisesriietuses.
NEtuvojietiesierīčutuvumāarplīvojošiemapğērbugabaliem
IT NON rimuovere le protezioni e i dispositivi di sicurezza a macchina in moto
GB Do NOT remove safety guards and devices with the machine operating
FR NEPASretirerlesprotectionsetlesdispositifsdesécuritépendantque
la machine tourne
DE DieSchutz-undSicherheitsvorrichtungenNICHTentfernen,solangedie
Maschine läuft
ES NO retirar las protecciones ni los dispositivos de seguridad con la
máquinaenmovimiento
PT NÃO remover as protecções e os dispositivos de segurança com a
máquinaemmovimento
NL Verwijder NIET de beschermingen en veiligheidsvoorzieningen terwijl de
machine loopt
DK Bevæg IKKE beskyttelsesskærmene og sikkerhedsanordningerne, når
maskinen kører
SE AvlägsnaINTEskyddenochsäkerhetsanordningarnanärmaskinenäridrift
FI
ÄLÄ poista suojia tai turvalaitteita, kun laite on toiminnassa
GR ΜΗΝαφαιρείτεταπροστατευτικάκαιτιςδιατάξειςασφαλείαςότανημηχανήκινείται
PL NIEusuwaćosłoniurządzeńzabezpieczającychpodczaspracymaszyny
HR NEsklanjajtesigurnostnezaščtitedokjestrojupokretu
SI
NEodstranjujtevarnostnezaščitedoklerstrojobratuje
HU NEvegyeleavédelmeketésabiztonságiberendezéseketamikoragép
működésbenvan
CZ NEODNÍMEJTEochrannékrytyabezpečnostníprvkyzachodunástroje.
SK NEVYBERAJTEbezpečnostnéochranyazariadenia,keďjestrojvprevádzke!
RU
НЕснимайтезащитуизащитныедеталисработающеймашины
NO IKKEfjernbeskyttelses-ogsikkerhetsanordningeneframaskinennårdeneridrift
TR Harekethalindeykenmakineninmuhafazasınıvedonanımıyerlerinden
çıkartmayınız.
RO NUîndepărtaţiprotecţiileşidispozitiveledesiguranţăalemaşiniiînfuncţiune
BG НЕотстранявайтезащитнииобезопасяващиустройстваповреме
дадействиенамашината
RS
NEuklanjatištitnikeibezbednosneuređajesamašineukretanju
LT NEnuimkiteapsaugųirapsaugosdaliųnuodirbančiosmašinos
EE ÄRGEeemaldagekaitseseadmeidtöötavaltmasinalt.
LV NEpārvietojietdrošībasierīcesunmašīnu,tāsdarbībaslaikā
T NON pulire, lubrificare, riparare organi in moto
Do NOT clean, lubricate or repair while the machine is running
NEPASnettoyer,graisserouréparerd’organesenmarche
InBewegungbefindlicheMaschinenteilenichtreinigen,schmieren,reparieren
NOlimpiar,lubricarnirepararórganosenmovimiento
NÃOlimpar,lubrificar,repararórgãosemmovimento
Reinig,smeerenrepareerNIETbewegendeorganen
Rens,smørogreparerIKKEelementer,dereribevægelse
Rengör,smörjellerrepareraINTEdelarirörelse
ÄLÄ puhdista, voitele, korjaa liikkuvia osia
ΜΗΝκαθαρίζετε,λιπαίνετε,επισκευάζετεκινούμεναόργανα
NIEczyścić,niesmarować,aninienaprawiaćczęściwruchu
IzmeđuradastrojaNIJEdozvoljenočišćenje,podmazivanjeipopravljanje
MedobratovanjemstrojaNIdovoljenočiščenje,mazanjeinpopravljanje
NEtisztítsa,olajozza,javítsaamozgásbanlévőgépelemeket
NEPROVÁDĚJTEčištění,mazáníaopravynanástrojizajehochodu.
NEVYKONÁVAJTEčistenie,mazanieaopravynaústrojenstvách,keď
jestrojvchode!
Нечистите,несмазывайте,неремонтируйтедвижущиесядетали
IKKE rengjøre, smøre, reparere komponenter i bevegelse
Harekethalindeykentemizleme,yağlama,parçalarıonarımyapmayınız.
NUcurăţaţi,nulubrifiaţi,nureparaţiorganeleînmişcare
НЕизвършвайтепочистване,смазванеипоправканадвижещисеоргани
NEčistiti,podmazivati,popravljatidelovemašineukretanju
NEvalykite,netepkite,netaisykitejudančiųdalių
ÄRGEpuhastage,määrigeegaparandageliikuvaidosi.
NEtīriet,NEļļojiet,NElabojietmašīnassastāvdaļas,tāsdarbībaslaikā
IT
GB
FR
DE
ES
PT
NL
DK
SE
FI
GR
PL
HR
SI
HU
CZ
SK
RU
NO
TR
RO
BG
RS
LT
EE
LV
I
GB
FR
DE
ES
PT
NL
DK
SE
FI
GR
PL
HR
SI
HU
CZ
SK
RU
NO
TR
RO
BG
RS
LT
EE
LV
IT
GB
FR
DE
ES
PT
NL
DK
SE
FI
GR
PL
HR
SI
HU
CZ
SK
RU
NO
TR
RO
BG
RS
LT
EE
LV
6
IT Pericolo proiezione di schegge
GB Danger splinter casting
FR Danger projection de déchets d’ébranchage
DE Gefahr durch fliegende Späne
ES Peligroproyeccióndeastillas
PT Perigo projeção de estilhaços
NL Gevaar voor rondvliegende scherven/splinters
DK Fare: Springende splinter
SE Riskförflisor
FI Varo sinkoutuvia esineitä
GR Κίνδυνοςεκτόξευσηςθραυσμάτων
PL Ostrzeżenieprzedniebezpieczeństwemodprysków
HR Opasnost od lijetenja trijeski
SI Pozor–letečiostružki!
HU Amunkaközbenkeletkezőforgácspattanásánakveszélye
CZ Nebezpečíodhozenítřísek
SK Nebezpečenstvoodhodeniatriesok
RU Рискпопаданияосколков
NO Fare for sprut av splinter
TR Tehlike:Yansıyankıymıkparçalarından
RO Pericolprăbuşiridestânci
BG Внимание!-Хвърчащиискри
RS Opasnost od letenja iverica
LT Skeveldrųpavojus
EE Pindude paiskumise oht
LV Šķembutrāpījumabriesmas

7
(1)
8
27
3
5
6
4
1
15
17
13
16
14
12
11
10
9

8
8.1
2
4
6
3
5
7

9
9
11
13
8
10
12
8.1
11.1

10
14
16
18
15
17
19

11
2120

12
26 27
29
30 31
28

13
32 33
34 35
36 37

14
38 39
41
40
39.2
39.1
39.3
(“A”) (“B”) (“C”)
5mm 5mm

25
GB
ELECTRICAL INFORMATION 5Amp Class 1 Protection
CONNECTION OF THE MAINS PLUG
Important!Thewiresinthemainsleadfittedtothisproductarecolouredinaccordancewiththefollowingcode:
Brown:Live(L)orRed
Blue: Neutral(N)orBlack
Green and Yellow or Green:Earth(E)
THISPRODUCTREQUIRESACONNECTIONTOEARTH.
THE3PINPLUGMUSTCOMPLYTOBS1363/A.
THEFUSEMUSTCOMPLYTOBS1362.
If for any reason the 13 amp plug fitted to this product requires replacement it must be wired in accordance with the following
instruction:
DO NOT CONNECT THE BROWN LIVE OR BLUE NEUTRAL TO THE EARTH PIN MARKED ‘E’ ON THE 3
PIN PLUG.
ConnecttheBluewiretotheterminalmarkedNeutral(N).ConnecttheBrownwiretotheterminalmarkedLive(L).ConnecttheGreen
andYellowwiretotheterminalmarkedEarth(E).Ensurethattheouterinsulationisgrippedbythecordgripandthatthewires
arenottrappedwhenreplacingtheplugcover.Themainsleadonthisproductisfittedwitha13amp(BS1363/A)plug.A5 amp
(BS1362)fusemustbefittedintheplug.
IF IN DOUBT CONSULT A QUALIFIED ELECTRICIAN
Therearenouserserviceablepartsinsidethisproductexceptthosereferredtointhemanual.Alwaysreferservicingtoqualified
servicepersonnel.Neverremoveanypartofthecasingunlessqualifiedtodoso;thisunitcontainsdangerousvoltages.
WARNING!
Foryourprotectionifthisproductistobeusedoutdoors,itshouldnotbeexposedtorainorusedindamplocations.Donotplace
theproductondampsurfaces,useaworkbenchifavailable.Foraddedprotectionuseasuitableresidualcurrentdevice(R.C.D.)at
thesocketoutlet.
If an extension cable is to be used with this machine, it must be of 3 core construction with the earth conductor connected at both the
plugandsocket.Ifindubt,consultaqualifiedelectrician.
13
Electrical information 5Amp Class 1 Protection
CONNECTION OF THE MAINS PLUG
Important! The wires in the mains lead fitted to this product are coloured in accordance with the following
code:
Brown: Live (L) or Red
Blue: Neutral (N) or Black
Green and Yellow or Green: Earth (E)
THIS PRODUCT REQUIRES A CONNECTION TO
EARTH. THE 3 PIN PLUG MUST COMPLY TO BS1363/
A. The FUSE MUST COMPLY TO BS1362.
If for any reason the 13 amp plug fitted to this product requires replacing it must be wired in accordance
with the following instruction:
Do not connect the brown live or blue neutral to the earth pin MARKED E
on the 3 pin plug.
Connect the Blue wire to the terminal marked Neutral (N). Connect the Brown wire to the terminal marked
Live (L). Connect the Green and Yellow wire to the terminal marked Earth E. Ensure that the outer
insulation is gripped by the cord grip and that the wires are not trapped when replacing the plug cover. The
mains lead on this product is fitted with a 13 amp (BS1363/A) plug. A 5 amp (BS1362) fuse must be fitted in
the plug. If in doubt consult a qualified electrician.
There are no user serviceable parts inside this product except those referred to in the manual. Always refer
servicing to qualified service personnel. Never remove any part of the casing unless qualified to do so; this
unit contains dangerous voltages.
WARNING!
For your protection if this tool is to be used outdoors, do not expose it to rain or use it in damp locations. Do
not place the tool on damp surfaces, use a workbench if available. For added protection use a suitable
residual current device (R.C.D.) at the socket outlet.
If an extension cable is to be used with this machine it must be of 3 core construction with the earth
conductor connected at both the plug and socket. If in doubt consult a qualified electrician.
GB

26
GB
GENERAL SAFETY INSTRUCTIONS
Before attempting to operate this machine, you must read,
understand and follow these instructions very carefully as they
are intended to ensure your safety and that of others and also a
longandtrouble-freeservicelifeofthemachine.
Learn how to use the power tool, its limitations and potential
hazards.
Keeptheseinstructionsinasafeplaceforfuturereference.
Avoid unintentional starting - Unplug the power tools
Before starting the power tool, always make sure that you have
removedthekeyandadjustingwrenches.
Before plugging the tool into the mains supply, always make
surethattheswitchisintheOFFposition.
Make sure that power tools are disconnected from the mains
supply when not in use, prior to servicing, lubrication or
adjustment and when replacing accessories such as blades,
bitsandcutters.
Check damaged parts
Before using the power tool, always inspect it carefully to
determine that it will operate properly and perform its intended
function.
Check correct alignment of moving parts, making sure they do
notbind.Checkforanydamagedcomponentsandmakesure
thatthepowertoolhasbeencorrectlyassembled.
Check for any condition that may affect operation of the power
tool.
Unless otherwise indicated in this instructions handbook, a
guard or any other part of the power tool that has been damaged
mustberepairedorreplacedbyanauthorizedservicecenter.
Anyswitchthatdoesnotworkcorrectlymustbereplacedbyan
authorizedservicecenter.
Do not use the power tool if the ON/OFF switch does not turn
thepowertoolONandOFF.
Dustgeneratedwhenmachiningmaterialsisahealthhazard.
Alwayswearasuitabledustmask.
When working, always wear personal protective equipment:
INTRODUCTION
Thankyouforpurchasingthisproductwhichhaspassedthroughourextensivequalityassuranceprocess.Everycarehasbeentaken
toensurethatitreachesyouinperfectcondition.However,intheunlikelyeventthatyoushouldexperienceaproblem,orifwecan
offeranyassistanceoradvicepleasedonothesitatetocontactourcustomercaredepartment.Fordetailsofyournearestcustomer
caredepartmentpleaserefertothetelephonenumbersatthebackofthismanual.
SAFETY FIRST
Before attempting to operate this power tool the following basic safety precautions should always be taken to reduce the risk of fire,
electricshockandpersonalinjury.Itisimportanttoreadtheinstructionmanualtounderstandtheapplication,limitationsandpotential
hazardsassociatedwiththistool.
CERTIFICATE OF GUARANTEE
Thisproductisguaranteedforaperiodof2Years,witheffectfromthedateofpurchaseandappliesonlytotheoriginalpurchaser.
This guarantee only applies to defects arising from, defective materials and or faulty workmanship that become evident during the
guaranteeperiodonlyanddoesnotincludeconsumableitems.Themanufacturerwillrepairorreplacetheproductattheirdiscretion
subjecttothefollowing.Thattheproducthasbeenusedinaccordancewiththeguidelinesasdetailedintheproductmanualand
thatithasnotbeensubjectedtomisuse,abuseorusedforapurposeforwhichitwasnotintended.Thatithasnotbeentakenapart
ortamperedwithinanywaywhatsoeverorhasbeenservicedbyunauthorisedpersonsorhasbeenusedforhirepurposes.Transit
damageisexcludedfromthisguarantee,forsuchdamagethetransportcompanyisresponsible.Claimsmadeunderthisguarantee
mustbemadeinthefirstinstance,directlytotheretailerwithintheguaranteeperiod.Onlyunderexceptionalcircumstancesshould
theproductbereturnedtothemanufacturer.Inthesecaseitshallbetheconsumer’sresponsibilitytoreturntheproductattheircost
ensuring that the product is adequately packed to prevent transit damage and must be accompanied with a brief description of the
faultandacopyofthereceiptorotherproofofpurchase.Themanufacturershallnotbeliableforanyspecial,exemplary,direct,
indirect,incidental,orconsequentiallossordamageunderthisguarantee.Thisguaranteeisinadditiontoanddoesnotaffectany
rights,whichtheconsumermayhavebyvirtueoftheSaleofGoodsAct1973asamended1975and1999.
STATUTORY RIGHTS
Thisguaranteeisinadditiontoandinnowayaffectsyourstatutoryrights.
PRODUCT DISPOSAL
Whenthisproductreachestheendofit’slifeorisdisposedofforanyotherreason,itmustnotbedisposedofinhouseholdwaste.In
order to preserve natural resources, and to minimise adverse environmental impact, please recycle or dispose of this product in an
environmentallyfriendlyway.Itshouldbetakentoyourlocalwasterecyclingcentreorotherauthorisedcollectionanddisposalfacility.
Ifindoubtconsultyourlocalwasteauthorityforinformationregardingavailablerecyclingand/ordisposaloptions.

27
GB
safety goggles, gloves, mask, ear protectors, non-slip safety
shoes.
Never wear loose clothes or jewelry that may be trapped in
movingparts;longhairmustbetiedback.
Alwaysworkonastablebase.
Alwaysfastentheworkpiecesecurelywithaclamp.
Keeptheworkareacleanandtidy.
Alwaysusethepowertoolwithbothhands.
Never open or modify the power tool or its accessories in
anyway.
Do not expose the power tool to rain, or use in damp or wet
locations.Keeptheworkareawelllit.
Do not use power tools in areas where there is a risk of explosion
or fire from combustible materials, flammable liquids, paint,
varnish,petroletc.flammablegasesanddustofanexplosive
nature.
Beware children and pets
Childrenandpetsshouldbekeptoutoftheworkarea.
Allpowertoolsshouldbekeptoutofthereachofchildrenand,
preferably, stored or locked in a secure cabinet or dry room
whennotinuse.
Use the right tool
Selecttherighttoolforthejob.Donotuseatoolforajobfor
whichitwasnotdesigned.Donotforceasmalltooltodothe
job of a heavy-duty tool. Do not use tools for purposes not
intended.
Do not force the power tool
The power tool will do a better and safer job and give you much
betterserviceifitisusedattherateforwhichitwasdesigned.
Maintain tools with care
Keep cutting tools sharp and clean for better and safer
performance.
Followtheinstructionsforlubricatingandchangingaccessories.
Keephandlesdry,cleanandfreefromoilandgrease.
Ensure that ventilation slots are kept clean and free from dust
atalltimes.Blockedventilationslotscancauseoverheatingand
damagetothemotor.
If this machine is to be used when working at a certain height,
scaffoldingfittedwithrailingandkick-plateoratowerplatform
mustbeusedinordertoguaranteesuitablestability.
GUARD AGAINST ELECTRIC SHOCK
Avoid body contact with earthed or grounded surfaces (e.g.
pipes,radiators,dish-washersandrefrigerators).
Power Cords
Never yank or pull the power cord to disconnect it from the
mainssupplysocket.
Nevercarrythepowertoolbyitspowercord.Keepthepower
cordawayfromheat,oil,solventsandsharpedges.
Check the tool power cord periodically and if damaged have it
replacedbyanauthorizedservicecenter.
Inspectextensioncordsperiodicallyandreplaceifdamaged.
DONOT use2-core extension cords orreelson power tools
withanearthpath.Alwaysusea3-coreextensioncordorreel
withtheearthcoreconnectedtoearth.
Alwaysunwindanyextensioncordsfully.
For extension cords up to 15 metres, use a wire cross section
of1.5mm2.
For extension cords over 15 metres, use a wire cross section
of2.5mm2.
Protect your extension cord from sharp objects, excessive heat
anddamporwetlocations.
This power tool complies with National and International
Standards and safety requirements. Repairs should be
carried only out by qualified persons using original spare
parts. Failure to do so may result in considerable danger
to the use.

28
GB
SPECIFIC SAFETY INSTRUCTIONS
WARNING! Some wood and wood type products, especially
MDF (Medium Density Fibreboard), can produce dust that
canbe hazardous to yourhealth. Werecommend the use of
an approved face mask with replaceable filters when using this
machineinadditiontousingthedustextractionfacility.Ensure
that power tools are disconnected from the mains supply when
not in use, before servicing, lubricating or making adjustments
andwhenchangingaccessoriessuchasblades,bitsandcutters.
DoNotusebladesmadefromHighSpeedSteel.DoNotstop
thebladebyforcingthemachineorbyusingsidewayspressure.
DoNotfitagrindingorcuttingdisctothismachine.Alwaysuse
the correct type of blade for the operation to be carried out.
DoNotusebladesthatarebentorhavemissingteeth.Thisis
highly dangerous and could result in a serious accident causing
injurytotheoperator,bystandersanddamagetothemachine.
Only use blades that are recommended by the supplier and
thatare ingood condition.DoNot useblades thatare larger
thanspecified.Onlyusebladesthatareratedforthemachine.
The rotational speed shown on the blade should always be
HIGHERthantherotationalspeedofthemachine.Ensurethat
the directional arrow marked on the blade corresponds with the
rotationaldirectionofthemotor.Theteethofthebladeshould
alwayspointdownwardasviewedfromthefrontofthesaw.Do
Notlockthebladeguardintheupposition.Ensurethatmovable
guardsoperatefreelywithoutjamming.KeepGuardsinplace
andingoodworkingorder.Withthemachinedisconnectedfrom
the mains supply check the operation of the guard to ensure
thatitoperatescorrectly.DoNotusebladesthebodyofwhich
is thicker or the set of which is smaller than the thickness of the
rivingknife.(SeeIllustration“A”)Alwaysensurethatthedistance
between the riving knife and the toothed rim of the saw blade is
notmorethan5mm.(SeeIllustration“B”)Alwaysensurethatthe
toothed rim of the saw blade does not extend more than 5mm
beyondtheloweredgeoftherivingknife.(SeeIllustration“C”)
Alwayskeepthebladesecuringarborandcollarsclean.
Wheneverreplacing blades ensure thattherecessed surface
ofthebladecollarfitssnuglyagainstthesurfaceoftheblade.
Ensure that the blade securing bolt is securely tightened using
thewrenchesprovided.Donotovertighten.Useonlyblades
that are recommended by the manufacturer. Do not start
the machine with the blade in contact with the work piece.
Check the work piece for any protruding nails, screw heads
oranythingthat could damage the blade. Do not attemptto
modifythemachineoritsaccessoriesinanyway.Donotforce
the machine let the machine do the work this will reduce the
wear on the machine and blade and increase its efficiency and
operatinglife.Approvedeardefendersshouldbewornwhen
using circular saws. Do not cut timber greater than 75mm,
Metal,Stone,Rubber,Plastic,Bones,Etc.Donotfitanyother
toolorcombinationofblades.Donotmodifythemachineorits
guards/controlsinanyway.Donotusewithanycovers/guards
removed. Always use the blade guard, riving knife and anti
kickback paws for every operation, including through sawing.
Through sawing operations are those in which the blade cuts
completelythroughtheworkpiecewhenrippingorcrosscutting.
Alwaysholdtheworkfirmlyagainstthemitregaugeorfence.
Always use a push stick for ripping narrow stock. Refer to
rippingapplicationsininstructionmanual.
Alwaysuseeitherthefenceorthemitregaugetopositionand
guidethework.Neverstandorhaveanypartofyourbodyinline
withthepathofthesawblade.Keepyourhandsoutoftheline
ofthesawblade.Neverreachbehindoroverthecuttingtoolfor
anyreason.Ifoffcutsofwoodbecomejammedinthemachine,
switchoffanddisconnectfromsupplybeforeremoval.Feedthe
workpieceintothebladeagainstthedirectionofrotationonly.
Neverusetheripfenceasacut-offgaugewhencross-cutting.
NEVERattempttofreeastalledsawbladewithoutfirstturning
thesawOFF.
Provide adequate support to the rear and sides of the saw
tableforwideorlongworkpieces.Avoidkickback(workthrown
backtowardyou)bykeepingthebladesharp,keepingripfence
paralleltothesawblade,keepingspreaderandanti-kickback
pawls(iffitted)andguardinplace.Donotreleaseworkbefore
itispushedallthewaypastthesawblade.Donotripworkthat
is twisted or warped or does not have a straight edge to guide
alongthefence.Avoidawkwardoperationsandhandpositions
where a sudden slip could cause your hand to move into the
blade.NeverusesolventstocleanplasticpartsSolventscould
possibly dissolve or otherwise damage the material. Only a
softdampcloth shouldbeused tocleanplastic parts.Usein
awellventilatedarea.Removesawdustfrequently.Cleanout
sawdust from the interior of the saw to prevent a potential fire
hazard.Sawdustispotentiallyhazardoustohealth.Alwaysuse
a suitable dust collection system and wear an approved face
mask.

29
GB
COMPONENTS AND CONTROLS (PIC.1)
FITTING THE RIVING KNIFE. (PIC. 2)
To fit the riving knife, remove the table insert. (Pic. 1) 16. With
the table insert removed the two rivingknife securing socket
screws can be seen (Pic. 2). Using a suitable sized hex key
slacken the two socket screws, locate the riving knife and
secure with the two socket screws. See (pics. A,B & C) for the
correct setting of the riving knife.
FITTING THE BLADE GUARD. (PIC. 3)
The blade guard (Pic.1) 8 is attached to the riving knife. Remove
the nylok nut and washer from the guard securing coach bolt
and remove the guard securing coach bolt from the blade
guard. Locate the blade guard over the riving knife, re insert the
guard securing coach bolt and refit the nylok nut and washer
(Pic.3). Check the operation of the blade guard ensuring that it
is correctly fitted and operates freely.
MOUNTING THE ELEVATING HANDLE (PIC. 4)
The elevating screw is located at the front of the machine
and has the locking knob (Pic.1) 14. already fitted. locate the
elevating handle onto the end of the screw and secure by
tightening the securing screw in the handle (Pic. 4).
MOUNTING THE TILTING HANDLE (PIC. 5)
The tilting screw is located at the side of the machine (Pic. 1) 13.
Locate the tilting handle onto the end of the screw and secure
by tightening the securing screw in the handle (Pic. 5).
ADJUSTING THE BLADE (PICS.6 & 7)
The blade has been set at the factory to be at an angle of
90° to the table. To check the angle elevate the blade to its
highest position and using an engineers square or a set square
positioned against the table and the blade, check that the angle
is at 90°(Pic. 6). If adjustment is required carefully turn the table
saw over and remove the bottom cover plate. Identify the tilt
angle operating screw (Pic. 7). The operating screw has two
sets of adjustment and locking nuts fitted. The set of nuts at
the motor end of the screw, are for setting the blade at 90° to
the table 0° on the angle scale. The set at the other end of the
screw, are for setting the blade at 45° to the table 45° on the
angle scale.
SETTING THE BLADE AT 90° TO THE TABLE (PICS.
7 TO 9).
Loosen the lock nut (Pic. 8.1) using two wrenches, one for the
lock nut and one for the adjustment nut (Pic. 8.2) on the motor
end of the operating screw (Pic. 7) and turn the adjustment
nut until the blade is at the 90° to the table. Then turn the
lock nut (while holding the adjustment nut in position) to fix
the adjustment nut in place. Check the position of the angle
indicator pointer against the angle scale and adjust to 0° by
loosening the cross head screw and setting the pointer on 0° on
the angle scale (Pic. 9).
SETTING THE BLADE AT 45° TO THE TABLE (PICS.
7,10 & 11)
To check the angle, elevate the blade to its highest position and
using the tilt handle tilt the blade as far as it will go. Using a
suitable set square, check the angle of the blade to the table
is at 45°(Pic. 10). If adjustment is required, locate the set of
adjustment and locking nuts on the tilt angle operating screw
furthest away from the motor (Pic. 7). Loosen the lock nut (Pic.
11.1) using two wrenches, one for the lock nut and one for the
adjustment nut (Pic. 11.2) and turn the adjustment nut until the
blade is at 45°to the table. Then turn the lock nut (while holding
the adjustment nut in position) to fix the adjustment nut in place.
Check the position of the angle indicator pointer against the
angle scale it should now align with the 45° mark.
CHECKING THE BLADE ALIGNMENT (PICS. 12 TO
15)
To check that the blade is set parallel to the two mitre gauge
guide grooves machined in the table (one on either side of the
blade). Elevate the blade to its highest point and mark an “X” on
one of the teeth which is set (Bent) to the left and to the front
of the blade slot in the table insert (Pic. 12). Position the head
of the combination square in the groove and adjust the blade
of the square so that it just contacts the tip of the marked tooth
(Pic. 13). Slide the combination square towards the rear of the
table and rotate the blade so that the marked tooth is to the rear
of the slot in the table insert. Check that the marked tooth again
1Table saw
2Mitre gauge
3Rip fence
4Rip fence mounting block
5Rip fence securing knobs x 2
6Rip fence adjusting knob
7Riving knife
8Blade guard
9Legs x 4
10 Upper support strut x 4
11 Lower support strut x 4
12 Table elevation handle
13 Blade tilting handle
14 Locking knob
15 Table
16 Table insert
17
No Volts ON/OFF switch

30
GB
just contacts the blade of the combination square. to see if the
marked tooth again contactsthe blade of the square (Pic. 14).
If the marked tooth just contacts the combination square blade,
when the marked tooth is positioned at the front and rear of
the blade slot in the table insert the saw blade is parallel to the
mitre gauge groove. If the blade is not parallel tilt the blade to
45°carefully turn the table saw over and remove the bottom
cover plate. Loosen the four bolts (Pic. 15) and adjust the motor
unit until the blade is set parallel to the mitre gauge groove and
then retighten the screws. Repeat the above procedureuntil the
blade is parallel to the mitre gauge grooves .
ASSEMBLING THE BASE (PIC. 16)
Account for all parts and lay out ready for assembly. The
wrenches required for this assembly, are not supplied. You will
need assistance with this operation. Examine the exploded
diagram making sure that all parts are in the correct relation to
each other. Put a washer onto the coach bolt. Take one of the
four support legs. Take the long upper strut and align the holes
in the support leg and insert the coach bolt. Place washer on
the protruding end of the coach bolt and tighten the hexagonal
nut finger tight. Take the short upper strut and repeat operation
regarding securing with the hexagonalnuts and coach bolts.
Repeat the operation until all four support legs have been
secured to the upper support struts. Locate the long lowerstruts
and the short lower struts and secure in the same operation as
the upper struts. Once all nuts are finger tight, tighten ALL
nuts
to a suitable torque.
MOUNTING THE TABLE SAW TO THE BASE (PIC.
17)
With an assistant lift the table saw onto the base. Care
is
required as the machine is not secured at this stage and is liable
to slip off the base possibly causing injury. Put the four washers
onto the four hexagonal bolts. While one person securely
holds
the table saw in place locate the bolt though the table saw base
(Pic. 17)passing through the hole in the base. Take the
washer
and hexagonal nut, secure finger tight. Repeat this operation
on
all four corners. Using suitable ring spanners tighten ALL
four
nuts.
MOUNTING THE RIP FENCE (PIC. 18 TO 20)
Locate the rip fence mounting block (Pic. 1) 4 onto the
slide
profile located along the front edge of the table saw, ensuring
that the clamping plate is located inside the groove in the slide
profile (Pic. 18). Position the mounting block to the right
of
the
blade and secure using the locking knob (Pic.18). Using
the
two
coach bolts and knobs secure the rip fence onto the mounting
block (Pic. 19). The rip fence can now be adjusted from
left
to
right and from the front to back. (Pic. 20)
FITTING THE MITRE GAUGE (PIC. 21)
The mitre gauge simply locates in the location grooves one on
either side of the blade (Pic. 21). and can be used for cutting
at
various angles.
MITRE GAUGE ADJUSTMENT (PIC. 21)
To check the accuracy of the mitre gauge, ensure that the
pointer is set to 0° on the angle scale and perform a cut. Check
the angle of the cut, if it is not at 90° adjust the mitre gauge until
a 90° cut is achieved. Check the position of the pointer against
the angle scale and if required adjust the position of the pointer
to 0° by slackening the cross head pointer securing screw and
set the pointer to zero on the angle scale and re-secure with the
cross head screw.
NO VOLTS ON/OFF SWITCH
This machine is fitted with a “No Volts Switch”. In the event of
a mains power failure or if the mains plug is removed from the
mains supply socket before the machine is switched off. The
machine will not re-start without warning when the mains supply
is restored or the mains plug is re-connected to the mains
supply, until the machine is switched ON at the ON/OFF switch
fitted to the machine.
WARNING!
Before switching the table saw ON, make sure the blade guard is
correctly installed and operating properly. Check that the blade
is set to 90° and at its lowest position. Ensure that the table is
clear of any tools or other materials. Ensure that all nuts, bolts
and other fastenings are secure. Starting and stopping (Pic. 26)
To start the machine, push the “ON” switch (Pic. 26). To stop the
machine, push the “OFF” switch (Pic. 26). If the machine makes
any unusual noise or vibrates excessively, STOP the machine
immediately and investigate the cause and rectify . If the cause
cannot be identified NO NOT use the machine and contact your
nearest service centre.
CONTROLS AND ACCESSORIES.
The following is a brief description of each control and accessory
and its typical uses.
THE ELEVATING HANDLE. (PIC. 27)
The elevating handle is used to raise and lower the blade. Turn
the handle clockwise to lower the blade
and counter clockwise to raise the blade.
THE TILTING HANDLE. (PIC. 28)
Table of contents
Languages:
Other NUTOOL Saw manuals

NUTOOL
NUTOOL MP185 User manual

NUTOOL
NUTOOL MC250N User manual

NUTOOL
NUTOOL NTS1500 User manual

NUTOOL
NUTOOL Red NTS810R User manual

NUTOOL
NUTOOL NMS2000 User manual

NUTOOL
NUTOOL BTL212 User manual

NUTOOL
NUTOOL NMS1700R User manual

NUTOOL
NUTOOL NTS1500 User manual

NUTOOL
NUTOOL NTS2000 User manual

NUTOOL
NUTOOL NCS185 User manual