manuals.online logo
Brands
  1. Home
  2. •
  3. Brands
  4. •
  5. Oakton
  6. •
  7. Measuring Instrument
  8. •
  9. Oakton ECTester11 User manual

Oakton ECTester11 User manual

Before You Begin
Remove the electrode’s protective cap. Soak the electrode for a few minutes in alcohol to remove
any oil stains on the electrodes which will affect the accuracy of the tester. Rinse thoroughly
with de-ionized water and shake off dry.
Note: INC & DEC keys are located inside the battery compartment. Refer figure 1.
Note: For ECTester11, the caption of HOLD key is ‘HOLD/ENT’ °C/ ° F
Figure 1: Battery compartment
Switching On
Press ON/OFF key to switch on the tester. The LCD shows the power-up sequence as illustrated in
Figure 2. When the tester is on, if you do not press a key for 8.5 minutes, the tester automatically
switches off to conserve batteries.
Figure 2: Power Up Sequence
Range Selection
Depending on the selected model, you can set the tester to limit its reading to a particular
measuring range (LO or HI) or full scale (AUTO). The default setting is AUTO. When you select
a range other than AUTO, the tester can be calibrated only for that particular range. If you
try to measure a sample which has a higher conductivity/TDS value than that of the selected
measuring range, the LCD shows ‘OR’ error message. Refer Specifications section for available
ranges of the selected model.
To select a range:
1. Switch off the tester. Press and hold °C/°F key and then switch on the tester using ON/OFF
key. Release °C/°F key.
2. The tester goes to range selection mode. The LCD shows the currently selected Range (the
default is AUTO) in the lower display. The upper display shows the maximum possible reading for
the selected range. Press HOLD key repeatedly until you see the required range (LO or HI).
Note: If no key is pressed within 5 seconds, LCD shows power-up sequence and tester goes
to measurement mode.
3. The tester automatically confirms the last selection if no key is pressed for 5 seconds. Upper
display momentarily shows ‘CO’. The LCD shows power-up sequence and the tester goes to
measurement mode.
Measurement
1. Press the ON/OFF key to switch on the tester. The ‘MEAS’ indicators appears when the tester
is in measurement mode.
2. Dip the electrode into the test solution making sure that it is fully immersed. Stir to clear any
trapped air bubbles from the electrode and let the reading stabilize. Note: The LCD indicates
‘Or’ (over range) if the reading is outside the selected range. If this occurs, select an appropriate
range to suit the reading.
3. The upper display shows the main reading (conductivity/TDS/Salt) of the solution, automatically
temperature compensated (ATC) to normalized temperature of 25°C. The lower display shows
the temperature of the solution.
HOLD Function
This feature lets you freeze the display for a delayed observation.
1. Press HOLD key to freeze the measurement. The tester goes to hold mode and ‘HOLD’ indicator
is displayed in LCD. The measurements are frozen and the ‘MEAS’ indicator disappears.
2. Press HOLD key again to release the measurement. The ‘HOLD’ indicator is no longer displayed.
The tester goes back to measurement mode.
Temperature Unit of Measurement Selection
This feature lets you set the unit of measurement of temperature to either Celsius (°C) or Fah-
renheit (°F). When the tester is in the measurement mode, press °C/°F button. The temperature
display toggles between the Celsius and Fahrenheit reading.
About Calibration
To ensure higher accuracy, the tester must be calibrated on a regular basis. Calibration can be
manual or automatic (only ECTester11); calibration can be 1-point or multi-point. You can choose
any combination of the above two options for calibration. If you calibrate the tester for 1-point,
the calibration is applied for all the measuring ranges. In applications where you need higher
accuracy, and when you intend to measure values in more than one range, it is recommended
to select multi-point calibration.
Selection of Automatic or Manual Calibration
ECTester11 models support both automatic & manual calibration while all other models have
to be calibrated manually. In automatic calibration, the tester automatically detects and verifies
known conductivity standard solutions (1413uS & 12.88mS) . In manual calibration, you can
use non-standard solutions which may be specific for your application. The factory default is
Automatic calibration (Auto). You can enable or disable automatic calibration as described
below (only ECTester11).
Selection of 1-point or Multi-point Calibration
The factory default is 1-point Calibration. For higher accuracy, it is recommended that you
calibrate the tester for multiple ranges if you intend to measure values in multiple ranges. You
can enable or disable multi-point calibration as described below.
Note: If you have selected a specific measuring range for the tester, selecting multipoint calibration
has no meaning, as the tester can only be calibrated for 1-point for the selected range. Set the
tester to ‘AUTO’ measuring range if you wish to calibrate multi-points.
To enable/disable auto calibration and multi-point calibration:
1. Switch off the tester. Press and hold INC key and then switch on the tester using ON/OFF
key.
2. The tester goes to auto calibration selection mode. The lower display shows ‘A.CAL’ and the
upper display blinks the current choice (‘Yes’ or ‘No’).
Note: This mode is available only for ECTester11 model, other models, go directly to 1-point
selection mode, described in step 4 below. Press INC or DEC key to select ‘Yes’ (to enable auto
calibration) or ‘No’ (to disable auto calibration)
Note: Press °C/°F key, if you wish to skip this setting without confirming changes.
Note: Press °C/°F key twice, if you wish to return to measurement mode without confirming
changes.
3. Press HOLD/ENT key to confirm the selection. The display shows ‘CO’.
4. The tester goes to 1-point calibration selection mode. The lower display shows ‘1.Pnt’ and
the upper display blinks the current choice (‘Yes’ or ‘No’).
Press INC or DEC key to select ‘Yes’ (to enable 1-point calibration) or ‘No’ (to disable 1-point
calibration, i.e. to enable multi-point calibration).
Note: Press °C/°F key if you wish to skip this setting without confirming.
5. Press HOLD/ENT key to confirm the selection. The display shows ‘CO’ for few seconds and
then shows power-up sequence The tester goes to measurement mode.
Auto Calibration
Auto calibration feature is available only for conductivity in ECTester11 models. Make sure that
‘auto calibration’ is enabled as described in the previous section. Auto calibration is suitable if
you use standard conductivity solutions for calibration process. If you selected 1-point calibration,
you need to choose a calibration standard corresponds to the selected measuring range of the
tester listed below. If you have selected multi-point calibration & AUTO measuring range, you
can choose any of the calibration standards listed below. During auto calibration, the tester
recognizes the calibration standard if its value is within 50% tolerance. For multipoint calibration
(with AUTO measuring range), the tester automatically scans through all possible calibration
points until all of them are calibrated.
Selected Measuring Range Calibration Standard
LO (0 to 2000 μS/cm) 1413 μS
HI (0 to 20.00 mS/cm) 12.88 mS
AUTO 1413 μS, 12.88 mS
To prepare calibration standards:
Use fresh calibration standard solutions listed in the above table. Prepare each solution in two
beakers - one for rinsing and the other for calibration. Rinse the electrode in de-ionized water
before calibration.
To o begin automatic calibration:
1. Switch on the tester. Make sure the tester is in measuring mode. Press INC or DEC key to
enter conductivity calibration mode.
2. ‘CAL’ indicator appears in LCD. The display briefly shows ‘CAL’ and the number of points the
tester will be calibrated.
3. The upper display shows the conductivity reading and the lower display sequentially shows
calibration standard values 1413 μS & 12.88 mS (for ECTester11) if the measuring range of the
tester is set to AUTO.
Note: If you have selected a specific measuring range for the tester, the lower display shows the
corresponding calibration standard value that matches the selected measuring range.
4. Rinse the electrode with the calibration standard that you intend to calibrate and then dip the
electrode in the other beaker with same calibration standard. Swirl gently to create a homogenous
sample and allow time for the reading to stabilize.
Note: For multi-point calibration, the lower display automatically locks at the calibration standard
value that closely matches. The tolerance range is ± 50% of the calibration standard. The tester
shows error message ‘Er.1’ if you try to calibrate with a solution whose conductivity is outside
the tolerance range.
Note: Press INC or DEC key if you wish to exit from auto calibration, during any of the above
steps.
5. Press HOLD/ENT key to confirm the calibration. LCD shows ‘CO’ for 2 seconds. The calibration
is complete and the tester returns to measurement mode, if this is a 1- point calibration.
6. For multi-point calibration, the tester goes to the next calibration point, lower display sho-
wing next calibration standard values. Rinse the electrode in de-ionized
water and repeat step 4 & 5 to continue calibrating with next calibration
standard solution.
Note: The tester shows error message ‘Er.0’ and returns to measuring
mode if the temperature of the calibration solution is not within 0°C
to 50°C.
Note: The tester shows error message ‘Er.1’ if you press HOLD/ENT key
before the tester recognizes the calibration standard.
GB
• Large Screen
• Waterproof
• Multi Range
Conductivity/
TDS/Salt Tester
with Tempera-
ture Display
Instruction
manual
EC/TDS/SALT 11
Manual Calibration
In manual calibration, the tester allows 1-point calibration for each measuring range. You can
use customized calibration solutions with known conductivity/TDS values to calibrate the tester.
The following table shows acceptable conductivity/TDS ranges of calibration solutions for each
measuring range. Make sure your calibration solutions are within the given ranges.
Selected Measuring Range Acceptable Calibration Standard Range
Conductivity TDS/Salt
LO 200 - 2000 μS/cm 200 - 2000 ppm
HI 2.00 - 20.00 mS/cm 1.00 - 10.00 ppt
AUTO Select a calibration standard nearer to application sample
To prepare calibration standards:
Use fresh calibration solutions. Measure conductivity/TDS values of the solution with a meter
known to be accurate. Prepare each solution in two beakers - one for rinsing and the other for
calibration. Rinse the electrode in de-ionized water before calibration.
To begin manual calibration:
1. Switch on the tester. Make sure the tester is in measuring mode. Rinse the electrode with the
calibration standard that you intend to calibrate and then dip the electrode in the other beaker
with same calibration standard. Swirl gently to create a homogenous sample and allow time
for the reading to stabilize.
2. Press INC or DEC key to enter calibration mode. The ‘CAL’ indicator appears in LCD. The display
briefly shows ‘CAL’ and the number of points the tester will be calibrated.
3. The upper display shows the measured conductivity/TDS reading of the solution based on
previous calibration (if any) and the lower display shows the default (uncalibrated) conductivi-
ty/TDS reading.
Note: The tester shows error message ‘Er.1’ :
(a) If the reading is over range (Or) of selected measuring range of the tester , or
(b) If the default (uncalibrated) reading is not within the acceptable calibration standard ran-
ge.
Use INC and DEC keys to adjust the upper display to the correct conductivity/TDS value of the
calibration solution.
Note: The calibration adjustment window is ± 50% from the default reading.
Note: If you do not press INC or DEC key within 5 seconds, the tester shows the confirmation
‘CO’ and returns to the measurement mode. However, the tester is not calibrated to new values
yet. The old calibration is still active. If this happens, press INC or DEC key once again to enter
calibration mode.
4. Wait for 5 seconds for the tester to automatically confirm the calibration by displaying ‘CO’
and return to the measurement mode.
Note: To exit calibration mode without confirming the calibration, press HOLD/ENT key before
the automatic confirmation takes place.
Note: The tester shows error message ‘Er.0’ and returns to measuring mode if the temperature
of the calibration solution is not within 0°C to 50°C.
5. For multi-point calibration rinse the electrode in de-ionized water and repeat step the above
steps with another standard solution.
TDS Factor Setting
TDS factor is only applicable for TDSTester11 models. The factory default TDS factor is 0.71. You
can adjust the TDS factor to suit different samples of your applications.
To change TDS factor:
1. Switch on the tester. Make sure the tester in measurement mode. Press HOLD key to bring
the tester to the HOLD mode.
2. Press INC or DEC key to enter the TDS factor setting mode.
3. The upper & lower displays of LCD show the last configured TDS factor. The upper display is
adjustable. Use the INC or DEC key to adjust the TDS factor.
The adjustable range is 0.4 to 1.0
Note: If you do not press INC or DEC key within 5 seconds, the tester shows the confirmation
‘CO’ and returns to measurement mode.
4. Wait for 5 seconds for the tester to automatically confirm the new setting by displaying ‘CO’
and return to the measurement mode.
Temperature Calibration
Temperature calibration need not be performed every time, unless the temperature reading
differs from that of an accurate thermometer. If temperature calibration is performed, Conduc-
tivity/TDS/Salt calibration is mandatory.
1. Switch on the tester. Make sure the tester is in measuring mode. If required, press °C/°F key
to select the desired unit of measurement for temperature (Celsius or Fahrenheit). Dip the tester
into a solution of known temperature and allow time for the temperature reading to stabilize.
2. Press INC or DEC key to bring the tester to the calibration mode. CAL’ indicator appears in
LCD. Immediately press °C/°F key to switch to the temperature calibration mode.
Note: When you enter calibration mode, if the conductivity/TDS/salt reading is outside the
specified range (Or), the tester shows ‘Er.1’ error message. You can still proceed to the tempe-
rature calibration mode by pressing °C/°F key immediately. If the °C/°F key is not pressed within
2 seconds, the tester exits the calibration mode and returns to the measurement mode.
3. The upper display shows the measured temperature reading based on the last set offset
(if any) and the lower display shows the default (uncalibrated) temperature reading based on
factory y settings. Use INC and DEC keys to adjust the upper temperature reading to the known
temperature value of the solution.
Notes: The temperature adjustment window is ± 5°C (± 9°F) from the default reading.
4. Wait for 5 seconds for the tester to automatically confirm the temperature calibration value
by displaying ‘CO’ and return to the measurement mode.
Note: To exit temperature calibration mode without confirming the calibration, press °C/°F key
or HOLD/ENT key before the automatic confirmation takes place.
Note: The tester shows error message ‘Er.0’ and returns to measuring mode if the temperature
of the solution is not within 0°C to 50°C.
Reset
Reset option allows you to restore the calibration and other parameters back to factory default
settings.
1. Switch off the tester. Press and hold the HOLD key and then switch on the tester using ON/OFF
key. Release HOLD key.
2. The lower display shows ‘rSt’ (reset) and the upper display blinks ‘No’. Use INC or DEC key
to select ‘Yes’ (to proceed with resting) or ‘No’ (to quit without resetting).
Note: Press °C/°F key if you wish to skip to measurement mode without making any selec-
tion.
3. Press HOLD key to confirm your selection. LCD shows ‘CO’. If ‘Yes’ is selected, the tester
resets to its factory default values as listed below. LCD shows power-up sequence and tester
goes to measurement mode.
Parameter Factory Default
User calibration (conductivity/TDS/salt) (Reset)
Temperature unit of measurement Celsius (°C)
Temperature offset 0
Auto calibration (for ECTester11) Enable
1-point calibration Enable
Conductivity calibration factor (for ECTester11) 1.0
TDS factor (for TDSTester11) 0.71
Changing Batteries
Replace the batteries when the low battery indicator starts blinking.
1. Open the battery compartment lid (with attached lanyard loop).
2. Remove old batteries by pulling plastic ribbon.
Replace with fresh ones.
Figure 11: Battery compartment
Electrode Maintenance
1. Always keep the sensor electrodes clean. Rinse the electrodes with de-ionized water and wipe
them dry with clean cloth before storing with its protective cap.
Model ECTester11
19 46 81
TDSTester11
19 47 01
SALTTester11
19 47 11
Range: Lo
Hi
0 to 2000 μS/cm
0 to 20.00 mS/cm
0 to 2000 μS/cm
0 to 10.00 mS/cm
-
0 to 10.00 ppt
Resolution: Lo
Hi
10 μS/cm
0.10 mS/cm
10 ppm
0.10 ppt
-
0.10 ppt
Accuracy ± 1% of Full Scale
Calibration Type Auto or Manual Manual Manual
Calibration Points 1 or 2 points 1 or 2 points 1 point
Calibration Window ± 50% from each point
Calibration Standard
Range (Manual) Lo
Hi
200 - 2000 μS/cm .
2.00 - 20.00 mS/cm
200 - 2000 ppm .
1.00 - 10.00 ppt
-
1.00 - 10.00 ppt
Sensor Type Two-pin
TDS Factor 0.4 to 1.0 (Default 0.71)
Temperature
Range in °C
Range in °F
Resolution
Accuracy
Calibration point
Calibration Window
ATC
Temp Coefficient
0.0 to 50.0°C
32.0 to 122°F
0.1°C (0.1°F)
±0.5°C (±0.9°F)
1 point
± 5°C (± 9°F)from factory default
0 to 50°C
2% per °C
Normalization Temp 25.0°C
Auto Off 8.5 minutes after last key press
Operating Temp 0 to 50°C
Power Battery 4 X 1.5V”A76“ micro alkaline battery
Battery Life >150 hrs
LCD Display Custom Dual Display 27mm (H) X 21 mm (W)
Dimensions, Weight Tester: 16.5 cm X 3.8 cm; 90g
Boxed: 22cm X 6cmX 5cm; 170 g
For cup type electrodes, remove the white
plastic cup and insert to thoroughly clean
viscous solutions. Never scratch electrodes
with a hard substance.
2. For better performance, soak the electrode
in alcohol for 10 to 15 minutes and rinse
with de-ionized water before starting any
measurement process.
This is to remove dirt and oil stains on the
electrode which may affect the accuracy of
the measurements.
Electrode Replacement
When the tester fails to calibrate or gives
fluctuating readings in calibration standards,
you need to change the electrode module. You
can replace the electrode module at a fraction
of the cost of a new tester.
1. With dry hands, grip the ribbed tester collar
with electrode facing you. Twist the collar
counter clockwise (see Figure13-A). Save the
ribbed tester collar and O-ring for later use.
2. Pull the old electrode module away from
the tester.
3. Align the four tabs of the new electrode
module so that they match the four slots on
the tester (see Figure 13-B).
4. Gently push the module into the slots to sit
it in position. Push the smaller O-ring fully onto
the new electrode module. Push the collar over
the module and thread it into place by firmly
twisting clockwise.
Note: It is necessary that you recalibrate the
tester prior to measurement after an electrode
replacement.
Accessories
194716 Replacement Sensor MicroDirect
EC/TDS/SALT11
Warranty
The waterproof testers are warranted to be
free from manufacturing defects for 2 years
and electrode module for 12 months, unless
otherwise specified. If repair, adjustment or
replacement is necessary and has not been
the result of abuse or misuse within the time
period specified, please return the tester -
freight prepaid - and correction will be made
without charge. Out of warranty products will
be repaired on a charge basis.
Return of Items
Authorization must be obtained from your
distributor before returning items for any re-
ason. When applying for authorization, please
include information regarding the reason the
item(s) are to be returned.
Note: Tintometer reserve the right to make
improvements in design, construction and
appearance of products without notice. Prices
are subject to change without notice.
Technical changes without notice
Printed in Germany 07/11
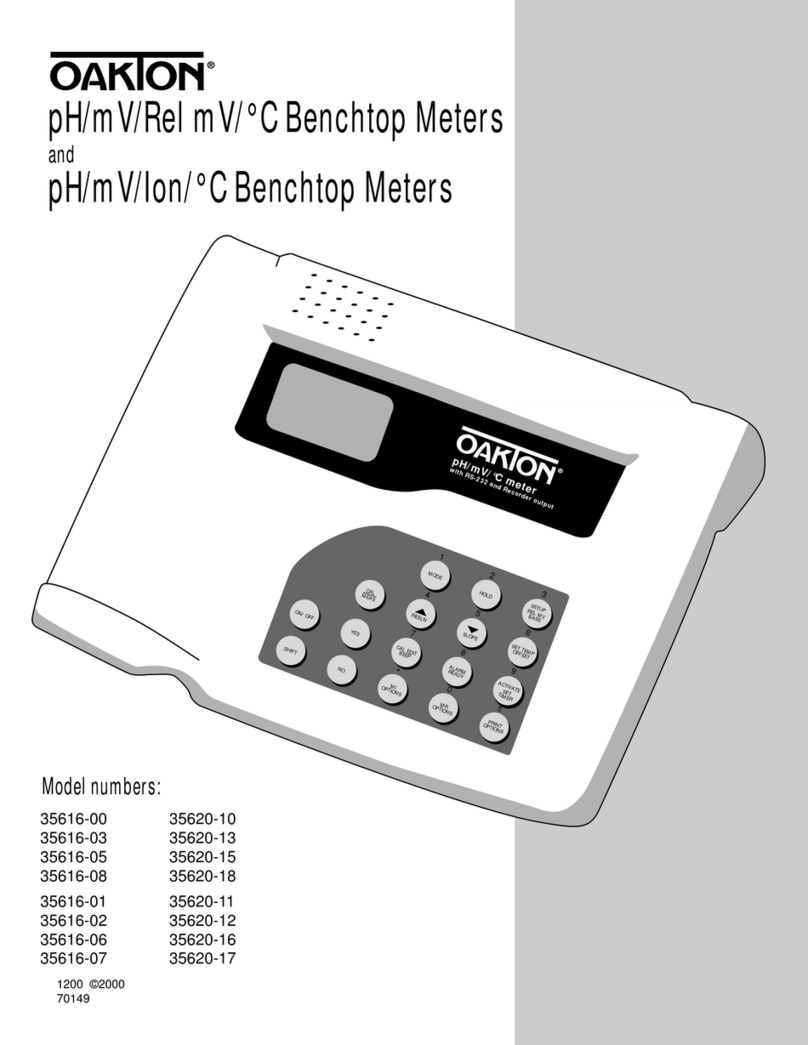
This manual suits for next models

2

Other Oakton Measuring Instrument manuals

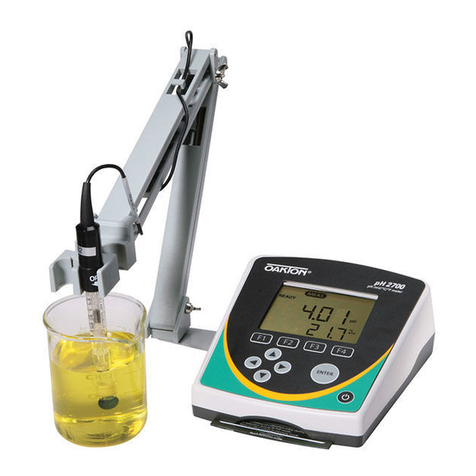
Oakton WD-35606-00, WD-35606-05 User manual

Oakton

Oakton WD-35606-00, WD-35606-05 User manual

Oakton ORPTestr 5 User manual

Oakton

Oakton ORPTestr 5 User manual

Oakton 35616-00 User manual

Oakton

Oakton 35616-00 User manual

Oakton PH200 User manual

Oakton

Oakton PH200 User manual

Oakton Acorn TEMP 4 User manual

Oakton

Oakton Acorn TEMP 4 User manual

Oakton ION 5 Acorn Series User manual

Oakton

Oakton ION 5 Acorn Series User manual

Oakton 450 Series User manual

Oakton

Oakton 450 Series User manual

Oakton 450 Series User manual

Oakton

Oakton 450 Series User manual

Oakton CON 110 User manual

Oakton

Oakton CON 110 User manual

Oakton 35630-00 User manual

Oakton

Oakton 35630-00 User manual

Oakton 35631-00 User manual

Oakton

Oakton 35631-00 User manual

Oakton PCD 650 User manual

Oakton

Oakton PCD 650 User manual

Oakton CON 400 User manual

Oakton

Oakton CON 400 User manual

Oakton PH550 User manual

Oakton

Oakton PH550 User manual

Oakton pH 10 Series User manual

Oakton

Oakton pH 10 Series User manual

Oakton T-100IR User manual

Oakton

Oakton T-100IR User manual

Oakton 35612-series User manual

Oakton

Oakton 35612-series User manual

Oakton T100WL User manual

Oakton

Oakton T100WL User manual

Oakton 300 Series User manual

Oakton

Oakton 300 Series User manual

Oakton EcoTestr pH1 User manual

Oakton

Oakton EcoTestr pH1 User manual

Oakton pHTestr 50 User manual

Oakton

Oakton pHTestr 50 User manual

Oakton pH 5+ User manual

Oakton

Oakton pH 5+ User manual

Oakton 35618 Series User manual

Oakton

Oakton 35618 Series User manual

Oakton 700 Series User manual

Oakton

Oakton 700 Series User manual

Popular Measuring Instrument manuals by other brands

Lasermet ICS-6 instruction manual

Lasermet

Lasermet ICS-6 instruction manual

Rohde & Schwarz NRX user manual

Rohde & Schwarz

Rohde & Schwarz NRX user manual

montwill M1 user manual

montwill

montwill M1 user manual

JPT YDFLP Installation guide and user's manual

JPT

JPT YDFLP Installation guide and user's manual

TR-Electronic LE-25 user manual

TR-Electronic

TR-Electronic LE-25 user manual

HALaser Systems HALscan X20 user manual

HALaser Systems

HALaser Systems HALscan X20 user manual

Viking VR-1B Technical practice

Viking

Viking VR-1B Technical practice

Endress+Hauser Proline Promass P 300 manual

Endress+Hauser

Endress+Hauser Proline Promass P 300 manual

Leica Geosystems DISTO D810 touch quick start

Leica Geosystems

Leica Geosystems DISTO D810 touch quick start

TRAMEX PROFESSIONAL PTM 2.0 user guide

TRAMEX

TRAMEX PROFESSIONAL PTM 2.0 user guide

Ofs Softening Control instruction manual

Ofs

Ofs Softening Control instruction manual

Haag-Streit LENSTAR LS 900 Instructions for use

Haag-Streit

Haag-Streit LENSTAR LS 900 Instructions for use

EIJKELKAMP 14.36 operating instructions

EIJKELKAMP

EIJKELKAMP 14.36 operating instructions

AEMC 721 user manual

AEMC

AEMC 721 user manual

Endress+Hauser Soliwave FDR56 Brief operating instructions

Endress+Hauser

Endress+Hauser Soliwave FDR56 Brief operating instructions

IQ Scientific Instruments miniLab IQ128 Elite operating instructions

IQ Scientific Instruments

IQ Scientific Instruments miniLab IQ128 Elite operating instructions

Sencore LC102 CALIBRATION PROCEDURE

Sencore

Sencore LC102 CALIBRATION PROCEDURE

ATAGO PAL-44S instruction manual

ATAGO

ATAGO PAL-44S instruction manual

manuals.online logo
manuals.online logoBrands
  • About & Mission
  • Contact us
  • Privacy Policy
  • Terms and Conditions

Copyright 2025 Manuals.Online. All Rights Reserved.