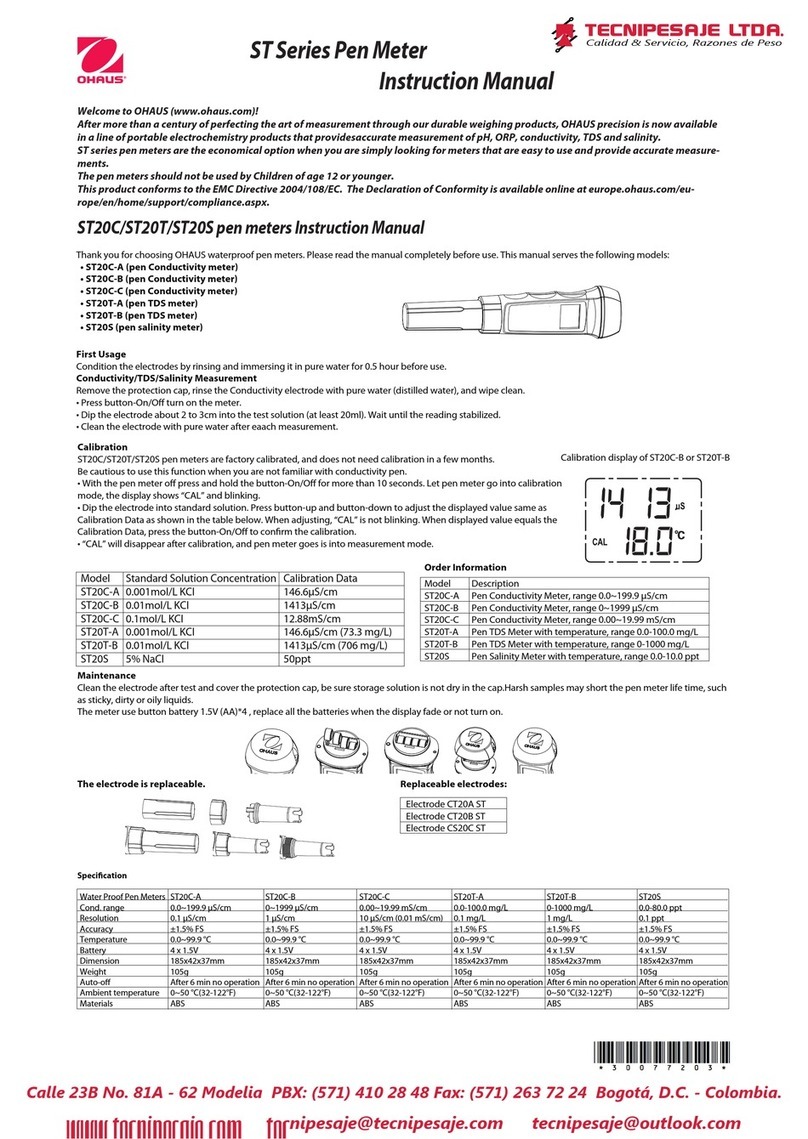
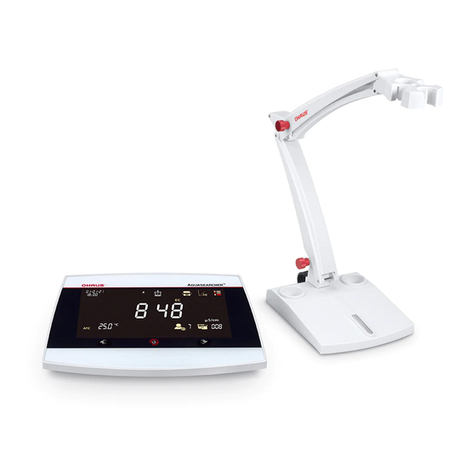
OHAUS MB25 User manual

SERVICE MANUAL
Ohaus Corporation 7 Campus Drive, Suite 310, Parsippany, NJ 07054 USA (973) 377-9000


SERVICE MANUAL
The information contained in this manual is believed to be accurate at the time of publication, but Ohaus
Corporation assumes no liability arising from the use or misuse of this material. Reproduction of this
material is strictly prohibited.
Material in this manual is subject to change.
80252469D © Copyright 2013 Ohaus Corporation, all rights reserved.
TM Registered trademark of Ohaus Corporation.


TABLE OF CONTENTS
Ohaus Corporation www.ohaus.com i MB23 and MB25 Service Manual
CHAPTER 1 GETTING STARTED Page No.
1.1 Introduction..............................................................................................................1-1
1.2 Service Facilities......................................................................................................1-1
1.3 Tools and Test Equipment Required........................................................................1-2
1.4 Specifications...........................................................................................................1-3
1.5 Analyzer Operation ..................................................................................................1-4
1.5.1 Overview of the Controls...................................................................................1-4
1.5.2 Overview of the Display Indicators....................................................................1-4
1.5.3 Operating Modes ..............................................................................................1-5
1.5.4 Power ...............................................................................................................1-7
1.5.5 Power On & Off.................................................................................................1-7
1.6 Communications Interface........................................................................................1-8
CHAPTER 2 TROUBLESHOOTING
2.1 Troubleshooting.......................................................................................................2-1
2.1.1 General Procedures for Troubleshooting ..........................................................2-1
2.2 Error Codes..............................................................................................................2-2
2.3 Problem Solver ........................................................................................................2-4
CHAPTER 3 MAINTENANCE PROCEDURES
3.1 Preventive Maintenance...........................................................................................3-1
3.1.1 Preventive Maintenance Checklist....................................................................3-1
3.2 Opening the MB23 and MB25..................................................................................3-1
3.3 Preliminary Checks of the Top Housing Components ..............................................3-4
3.3.1 Test the Heater Circuit......................................................................................3-4
3.3.2 Test the Temperature Sensor and Cable..........................................................3-4
3.3.3 Test the Fan......................................................................................................3-4
3.3.4 Test the Ground Circuit on the MB23................................................................3-4
3.4 Testing the Power PCB............................................................................................3-5
3.5 Replacing the Power PCB........................................................................................3-5
3.6 Replacing the Main PC Board..................................................................................3-6
3.6.1 Replacing the Display LCD...............................................................................3-6
3.7 Replacing the Load Cell...........................................................................................3-7
3.8 Repairing and/or Replacing the Heating Unit Parts ..................................................3-8
3.8.1 Testing the Heater Circuit .................................................................................3-8
3.8.2 Removing the Heater on the MB23...................................................................3-9
3.8.3 Removing the Heater on the MB25.................................................................3-10
3.8.4 Replacing the Heater on the MB25 .................................................................3-10
3.8.5 Replacing the Heater on the MB23 .................................................................3-11
3.8.6 Testing the Thermal Overload Device.............................................................3-11
3.8.7 Replacing the Thermal Overload Device.........................................................3-12
3.8.8 Replacing the Fan...........................................................................................3-13
3.8.9 Replacing the Temperature Sensor.................................................................3-14
3.9 Installing the Top Housing......................................................................................3-15
CHAPTER 4 FINAL TESTING Page No.
4.1. Final Testing ............................................................................................................4-1
4.2 Operational Test ......................................................................................................4-1
4.3 Segment Display Test..............................................................................................4-1
4.4 Performance Tests...................................................................................................4-1

TABLE OF CONTENTS
MB23 and MB25 Service Manual ii Ohaus Corporation www.ohaus.com
CHAPTER 4 FINAL TESTING continued Page No.
4.4.1 Precision Test...................................................................................................4-2
4.4.2 Repeatability Test.............................................................................................4-3
4.4.3 Linearity Test....................................................................................................4-4
CHAPTER 5 DRAWINGS AND PARTS LISTS
5-1 MB23 and MB25: Housing & Internal Parts..............................................................5-2
Appendix A STANDARD CALIBRATION
A.1 Weight Calibration...................................................................................................A-1
A.2 Temperature Calibration..........................................................................................A-2
A.3 Service Calibration..................................................................................................A-3
Appendix B SOFTWARE SERVICE TOOL
B.1 Software service tool location..................................................................................B-1
LIST OF TABLES
TABLE NO. TITLE Page No.
1-1 Specifications ......................................................................................................1-3
1-2 Functions of Display Controls ..............................................................................1-4
2-1 Error Codes.........................................................................................................2-2
2-2 Problem Solver....................................................................................................2-3
4-1 Types of Performance Tests & Tolerances....................................................4-1
5-1 MB23 & MB25: Housing & Internal Parts.............................................................5-3
LIST OF ILLUSTRATIONS
FIGURE NO. TITLE
1-1 MB23 and MB25 Function Labels........................................................................1-4
1-2 MB23 & MB25 Display Indicators.........................................................................1-4
1-3 AC Power ............................................................................................................1-7
1-4 RS232 DB9-pin setup..........................................................................................1-8
1-5 Solder Points on PCB..........................................................................................1-8
3-1 MB25 with Top Open...........................................................................................3-2
3-2 Housing Chamber................................................................................................3-2
3-3 Lifting Out Plug in Housing ..................................................................................3-2
3-4 Clear Plastic In-use Cover...................................................................................3-2
3-5 Three screws in Top Housing ..............................................................................3-2
3-6 Lifting the Housing...............................................................................................3-3
3-7 Fan, Temperature Sensor, Heater cable connectors on Power PCB ...................3-3
3-8 Cables for Temperature Sensor, Fan, Ground and Heater disconnected.............3-4
3-9 Power PCB Connectors.......................................................................................3-5
3-10 Power PCB..........................................................................................................3-5
3-11 Load Cell Cover...................................................................................................3-6
3-12 Main Printed Circuit Board...................................................................................3-6
3-13 Display LCD on Main PCB...................................................................................3-6
3-14 Load Cell.............................................................................................................3-7
3-15 Load Cell with Ribbon Cable Attached at Bottom.................................................3-7
3-16 Screws Holding Chamber Top to the Heater Frame Housing...............................3-8
FIGURE TITLE Page No.
3-17 Separating the Chamber Top from the Heater Frame Housing............................3-8
3-18 Testing Heater Leads’ Resistance.......................................................................3-8

TABLE OF CONTENTS
Ohaus Corporation www.ohaus.com iii MB23 and MB25 Service Manual
3-19 Screws and Washers that Secure the Reflector...................................................3-9
3-20 MB23: Screws and washers anchoring cables on each side of Heater ................3-9
3-21 Spring Tab on Connector.....................................................................................3-9
3-22 Lifting Out the Heater (MB23)..............................................................................3-9
3-23 Screw and washer anchoring Heater Cables.....................................................3-10
3-24 Lifting Out the Heater (MB25)............................................................................3-10
3-25 MB23: Installing the Heater................................................................................3-11
3-26 Reset Button on the Thermal Overload Device..................................................3-11
3-27 MB25 Thermal Overload Device........................................................................3-12
3-28 MB23 Thermal Overload Device........................................................................3-12
3-29 MB 25 Thermal Overload Device Installed.........................................................3-12
3-30 Screws in Fan Plate...........................................................................................3-13
3-31 Grommets Slide Out from the Bottom Plate.......................................................3-13
3-32 Lid Position Rod and Spring under the Fan Plate ..............................................3-13
3-33 Removing the Fan .............................................................................................3-12
3-34 Removing Screw to Access Temperature Sensor Cable....................................3-14
3-35 Removing Clip that Secures Heater, with Needle Nose Pliers ...........................3-14
3-36 Removing Screws and Washers Securing Temperature Sensor........................3-14
3-37 Connecting Cables to the Power PCB ...............................................................3-15
3-38 Placing Plug on Top Housing.............................................................................3-15
3-39 Installing Protective Glass..................................................................................3-15
3-40 Clear plastic In-use Cover..................................................................................3-16
3-41 Housing Chamber..............................................................................................3-16
3-42 MB25 with top open...........................................................................................3-16
4-1 Segment Display .................................................................................................4-1
5-1 MB23 & MB25: Housing & Internal Parts.............................................................5-2
A-1 Temperature Calibration Kit installed..................................................................A-1

TABLE OF CONTENTS
MB23 and MB25 Service Manual iv Ohaus Corporation www.ohaus.com

CHAPTER 1 GETTING STARTED
MB23 and MB25 Service Manual 1-1 Ohaus Corporation www.ohaus.com
1.1 INTRODUCTION
This service manual contains the information needed to perform routine maintenance and
service on the MB23 and MB25 Moisture Analyzers. Familiarity with the Instruction Manual is
assumed. The contents of this manual are contained in five chapters:
Chapter 1 Getting Started –Contains information on service facilities, tools, specifications,
and the mechanical and electronic functions of the product.
Chapter 2 Troubleshooting –Contains a diagnostic guide and error code table.
Chapter 3 Maintenance Procedures –Contains preventive maintenance procedures and
disassembly, repair and replacement procedures.
Chapter 4 Testing –Contains a list of required test masses, an operational test, segment
display test, performance tests and adjustments.
Chapter 5 Drawings and Parts Lists –Contains exploded views of MB23 and MB25 Moisture
Analyzers identifying all serviceable components.
Appendix A Standard Calibration –Explains procedures for Standard Calibration, performed
prior to use and after service.
1.2 SERVICE FACILITIES
The service area should meet the following requirements:
Should be temperature controlled and meet specifications for temperature environmental
requirements.
Must be free of vibrations such as fork lift trucks close by, large motors, air currents or
drafts from air conditioning/heating ducts, open windows, people walking by, fans, etc.
Area must be clean and free of excessive dust.
Work surface must be stable and level.
Moisture Analyzers must not be exposed to direct sunlight or radiating heat sources.
Use an approved Electro-Static Device.

CHAPTER 1 GETTING STARTED
Ohaus Corporation www.ohaus.com 1-2 MB23 and MB25 Service Manual
1.3 TOOLS AND TEST EQUIPMENT REQUIRED
1. Digital Voltmeter (DVM) - Input impedance of at least 10 megohms in 1 Volt dc position.
2. Standard electronics tool kit
3. Soldering iron (50 watt) and solder (rosin core solder, not acid core).
4. Solder remover
5. Ohaus Temperature Calibration Kit P/N 11113857
6. 50g calibration weight
7. Strain Gage Simulator (optional)
8. Soft, lint-free cleaning cloth
9. Anti-static bags for PCBs
10. Anti-static wrist strap and mat
11. RS232 Cable, P/N 80500525

CHAPTER 1 GETTING STARTED
MB23 and MB25 Service Manual 1-3 Ohaus Corporation www.ohaus.com
1.4 SPECIFICATIONS
Complete specifications for the Ohaus MB23 and MB25 Moisture Analyzers are listed in
Table 1-1. When a scale has been serviced, it must meet these specifications.
TABLE 1-1. SPECIFICATIONS
Model
MB25
MB23
Capacity
110g
Repeatability (Std Dev) (g)
0.2% (3g sample)
0.05% (10g sample)
0.3% (3g sample)
0.2% (10g sample)
Readability (% requires >10g sample)
0.005g; 0.05%
0.01g, 0.1%
Linearity (d)
±2
Off Center Load (½ cap, ½ dist)
5d
Tare range
To capacity by subtraction
Stabilization Time
3 seconds
Calibration –Weight
External Calibration Mass, 50g
Calibration –Temperature
OHAUS Temperature Calibration Kit
Temperature Settings
50°C to 160°C (5°increments)
Temperature Readability
±5°C
Temperature Repeatability
±5°C
Thermal Overload Protection
Bimetalic-element switch in dryer unit
Temperature Adjustments
2 points, 100°C and 160°C
Operating Temperature Range
41°F to 104°F / 5°C to 40°C
Operating Humidity Range
10% - 85% (RH) non-condensing
Shipping & Storage Temp.
–40°C (–40°F) to 60°C (140°F) at 10% to 95% RH,
non-condensing
Heating Technology
Halogen
Infrared (no glass)
Power Requirement
100 to 240 VAC, 50/60 Hz

CHAPTER 1 GETTING STARTED
Ohaus Corporation www.ohaus.com 1-4 MB23 and MB25 Service Manual
1.5 ANALYZER OPERATION
This section contains information on the basic operation of the scale.
1.5.1 Overview of the Controls
25
Figure 1-1. MB23 and MB25 Function Labels.
TABLE 1-2. FUNCTIONS OF DISPLAY CONTROLS
Button:
Name:
Functions:
Button:
Name:
Functions:
Start/Stop
On (short press)/Off (long press)
Start/Stop (short press)
Back (short press)
Set
Increase value
(short or long press)
Tare
Tare (short press)
Enter/Accept value (short press)
Set
Decrease value
(short or long press)
Temp
Temperature Setting (short press)
Print/Cal
Print (short press)
Calibrate (long press)
Time
Time Setting (short press)
%g
Result Unit (short press)
There are also several modes of operation which affect how each button operates. Please refer
to the following section.
1.5.2 Overview of the Display Indicators
Figure 1-2. MB23 & MB25 Display Indicators.
Stable
indicator
% Solid
Timing Setting
=% Moisture
Temperature
setting*or
current
chamber
temperature*
(Celsius)
*Depends on Mode

CHAPTER 1 GETTING STARTED
MB23 and MB25 Service Manual 1-5 Ohaus Corporation www.ohaus.com
1.5.3 Operating Modes
Standby Mode
When Analyzer is connected to AC power and display is off, the unit is in Standby mode.
(Short press) Turns on the display and enters Weigh mode.
Weigh Mode
The display shows the weight of items placed on the pan support.
(Short press) Sets the displayed weight value to zero.
(Long press) Enters Standby mode (Off).
After power on, the following operations can be initiated:
(Short press) Enters Edit mode for the temperature setting, the value will blink.
(Short press) Enters Edit mode for the time setting, the value will blink.
(Short press) Activates Run mode, initiates test with sample greater than 0.5g.
(Long press) Initiates weight or temperature Calibration (See Appendix A.)
Temperature/Time Edit Mode (Preparing a Test)
Temperature editing: (50°to 160°C in 5°steps)
(Short press) Enters Edit mode for the temperature setting, the value will blink.
(Short or long press) Increases the value of the temperature setting.
(Short or long press) Decreases the value of the temperature setting.
(Short press) Accepts the blinking value and returns to Weigh mode.
(Short press) Exits Edit mode without saving changes.
Note: After 5 seconds of no activity the blinking setting is automatically saved and the
mode returns to Weigh mode.
Time editing: (1 to 60 minutes in 30 second steps, 61 to 99 minutes in 1 minute steps)
The time parameter can be set to timed duration or AUTO (test ends when Analyzer
detects the weight loss has ended).
Selecting AUTO or timed duration: )
(Short press) Enters Edit mode for the time setting. The value will blink.
(Short press while time setting blinks) Toggles between AUTO and time value.
Accepts the blinking setting.
If AUTO is selected: Weigh mode is entered.

CHAPTER 1 GETTING STARTED
Ohaus Corporation www.ohaus.com 1-6 MB23 and MB25 Service Manual
1.5.3 Operating Modes continued
If Time Duration is selected:
(Short or long press) Increases the value of the time setting.
(Short or long press) Decreases the value of the time setting.
(Short press) Accepts the blinking value and returns to Weigh mode.
(Short press) Exits Edit mode without saving changes.
Note: After 5 seconds of no activity the blinking setting is automatically saved and the
mode returns to Weigh mode.
Run Mode (Performing a Test)
A moisture determination test is initiated. The results in progress are displayed.
NOTE: To setup a test:
1. Place a container on the Pan, and press Tare.
2. Place mass to be tested (>0.5g) on Pan. Then press Start, as below.
(Short press) Activates Run mode, initiates test with sample greater than 0.5g.
Changes the unit of displayed result:
toggles between weight (grams) -> % Moisture -> % Solids.
(Short press) Stops test in progress.
Sends current displayed value to the RS232.
Result Mode
At the end of the test (Run Mode), the display blinks the test result.
Changes the unit of displayed result: weight (grams) > % Moisture > % Solids.
Exits to Weigh mode.
Sends current displayed value to the RS232.

CHAPTER 1 GETTING STARTED
MB23 and MB25 Service Manual 1-7 Ohaus Corporation www.ohaus.com
1.5.4 Power
Verify that the input voltage printed on the voltage identification
label information and the plug type matches the location’s AC
power supply.
Connect the supplied power cable to the power input receptacle
at the rear of the Analyzer and into a properly grounded power
outlet.
Figure 1-3. AC power
.
Follow these safety precautions when servicing or using the Moisture Analyzer:
–The Analyzer has a 3-pin power cable that includes a ground connection. Intentionally
disabling the equipment grounding connection is prohibited.
–Disconnect the Analyzer from the power supply when cleaning.
1.5.5 Power On & Off
On short press; Off/Standby Mode long press
When powered on from standby mode, Analyzer is ready for immediate use.
Allow time for the Analyzer to stabilize after moving it from an area which is at a different
temperature than the area where it is to be operated. Allow one hour for each 5°F (2.7°C)
temperature change before using the unit. After temperature stabilization, allow an additional
20 minutes after turning the unit on, for the electronics to stabilize.
When the scale is first turned on, the factory default is to weigh (in grams) and tare items
without setting the menus.

CHAPTER 1 GETTING STARTED
Ohaus Corporation www.ohaus.com 1-8 MB23 and MB25 Service Manual
1.6 Communications Interface
The MB23 and MB25 are equipped with a bi-directional RS232 interface, accessed through a
DB9-pin connector on the rear of the unit. Following are available parameters (defaults in bold):
1. Baud Rate: 1200; 2400; 4800; 9600; 19,200
2. Parity: Odd, Even, None
3. Data Bits: 7, 8
4. Stop Bits: 1, 2
5. Handshake: None, XON-XOFF, RTS-CTS
DB9 Connections
Pin 1: Jumper required (J2) for Remote Tare operation*
Pin 2: Balance transmit line: TxD
Pin 3: Balance receive line: RxD
Pin 4: Shorted to Pin 6.
Pin 5: Ground signal: GND
Pin 6: Shorted to Pin 4.
Pin 7: Clear to send (hardware handshake): CTS
Pin 8: Request to send (hardware handshake): RTS
Pin 9: Jumper required (J1) for Remote Print operation*
HAND
SHAKE
CTS
RTS
In
Out
5
9
1
6
DATA
RxD
TxD
In
Out
GND
Remote
Tare
Remote
Print
Solder Bridge
Solder Bridge
1
2
3
4
5
6
7
8
9
10
11
12
CN1 Gnd
BD1
+VCC
ShDn
RTS
TxD
RxD
CTS
RmTr
RmPr
LFT LFT
Switch
Ohaus RS232-1 Board
1
3
4
5
6
7
8
9
10
11
12
CN1 Gnd
+VCC
INT
SCL3
SDA3
LFT
BD2
LFT
Switch
Ohaus USB Board
(preliminary)
2
Figure 1-4. RS232 DB9-
pin setup.
Note: After installing the jumper for remote operation, ensure that wires are protected
from static discharge.
* To enable External PRINT and/or ZERO/ TARE functions, join the solder points for Tare (J2)
and Print (J1), on the Main PCB:
1. Locate solder points J1 and J2 on the Main PCB,
above the Display LCD.
2. Using a low wattage soldering iron, apply a small
amount of solder to:
–Join two points at J2 to enable Tare.
–Join two points at J1 to enable Print.
Join the points by filling the gap:
Figure 1-5. Solder points on PCB.
Join the points by filling the gap:
points by filling the gap:

CHAPTER 2 TROUBLESHOOTING
MB23 and MB25 Service Manual 2-1 Ohaus Corporation www.ohaus.com
2.1 TROUBLESHOOTING
This section of the manual provides a standard troubleshooting methodology. Follow all
directions step by step. Make certain that the work area is clean. Handle components with
care. Use an Electro-Static Device.
2.1.1 General Procedures for Troubleshooting
1. Do the most obvious, user-level remedies.
2. Check that internal parts are clean and free of debris.
3. Consult the Error Code Table (Table 2-1) for solutions to specific codes.
4. Use the Problem Solver (Table 2-2) to locate the symptom.
Follow the suggested remedies in the order they appear.
5. Visual Check: Examine the Load Cell for signs of bending, twisting or corrosion.
–Clean the unit before evaluating any mechanical problems.
Remove any debris inside the Housing.
–Examine the Housing for damage, bent parts or signs of physical abuse.
Replace all damaged parts. See Chapter 5 for parts list.
–Check the cables leading to the Load Cell for cuts, abrasions or other signs
of damage.
–Examine the Load Cell for corrosion due to high humidity or exposure to
chemicals. A Load Cell that is even slightly bent or corroded should be replaced.
–Check the heating unit for corrosion or other damage.
If a problem arises that is not covered in this manual, contact your local Ohaus office.

CHAPTER 2 TROUBLESHOOTING
Ohaus Corporation www.ohaus.com 2-2 MB23 and MB25 Service Manual
2.2 Error Codes
When a problem occurs, the display may indicate an error code. Table 2-1 describes the
various error codes and specifies the probable cause and remedy.
TABLE 2-1. ERROR CODES
ERROR
PROBABLE CAUSE
REMEDY
Err 7.0
Time out, the weighing value is not stable
Defective Main PCB.
Turn unit off and then back on.
Replace Main PCB. Section 3.6.
Err 8.1
Pan Support has load during power on.
Dirt or debris in unit.
Defective Load Cell.
Defective Main PCB.
Remove weight from Pan Support.
Clean the unit thoroughly.
Replace Load Cell. Section 3.7.
Replace Main PCB. Section 3.6.
Err 8.2
Pan Support removed during power on, or dirty
Pan Support.
Load Cell defective.
Main PCB defective.
Install Pan Support.
Be sure it’s clean.
Replace Load Cell. Section 3.7.
Replace Main PCB. Section 3.6.
Err 8.3
Weight on Pan Support exceeds capacity.
Dirt or debris in unit.
Remove weight from Pan Support.
Perform troubleshooting steps. Section 2.1.
Clean the unit thoroughly.
Err 8.4
Pan Support was removed during weighing.
Dirt or debris in unit.
Re-install Pan Support.
Perform troubleshooting steps. Section 2.1.
Clean the unit thoroughly.
Err 8.5
Analyzer temperature is higher than 50°C
Cool down the analyzer
Err 8.6
1. Analyzer temperature is higher than target
setting. (20°C higher than target setting)
2. Bad temperature calibration
3. Temperature Sensor defective
Cool down the analyzer
Perform temperature calibration
Replace temperature sensor
Err 9.5
Factory calibration data corrupted.
Use Software Service Tool to restore EEPROM.
Appendix B.
Err 10.3
1. Bad temperature calibration
2. Temperature Sensor defective
Check/Replace cables. Section 3.3.2.
Check/Replace Sensor. Section 3.8.9.
Replace Main PCB. Section 3.6.
Perform temperature calibration
Err 10.4
Temperature Sensor out of range –low
Check/Replace cables. Section 3.3.2.
Check/Replace Sensor. Section 3.8.9.
Replace Main PCB. Section 3.6.
Err 10.5
Temperature Sensor defective
Check/Replace cables. Section 3.3.2.
Check/Replace Sensor. Section 3.8.9.
Replace Main PCB. Section 3.6.
Err 10.6
Temperature Sensor defective
Check/Replace cables. Section 3.3.2.
Check/Replace Sensor. Section 3.8.9.
Replace Main PCB. Section 3.6.
Err 10.7
Temperature out of control (Current temperature is
20°C higher than target setting)
Use a Power Supply Regulator
Replace temperature Sensor Section 3.8.9.
Replace main PCB. Section 3.6.

CHAPTER 2 TROUBLESHOOTING
MB23 and MB25 Service Manual 2-3 Ohaus Corporation www.ohaus.com
TABLE 2-1. ERROR CODES
ERROR
PROBABLE CAUSE
REMEDY
Err 11.0
AC power is unstable
Use a Power Line Conditioner
Err 53
EEPROM Checksum error
Defective ribbon cable.
Main PCB defective.
Cycle power.
Check cable from Main PCB to Load Cell.
Replace Main PCB. Section 3.6.
Restore EEPROM. Appendix B.
Err 54
Calibration parameters loading failed
Restore EEPROM. Appendix B.
Replace main PCB. Section 3.6.
2.3 Problem Solver TABLE 2-2. PROBLEM SOLVER
Symptom
Possible Cause
Remedy
Cannot turn on.
Power cord not plugged in or no power supply voltage.
Defective main fuse.
Defective power supply fuse.
Defective Power PCB.
Cable connections inside instrument not plugged in or
defective.
Defective Main PCB.
Verify connections and voltage.
Check fuse on back of instrument.
Replace power supply fuse. Figure 3-10.
Replace Power PCB. Section 3.5.
Plug in or replace cable.
Replace Main PCB. Section 3.6.
Portions of display do
not light up.
Defective display.
Defective Main PCB.
Replace Display LCD.
Replace Main PCB.
Cannot calibrate
Unstable environment
Incorrect calibration masses
Move unit to suitable location.
Use correct calibration masses
Heater does not
switch on after
"Start".
Defective Heater connection or cable.
Thermal Overload Device has tripped.
Defective temperature sensor cable.
Defective Temperature Sensor.
Defective Heater.
Defective Power PCB.
Defective Main PCB.
Test resistance at Heater Connector
Plug on Power PCB. Section 3.3.1.
Reset Thermal Overload Device.
Section 3.8.6.
Test Temperature Sensor.
Section 3.3.2.
Test resistance in Temperature Sensor’s
plug receptacle. Replace if resistance <
1,000 Ω. Section 3.8.7.
Replace Heater. Section 3.8.5.
Replace Power PCB. Section 3.5.
Replace Main PCB. Section 3.6.
Temperature rises
above 180°C.
Defective Temperature Sensor.
Defective Power PCB.
Defective Main PCB.
Replace if resistance < 1,000 Ω.
Section 3.8.7.
Replace Power PCB. Section 3.5.
Replace Main PCB. Section 3.6.
Unstable weight.
Dirt or debris in unit.
Cooling air current blocked.
Defective Load Cell.
Defective Main PCB.
Clean the unit thoroughly.
Clean the ventilation grill.
Replace Load Cell. Section 3.7.
Replace Main PCB. Section 3.6.

CHAPTER 3 MAINTENANCE PROCEDURES
MB23 and MB25 Service Manual 3-1 Ohaus Corporation www.ohaus.com
3.1 PREVENTIVE MAINTENANCE
Ohaus moisture analyzers are precision instruments and should be carefully handled, stored in
a clean, dry, dust-free area, and cleaned periodically. Follow these precautionary steps:
–When a moisture analyzer has had chemicals or liquids spilled on it, all exterior surfaces
should be cleaned as soon as possible with warm water on a damp cloth.
–Do not leave a mass on the moisture analyzer when it is not in use.
–Allow time for the moisture analyzer to stabilize after moving it from an area which is at a
different temperature than the area where it is to be operated. Allow one hour for each
5°F (2.7°C) temperature change before using the Analyzer. After temperature
stabilization, allow an additional 20 minutes after turning the unit on, for the electronics
to stabilize.
3.1.1 Preventive Maintenance Checklist
The moisture analyzer should be inspected and checked regularly, as follows:
1. Remove the Pan Handler Pan Support, and Draft Shield to inspect and clean the
area beneath the Pan.
2. Clean the outside using a damp cloth with warm water.
CAUTION
DO NOT USE CHEMICAL CLEANERS OR SOLVENTS OF ANY TYPE.
SOME CLEANERS ARE ABRASIVE AND MAY AFFECT THE FINISH.
3. Check the Power Cord for broken or damaged insulation.
4. Make a visual inspection for faulty connectors, wiring, and loose hardware.
3.2 OPENING THE MB23 AND MB25
Common hand tools are sufficient to disassemble the MB23 and MB25 moisture analyzers.
Turn the Analyzer off and unplug the power cord before you begin.
Warning: Disconnect from power supply and allow heating module to cool!
Use electrostatic protection when servicing!
Electrostatic damage is difficult to detect, because the faults it causes are not clear-cut. MOS
switching transistors with electrostatic damage have substantially higher, thermically unstable
leakage currents. As a result, the Moisture Analyzer Analyzer drifts more and the display can
fluctuate similar to when there is a draft.
To avoid electrostatic damage during production, conducting floors, controlled air humidity, and
EMC mats are used. When servicing the unit it is also advisable –as soon as the instrument is
opened –to neutralize electrostatic charges.
This manual suits for next models
1
Table of contents
Other OHAUS Measuring Instrument manuals

OHAUS
OHAUS TD52 User manual

OHAUS
OHAUS 8000 Series User manual

OHAUS
OHAUS STARTER 5000 User manual

OHAUS
OHAUS AB23PH User manual

OHAUS
OHAUS STARTER 2100 User manual

OHAUS
OHAUS TD52 User manual

OHAUS
OHAUS starter 3100 User manual

OHAUS
OHAUS a-AB33M1 User manual

OHAUS
OHAUS CD-1 User manual

OHAUS
OHAUS MB35 User manual