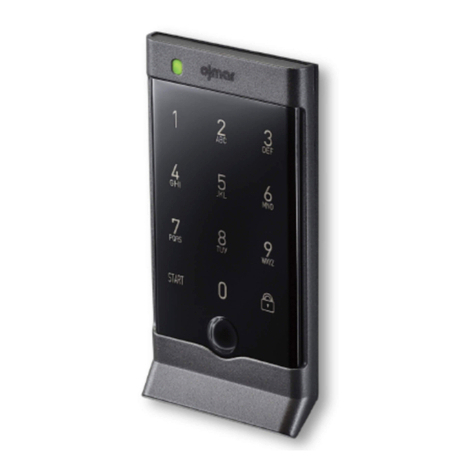
Ojmar OCS User manual

OCS®DIGITAl LOCK
OCS®DIGITAL LOCK V5 SYSTEM AND PC
SOFTWARE MANUAL
V6.1
ENG

OCS SOFTWARE OJMAR
INDEX
1. INTRODUCTION ............................................................................................1!
1.1 GENERAL NOTIFICATIONS................................................................................................ 1!
1.2 TECHNICAL SUPPORT...................................................................................................... 1!
2. OCS SYSTEM: ELEMENTS ..............................................................................2!
3. OPERATING DESCRIPTION.............................................................................2!
3.1 OCS ............................................................................................................................... 2!
3.1.1 OCS free mode ....................................................................................................................................................... 2!
3.1.2. OCS automatic locking fixed mode.............................................................................................................. 2!
3.1.3. OCS manual locking fixed mode................................................................................................................... 3!
3.1.3.1 Assignment and/or change of the code in dedicated locks .......................................................................... 3!
3.1.4. OCS free mode with coin....................................................................................................................................... 3!
3.1.5. OCS free mode with card ...................................................................................................................................... 4!
3.2 Programming key ........................................................................................................... 5!
3.3 Programming key - OCS lock operations ........................................................................... 6!
3.3.1 Operations with programming key configured as initialisation key..................................................................... 6!
3.3.1.1 Connection ...................................................................................................................................................... 6!
3.3.1.2 Event reading operation ................................................................................................................................. 6!
3.3.1.3 Lock initialisation operation ........................................................................................................................... 7!
3.3.1.4 Lock deletion operation.................................................................................................................................. 7!
3.3.2 Operations with programming key configured as master key............................................................................. 7!
3.3.3 Operations with programming key configured as user key ................................................................................. 7!
4. OCS MANAGEMENT SOFTWARE......................................................................8!
4.1 Configuration and start-up of the locks ............................................................................ 9!
4.1.1 Create / Eliminate locks....................................................................................................................................... 10!
4.1.1.1 Create locks .................................................................................................................................................. 10!
4.1.1.2 Eliminate locks ............................................................................................................................................. 11!
4.1.2 Programming key................................................................................................................................................. 11!
4.1.2.1 Configurar y conectar la llave programadora ............................................................................................. 11!
4.1.2.2 Manual connection programming key port ................................................................................................. 12!
4.1.3 Initialisation key.................................................................................................................................................... 12!
4.1.4 Master key ............................................................................................................................................................ 15!
4.1.5 User key................................................................................................................................................................ 15!
4.2 Maintenance................................................................................................................. 16!
4.2.1 Reading from a key .............................................................................................................................................. 16!
4.2.2. Event reading....................................................................................................................................................... 17!
4.2.3 Event reading.................................................................................................................................................... 19!
4.3. Other options .............................................................................................................. 19!
4.3.1 Operators.............................................................................................................................................................. 19!
4.3.2 Advanced configuration........................................................................................................................................ 22!
4.3.2.1 Length of the user code................................................................................................................................ 22!
4.3.2.2 Closed locker alert ....................................................................................................................................... 22!
4.3.2.3 Activate buzzer.............................................................................................................................................. 22!
4.3.2.4 Keypad lock activation 3 attempts ............................................................................................................... 22!
4.3.3 Personalise installation ....................................................................................................................................... 23!
4.3.4 Help mode ............................................................................................................................................................ 25!
5. MAINTENANCE........................................................................................... 26!
5.1.1 Description of OCS lock LED flashes .................................................................................................................. 26!
5.1.2 Description of programming key's LED flashes............................................................. 27!
5.1.3 Lock commands ................................................................................................................................................... 27!
5.2. Battery replacement .................................................................................................... 29!
5.3. Emergency opening...................................................................................................... 30!
5.4 Cleaning ...................................................................................................................... 30!

OCS SOFTWARE OJMAR 1
1. INTRODUCTION
1.1 GENERAL NOTIFICATIONS
To ensure the correct operation of our product in your facilities you must follow the following rules:
WARNING: Product installation and use must be carried out in accordance with the technical operating conditions described in the
corresponding manual.
WARNING: When not specifically indicated the proper installation and use of the application is the responsibility of the customer.
WARNING: Inspect the packaging and material for damage immediately after reception of the material. Also check that the delivery
is complete (accessories, documentation, etc.).
WARNING: If the packaging has been damaged during transport or you suspect that it could have been damaged or may be faulty,
the material must not be started up. In this case, please contact us.
WARNING: Our products' installation and handling must be carried out by authorised staff. The electrical connections in particular
must be carried out only by qualified specialists.
WARNING: Any replacement or removal of the protection covers is strictly forbidden.
WARNING: Do not attempt to repair materials after a fault or damage and try to operate it again. In such an event, it is essential
you contact us.
WARNING: We take no responsibility for damage caused as the result of misuse.
WARNING: In accordance with Royal Decree 106/2008, dated 1 February 2016, before leaving the devices in their pick-up
installations, the batteries must be removed and left separately for the proper management.
1.2 TECHNICAL SUPPORT
Should you wish to make any enquiries on our products, please contact the Ojmar technical department:
Telephone: +34 943 748 484
Fax: +34 943 748 490
Website: www.ojmar.com

OCS SOFTWARE OJMAR 2
2. OCS SYSTEM: ELEMENTS
OCS is an electronic locking system mainly designed for sports and leisure centres. This system is basically made up of OCS
keypad locks, a device for its programming and maintenance called programming key and management software.
The OCS lock is an electronic lock that includes a capacitive touch keypad for the user to insert a numeric code.
This locking system replaces the traditional mechanical key lock and even the transponder lock. The lock is a safety device with
four, five or six digit configurable numeric codes.
The system is autonomous and 4 non-rechargeable alkaline batteries power the lock.
3. OPERATING DESCRIPTION
3.1 OCS
The OCS lock can be configured with five different operating modes: free, free with coin, free with key, fixed with latch and fixed
without latch.
The following sections describe the special features of each of these operating modes. Bear in mind that any OCS can be
configured in any of the five ways, but that they have physical differences (tabs and mechanical parts), which makes certain
operating modes incompatible with the different locks.
3.1.1 OCS free mode
The OCS lock in free mode operates with sequence of any digits entered by the user when occupying the lock.
Free OCS are normally open. The user will enter any code to close them. Once occupied by the user, the OCS will only open if the
same code is entered again, and will then open and become free so that another user can occupy it with a code of their choice.
The procedure is the same for closing and opening and consists of the following steps:
1. Press “start” to wake the lock up.
2. If the lock is openàEnter any numeric code (4, 5 or 6 digits, this is defined during the initialisation of the lock).
3. If the lock is closedàEnter the code entered previously in the locking process.
4. Click
5. The lock closes and if we are in situation 2a and it gets occupied. The lock opens and if we are in situation 2b and is
released.
3.1.2. OCS automatic locking fixed mode
The OCS lock operating in fixed mode will open entering a preset numeric code, preset by the facility's staff. This lock only opens
with the combination of numbers assigned to each lock.
Fixed with latch OCS are always closed, and the following steps should be used to open them:
1. Press “start” to wake the lock up.
2. Enter the assigned code into the keypad.
3. Press
4. The lock opens and after a few seconds automatically closes.

OCS SOFTWARE OJMAR 3
3.1.3. OCS manual locking fixed mode
The OCS lock operating in manual locking fixed mode will open entering a preset numeric code, preset by the facility's staff. This
lock only opens with the combination of numbers assigned to each lock.
Manual locking fixed OCS are normally closed, and the following steps should be used to open them:
1. Press “start” to wake the lock up.
2. Enter the assigned code into the keypad.
3. Press
4. The lock opens. To close follow the same steps as for opening. It can only be locked with the code assigned to the lock.
3.1.3.1 Assignment and/or change of the code in dedicated locks
Tras inicializar una cerradura en modo fijo ésta no se puede accionar ya que no tiene ningún código de apertura almacenado en su
memoria. Para grabar por primera vez el código de apertura o para cambiar el existente por uno nuevo se debe introducir por
teclado la siguiente combinación numérica.
1. Press “start” to wake the lock up.
2. Enter the assigned code into the keypad.
3. New code
4. Press
Or in other words: the lock must be turned on pressing the “start” button. After that, enter the master code programmed on
initialising, after it the new code will be 4, 5 or 6 digits depending on the configuration of the lock and to finish the sequence press
the padlock key.
After carrying out this sequence the new opening code will be programmed in the lock.
3.1.4. OCS free mode with coin
The OCS lock in free mode with coin operates in the same way as in the free mode, and the only difference is that a coin has to be
inserted in the slot designed for this purpose to activate it.
The lock will not close if it is open and no coin has been inserted.
If the lock is closed and the coin is removed, the lock will automatically open when the “start” key is pressed.
The procedure is the same as above for the free mode (see
Section 2.1.1
)

OCS SOFTWARE OJMAR 4
3.1.5. OCS free mode with card
The OCS lock in free mode with card operates in the same way as in the free mode, and the only difference is that a key has to be
inserted in the slot designed for this purpose to activate it.
The lock will not close if it is open and no card has been inserted.
If the lock is closed and the card is removed, the lock will automatically open when the “start” key is pressed.
The usage procedure is the same as the one described in
Section 2.1.1
)
There are two types of operation with card:
1. With perforated card
(*) NOTE: The OCS with card is only valid for perforated ISO 7810 cards.
.

OCS SOFTWARE OJMAR 5
2º With white smooth card
(*) NOTE: The OCS with card is only valid for white ISO 7810 cards.
3.2 Programming key
The programming key is a peripheral device capable of interacting with the OCS locks and management software.
Its main functions are:
§Master and service key
§Initialisation key and start up
§Deletion key
§User key
§Event reading key
A same programming key can carry out all of the functions described above, as it can be configured as many times as you want
using the management software.
Figure 2.1.- OCS programming key

OCS SOFTWARE OJMAR 6
3.3 Programming key - OCS lock operations
3.3.1 Operations with programming key configured as initialisation key
When a programming key is configured as an initialisation key it can perform different operations in the OCS lock.
All these actions start with the "Connection" command, used to establish a link between the two devices. After correctly making
the "Connection" the rest of the operations can be performed, distinguishing one from another entering different code sequences
on the OCS lock keypad.
3.3.1.1 Connection
Put the programming key, configured as an initialisation key, in front of the OCS lock. Position the key sensor at the same height as
the OCS window, as shown in
Figure 2.2
. There should be no more than 30 cm between the two devices.
Figure 2.2
Press the “start” button on the OCS lock. Then press the button on the programming key.
If everything has gone well, the programming key's LED will light up in green (this make take several seconds). The connection has
been carried out successfully and the rest of the operations can now be carried out. Never remove the key before the
communication ends, in that case the LED of the key will stay green for 20 seconds.
3.3.1.2 Event reading operation
This operation collects the last 50 events stored in the OCS lock's memory and records them on the programming key, so that they
can be read in the management software later on.
1. Make the "Connection".
2. If the programming key has a low battery, the LED will light up in amber instead of in green, indicating error code 2 and
no actions will be carried out on the lock.
3. Wait for a few seconds.
4. The LED will light up in red, indicating that it is receiving the events from the lock.
5. When it finishes downloading events and if everything has gone well, the LED will flash green indicating that the key can
now be removed.

OCS SOFTWARE OJMAR 7
3.3.1.3 Lock initialisation operation
This operation configures the lock with the data stored in the key that have previously been downloaded from the PC software (lock
number, lock type, alarms, time details...).
Follow the steps indicated below:
1. Make the "Connection".
If all the foreseen locks have already been programmed, the LED will light up in red instead of in GREEN, indicating error
code 4 and no actions will be carried out on this lock.
2. Enter the sequence “start” + + 0 + to start to programme the lock. This sequence should be entered before
starting to download events.
3. If the sequence is not correctly entered or the key is removed to soon, the LED will flash in red indicating error code 3.
If the programming key has a low battery, the LED will light up in red instead of in green, indicating error code 2 and no
actions will be carried out on the lock.
4. If the lock initialisation has gone well, the green LED will flash indicating that the key can now be removed.
3.3.1.4 Lock deletion operation
This operation deletes all the data in the OCS lock, leaving it in the same status as when it left the factory.
a) Make the "Connection"
If the programming key has a low battery, the LED will light up in amber instead of in green, indicating error code 2 and
no actions will be carried out on the lock.
b) Before starting to download events, enter the sequence “start” + + 1 + to start to delete the lock.
Deletion will take a few seconds, and the LED will remain turned on in red while this operation is being carried out.
c) If the deletion has been carried out correctly, the green LED will flash indicating that the key can now be removed.
3.3.2 Operations with programming key configured as master key
A programming key configured as a master key allows activating an OCS lock when it is locked. It therefore allows opening a
locker and then closing it again, leaving it in the same condition as it was before.
If the lock is configured as free it will open and close depending on its status (if it is closed or open).
If, on the contrary, the lock is configured as dedicated (normally closed), the master key will open the OCS and a few seconds later,
the OCS will automatically close.
The steps to follow to use a master key are the same as those carried out in the "Connection" command:
a) Turn the lock on pressing “start”
b) Press the button on the programming key.
3.3.3 Operations with programming key configured as user key
The programming key can be configured as a user key, replacing having to manually enter the numeric code using the keypad.
The steps to follow to use a user key are the same as those carried out in the "Connection" command:
a) Turn the lock on pressing “start”
b) Press the button on the programming key.

OCS SOFTWARE OJMAR 8
4. OCS MANAGEMENT SOFTWARE
Figure 3.1.- Application home screen
It asks for a user name and a password for accessing the application. This information will be supplied by ojmar. You can find the
user and your password in the installation CD, in file
“License”
, written in a text document called
“Default User.txt”.
The program will be accessed after entering this information.
IMPORTANT NOTE: From software version V4.2.2, graphic interfaces get little changes, due to couple of changes explained
below.
.

OCS SOFTWARE OJMAR 9
Note: Graphic interface from versión 4.2.2
1- Language: Possibility of changing languague in SW. Following languages can be selected: Spanish, English, French,
Deustch or Portuguese
2- Hello “Operator”: Identifies which operator has been logged with, and a close session shortcut is created
3- Add lock: Only available in “Lock” screen. By clicking in “Add Lock” button, option to create locks appears.
4.1 Configuration and start-up of the locks
To start the locks up, you have to configure a series of data that must be entered for the correct operation of the system.
We find the main screen or "Lock" screen when we open the application this screen can also be reached from
“ConfigurationàLocks" or pressing the icon .
Figure 3.2.- Lock screen

OCS SOFTWARE OJMAR 10
4.1.1 Create / Eliminate locks
4.1.1.1 Create locks
The next step consists of creating the locks that will make up the installation in the software. To do so we return to the “Locks”
screen from “Configuration àLocks” or pressing the icon.
To create locks double left-click the OCS icon. The following window appears:
Figure 3.3.- "Add OCS lock" window
The first thing we see is the lock's name. This field is automatically allocated by the software suing consecutive numbers.
The two next fields “First lock” and “Final lock” are the lock numbers that will be created. In the example in
Figure 3.4
we are
going to create locks from number 1 to 10.
Figure 3.4.- Creating locks in free mode
-Free. Freely assigned lock, the user can occupy an open lock entering a numeric code.
-Free with coin/key. Freely assigned lock, the user can occupy an open lock entering a numeric code and a coin or key.
-Fixed automatic locking. Lock assigned to a member. The lock can only be opened with a previously programmed code. The
lock closes automatically.
-Fixed manual locking. Lock assigned to a member. The lock can only be opened with a previously programmed code. The user
code has to be entered to open and close the lock.

OCS SOFTWARE OJMAR 11
4.1.1.2 Eliminate locks
To eliminate an already created lock double left-click its icon again and on the window that appears click on the “ Delete”
button.
If you want to delete several locks at the same time select them using the “Control” or “Shift” key on the keyboard and keep it
pressed and double left-click the mouse on one of the icons. In the window click “ Delete” to delete the selected locks.
4.1.2 Programming key
The programming key is a peripheral of the OCS lock which can be used to carry out different functions such as initialising locks,
changing their configuration, reading events, operating as a master key.
4.1.2.1 Configurar y conectar la llave programadora
From “Communications àProgramming key” or pressing the icon accesses the screen from which the programming
key and its functions is managed.
Before accessing this screen, make sure that all of the programming key's controllers are properly installed.
Check that when the key is connected to a USB port the LED turns on in amber. This means that the key is connected to the
computer, but that it has not been connected to the software yet. When you go to the “Programming key” the first time, the
software will try to connect to the programming key automatically, analysing the active USB ports in the computer. The following
screen will be displayed while this operation is being carried out.
Figure 3.5.- Attempting to connect to the programming key
When the detection has finished, the button will change to indicating that the key is
connected and ready for use. In the same way, the key's LED will turn from amber to green.
If for any reason the software cannot automatically connect to the key, you can retry the operation clicking the port refresh
button or manually selecting the port from the dropdown list with active ports and clicking “ Connect”.
Figure 3.6.- Configuration of the programming key port

OCS SOFTWARE OJMAR 12
When the key has been connected, reading/writing operations can be carried out with it.
IMPORTANT NOTE: Before unplugging the programming key from its USB cable, it is highly recommended to use the disconnect
button and wait for the key to return to its standby status (LED of the key lit in amber).
4.1.2.2 Manual connection programming key port
The port the programming key is going to be connected to can be manually assigned.
From “Communications àManual connection” the screen where the port to be used will be selected.
Figure 3.7.- Manual assignment of the programming key port
Select the port where the programming key is connected from the dropdown list of ports and click the button.
When the connection has finished, the button will change to indicating that the key is
connected and ready for use. In the same way, the key's LED will turn from amber to green.
4.1.3 Initialisation key
An initialisation key can carry out the following actions:
1. Start-up of an OCS lock
2. Collect events from an OCS lock
3. Delete the information from the OCS lock
To know who to carry out these actions, see
Section 2.3
.
To programme the programming key as an initialisation key, we go to the “Communications àprogramming key”. When the
key has been selected we select “Initialisation” and the different details to be filled in pop up on the right-hand side of the
screen.

OCS SOFTWARE OJMAR 13
Figure 3.8.- Configuring a programming key as an initialisation key
In “Lock type” we will select “Free mode with coin/card”, “Free” or “Dedicated” depending on the type of OCS we are
going to initialise. The programming key can initialise locks consecutively, so that if we want to carry out this operation with the 2
to 10 locks, we will only have to select in “Initial” and “Final” these values and the key can be used to initialise one after another.
“Automatic opening” allows configuring an automatic opening depending on the time and day of the week selected. This
function is only configurable in free locks (with or without coin/card) and it will not appear when we have selected “Dedicated” as
“Lock type”.
“Lock renting duration time” allows defining a usage time of a lock after closing it. When this time has been exceeded, the
lock will open automatically. The rental time is configured by hours (from 0 to 23 hours) and quarters of an hour (0, 15, 30 or 45
minutes). Therefore, the maximum configurable time is from 23 hours to 45 minutes. The “Duration of locker rental” can only be
used in free lockers (with or without coin/card).
IMPORTANT NOTE: If the “Automatic Opening” option is selected, the “Duration of locker rental” option is disabled and vice
versa. Both functions are mutually incompatible.
The “Master code" is a 6-figure number that can be used to open the OCS when the user does not remember the sequence of
numbers he/she has entered to close his cupboard or locker. This field is optional in free locks but compulsory in fixed locks.
In “Time changes” the time zone in which the lock will be installed can be selected. In this way, the lock can be automatically
adapted to the summer or winter time putting its time back or forward depending on the selected time zone.

OCS SOFTWARE OJMAR 14
“Expiry” allows configuring a lock to prevent it from being used after the time and date selected. This function is only configurable
in only fixed locks (with automatic or manual locking) and it will not appear when we have selected “Free” as “Lock type”.
After the selected date, the lock cannot be closed again after opening with the user code until a new initialisation.
After entering the date, we click Write key” and if everything has gone well, the key will be ready to carry out its functions
as an initialisation key.
Figure 3.9.- Key recorded correctly

OCS SOFTWARE OJMAR 15
4.1.4 Master key
The programming key can also be configured as a master key.
Select “Master” as the key type. This key has no configurable option, and therefore when it is selected all of the boxes disappear,
and only the “ Read key” and “ Write key” will be active.
Figure 3.10.- Configuring a programming key as master key
We will click “ Write key” to programme the key as a master key.
4.1.5 User key
The programming key can also be programmed as a user key for the disabled.
To do so we select “User” in “Key type”. A window is displayed on the right-hand side of the screen where we will select the
“Lock number” of the dedicated type OCS we are going to assign the key to. User keys can only be used in dedicated locks, never
in free mode, and therefore only the dedicated locks created up to that moment will appear.
The user keys can also be assigned an expiry date on which they stop being valid.
In the next figure (
Figure 3.11
) we are creating a user key for dedicated lock 15 and with an expiry date of 19 April 2015 at 17:00.

OCS SOFTWARE OJMAR 16
Figure 3.11.- Configuring a programming key as a user key
4.2 Maintenance
4.2.1 Reading from a key
The “ Read key” button allows reading both the key's configuration and the data it has stored in its memory.
When this button is pressed, how the key is configured will be displayed, if it is initialisation, master, user, if there are locks not yet
configured, if it has recorded time changes, etc. At the same time, the key events will be received if it has read them from an OCS
lock. If this is the case, the software will display a message on the screen notifying that events have been received and which can
be consulted on the events screen.
Figure 3.12.- Received events.

OCS SOFTWARE OJMAR 17
4.2.2. Event reading
A programming key configured as an initialisation key can receive and store events from an OCS lock.
These events are consulted from the “Communications àEvents” screen, also accessible from the icon
As already commented, reading an initialisation key that has stored events from the "Programming key" screen, will make these
events be automatically displayed on this screen.
The key can also be forced to send the events from this events screen. To do so, just have the key connected and click “ Read
events” button.
The application will communicate with the key and if it has events stored in its memory they will be displayed on the screen, as can
be seen in
Figure 3.13
.
Figure 3.13.- Received events
The number of the lock from which the events have been received can be seen on the events list, in this case lock number 3. After
the description of the event, the last code entered by the user to lock the locker and the date on which the event has occurred.
When we exit the events screen, the application will ask if we want to keep or delete them.
Figure 3.14.- Exiting the events screen
If “ Save events” is clicked, these will be stored in a database, so that they can be consulted again the next time the
application is opened. On the contrary, they will be definitively deleted.
If saving the events is selected and later on we decide to delete them, we will use icon “Delete events list” to delete all of
them.
If you want to save the event, but do not want them in the application, they can be exported. The “Export events to a file”
button stores the events downloaded onto a text file in table format, which allows for saving them conveniently in the computer.

OCS SOFTWARE OJMAR 18
Figure 3.15.- Events exported to a file
There is another button “Print events” used when we want to print the received events. When this is used, the events will
open in a file with pdf extension, from where they can be saved using this format or printed.
Figure 3.16.- Events exported to a pdf format The application allows saving or printing them.
Table of contents
Other Ojmar Lock manuals

Ojmar
Ojmar OTS ADVANCE User manual

Ojmar
Ojmar OTS ADVANCE User manual

Ojmar
Ojmar LOCKR COMBI 8001 User manual

Ojmar
Ojmar OTS PULSE User manual

Ojmar
Ojmar OTS ADVANCE User manual

Ojmar
Ojmar OCS PRO User manual

Ojmar
Ojmar INFOTERMINAL User manual

Ojmar
Ojmar OCS SMART User manual

Ojmar
Ojmar Nexo NLX1 User manual

Ojmar
Ojmar OCS SMART User manual

Ojmar
Ojmar LOCKR COMBI 8001 Guide

Ojmar
Ojmar Nexo NLX1 User manual

Ojmar
Ojmar OTS BASIC User manual

Ojmar
Ojmar OCS SMART User manual

Ojmar
Ojmar OTS ADVANCE E-30 User manual

Ojmar
Ojmar LOCKR 75 Operating instructions

Ojmar
Ojmar LOCKR COMBI User manual

Ojmar
Ojmar OCS SMART User manual

Ojmar
Ojmar Nexo NLX1 Guide

Ojmar
Ojmar NEXO NL1 Guide