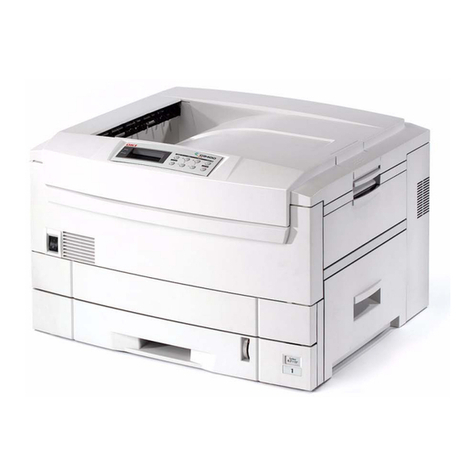
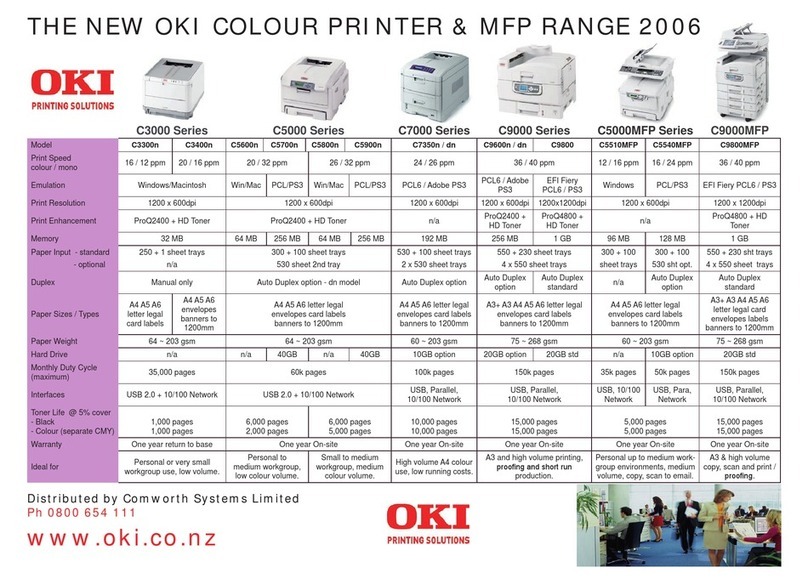
Oki C7400n User manual

41316401TH Rev.4A 1 / 186
C7000 Series
Color LED Page Printer
SERVICE MANUAL
OkiData
01-23-2001 based on Rev.4

41316401TH Rev.4 2 /
1
2000-05-29 ISSUE E4 Yamazaki
2 2000-05-31 E4 Murakami
3 2000-12-04 NIP9 Yamazaki
4 2000-12-15 NIP9 Yamazaki
Rev.No. Date No.
Corrected items
Page Description of change Person in
charge
Document Revision History

41316401TH Rev.4 3 /
PREFACE
This manual describes the procedures forthe maintenance of the C7000 Series of printers.
Thedocumentisproducedformaintenancepersonneluse. Fordetailsontheproceduresforhandlingthe
C7000 Series of printers, see its user documentation.
Note!
• The descriptions in this manual are subject to change without prior notice.
• Inpreparingthedocument,effortshavebeenmadetoensurethattheinformationinitisaccurate.
However, there may be errors in the document. Oki Data assumes no responsibility for any
damage resulting from, or claimed to be the results of, those repairs, adjustments or modifica-
tions to the printers which are made by users using the manual.
•The parts used for the printers are electrostatic sensitive and, if handled improperly, may be damaged.
It is strongly recommended that the products be maintained by Oki Data Authorized Repair Centers
Oki Data. .

41316401TH Rev.4 4 /
CONTENTS
1. CONFIGURATIONS ......................................................................................... 7
1.1 System Configuration....................................................................................................... 7
1.2 Printer Configuration ........................................................................................................8
1.3 Option Configuration ........................................................................................................ 9
1.4 Specifications................................................................................................................. 10
2. OPERATION DESCRIPTION ......................................................................... 12
2.1 Main Board (CRM PWB)................................................................................................ 13
13
2.2 Engine Controller Board (K71 PWB).............................................................................. 15
2.3 Power Units.................................................................................................................... 16
2.4 Mechanical Processes .................................................................................................. 17
2.4.1 Electrophotographic process............................................................................ 18
2.4.2 Paper running process ..................................................................................... 23
2.5 Sensor............................................................................................................................ 31
2.5.1 Paper related sensors ...................................................................................... 31
2.5.2 Other sensors................................................................................................... 32
2.6 Color Misalignment Correction....................................................................................... 33
2.7 Transfer Control Responds to Environmental Changes
(Room Temperatures and Relative Humidities)............................................................. 33
2.8 Paper Jam Detection ..................................................................................................... 34
2.9 Cover-Open ...................................................................................................................35
2.10 Toner Low Detection...................................................................................................... 36
2.11 Page Size Detection ...................................................................................................... 37
2.12 Operation at Power-on................................................................................................... 38
2.12.1 Self-diagnostic test ........................................................................................... 38
2.13 Color Misalignment Detection ........................................................................................ 39
2.14 Version Read of Units Replaced Periodically ................................................................ 40
2.15 Life Count for Units Replaced Periodically..................................................................... 40
2.16 Toner Consumption Detection ...................................................................................... 40
3. PARTS REPLACEMENT................................................................................ 41
3.1 Precautions in Replacing Parts...................................................................................... 41
3.2 Parts layout .................................................................................................................... 43
3.3 Replacing Parts..............................................................................................................49
3.3.1 Top Cover......................................................................................................... 51
3.3.2 LED Assy/ LED Assy Spring............................................................................. 52
3.3.3 Top Cover Unit ................................................................................................. 53
3.3.4 Control Panel Assy/ Control Panel Bezel/ LED Control PWB/ Toner Sensors/
Stacker Full Sensor/ Control Panel/ Control Panel Tape Harness/ Eject Rollers. 54
3.3.5 Top Cover Handle/ Top Cover Latch/ Top Cover Latch Spring........................ 55
3.3.6 Eject Guide Assy .............................................................................................. 56
3.3.7 Cassette Assy/ Front Cover Assy/ Front Cover Inner Baffle ........................... 57
3.3.8 Retard Pad Assy/ Retard Pad Assy Spring ...................................................... 58
3.3.9 Feed Roller and Nudger Roller......................................................................... 59
3.3.10 Rear Cover ....................................................................................................... 60
3.3.11 Face-Up Tray.................................................................................................... 61
3.3.12 Left Side Cover................................................................................................. 62
3.3.13 Right Side Cover .............................................................................................. 63
3.3.14 Multipurpose Tray Assy/ Multipurpose Tray Cover Assy/ Links/
Multipurpose Tray Top Cover/ Multipurpose Tray Drive Gear.......................... 64
3.3.15 Drum Contact Assys .......................................................................................... 65
3.3.16 Registration Roller Assy (A)/ Registration Drive Gear (A) ................................ 66
3.3.17 Registration Roller Assy (B) ............................................................................. 67
3.3.18 Registration Clutch and Registration Motor Assy............................................. 68
3.3.19 Main Cooling Fan ............................................................................................. 69

41316401TH Rev.4 5 /
3.3.20 Color Registration Sensor Assy........................................................................ 70
3.3.21 Duplex Guide Assy........................................................................................... 71
3.3.22 Electrical Chassis Cooling Fan......................................................................... 72
3.3.23 Printer Engine Controller PWB......................................................................... 73
3.3.24 Printer Unit Chassis.......................................................................................... 74
3.3.25 Entrance Cassette Sensor Actuator ................................................................. 75
3.3.26 Entrance Sensor PWB...................................................................................... 76
3.3.27 Entrance MT Sensor Actuator and Entrance Belt Sensor Actuator.................. 77
3.3.28 Fuser Exit Roller ............................................................................................... 78
3.3.29 Exit Sensor Assy .............................................................................................. 79
3.3.30 Fuser Latching Handle (L)................................................................................ 80
3.3.31 Belt Motor Assy ................................................................................................ 81
3.3.32 Fuser Latching Handle (R) ............................................................................... 82
3.3.33 Main Motor Assy............................................................................................... 83
3.3.34 Main Feeder Drive Motor.................................................................................. 84
3.3.35 Contact Assy/ Left Plate Assy .......................................................................... 85
3.3.36 Low Voltage Power Supply............................................................................... 86
3.3.37 High voltage power supply ............................................................................... 87
3.3.38 Main Feed Assy................................................................................................ 88
3.3.39 Cassette/ Left Guide Assy................................................................................ 89
3.3.40 Cassette/ Right Guide Assy.............................................................................. 90
3.3.41 Fuser Unit ......................................................................................................... 91
3.3.42 Belt Unit ............................................................................................................ 92
3.3.43 Duplex Unit ....................................................................................................... 93
3.3.44 Guide Rails (L) and (R)..................................................................................... 94
3.3.45 Duplex Transport Assembly ............................................................................. 95
3.3.46 CU Assy............................................................................................................ 97
4. ADJUSTMENTS .............................................................................................99
4.1 Maintenance Modes and Their Functions...................................................................... 99
4.1.1 Maintenance menu........................................................................................... 99
4.1.2 Engine maintenance mode............................................................................. 100
4.1.2.1 Operator panel................................................................................... 100
4.1.2.2 General self-diagnosis mode (level 1)............................................. 100
4.1.2.2.1 Entering self-diagnosis mode (level 1) ............................ 100
4.1.2.2.2 Exiting self-diagnosis mode ............................................ 100
4.1.2.3 Switch scan test................................................................................. 101
4.1.2.4 Motor and clutch test ......................................................................... 104
4.1.2.5 Test printing .................................................................................... 106
4.1.2.6 NVM initialization............................................................................ 110
4.1.2.7 Consumable counter display........................................................... 111
4.1.2.8 Consumable counter display - continuous ...................................... 111
4.1.2.9 Error Messages and their Details.................................................... 112
4.1.3 CRM board adjustments................................................................................. 116
4.1.3.1 Short plug settings .......................................................................... 117
4.1.3.2 Printings singly using controller-equipped printer ........................... 117
4.2 Adjustments after Parts Replacement ......................................................................... 118
4.2.1 Precautions in replacing engine controller board ........................................... 118
4.2.2 Precautions in replacing EEPROM................................................................. 118
4.2.3 EEPROM replacement after CRM board replacement................................... 119
4.3 Color Balance Adjustment ........................................................................................... 120
5. PERIODIC MAINTENANCE ......................................................................... 122
5.1 Parts Replaced Periodically ......................................................................................... 122
5.2 Cleaning....................................................................................................................... 122
5.3 Cleaning LED Lens Array ............................................................................................ 122
5.4 Cleaning Pickup Roller................................................................................................. 122

41316401TH Rev.4 6 /
6. TROUBLESHOOTING PROCEDURES ....................................................... 123
6.1 Before Troubleshooting................................................................................................ 123
6.2 Checking before Troubleshooting Image Problems..................................................... 123
6.3 Precautions in Troubleshooting Image Problems ........................................................ 123
6.4 Preparation for Troubleshooting .................................................................................. 123
6.5 Troubleshooting ........................................................................................................... 123
6.5.1 LCD messages list.......................................................................................... 124
6.5.2 Preparation for troubleshooting ...................................................................... 129
6.5.3 Troubleshooting image problems ................................................................... 140
7. CONNECTION DIAGRAM............................................................................ 154
7.1 Resistance Checks ...................................................................................................... 154
7.2 Program/Font ROM Layouts ........................................................................................ 158
8. Parts List...................................................................................................... 162
APPENDIX A CENTRONICS PARALLEL INTERFACE................................... 178
APPENDIX B 2ND/3RD TRAY MAINTENANCE .............................................. 182

41316401TH Rev.4 7 /
MMMMMMMM
LED Head
Centronics I/F
USB I/F
2 × Option Slots
Junction Board
Pulse Motor
Engine Control
Low Voltage
Power Unit
Fuser
Unit
High Voltage
Power Unit 2nd/3rdTray
Duplex
Unit
Belt
Unit
<Sensors, Switches and Thermistors>
Paper size sensor (4 bits)
Paper empty sensor
Paper near empty sensor
MT paper empty sensor
FF home switch
Loading sensor 1
Loading sensor 2
C-ID
Unit
M-ID
Unit
Y-ID
Unit K-ID
Unit
C ID M ID Y ID K IDBelt Heat MT/
Registration Hopping
Operator Panel
3 × ROM
DIMMs
4 × RAM
DIMM
IDE
I/F(HDD)
DC Fan
Note
Note Option Slot:
LAN Card made by JCI
1. CONFIGURATIONS
1.1 System Configuration
Figure 1-1 shows the system configuration of the C7000 Series of printers.
Figure 1-1

41316401TH Rev.4 8 /
1.2 Printer Configuration
The inside of the printers is composed of the followings:
• Electrophotographic Processor
• Paper Paths
• Controller Block (CU and PU)
• Operator Panel
• Power Units (High Voltage Unit and Low Voltage Unit)
Figure 1-2 shows the printer configuration.
Figure 1-2
B
A
B
A
B
A
B

41316401TH Rev.4 9 /
1.3 Option Configuration
The following options are available for the C7000 Series of printers.
(1) 2nd Tray/ 3rd Tray
(2) Duplex Unit
(3) Expansion Memory 64/128/256 MB
(4) Internal Hard Disk
(5) OkiLAN 6200e NIC

41316401TH Rev.4 10 /
1.4 Specifications
(1) External Dimensions Height: 16.9 in. Width: 16.9 in. Length: 24.4 in.
(2) Weight 92.5 lbs.
(3) Papers Type: Ordinarypaper,Transparencies(Recommended:MLOHP01)
Size: Postalcard,Legal13"or14",Executive,A4,A5,B5,A6(Only
the 1st tray and the front feeder support A6 and postal-card
sizes.)
Weight:1st tray55 kg to 90 kg (64 to 105g/m2)
Front feeder55 kg to 140 kg (64 to 163g/ m2)
(4) Print Speed Color: 12 pages per minute (Transparency: 5 pages per minute)
Monochrome: 20pagesperminute(Transparency: 12pagesperminute)
Postal Card, Label, Thick Paper: 8 pages per minute
(5) Resolution (C7200) = 600 ×600 -//- (C7400) 1200 x 1200 dots per inch
(6) Power Input 100VAC ±10%
(7) Power Consumption Peak:1300W Normal Operation: 400W (5% duty)
Idle: 110W Power Saving Mode:45W or less
(8) Frequency 50Hz or 60Hz ±2%
(9) Noise Operation: 54 dB (Without second tray)
Standby: 45 dB
Power Saving:43 dB
(10) Consumable Life Toner Cartridge: 10,000 pages (5% duty) (each of Y, M, C and K)
Image Drum: 30,000 pages (Continuous printing)
(each of Y, M, C and K)
(11) Parts Replaced Periodically Fuser Unit Assy: Every 60,000 pages
Transfer Belt Assy: Equivalentof60,000pages(3pages/job)

41316401TH Rev.4 11 /
(12) Temperatures and Relative Humidities
Temperature
Temperature Condition
Temperature (˚F) Temperature (˚C) Remark
Operation 50 to 89.6 10 to 32 17 to 27˚C
(Temperatures to assure full
color print quality)
Non-Operation 32 to 109.4 0 to 43 Power-off
Storage (Max. One Year) -14 to 109.4 -10 to 43 With drum and toner
Transport (Max. One Month) -20 to 122 -29 to 50 With drum and without toner
Transport (Max. One Month) -20 to 122 -29 to 50 With drum and toner
Humidity
Humidity Condition
Relative Humidity Max. Wet-Bulb Remark
(%) Temperature(˚C)
Operation 20 to 80 25 50 to 70% (Humidities to assure full
color print quality)
Non-Operation 10 to 90 26.8 Power-off
Storage 10 to 90 35
Transport 10 to 90 40
(13) Printer Life 600,000 pages (on a A4-size basis) or five years

41316401TH Rev.4 12 /
2. OPERATION DESCRIPTION
TheC7000Seriesofprinters,tandemcolorelectrophotographicpageprinters,adopttechnologies
such as an LED array, OPC, dry single-component non-magnetic developing, roller transfer and
heat-compressionfusing. Ablack-writingprintingmethodbysheddinglightonprintareasisused.
N71 Board
Belt
Fuse
K Fuse
Y Fuse
M Fuse
C Fuse
JODEN
14P
PaperTray 1 Paper Empty
PaperTray 2 Near Empty
3P
3P WHITE
BLUE
OPTION
7P
7P
BLUE
BLUE
BLUE
WHITE
WHITE
WHITE
RED
9P 10P 14P 14P
4P3P 22P 11P 2P 8P
YELLOW
YELLOW
FAN1 (Pr)
HUM/
TMP
3P
FAN2 (Pow)
Plate Senosr Gray
Blue
Z7L
Z7R
9P
R71 Board
Manual Bypass Feeder (MBF) Hopping
Motor FF/Regist
Motor K IDU
Motor Y IDU
Motor M IDU
Motor C IDU
Motor Belt
Motor Heat
Motor
MBF Stage MBF Paper Empty
Duplex Unit
DUP V71 Board
Motor
Clutch
INSENS
FSENS
RSENS
Main
14P
7P 7P
7P
7P
Front Cover
Open
Microswitch
Duplex Cover
Open Microswitch Upper Cover
Open Microswitch
COVOPN
71K Board
POWER FAN
FAN(LEFT)
3P
HVOLT
CPUFL1
PSIZE
DUCOV
FCOVERDUPLEX
PARTTEMP
JODEN
RSNS
SW1
FSENS
FAN1 HUM/TMP
FAN2 CUIF
FAN4
Cord 18
Cord 19
BLACK
Exit Sns. WHITE
REG
DCL
BELTHET
TR10P
SHUTTER
HOPFF RCL ID
CLUTCH3
Main Motor Assy Belt Motor Assy
46
WHITE YELLOW
K LED HEAD
Control Panel
X71 board
Y LED HEAD
M LED HEAD
C LED HEAD
Toner Sensor (Y71-board)
Paper Size
Sensor
PXC-Board AC Switch AC
CN1 CN1
CN5
CN2
High -Voltage
Power Supply
Low-Voltage
Power Supply
CN3
CN2
16P
30P
30P
19P6P3P
16P
3P
19P
2P 8P 2P 16P
Cord 20
Cord 7
6P
TNRK
PANEL
STUCK POWER
4P 4P 4P 4P 4P 4P
RED WHITE BLACK YELLOW RED BLUE
6P KPOW2
TNRY
YPOW2
TNRM
MPOW2
TNRC
CPOW2
OPTN
16P 3P
3P
3P3P3P 16P
STUCKFULL
Sns.
RED
RED
BLACK
BLACK
88
THERM1
THERM2
FUSE
NFU
3P
FAN0
Up/Down
OHP Sen.
2
RAM
CRM Board
ROM
HDD
LAN
USB
CENTRO
Figure 2-1 provides the block diagram of the printers.
Figure 2-1

41316401TH Rev.4 13 /
2.1 Main Board (CRM PWB)
Figure 2-2 provides the block diagram of the main control board (CRM PWB).
Figure 2-2
14.31818MHz
Crystal Resonator CY2292
CY2308Delay CDC516
SDRAM DIMM
×
4
ROM DIMM
×
3
FET SW
162212
Flash ROM
IMI530
Fluctuation Circuit
LVC244
LVC245
EEPROM
C2 LSI
MHM2031-002
PCI Bus
LAN Board
L60851
USBCentro IDE HDD
LVC161284
Buf
16244
Buf
16244
Delay
PU Board Connector, 200 Pins
to C2 LSI and
3.3V ICs
to 5V ICs
Inverter RESET-P
3.3V5V Reset
DS1834
2.0V
Regulator
2.5V
Regulator
C1 LSI
MHM2030
-002
PPC
750
L2
Cache
Internal-CLK-
Adjusting
Resistance
80MHz
80MHz
80MHz
40MHz
80MHz
×
280MHz
×
16
33MHz
~
248MHz
IF Bus
33MHz
SPD
PU-CU I/F,
Operator Panel
A/D, Cont (SUB Bus)
Y, M, C and K Video Data
D
D
A
D
Cont
D
DD
A, Cont A, Cont A, Cont
A, Cont
A/D, Cont

41316401TH Rev.4 14 /
(1) CPU
TheCPUisPowerPC750,a64-bitbusRISCprocessor,whichinputsan80-MHzCLK(=BUS
CLK), and operates at 400MHz that is five times the input.
(2) Secondary Cache SRAM
SRAM is included as secondary cache of the CPU on the board.
(3) ROM
ROM is to be inserted into the three 168 pin DIMM slots. The slot A is for program ROM and
the slot B is for Japanese kanji fonts. The slot C is not assigned.
(4) RAM
RAM is to be inserted into the four 168 pin DIMM slots. The DIMMs must be fitted in
descending labeled type No. order into the slots 1, 3, 2 and 4.
SDRAM DIMM Specifications:
Speed: PC100 or more
Capacity: 64/128/256 MB
Configuration: Without parity. Without ECC. SPD information is required. Number
of chips contained = 8 or 16.
(5) EEPROM
EEPROM, an 8-pin DIP package, is to be inserted into the IC socket. The EEPROM is of 16
Kbits for 3.3V power supply, and settings for controlling the controller block are stored in it.
(6) Flash ROM
A 2-Mbyte flash ROM is surface-mounted on the CRM board. The flash ROM is composed
of four 256-k-by-16bit chips, and fonts and macros can be stored in it.
(7) Memory Control LSI (CI)
A696-pin BGApackageASIC madebyNEC, whichis equippedwitha coolingheatsink and
mainlycontrols aCPUI/F, memory,videodata compressionand decompression,anda PU-
video I/F.
(8) Interface Control LSI (C2)
A BGA package ASIC made by Toshiba, which controls a PU command I/F, operator panel
I/F, IDE I/F, Centronics I/F, USB I/F, PCI I/F, EEPROM and a SPD (SDRAM DIMM) I/F.
(9) IDE HDD
An IDE connector is surface-mounted on the board to which an IDE HDD assembled using
exclusivemoldswillbeconnected. TheIDEHDDisusedforstoringfontdata,spoolingedited
video data and registering form data.
(10) PCI Bus Option
TwoPCII/Fslotsareprovidedforoptionboarduse. Thebus,whichusesanOkiDataoriginal
connector, can accept an Ethernet board.
(11) Host Interface
Standard: Centronics two-way parallel I/F (IEEE-1284-compliant)
USB (USB1.1-compliant)
Additional Board: (connected to PCI BUS)
Ethernet Board

41316401TH Rev.4 15 /
Figure 2-3
The engine control block (PU) is controlled by the engine controller board (K71 PWB) which
consistsofaCPU(MSM66Q577),generalLSIchip,flashROM,EEPROM,pulsemotordriversand
a video memory (see Figure 2-4).
(1) CPU
This, a 16-bit CPU with an AD converter containing 126-Kbyte ROM (OKI MSM66Q577),
controls the entire system.
(2) General LSI
This LSI (MG63P011-001LA), which is contained in the printer engine control block, has 4
Mbits of video memory, and functions such as controller-engine video interfacing, LED
interfacing,motorcontrol,sensorinput,videomemorycontrol,mainscancolormisalignment
correction, skew correction and high voltage power supply control.
2.2 Engine Controller Board (K71 PWB)
K Head I/F
Y Head I/F
M Head I/F
C Head I/F
8
×
Pulse Motors
LSI
(VIDEO MEM
Containing
4Mbit DRAM)
High Voltage Power Supply
Serial Interface (2 channels)
Toner and ID sensors ID checks
CU I/F
Fuse Cut
Driver
EEPROM
D/A
48MHz
32bit Video I/F
Heater control
CPU BUS
Control Panel
4Kbit(512KByte)
FLASH 256Kbit(32KByte)
SRAM
CPU
MSM66Q577
A/D CON
Duplex
Cassette 2/3
28MHz
Paper Feed System Sensors
(Paper Feed, Paper Registration,
Write and Eject Sensors)
MT Sensor (Stage position and paper empty)
Cassette 1 Sensor
(Paper empty and near empty)
Any of Shutter, Clutch, Belt Home and
Transparency Sensors
Belt and Fuser Checks
Cassette Size
Analog output
(Color registration sensor adjustment)
Analog input
(Temperature variation) Analog Input
Switch
Analog input (Transparencies)
Analog input (Various densities)
Fan control
Cover front/upper open
Stacker full
Test switch
(Power supply cooling)
Interruption by motor
Interruption by UART
Motor Driver
Motor Driver

41316401TH Rev.4 16 /
Output Voltage Use for
+3.8V CU LSI
+3.8V LED head
+5 V Logic circuit power supply, PU CPU
+34 V Motor, drive voltage and power supply voltage for high voltage power supply
+12 V OP Amp, High voltage power supply
(2) High Voltage Power Unit
This circuit generates the following voltages of not less than +34V, which are required for
electrophotographic process, according to control sequences from the controller board.
2.3 Power Units
There are a low voltage power unit consists of an AC filter circuit, low voltage power circuit and
heater driver circuit, and a high voltage power unit organizes a high voltage power circuit.
(1) Low Voltage Power Unit
This circuit generates the following voltages:
(3) Flash ROM
The flash ROM (29F400-70) is of 4-Mbits, and PU programs are stored in it.
(4) EEPROM
The EEPROM (NM93C66N-NW) is of 4-Kbits, and mounted on the board with an IC socket.
Correction values are stored in it.
(5) Pulse Motor Driver
The pulse motor driver (A2919SLBTR, A2918SWV) drives the eight pulse motors to revolve
the EP and transport media.
(6) SRAM
This SRAM (62256LFP-7LL) is used as working memory of the CPU.
Output Voltage Use for Remark
CH -900V to 1.4KV Voltage to charging roller
DB -100 to 400V/ +300V Voltage to developing roller
SB Y, M, C and K: -100V to -700V Voltage to toner supplying roller
TR 0KV to 7KV Voltage to transfer roller Variable

41316401TH Rev.4 17 /
2.4 Mechanical Processes
Figure 2-4 shows the mechanical processes of the C7000 Series of printers.
Paper Eject Roller
Pape
ejection
(Face down)
Power Supply
Charging Roller
Cleaning Blade
Heat Roller
Paper
Eject
Roller Fusing
Backup Roller
Control Signals
LED Head
Developing Roller
Power Supply
Toner Cartridge
Transfer Roller
Paper
registration
Registration
Roller 1
Paper loading
Hopping Roller
Power
Supply Registration
Roller 2
Paper ejection Fusing Cleaning Transfer Paper transport Paper advance
Transfer
Development
Paper Eject
Sensor
Paper Feed
Sensor 1
Paper Feed
Sensor 2
Paper Cassette
Paper
registration
(FF, 1ST, 2ND)
Write Sensor
×
4
K YMC
Duplex printing
Paper path
selection
Paper path
selection
Paper traveling
OPC drum revolution
Charging
Exposure
Cleaning
Paper
ejection
(Face up)
Multipurpose Tray
Figure 2-4

41316401TH Rev.4 18 /
2.4.1 Electrophotographic process
(1) Electrophotographic process
The following is the outline of electrophotographic process:
1Charging
DCvoltageisappliedtothechargingrollerandthesurfaceoftheOPCdrumisnegatively
and evenly charged.
2Exposure
The LED head, under image signals, emits light to the negatively charged surface of the
OPC drum. The radiated portions of the drum surface attenuate in negative charge
according to the intensity of the light and, based on the surface potentials, a latent
electrostatic image is formed on the drum surface.
3Development
Negatively charged toner contacts the OPC drum and by electrostatic force adheres to
the latent electrostatic image to form a clear image on the drum surface.
4Transfer
Placed on the surface of the OPC drum, paper is positively, or opposite to the polarity of
thetoner,chargedbythetransferrolleronitsbacktotransferthetonerimagetothepaper.
5Cleaning
The cleaning blade removes residual toner from the OPC drum after the transfer.
6Fusing
The toner image on the paper is fused into place through the application of heat and
pressure to it.

41316401TH Rev.4 19 /
(3) Exposure
The negatively charged surface of the OPC drum is radiated with light from the LED head.
The negative charge of the radiated portions of the drum surface attenuates in response to
the intensity of the light and a latent electrostatic image responsive to the potentials of the
surface is formed on the drum surface.
(2) Charging
NegativeDCvoltageisappliedtothechargingrollercontactingthesurfaceoftheOPCdrum.
Charging roller
OPC drum
Power
unit
Power
unit
LED head
Charging roller
OPC drum
LED head
OPC drum
Paper

41316401TH Rev.4 20 /
2The developing blade removes excess toner from the developing roller and a thin layer
of toner remains and forms on the developing roller.
3The toner is drawn by the latent electrostatic image at the contact portion between the
OPC drum and the developing roller.
The latent electrostatic image on the drum surface is made visible with the toner.
(4) Development
By the adhesion of toner to the latent electrostatic image on the drum surface, the image is
changed to an image of its toner. The development is processed at the contact portion
between the OPC drum and the developing roller.
1The sponge roller causes toner to adhere to the developing roller. The toner becomes
negatively charged.
Developing roller
Developing blade
Charging roller
OPC drum
Sponge roller
This manual suits for next models
1
Table of contents
Other Oki Printer manuals

Oki
Oki C9800 Series User manual

Oki
Oki C5800Ldn Series User manual

Oki
Oki B6200 Series Original instructions

Oki
Oki DP-5000 Metallic and Colour Desktop Printer User manual

Oki
Oki C711cdtn User manual

Oki
Oki MICROLINE 591Elite User manual

Oki
Oki C5800 User manual

Oki
Oki B2200 User manual

Oki
Oki LED Printer User manual

Oki
Oki MPS710c User manual