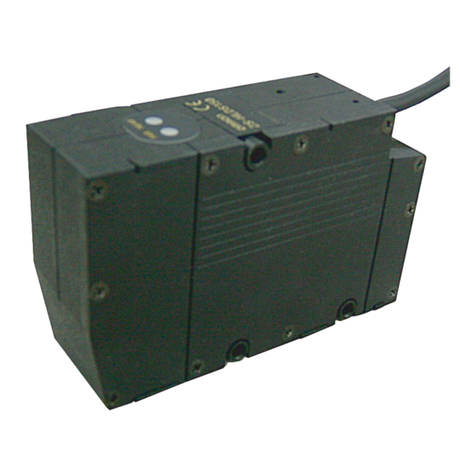
Omron Z5FP-MC10 - SETUP User guide

POWER
Multi-Dimensional Sensor
Setup Manual
This manual provides information on
system hardware. Be sure to read this
manual first.
Cat.No. Z178-E1-01A
Cat.No.Z178-E1-01A Multi-Dimensional Sensor Setup Manual
©OMRON Corporation 2003 All Rights Reserved.
Note: Specifications subject to change without notice.
Printed in Japan.
Authorized Distributor:
OMRON Corporation
Industrial Automation Company
Application Sensors Division
Sensing Devices and Components Division H.Q.
Shiokoji Horikawa, Shimogyo-ku,
Kyoto, 600-8530 Japan
Tel: (81)75-344-7068/Fax: (81)75-344-7107
Regional Headquarters
OMRON EUROPE B.V.
Sensor Business Unit,
Carl-Benz-Str. 4, D-71154 Nufringen,
Germany
Tel: (49)7032-811-0/Fax: (49)7032-811-199
OMRON ELECTRONICS LLC
1 East Commerce Drive, Schaumburg, IL 60173
U.S.A.
Tel: (1)847-843-7900/Fax: (1)847-843-8568
OMRON ASIA PACIFIC PTE. LTD.
83 Clemenceau Avenue,
#11-01, UE Square,
239920 Singapore
Tel: (65)6835-3011/Fax: (65)6835-2711
OMRON CHINA CO., LTD. BEIJING OFFICE
Room 1028, Office Building,
Beijing Capital Times Square,
No. 88 West Chang’an Road,
Beijing, 100031 China
Tel: (86)10-8391-3005/Fax: (86)10-8391-3688
0104-0.5C (0303) (M)
Cat. No. Z178-E1-01A

Operation Procedure and Reference Manual
The following shows main contents of operation steps and manuals. Select the manual suitable for your
purpose and read it before starting operation
INTRODUCTION
Thank you for your purchase of Z5FP-MC10 (hereinafter referred to as the Controller). This manual explains
how to use the Controller. Please observe the following points when using the Controller.
•
Please read and understand this manual thoroughly before using the Controller so that it is not used incorrectly.
• Please keep this manual at hand so that you can refer to it at any time.
POWER
POWER
Installation Wiring
Starting the Controller and Setting Workpieces in Place
Adjusting Images
Setting Measurement Conditions and Starting Measurement Outputting Data to External Device
Operation Manual
Explains menu operation method and communication method with external
devices.
Multi-Dimensional Sensor
Setup Manual
This manual provides information on
system hardware. Be sure to read this
manualfirst.
Multi-Dimensional Sensor
Operation Manual
This manual explains menu operation method
and communication method with external
devices.
Setup Manual
Contains information on safe use of the unit, series of procedures starting from
package content check, installation to cable connection, together with functions
and specifications of the unit and its peripheral devices.

INTRODUCTION
SECTION 1 SECTION 2 SECTION 3 SECTION 4
INTRODUCT
ION
SECTION 1
SECTION 2
SECTION 3
SECTION 4
Precautions in using the Product(Be sure to read it.)
Wiring and Connection
Installation
Connecting External Devices
Appendix
Setup Manual
Multi-Dimensional Sensor
top.fm Page 1 Monday, April 19, 2004 3:17 PM

2
INTRODUCTION
Precautions in using the Product
Setup Manual
INTRODUCTION
Precautions in using the Product
Please read and understand this manual before storing, installing, programming, operating, maintaining,
or disposing of the products. Please consult your OMRON representative if you have any questions or
comments.
OMRON's exclusive warranty is that the products are free from defects in materials and workmanship for
a period of one year (or other period if specified) from date of sale by OMRON.
OMRON MAKES NO WARRANTY OR REPRESENTATION, EXPRESS OR IMPLIED, REGARDING
NON-INFRINGEMENT, MERCHANTABILITY, OR FITNESS FOR PARTICULAR PURPOSE OF THE
PRODUCTS. ANY BUYER OR USER ACKNOWLEDGES THAT THE BUYER OR USER ALONE HAS
DETERMINED THAT THE PRODUCTS WILL SUITABLY MEET THE REQUIREMENTS OF THEIR
INTENDED USE. OMRON DISCLAIMS ALL OTHER WARRANTIES, EXPRESS OR IMPLIED.
OMRON SHALL NOT BE RESPONSIBLE FOR SPECIAL, INDIRECT, OR CONSEQUENTIAL
DAMAGES, LOSS OF PROFITS OR COMMERCIAL LOSS IN ANY WAY CONNECTED WITH THE
PRODUCTS, WHETHER SUCH CLAIM IS BASED ON CONTRACT, WARRANTY, NEGLIGENCE, OR
STRICT LIABILITY.
In no event shall the responsibility of OMRON for any act exceed the individual price of the product on
which liability is asserted.
IN NO EVENT SHALL OMRON BE RESPONSIBLE FOR WARRANTY, REPAIR, OR OTHER CLAIMS
REGARDING THE PRODUCTS UNLESS OMRON'S ANALYSIS CONFIRMS THAT THE PRODUCTS
WERE PROPERLY HANDLED, STORED, INSTALLED, AND MAINTAINED AND NOT SUBJECT TO
CONTAMINATION, ABUSE, MISUSE, OR INAPPROPRIATE MODIFICATION OR REPAIR.
Read and Understand this Manual
WARRANTY
LIMITATIONS OF LIABILITY
0intro.fm Page 2 Monday, April 19, 2004 3:17 PM

3
Setup Manual
INTRODUCTION
Precautions in using the Product
INTRODUCTION
OMRON shall not be responsible for conformity with any standards, codes, or regulations that apply to
the combination of the product in the customer's application or use of the products.
At the customer's request, OMRON will provide applicable third party certification documents identifying
ratings and limitations of use that apply to the products. This information by itself is not sufficient for a
complete determination of the suitability of the products in combination with the end product, machine,
system, or other application or use.
The following are some examples of applications for which particular attention must be given. This is not
intended to be an exhaustive list of all possible uses of the products, nor is it intended to imply that the
uses listed may be suitable for the products:
• Outdoor use, uses involving potential chemical contamination or electrical interference, or conditions or
uses not described in this manual.
• Nuclear energy control systems, combustion systems, railroad systems, aviation systems, medical
equipment, amusement machines, vehicles, safety equipment, and installations subject to separate
industry or government regulations.
• Systems, machines, and equipment that could present a risk to life or property.
Please know and observe all prohibitions of use applicable to the products.
NEVER USE THE PRODUCT FOR AN APPLICATION INVOLVING SERIOUS RISK TO LIFE OR
PROPERTY WITHOUT ENSURING THAT THE SYSTEM AS A WHOLE HAS BEEN DESIGNED TO
ADDRESS THE RISKS, AND THAT THE OMRON PRODUCTS ARE PROPERLY RATED AND
INSTALLED FOR THE INTENDED USE WITHIN THE OVERALL EQUIPMENT OR SYSTEM.
OMRON shall not be responsible for the user's programming of a programmable product, or any
consequence thereof.
SUITABILITY FOR USE
PROGRAMMABLE PRODUCTS
0intro.fm Page 3 Monday, April 19, 2004 3:17 PM

4
INTRODUCTION
Precautions in using the Product
Setup Manual
INTRODUCTION
Product specifications and accessories may be changed at any time based on improvements and other
reasons.
It is our practice to change model numbers when published ratings or features are changed, or when
significant construction changes are made. However, some specifications of the products may be
changed without any notice. When in doubt, special model numbers may be assigned to fix or establish
key specifications for your application on your request. Please consult with your OMRON representative
at any time to confirm actual specifications of purchased products.
Dimensions and weights are nominal and are not to be used for manufacturing purposes, even when
tolerances are shown.
The information in this manual has been carefully checked and is believed to be accurate; however, no
responsibility is assumed for clerical, typographical, or proofreading errors, or omissions.
The following signal words are used in this manual.
The following alert symbols are used in this document.
CHANGE IN SPECIFICATIONS
DIMENSIONS AND WEIGHTS
ERRORS AND OMISSIONS
Meanings of Signal Words
WARNING
Indicates a potentially hazardous situation which, if not avoided, will result in minor or
moderate injury, or may result in serious injury or death. Additionally there may be
significant property damage.
Meanings of Alert Symbols
Cautions to indicate potential laser beam hazard
0intro.fm Page 4 Monday, April 19, 2004 3:17 PM

5
Setup Manual
INTRODUCTION
Precautions in using the Product
INTRODUCTION
Sensor Head is a Class 3B Laser Product according to EN60825-1 (IEC60825-1) and Class IIIB Laser
Product according to FDA (21 CFR1040.10) (see note). This product is meant to be built into final
system equipment. Pay special attention to the following precautions for the safe use of the product:
Note:Europe: Class 3B of EN60825-1: 1994 = IEC60825-1: 1993
U.S.A.: Class IIIB of FDA (21 CFR1040.10)
(1)Use this product as specified in this manual. Otherwise, you may be exposed to hazardous laser
radiation.
(2)This product radiates laser beams in the visible light range. Do not expose your eyes directly to the
laser radiation. Ensure that the laser beam path is terminated during use. If a mirror or shiny surface
is positioned in the laser beam path, ensure that the reflected beam path is also terminated. If the Unit
must be used without terminating the laser beam path, position the laser beam path so that it is not at
eye level.
(3)To avoid exposure to hazardous laser radiation, do not displace nor remove the protective housing
during operation, maintenance, and any other servicing.
(4)The user should return the product to OMRON for all repair and servicing.
(5)As for countries other than those of Europe and the U.S.A., observe the regulations and standards
specified by each country.
As for the Laser Product Classifications, refer to the Appendix.
p.55
Laser Safety
Z550-SW70
Wavelength 658 nm
Maximum pulse duration 17.5 ms
Cycle 0.5 to 25 ms
Peak power 15 mW max.
Classification 3B
WARNING
Do not expose your eyes to the laser radiation either directly or indirectly (i.e., after
reflection from a mirror or shiny surface).
The laser radiation has a high power density and exposure may result in loss of sight.
0intro.fm Page 5 Monday, April 19, 2004 3:17 PM

6
INTRODUCTION
Precautions in using the Product
Setup Manual
INTRODUCTION
Labeling on Laser Use
The following warning label is attached to the side of the sensor.
Re-labeling
The following labels are provided, to be used selectively according to countries.
for use in the U.S.: FDA label (Aperture label, Caution logo label, Certification and Identification
label)
for use in countries other than the U.S.: Warning label according to EN/IEC standards.
Be sure to turn off the sensor before replacing the label, or your hand or other body parts may be
exposed to the hazardous laser beam radiating from the sensor.
§Use in the U.S.
When a laser product mounted on a certain device is to be used in the U.S., it has to meet the
requirements set forth by the FDA (regulations for laser products set forth by the Food and Drug
Administration).
Applications have been approved by CDRH (Center for Devices and Radiological Health) for
Z550-SW70. Three different FDA labels are enclosed in the sensor package. Attach them to the
sensor body.
This product is designed to be built into the finished system unit. Refer to the following technical
standard for installation.
21CFR1040.10 and 1040.11
FDA Labels for Laser Products
Be sure to attach FDA labels; do not attach EN/IEC WARNING label by mistake.
䊧䊷䉱శ
䊎䊷䊛䉕⋥ធ䈢䉍
䇭䇭䇭䇭䇭䇭䇭䇭⸅䉏䈢䉍䈚䈭䈇䈖䈫
㪤㪸㫏㪅㩷㩷㪈㪌㫄㪮䇭㪉㪌㫄㫊㪼㪺
ඨዉ䊧䊷䉱䇭㪍㪌㪏㫅㫄
䉪䊤䉴㪊㪙䊧䊷䉱ຠ
䇭㩷㩷㪡㪠㪪䇭㪚䇭㩷㩷㩷㩷㩷㩷㪍㪏㪇㪉䇭㪈㪐㪐㪎
䇭䇭䇭䇭䇭䇭㩷㩷㩷㩷㩷㩷㩷㩷
ㅊ
㪈㩷㩷㪈㪐㪐㪏
ᵈᗧ
㩷䈖䈖䉕㐿䈒䈫
㩷
䊧䊷䉱
శ䈏䈪䉁䈜
⼊๔
Z550-SW70
CLASS 3B
DANGER
DANGER
PEAK POWER
PULSE DURATION
WAVE LENGTH
15000
25000
658
µw
µs
Class III B DANGER logo type
Aperture Label Certification and Identification Label
AVOID
EXPOSURE
This laser product complies with
21 CFR 1040.10 and 1040.11.
Shiokoji Horikawa, Shimogyo-ku,
Kyoto 600-8530 JAPAN
OMRON Corporation
AYABE Factory, OMRON Corp.
Place of manufacture:
Manufactured in
Laser radiation
is emitted from
this aperture
15000
25000
658
µw
µs
0intro.fm Page 6 Monday, April 19, 2004 3:17 PM

7
Setup Manual
INTRODUCTION
Precautions in using the Product
INTRODUCTION
Areas to Attach Labels
§Use in Countries Other than the U.S.
Replace the warning label in Japanese on the sensor main body with the attached EN/IEC
warning label upon use in countries other than the U.S. Attach the label in the area where the
original Japanese warning label was provided.
EN60825-1(IEC60825-1) standard is applied to products exported to European countries. This
product conforms to the standard.
EN/IEC Warning Labels
DANGER
DANGER
PEAK POWER
PULSE DURATION
WAVE LENGTH
15000
25000
658
µw
µs
Class III B
DANGER logo type
A
perture Label
AVOID
EXPOSURE
Laser radiation
is emitted from
this aperture
Certification and
Identification Label
This laser product complies with
21 CFR 1040.10 and 1040.11.
Shiokoji Horikawa, Shimogyo-ku,
Kyoto 600-8530 JAPAN
OMRON Corporation
AYABE Factory, OMRON Corp.
Manufactured in
㪮㪘㪩㪥㪠㪥㪞
㪚㪘㪬㪫㪠㪦㪥
㪣㪘㪪㪜㪩
㪩㪘㪛㪠㪘㪫㪠㪦㪥
㪮㪟㪜㪥㩷㩷㪦㪧㪜㪥
㪣㪘㪪㪜㪩㩷㪩㪘㪛㪠㪘㪫㪠㪦㪥
㪘㪭㪦㪠㪛㩷㪜㪯㪧㪦㪪㪬㪩㪜㩷㪫㪦㩷㪙㪜㪘㪤
㩷㪚㪣㪘㪪㪪㩷㪊㪙㩷㪣㪘㪪㪜㪩㩷㪧㪩㪦㪛㪬㪚㪫
㪂㪘㪈䋺㪈㪐㪐㪎
㪤㪘㪯㪠㪤㪬㪤㩷㪦㪬㪫㪧㪬㪫䋺㪈㪌㫄㪮
㪧㪬㪣㪪㪜㩷㪛㪬㪩㪘㪫㪠㪦㪥䇭䋺㪉㪌㫄㫊㪼㪺
㪮㪘㪭㪜㩷㪣㪜㪥㪞㪫㪟䇭䇭 䋺㪍㪌㪏㫅㫄
㪤㪜㪛㪠㪬㪤䋺㪪㪜㪤㪠㪚㪦㪥㪛㪬㪚㪫㪦㪩㩷㪣㪘㪪㪜㪩
㪠㪜㪚㩷㪍㪇㪏㪉㪌㪄㪈䋺㪈㪐㪐㪊
Z550-SW70
CLASS 3B
0intro.fm Page 7 Monday, April 19, 2004 3:17 PM

8
INTRODUCTION
Precautions in using the Product
Setup Manual
INTRODUCTION
Please observe the following precautions for safe use of the products.
Installation Environment
•Do not use the product in environments where it can be exposed to inflammable/explosive gas.
•Do not install the product close to high-voltage devices and power devices in order to secure
the safety of operation and maintenance.
Power Supply and Wiring
•Make sure to use the product with the power supply voltage specified by this manual.
•Make sure to use crimp terminals when performing the wiring of the product. Do not simply
connect the twisted ends of the wires directly to the terminal block.
•Use a power supply cable and crimp terminals of the specified size.
•Check carefully that the wiring is correct before turning the power supply on.
•Make sure to install the terminal block protection cover after wiring.
•Use a DC power supply with safety measures against high-voltage spikes (safety extra low-
voltage circuits on the secondary side) for the power supply to the terminal blocks of the
Controller.
p.20
•Make sure to tighten all installation screws securely.
Other
•Do not disassemble, repair, or modify the product.
•Dispose of this product as industrial waste.
Precautions for Safe Use
0intro.fm Page 8 Monday, April 19, 2004 3:17 PM

9
Setup Manual
INTRODUCTION
Precautions in using the Product
INTRODUCTION
Please observe the following precautions to prevent failure to operate, malfunctions, or undesirable
effects on product performance.
Installation of the Controller
Installation Site
Do not install the Controller in locations subjected to the following conditions:
•Ambient temperature outside the range of 0 to +50°C
•Condensation due to rapid temperature fluctuations
•Relative humidities outside the range of 35 to 85%
•Corrosive or flammable gases
•Dust, salt, or iron particles
•Direct vibration or shock
•Reflection of intense light (such as other laser beams or electric arc-welding machines)
•Strong magnetic fields
•Direct sunlight
•Contact with water, oil, and chemical agents
Mounting of the Controller
To improve heat dissipation, install the controller in the following direction only:
Precautions for Correct Use
Do not install the controller in the orientations shown in the following diagram.
0intro.fm Page 9 Monday, April 19, 2004 3:17 PM

10
INTRODUCTION
Precautions in using the Product
Setup Manual
INTRODUCTION
Ambient temperature
•Maintain a minimum clearance of 50 mm above and below the Controller to improve air
circulation.
•Do not install the Controller immediately above significant heat sources, such as heaters,
transformers, or large-capacity resistors.
•Do not let the ambient temperature exceed 50°C.
•Provide a forced-air fan cooling or air conditioning if the ambient temperature is near 50°C so
that the ambient temperature never exceeds 50°C.
Ambient Illumination
•Do not let the ambient illumination exceed 3000 lx.
•When using the Controller near lighting equipment that turns on and off continuously, reduce
the influence of the light by, for example, using a light baffle.
Noise Resistance
•Do not install the Controller in a cabinet containing high-
voltage equipment.
•Do not install the Controller within 200 mm of power cables.
Sensor
Install the sensor in a clean environment and keep the optical
filter on the front panel of the sensor free from oil and dust. If affected by oil or dust, clean the
filter as follows:
•Use a blower brush (normally used to clean camera lenses) to blow large dust particles away
from the surface. Do not blow the dust away with your mouth.
•Use a soft cloth (for lenses) with a small amount of alcohol to remove the remaining dust.
Never use strong force when wiping the sensor. The filter may become scratched, which can
cause errors.
When replacing the sensor connected to the Controller:
Turn off the download function when replacing the sensor.
If the sensor is replaced while the download function is on, measurements cannot be taken
correctly with the new sensor because the old sensor information (such as the measurement
range) is still stored.
Operation Manual p.179
Control panel
Louver
200 mm min.
200 mm min.
Power cable
0intro.fm Page 10 Monday, April 19, 2004 3:17 PM

11
Setup Manual
INTRODUCTION
Precautions in using the Product
INTRODUCTION
Environment
The sensor cannot detect the following types of objects accurately: Materials with extremely
small reflectances, objects with small curvatures, or objects tilted to a large degree
Component Installation and Handling
Dedicated Components
Make sure to use the dedicated components for the sensor and console connected to this
controller.
•Sensor: Z550-SW70
•Console: Z300-KP
Connecting/Disconnecting Cables
Always turn the power supply off before connecting or disconnecting any cables.
Touching Signal Lines in Connectors or Terminals
To prevent damage from static electricity, use a wrist strap or another device for preventing
electrostatic discharges when touching terminals or signal lines in connectors.
Wiring
When using a transformer for the Controller's driving power supply, use an isolation transformer
in the way shown below.
Do not use an auto-transformer. Doing so may result in equipment failure.
䋫
䋭
Commercial
power supply
Isolation transformer
䋫
䋭Z5FP-MC10
Z5FP-MC10
Auto-transformer
Commercial
power supply
0intro.fm Page 11 Monday, April 19, 2004 3:17 PM

12
INTRODUCTION
Precautions in using the Product
Setup Manual
INTRODUCTION
Turning off the Power
Do not turn the power supply off while the message indicating that processing is being performed
is being displayed. Data in the memory will be destroyed, and the Controller may not operate
correctly the next time it is started.
Using the RESET Signal
Do not input the RESET signal immediately after power supply is turned on. When using the
RESET input to synchronize startup timing, wait at least 1 second after the Controller's power
supply is turned on before turning on the RESET terminal.
Securing the Video Monitor (When Using the Recommended F150-M09)
If the video monitor case is metallic, observe the following precautions to prevent noise
interference, because the video monitor case is connected to the 0V line in the internal circuits.
•Do not ground the video monitor.
•Do not ground the metallic part of the connector.
•Secure the video monitor with plastic screws if it is being mounted to a metallic surface.
Warming Up
After turning on the power supply, allow the Controller to stand for at least 30 minutes before
use. The circuits are unstable immediately after the power supply is turned on and attempting
measurement may result in inconsistent measurement values.
Saving
Scn 0䂯Save䂯
Example: Saving
0intro.fm Page 12 Monday, April 19, 2004 3:17 PM

13
Setup Manual
INTRODUCTION
Editor's Note
INTRODUCTION
Editor's Note
Visual Aids
Indicates information required to take full advantage of the functions and performance of the product.
Incorrect application methods may result in data corruption or damage to the product. Read and follow all
precautionary information.
Indicates points that are important to achieve the full product performance, such as operational precautions
and application procedures.
Indicates where to find related information.
Indicates information helpful in operation.
0intro.fm Page 13 Monday, April 19, 2004 3:17 PM
14 Setup Manual
INTRODUCTION
Table of Contents
INTRODUCTION
Table of Contents
INTRODUCTION 1
Precautions in using the Product 2
Wiring and Connection 15
Editor's Note 13
Table of Contents 14
SECTION 1 Wiring and Connection 15
Basic System Configuration 16
Component Names and Functions 17
Wiring Power Supply and Ground 19
SECTION 2 Installation 21
Mounting the Controller 22
Mounting the Sensor 24
SECTION 3 Connecting External Devices 29
Terminal Block Connections 30
RS-232C Connections 34
Linear Sensor Controller Connections 36
SECTION 4 Appendix 41
Troubleshooting 42
Inspection 44
Specifications and Dimensions 45
Laser Product Classifications 55

SECTION 1 Wiring and Connection
15
Setup Manual
SECTION 1
Wiring and Connection
Basic System Configuration 16
Component Names and Functions 17
Wiring Power Supply and Ground 19

16
SECTION 1 Basic System Configuration
Setup Manual
SECTION 1
Wiring and Connection
Basic System Configuration
The following diagram shows the basic Controller system configuration.
•Dedicated products must be used for some of the components. Some of the devices may be damaged if
products other than the specified dedicated products are used. These items are indicated with asterisks.
•Always turn the power supply off before connecting or disconnecting cables. The peripheral devices may
be damaged if connected or disconnected while the power supply is turned on.
Power Supply
Recommended model:
OMRON S82K-05024
Z550-SW70
(
0.5m cable
)
*
Sensor Extension Cable
Z519-SC1R (1.5m,3m, 6m, 8m or 13m)
Specify the required cable
length when ordering.
Z5FP-MC10
* Console
Z300-KP
(2m cable)
F150-VM
Monitor
Cable (2m)
BNC Jack
(included with
the F150-VM)
F150-M05L
Color Liquid
Crystal Monitor
(pin input)
F150-M09
Monochrome
CRT Video Monitor
(BNC input)
POWER
SYNC
The Monitor is used to check the image
and display menu where making settings.
㬍㬍 㬍 㬍 㬍 㬍 㬍 㬍 㬍 㬍 㬍 㬍
㬍 㬍 㬍
㬍㬍 㬍 㬍 㬍 㬍 㬍㬍
㬍 㬍 㬍 㬍 㬍 㬍 㬍 㬍 㬍 㬍
㬍 㬍
㬍 㬍 㬍 㬍 㬍 㬍 㬍
ESC TRIG
SHIFT
ENT
CONSOLE
Monitors
Controller
Sensor
*
POWER
Operation Manual
Up to 2 sensors can be connected.
To replace the sensor being connected to the
controller, turn off the download function.
p.179

17
Setup Manual
SECTION 1 Component Names and Functions
SECTION 1
Wiring and Connection
Component Names and Functions
Sensor
㪉
㪊
㪈Z550-SW70
No. Name Function
1 Laser beam
warning indicators
When the laser beam is turned on, both indicators will turn on.
When the laser beam is turned off, both indicators will turn off.
For 15 to 25 seconds after the power supply is turned on, both indicators will be
off indicating that the laser beam is off.
2 Laser emitter Emits the laser beam.
3 Laser receiver Receives the laser beam.

18
SECTION 1 Component Names and Functions
Setup Manual
SECTION 1
Wiring and Connection
Controller
* Dip switch settings
㬍㬍㬍 㬍 㬍 㬍 㬍 㬍 㬍 㬍 㬍 㬍
㬍 㬍 㬍
㬍㬍 㬍 㬍 㬍 㬍 㬍 㬍
㬍 㬍 㬍 㬍 㬍 㬍 㬍 㬍 㬍 㬍
㬍 㬍
㬍 㬍 㬍 㬍 㬍 㬍 㬍
㬍 㬍 㬍
4
5
Do not remove the
sticker on the side.
Do not open.
6
7
9
2
13
3
8
10
11
Z5FP-MC10
Shading indicates parts that are lifted to see the terminals underneath.
POWER
No. Name Function
1 Ground wire terminal Connected to the ground wire.
2 Power supply terminal Connected to the power supply.
3 Output terminals Connected to external devices such as a PLC.
4 Input terminals Connected to external devices such as a PLC.
5 Monitor connector Connected to the monitor.
6 Console connector Connected to a console.
7 Sensor connector Connected to the sensor.
8 Analog output terminals Connected when using analog output.
9 Dip switch Used to select the language of the messages displayed on the screen.*
10 RS-232C connector Connected to external devices such as a personal computer or PLC.
11 POWER indicator lamp Lit while the power is on.
Switch 1 Switch 2 Switch 3 Switch 4 Switch 5 Switch 6 Switch 7 Switch 8
Always off Off:
Japanese
On:
English
Always off Always on Always off
OFF
Japanese
English
OFF
ON
OFF
Table of contents
Other Omron Accessories manuals

Omron
Omron ZN-TH11-S User manual

Omron
Omron F160-2 - 2 User manual

Omron
Omron E8F User manual

Omron
Omron ZFV-SC50 Series User manual

Omron
Omron E3T-C User manual

Omron
Omron E3Z-LR User manual

Omron
Omron ZS-HLDS14AFT User manual

Omron
Omron ZFX-C20 User manual

Omron
Omron E3ZS User manual

Omron
Omron ZW-7000 Series User manual

Omron
Omron ZS-HLDS5T User manual

Omron
Omron 2JCIE-BL01 User manual

Omron
Omron E2C-EDA Series User manual

Omron
Omron E2E-Y - User manual

Omron
Omron FHV7H-C004-H19-MC User guide

Omron
Omron E3M-V - User manual

Omron
Omron ZFV-SC90 Series User manual

Omron
Omron F3S-TGR-SB - User manual

Omron
Omron ZJ-SD Series User manual

Omron
Omron ZFV-SC10 Series User manual