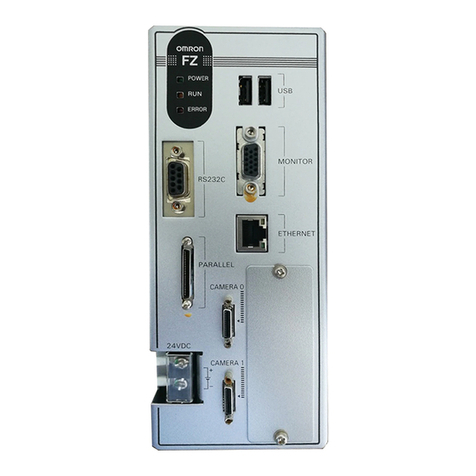
Omron F150-2 User manual

Cat. No. Z133-E1-01B
F150-2
Manual 2:
AUTO MENU
OPERATION MANUAL
Vision Sensor

!
!
!
iv
Notice:
OMRON products are manufactured for use according to proper procedures
by a qualified operator and only for the purposes described in this manual.
The following conventions are used to indicate and classify precautions in
this manual. Always heed the information provided with them. Failure to
heed precautions can result in injury to people or damage to property.
DANGER Indicates an imminently hazardous situation which, if not
avoided, will result in death or serious injury.
WARNING Indicates a potentially hazardous situation which, if not
avoided, could result in death or serious injury.
Caution Indicates a potentially hazardous situation which, if not
avoided, may result in minor or moderate injury, or property
damage.
Visual Aids
The following headings will help you locate different types of information.
Note Indicates information of particular interest for efficient and con-
venient operation of the product.
→Indicates pages where additional information can be found.
1Indicates a procedure. The step numbers in the procedure
correspond to the numbers in any related illustrations.
OMRON, 1999
All rights reserved. No part of this publication may be reproduced, stored in a retrieval system, or transmitted,
in any form, or by any means, mechanical, electronic, photocopying, recording, or otherwise, without the prior
written permission of OMRON.
No patent liability is assumed with respect to the use of the information contained herein. Moreover, because
OMRON is constantly striving to improve its high-quality products, the information contained in this manual is
subject to change without notice. Every precaution has been taken in the preparation of this manual. Never-
theless, OMRON assumes no responsibility for errors or omissions. Neither is any liability assumed for dam-
ages resulting from the use of the information contained in this publication.

TABLE OF CONTENTS
v
PRECAUTIONS ix. . . . . . . . . . . . . . . . . . . . .
1 Safety Precautions x. . . . . . . . . . . . . . . . . . . . . . . . . . . . . . .
2 General Precautions xi. . . . . . . . . . . . . . . . . . . . . . . . . . . . . .
SECTION 1
The Auto Menu Mode 1. . . . . . . . . . . . . . . .
1-1 Features 2. . . . . . . . . . . . . . . . . . . . . . . . . . . . . . . . . . .
1-2 Overview of F150 Installation and Operation 4. . . . . .
1-3 Input and Output 5. . . . . . . . . . . . . . . . . . . . . . . . . . . . .
1-4 Data Compatibility 5. . . . . . . . . . . . . . . . . . . . . . . . . . .
SECTION 2
Basic Operation 7. . . . . . . . . . . . . . . . . . . . . .
2-1 Starting and Quitting 8. . . . . . . . . . . . . . . . . . . . . . . . .
2-2 Input Devices 10. . . . . . . . . . . . . . . . . . . . . . . . . . . . . . .
2-3 Screen Displays 11. . . . . . . . . . . . . . . . . . . . . . . . . . . . .
2-4 Menu Tree 13. . . . . . . . . . . . . . . . . . . . . . . . . . . . . . . . .
SECTION 3
Operating Procedure 15. . . . . . . . . . . . . . . . .
3-1 Overview 16. . . . . . . . . . . . . . . . . . . . . . . . . . . . . . . . . .
3-2 Displaying Images 17. . . . . . . . . . . . . . . . . . . . . . . . . . .
3-3 Registering Images 18. . . . . . . . . . . . . . . . . . . . . . . . . . .
3-4 Setting Measurement Conditions 21. . . . . . . . . . . . . . . .
3-5 Checking Measurements 24. . . . . . . . . . . . . . . . . . . . . .
3-6 Measuring Objects 28. . . . . . . . . . . . . . . . . . . . . . . . . . .
3-7 Optional Functions 29. . . . . . . . . . . . . . . . . . . . . . . . . . .
3-8 Changing Scenes 44. . . . . . . . . . . . . . . . . . . . . . . . . . . .
3-9 System Settings 46. . . . . . . . . . . . . . . . . . . . . . . . . . . . .
3-10 Saving to Flash Memory 61. . . . . . . . . . . . . . . . . . . . . .
SECTION 4
Terminal Block 63. . . . . . . . . . . . . . . . . . . . . .
4-1 I/O Formats 64. . . . . . . . . . . . . . . . . . . . . . . . . . . . . . . . .
4-2 Terminal Signal Operation and Timing 65. . . . . . . . . . .
4-3 Communications Settings 72. . . . . . . . . . . . . . . . . . . . . .
SECTION 5
CompoBus/D Settings 75. . . . . . . . . . . . . . . . .
5-1 Communications Settings 76. . . . . . . . . . . . . . . . . . . . . .
5-2 Input Format 81. . . . . . . . . . . . . . . . . . . . . . . . . . . . . . . .
5-3 Output Format 83. . . . . . . . . . . . . . . . . . . . . . . . . . . . . .
5-4 Timing Charts 85. . . . . . . . . . . . . . . . . . . . . . . . . . . . . . .
5-5 Allocation Charts 88. . . . . . . . . . . . . . . . . . . . . . . . . . . .

TABLE OF CONTENTS
vi
SECTION 6
RS-232C Communications Settings 91. . . . .
SECTION 7
Troubleshooting 95. . . . . . . . . . . . . . . . . . . . .
Index 99. . . . . . . . . . . . . . . . . . . . . . . . . . . . . . .
Revision History 101. . . . . . . . . . . . . . . . . . . . .

vii
About this Manual:
This manual describes the operation of the F150 Vision Sensor using the Auto Menu and
includes the sections described below. This is one of three manuals used to operate the
F150. Refer to the following table for the contents of each manual.
Manual Contents Cat. No.
1: Setup
Manual
Provides information on system hardware and
installation. Be sure to read this manual first.
Z132
2: Auto Menu
Operation
Manual
Describes operation of the F150 using the Auto
Menu. The Auto Menu enables the simplest
operation for OK/NG outputs based on registered
images of acceptable and unacceptable products.
Z133
3: Expert
Menu
Operation
Manual
Describes operation of the F150 using the Expert
Menu. The Expert Menu enables application of all
F150 capabilities, including setting region images
and criteria, and outputting judgement results and
data via the terminal block, RS-232C or
CompoBus/D.
Z134
Please read the above manuals carefully and be sure you understand the information
provided before attempting to install and operate the F150.
Section 1 The Auto Menu Mode outlines the features of the Auto Menu mode and
explains what can be achieved by using it. It also describes the overall flow of F150
application and basic operations, and the conventions used in this manual.
Section 2 Basic Operation describes the starting and quitting of Auto Menu mode
operation and the basic menu operations.
Section 3 Operating Procedures describes how to operate the F150 using the Auto
Menu mode.
Section 4 Terminal Block describes the communications settings and I/O formats for
communications with external devices via the terminal blocks.
Section 5 CompoBus/D Settings describes the communications settings required
when the F150 is used as a CompoBus/D Slave.
Section 6 RS-232C Communications Settings describes the communications set-
tings for the RS-232C port when making a backup to a personal computer or operating
the F150 menus from a personal computer.
Section 7 Troubleshooting lists the errors that may occur during F150 operation, along
with their probable causes and remedies.
WARNING Failure to read and understand the information provided in this
manual may result in personal injury or death, damage to the
product, or product failure. Please read each section in its
entirety and be sure you understand the information provided
in the section and related sections before attempting any of
the procedures or operations given.
!

ix
PRECAUTIONS
This section provides general precautions for using the F150 Vision Sensor.
The information contained in this section is important for the safe and reliable
application of the F150 Vision Sensor. You must read this section and understand the
information contained before attempting to set up or operate a F150 Vision Sensor.
1 Safety Precautions x. . . . . . . . . . . . . . . . . . . . . . . . . . . . . . . .
2 General Precautions xi. . . . . . . . . . . . . . . . . . . . . . . . . . . . . . .

!
!
!
!
!
!
!
!
!
!
1PRECAUTIONS
x
1 Safety Precautions
Caution Do not touch fluorescent or halogen lights while
the power is ON or immediately after the power is
turned OFF. These lights generate heat and can
cause burns.
Caution Cover the terminal blocks with the Terminal Block
Protection Covers.
Caution Use DC power supplies with safe extra low-volt-
age circuits on the secondary side for the main
F150 power supply and power supplies for the
terminal blocks.
Caution Do not use the F150 in environments with flam-
mable or explosive gases.
Caution Install the F150 away from high-voltage equip-
ment or motors to ensure safety during operation
and maintenance.
Caution Use the power supply cables and crimp terminals
of specified sizes.
Caution Use at the power supply voltages specified in this
manual.
Caution Be sure to securely tighten the screws when
mounting F150 components.
Caution Do not dismantle, repair or modify any F150 com-
ponents.
Caution Dispose of F150 components as industrial waste.

!
!
2PRECAUTIONS
xi
Caution To prevent damage from static electricity, use a
wrist strap or another device for preventing elec-
trostatic charges when touching terminals or con-
nector signal lines.
Caution Do not turn OFF the power while a message is
being displayed indicating that processing is
being performed. Data in memory will be
destroyed, and the F150 may not operate cor-
rectly the next time it is started.
2 General Precautions
The user must operate the product according to the performance
specifications described in the operation manuals.
Before using the product under conditions which are not
described in the manual or applying the product to nuclear con-
trol systems, railroad systems, aviation systems, vehicles, com-
bustion systems, medical equipment, amusement machines,
safety equipment, and other systems, machines, and equipment
that may have a serious influence on lives and property if used
improperly, consult your OMRON representative.
Make sure that the ratings and performance characteristics of
the product are sufficient for the systems, machines, and equip-
ment, and be sure to provide the systems, machines, and equip-
ment with double safety mechanisms.

1
SECTION 1
The Auto Menu Mode
This section outlines the features of the Auto Menu mode and explains what can be
achieved by using it. It also describes the overall flow of F150 application and basic opera-
tions, and the conventions used in this manual.
1-1 Features 2. . . . . . . . . . . . . . . . . . . . . . . . . . . . . . . . . . . .
1-2 Overview of F150 Installation and Operation 4. . . . . . .
1-3 Input and Output 5. . . . . . . . . . . . . . . . . . . . . . . . . . . . .
1-4 Data Compatibility 5. . . . . . . . . . . . . . . . . . . . . . . . . . . .

1-1SectionFeatures
2
1-1 Features
The Auto Menu mode provides the easiest operation of the F150.
Measurement conditions can be set automatically merely by reg-
istering images of acceptable (OK) and unacceptable (NG) prod-
ucts. Up to 23 images of unacceptable objects can be stored in
memory, allowing easy verification of previous faults. Various
options, such as for image adjustment, position compensation,
and drawing of measurement regions have been added.
The following F150 features are supported by Auto Menu mode.
Sample Image Registration →p 18
Acceptable and unacceptable images can be registered as sam-
ples, and the measurement conditions for the F150 are automati-
cally set by simply inputting OK or NG for the samples.
Optional Functions →p. 29
Images can be adjusted for easier measurement. Refer to Image
Adjustment for details.
When measuring objects in almost exactly the same position
(i.e.: the objects are positioned), processing time can be reduced
by turning OFF the position compensation function. Refer to Fil-
tering for details.
The measurement region can be drawn in the desired position.
Refer to Drawing Measurement Region for details.
Scenes →p 44
Up to 16 different sets of measurement conditions can be set.
Each set of measurement conditions is called a “scene.” You can
switch scenes to automatically change the measurement condi-
tions, e.g. to those for a different measurement object.
Measurement Images →p 52
Up to 23 measurement images are stored in memory for easy
confirmation of past images to see what problems have
occurred. The images in memory are cleared when power is
turned OFF or the scene is changed. These images, however,
may be backed up to a computer.

1-1SectionFeatures
3
Terminal Blocks, CompoBus/D
Measurement triggers can be input, and judgements (OK/NG)
can be output via the terminal blocks or CompoBus/D. (Actual
measurement values cannot be output from the terminal blocks,
only the OK/NG measurement results.)
Note The external devices with which communications are supported
vary with the model. →p. 5
RS-232C Port →p 48
Data can be backed up on a personal computer or other external
device via the RS-232C port.

1-2SectionOverview of F150 Installation and Operation
4
1-2 Overview of F150 Installation and
Operation
The following table shows the basic steps that must be per-
formed to use the F150.
Step Manual
1: Unit Connections and Wiring
Programmable Controller Video
Monitor
Console
IBM Program-
mable Controller/
AT or compatible
computer
Power Supply
Camera with Light Source
Synchronous
sensor
Setup Manual
2: Setting Measurement Conditions
Video
Monitor
Easy Operation:
Auto Menu
Operation Manual
Advanced Operation:
Expert Menu
Operation Manual
3: Confirming Operation, Measuring
Objects, and Outputting Results
Programmable
Controller
Synchronous
sensor
IBM Program-
mable Controller/
AT or compatible
computer Video
Monitor

1-4SectionData Compatibility
5
1-3 Input and Output
The kind of communications supported varies with the model as
shown below.
Item F150-C10E-2
F150-C15E-2
F150-C10E-2-DRT
External communications Connector for RS-232C
connections
Terminal
block
Connector for RS-232C
connections
Connector for CompoBus/D
connections
Terminal
block
Input Console Yes Yes
p
Terminal block Yes Yes (except DI0 to DI7)
CompoBus/D No Yes
RS-232C No (see note) No (see note)
Output Terminal block Yes Yes (except DO0 to DO15)
p
CompoBus/D No Yes
RS-232C No (see note) No (see note)
Note RS-232C can be used to operate the F150 from a personal com-
puter or to make backup data. However, input of commands and
output of results are not supported.
1-4 Data Compatibility
Scene and system data for version 1.jj is not compatible with
this version and cannot be used. It is necessary to make new
data settings.

7
SECTION 2
Basic Operation
This section describes the starting and quitting of Auto Menu mode operation and the basic
menu operations.
2-1 Starting and Quitting 8. . . . . . . . . . . . . . . . . . . . . . . . . .
2Ć1Ć1 Starting 8. . . . . . . . . . . . . . . . . . . . . . . . . . . . . . . . .
2Ć1Ć2 Quitting 8. . . . . . . . . . . . . . . . . . . . . . . . . . . . . . . . .
2-2 Input Devices 10. . . . . . . . . . . . . . . . . . . . . . . . . . . . . . . .
2Ć2Ć1 Console 10. . . . . . . . . . . . . . . . . . . . . . . . . . . . . . . . .
2Ć2Ć2 RSĆ232C 11. . . . . . . . . . . . . . . . . . . . . . . . . . . . . . . .
2-3 Screen Displays 11. . . . . . . . . . . . . . . . . . . . . . . . . . . . . .
2-4 Menu Tree 13. . . . . . . . . . . . . . . . . . . . . . . . . . . . . . . . . .

2-1SectionStarting and Quitting
8
2-1 Starting and Quitting
2-1-1 Starting
Note Before connecting components or wiring power supply lines and
grounding wires, be sure to refer to the relevant section in the
Setup Manual.
Use the following procedure to start up the F150.
1Be sure that the basic F150 components have been con-
nected correctly. →Setup Manual p. 7
2Turn ON the power supply on the monitor.
3Turn ON the power supply on the F150.
A startup message will appear followed by a processing
message. After a short pause, the initial screen will appear.
The following screen will appear the first time power is
turned ON.
Note The startup scene and startup mode that appear when power is
turned ON can be set. Use these settings to make daily operation
more efficient once the F150 is ready for actual operation.
→p. 58
2-1-2 Quitting
Save all settings to flash memory before turning OFF the power.
The data in flash memory is loaded each time the F150 is started.
Any changes made will be lost unless they are saved to the flash
memory.
The measurement images and sample images in memory are
also cleared when the power is turned OFF. These images can-
not be saved to flash memory, but they can be backed up on a
computer if required. →p 48

!
2-1SectionStarting and Quitting
9
Caution Do not turn OFF the power or input a RESET signal while a mes-
sage is being displayed in any save or load operation. Data in
memory will be destroyed, and the F150 may not operate cor-
rectly the next time it is started.
1Display the Basic Screen.
2Move the cursor to MON and press the ENT Key.
3Select SAVE.
4A confirmation message will be displayed. Select Execute
to save any changes. When saving is completed, the screen
from step 1 will be returned.
5Turn OFF the power to the F150.

2-2SectionInput Devices
10
2-2 Input Devices
2-2-1 Console
The Console is used to perform menu operations. Be sure to
familiarize yourself with Console operations before actually
using the menus.
TRIG (trigger) Key
ESC (escape) Key
Up, Down, Left,
and Right Keys
SHIFT Key
ENT (enter) Key
Key Function
ESC: Escape Key The function of this key varies with the screen displayed. The
function is displayed at the bottom of the screen.
When moving between menus, pressing this key interrupts
processing and returns the user to the previous menu display.
TRIG: Trigger Key Starts object measurement.
ENT: Enter Key Executes a function or set a value.
Up and Down Keys Used to move the cursor up and down to select items.
Also used to set values. The Up Key will increase a value by 1
and the Down Key will decrease a value by 1. Continue
pressing the Up or Down Key to quickly increase or decrease a
value.
Left and Right Keys Used to move the cursor left or right to select items.
SHIFT Key Must be pressed in combination with another key to have any
affect. Specific functions are assigned to Shift + another key
for specific screens.

2-3SectionScreen Displays
11
2-2-2 RS-232C
For details of menu operation via RS-232C, refer to Section 6
RS-232C Communications Settings.→p. 91
2-3 Screen Displays
The F150 is operated by selecting functions from the screen.
Scene number
Mode
Key operations
Cursor
Functions
The current scene number is given. There are 16 scenes that can
be created.
The current operating mode is displayed.
Display Meaning
SET Sets the measurement conditions.
MON
(Monitor)
Checks whether measurement is being performed
correctly under the set measurement conditions.
The measurement results are displayed on the
monitor only. The results cannot be output to
external devices.
RUN Performs measurement. The measurement results
are output to an external device via a terminal
block or CompoBus/D.
SYS (System) Sets system conditions for the F150.
SAVE Saves data to flash memory. If new settings have
been made, be sure to save the data before
quitting.
Displays special key combinations at the bottom of the screen
where available.
Scene
Number
Mode
Key
Operations

2-3SectionScreen Displays
12
The available functions are displayed on the menus.
The cursor is moved to the desired function by pressing the Cur-
sor Keys. The selected item is displayed in reverse black/white.
Functions
Cursor

2-4SectionMenu Tree
13
2-4 Menu Tree
The following diagram shows the menu tree of the F150.
Scene 0 Scene 0
Scene 15
Copy
Clear
p. 44
Set Option Adjust Shutter speed p. 30
Filtering p. 31
BGS levels p. 32
Position compensation p. 34
Inspection
region
Region 0
p. 36
Region 15
Monitor p. 24
Run p. 28
System setting Communications RS-232C
Normal
Host Link
Terminal block
p. 91
p. 63
Not used with Auto Menu.
CompoBus/D settings p. 78 Only displayed for
F150-C10E-2-DRT.
CompoBus/D reference p. 80
Backup System data
Scene data
Output Not used with Auto Menu.
System and scene data
Image data
p. 48
Switch menu p. 58
Startup mode p. 58
Error method
Version
p. 60
p. 61
Save p. 61
Display p. 52
Other manuals for F150-2
1
Table of contents
Other Omron Accessories manuals

Omron
Omron MS4800E User manual

Omron
Omron FZ2 Series User manual

Omron
Omron F3ET2 Series User manual

Omron
Omron ZX-E - User manual

Omron
Omron Z4M-WR User manual

Omron
Omron ZFV-SC150 Series User manual

Omron
Omron E3C-LDA - 3 User manual

Omron
Omron E3S-C - User manual

Omron
Omron ZFX-C10 COMMUNICATION Operating manual

Omron
Omron ZG2 Series How to use

Omron
Omron E3X-DA-SE-S User manual

Omron
Omron F3SJ-A series User manual

Omron
Omron E2K-F User manual

Omron
Omron E3JK User manual

Omron
Omron E2EL User manual

Omron
Omron E3F User manual

Omron
Omron ZG2 Series User manual

Omron
Omron E3ZS-T81A User manual

Omron
Omron FQ-MS120 User manual

Omron
Omron E32 - User manual