16151413
12
11
10
89 17
USE THE UNIT
■Cases where the unit may not be able to
count steps accurately
Irregular movement
●When the unit is placed in a bag that moves
irregularly.
●When the unit hangs from your waist or a bag.
Inconsistent walking pace
●When you shuffle or wear sandals etc.
●When you cannot walk at a consistent pace in a
crowded area.
Excessive vertical movement or vibration
●When standing up and/or sitting down.
●When doing sports other than walking.
●When ascending or descending stairs or on a steep
slope.
●When there is vertical or horizontal vibration in a
moving vehicle such as on the bicycle, in a car, trains
or a bus.
When walking very slowly
USE THE UNIT
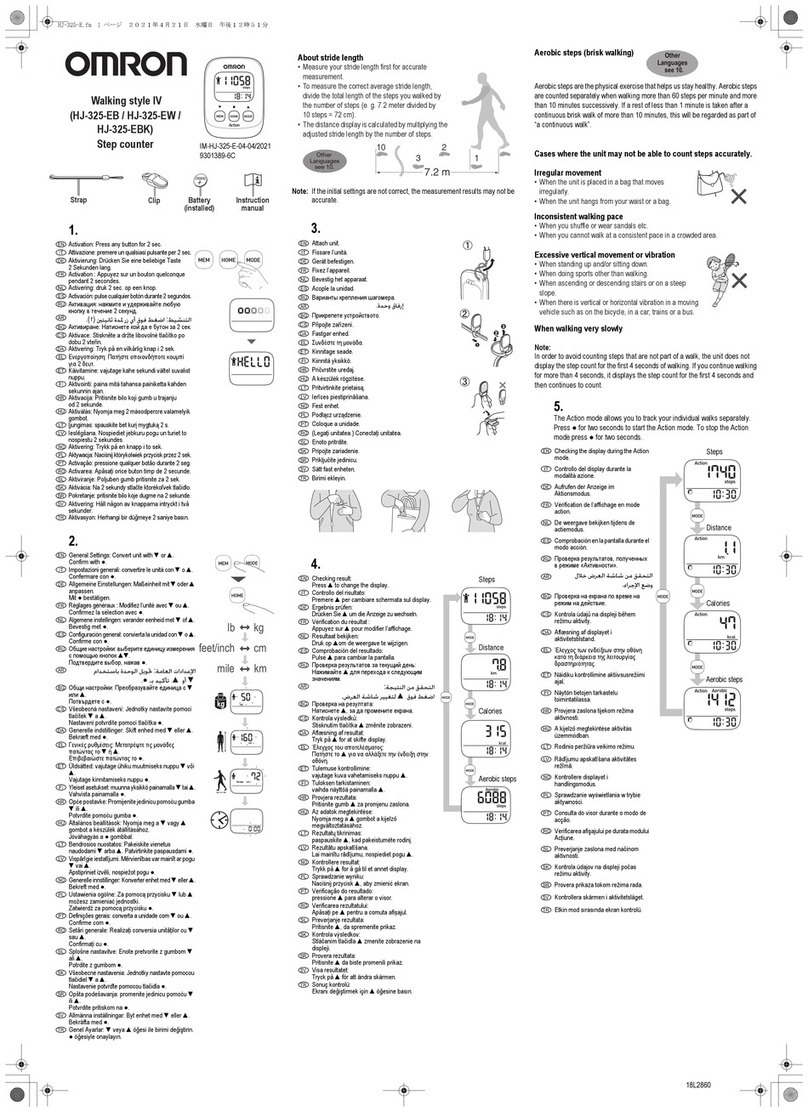
Start walking.
After you walk, press to read the data.(Refer to “Check
The Measurement Results” on page 10.)
Notes:
●In order to avoid counting steps that are not part of a
walk, the unit does not display the step count for the first
4 seconds of walking. If you continue walking for more
than 4 seconds, it displays the step count for the first 4
seconds and then continues to count.
●This unit resets to “0” at midnight (0:00) each day.
To ensure an accurate step count, be sure to read “Cases
where the unit may not be able to count steps accurately”
on page 8 before using the unit.
■Activity mode
The activity mode stores the measurement values for a
specified walking period or session.
Note: You cannot check the current display or memory
function when using the activity mode.
Press for two seconds.
rotates when using the activity mode.
Start walking.
The display changes with each press of to display the step count,
distance, calories burned, fat burned and aerobic steps in that order.
●Press for two seconds from any of the activity
mode displays to finish the activity mode.
●Press to view the measurement results after the
activity mode has finished.
Notes:
●Only one session can be stored in memory for the
activity mode.
●If you don’t stop the activity mode within 24 hours, the
unit will go back to the normal mode.
CHECK THE MEASUREMENT RESULTS
1 Check the current display
Press to change the display.
Steps taken during a day
Displays the symbol
when you reach 10,000
steps for a day.
Distance walked during
a day
Calories during a day
Fat burned
Aerobic steps
■About the energy saving function
In order to save energy, the display of the unit will be
turned off if no buttons are pressed for more than 5
minutes. However, the unit will continue to monitor your
step count.
Press any button to turn the display on again.
CHECK THE MEASUREMENT RESULTS
2 Check the display during the activity mode
Press to change the display.
Steps taken during the
activity mode.
Distance walked during
the activity mode.
Calories during the
activity mode.
Fat burned during the
activity mode.
Aerobic steps during
the activity mode.
USE THE MEMORY FUNCTION
■Memory function
The measurements for each day (steps, distance, calories
burned, fat burned and aerobic steps) are automatically
stored in memory and reset to 0 at midnight (0:00) each
day.
Recall data
1Press to select the type of display you want to see.
2 Press to view the measurement results.
The display changes with each press of as shown below.
●Keep pressed to automatically change the display
until the current display is displayed.
●Press to return to the current display.
Current display
Activity mode
memory
Memory for 1 to 7
days
Notes:
●You cannot use the memory function when using the
activity mode.
●If no buttons are pressed for more than 1 minute, the
display returns to the current display.
DELETE ALL SETTINGS
To clear all of the set values and measured results (past
measurement results), initialize your main unit as follows.
1Press and hold and at the same time.
The “lb” or “kg” flashes on the display.
2Press and hold and at the same time again.
After “Clr” has been displayed, “lb” and “kg” flash on the
display.
Notes:
●To continue using the unit, reset the weight, height,
stride length and time.(Refer to “Settings” on page 5.)
●After "Clr" has been displayed, if no settings are made
for more than 5 minutes, the unit will revert to the factory
mode.
BATTERY LIFE AND REPLACEMENT
When “ ” blinks/lights up, replace the battery with a
new one (CR2032).
Blinks Battery power is low.
Lights up Battery is exhausted.
The unit stops measurement.
Note: Do not replace the battery around 12 midnight or
doing so may cause erroneous measurement
results.
BATTERY LIFE AND REPLACEMENT
If the symbol blinks or lights up on the display, replace
the battery with a new (CR2032) battery.
If the battery is replaced, please input the settings again.
(Refer to “Settings” on page 5.)
Note: The supplied battery is for trial use. This battery can
run out within 6 months.
Replace the battery
1Turn the button on the back of the unit to left, unlock
and remove the battery cover by pulling it off in the
direction of the arrow.
2Remove the battery with a
thin, sturdy, stick that will
not break easily.
Note: Do not use a pair of
metal tweezers or a screwdriver.
3Insert the battery (CR2032)
with the positive (+) side
face up.
4Replace the battery cover
by sliding the catch in first,
then turn the button to
right and lock the
battery cover.
MAINTENANCE AND STORAGE
Maintenance
Always keep the unit clean.
The unit should be cleaned with a soft dry cloth.
To remove stubborn stains, wipe the unit with a damp cloth
moistened with water or mild detergent. Then wipe it dry.
Maintenance and storage precautions
Do not use volatile liquids, such as benzene, or thinner, to
clean the unit.
Please observe the following storage conditions.
●Do not disassemble or modify the unit. Changes or
modifications not approved by OMRON HEALTHCARE
will void the user warranty.
●Do not subject the unit to strong shocks or vibrations,
drop it, step on it, or leave it at an angle.
●Do not immerse the unit or any of the components in
water.
The unit is not waterproof. Do not wash it or touch it with
wet hands. Be careful that water does not get into the
unit.
●Do not subject the unit to extreme temperatures,
humidity, moisture, or direct sunlight.
●Do not store the unit where it will be exposed to
chemical or corrosive vapours.
Always store the unit out of the reach of young children.
Remove the batteries if the unit will not be used for a long
time (3 months or more).
TROUBLESHOOTING
Phenomenon Cause Rectification
blinks or
lights up
Battery weak
or exhausted.
Insert a new 3V
Lithium battery type
CR2032. (Refer to
page 13 )
Nothing is
displayed.
Polarities of
battery (+ and -)
aligned in wrong
directions.
Insert battery in
correct alignment.
(Refer to page 14 )
Battery weak
or exhausted.
Insert a new 3V
Lithium battery type
CR2032. (Refer to
page 14 )
Energy saving
function
active.
Press either of ,
or . (Refer to
page 10 )
Displayed values
are incorrect.
The unit is
attached
incorrectly.
Follow instructions.
(Refer to page 7 )
You are
walking at
inconsistent
pace.
Follow instruction.
(Refer to page 8 )
Settings are
wrong.
Change settings.
(Refer to page 6 )
The display is unusual or the
buttons do not operate normally.
Remove the battery
then insert it again.
(Refer to page 14 )
Note: If a malfunction has occurred and you need to repair
your unit, all settings and measurement results are
deleted. We recommend you to record measurement
results.
SPECIFICATIONS
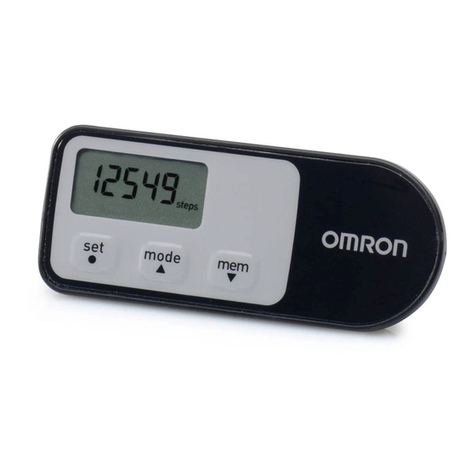
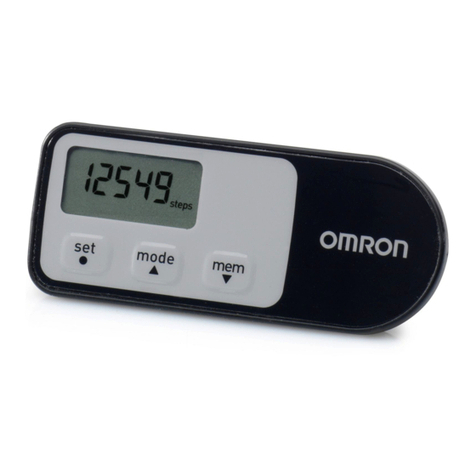
Product name Walking style
Type HJ-325(HJ-325-AP)
Power supply 3V Lithium battery type CR2032
Battery life Approx. 6 months*
(when used for 14 hours a day).
Note:
Supplied battery is for trial use.
This battery can run out within 6 months.
Measurement Steps: 0 to 99,999 steps
range Distance walked: 0.0 to 999.9 km /
0.0 to 621.3 miles
Calories: 0 to 59,999 kcal
Fat burn: 0.0 to 999.9 g
Aerobic steps: 0 to 99,999 steps
Time: 0:00 to 23:59
Memory Previous 7 days on display
1 activity mode results on display
Setting range
Time: 0:00 to 23:59
Height:
100 to 199 cm in increments of 1 cm/
3'4"to 6'6" in increments of 1 inch
Weight: 30 to 136 kg in increments of 1 kg/
66 to 300 lb in increments of 1lb
Stride length: 30 to 120 cm in increments of
1 cm / 12" to 48" in increments
of 1 inch
Operating -10°C to +40°C/30 to 85% RH
temperature/
humidity
External 42.0(W) × 57.0(H) × 13.0(D) mm
dimensions
Weight Approx. 23 g (including battery)
Contents Step counter, Strap, Clip, 3V Lithium battery
type CR2032 and Instruction manual
These specifications are subject to change without notice.
*New battery life based on OMRON testing.

