Ooni Pro User manual

Ooni Pro
ESSENTIALS GUIDE
How to set up, use and look after
Ooni Pro, plus handy tips and recipes

Ooni Pro is designed for outdoor use only.
Your safety is paramount. Please read the
Ooni Pro safety manual carefully.
Keep Ooni Pro company while preheating and
cooking. It must not be left unattended while lit.
Ooni Pro has been designed to run at up to
932°F (500°C). If Ooni Pro exceeds these
temperatures, remove fuel hatch to let out heat
Ensure children and pets are kept at a safe
distance and supervised at all times around
Ooni Pro.
Ooni Pro will get hot. Do not touch the outer
shell while in use.
Important
Ooni Pro can be left to cool naturally with the door
off. If you leave the door on when cooling from these
extreme temperatures, it may become damaged.
Important: The glass door with thermometer must
be removed during the cooling process.
Ooni Pro may overheat if too much fuel has been added
in one go. It is best to gradually build heat, adding fuel
little and often. If Ooni Pro exceeds normal cooking
temperatures, it is easy to lower by:
• Removing the fuel hatch to let out heat
• Stopping adding fuel
• Resting a cast iron pan on the stones to absorb heat
Caution: Do not expose the glass door to water or
moisture while hot! This may cause the glass to crack
or break.

Ooni Pro is the world’s most versatile outdoor oven and is
capable of running on wood, charcoal, wood pellets or gas*.
With Pro you can create delicious food with your family and
friends and adapt to the style of cooking that best suits the
particular dish you’re making. Ooni Pro is a game-changer and
we are very excited to see what you make with yours.
The options are limited only by your imagination: 16”
pizzas, slow-roasted joints of meat, loaves of bread, roasted
vegetables and more can all be cooked in your Ooni Pro.
We put this guide together to help you get the most out of
using your new Ooni Pro. We will take you from unboxing and
setting up to Ooni care and beyond.
We know that you will love it.
Thank you and welcome to the Ooni Community,
Kristian and the Ooni Team
Say hello to Ooni Pro!
*Pellet Burner and Gas Burner accessories available separately and depending on region.
See ooni.com for more details.


Important notes before you cook 4
How and where to set up your Ooni Pro 6
How to get the best results from Ooni Pro 8
What’s in the box? 10
Which fuel should you use? 12
Chimney and ceiling vent positioning explained 14
The doors 16
Cooking with...
Wood 18
Charcoal 20
Pellets 22
Gas 24
Care instructions 26
Troubleshooting 28
Recipes
Ooni Classic Pizza Dough 32
Diablo III Pizza 33
Roasted Veg 34
Reverse Seared Prime Rib 35
Seafood Stew 36
Keep in touch 37
Contents

Important notes before you cook
Before you light up and start
cooking with your new
Ooni Pro, here are some
important things to note.
Caution:
Ooni Pro is designed for outdoor
use only.
Read Ooni Pro’s
safety instructions
Ooni Pro is super-fun but your
safety is paramount. Please take
the time to review the safety
guide in your manual before you
begin.
Ooni Pro is designed for
outdoor use only. Like all
fire-based products, children
and animals should not be left
unattended while Ooni Pro is lit.
Ooni Pro remains hot even
after visible flames have died
down. Allow at least two hours
after using Ooni Pro for it to
cool down before attempting to
move, clean or remove parts.
Season your Ooni Pro
We know that you are excited
to get cooking, but it’s best for
the long term if you run your
Ooni Pro once before your first
cook. We advise that you run
your Pro at top temperatures for
30 minutes, allow it to cool and
wipe down the inside with dry
paper towels.
Choose your fuel
Using the right fuel is your first
step towards delicious food. See
page 12 for further information.
If you want to switch fuel burners,
please allow your Ooni Pro to cool
first.
Use your Ooni Gloves
Always wear your Ooni Gloves
when using your Ooni Pro.
The glass door with
thermometer must be removed
during the cooling process.
Prep your food
We have a lot of recipes on our
website which are tried, tested
and delicious. Your Ooni Pro
will cook almost anything and
everything and experimentation
is all part of the fun.
See page 32 for some classic Ooni
recipes to get you started.
4

Caution: Do not run Pro at temperatures higher
than 1022°F (550°C)! This may cause stress to the
oven, which could result in damage.
5

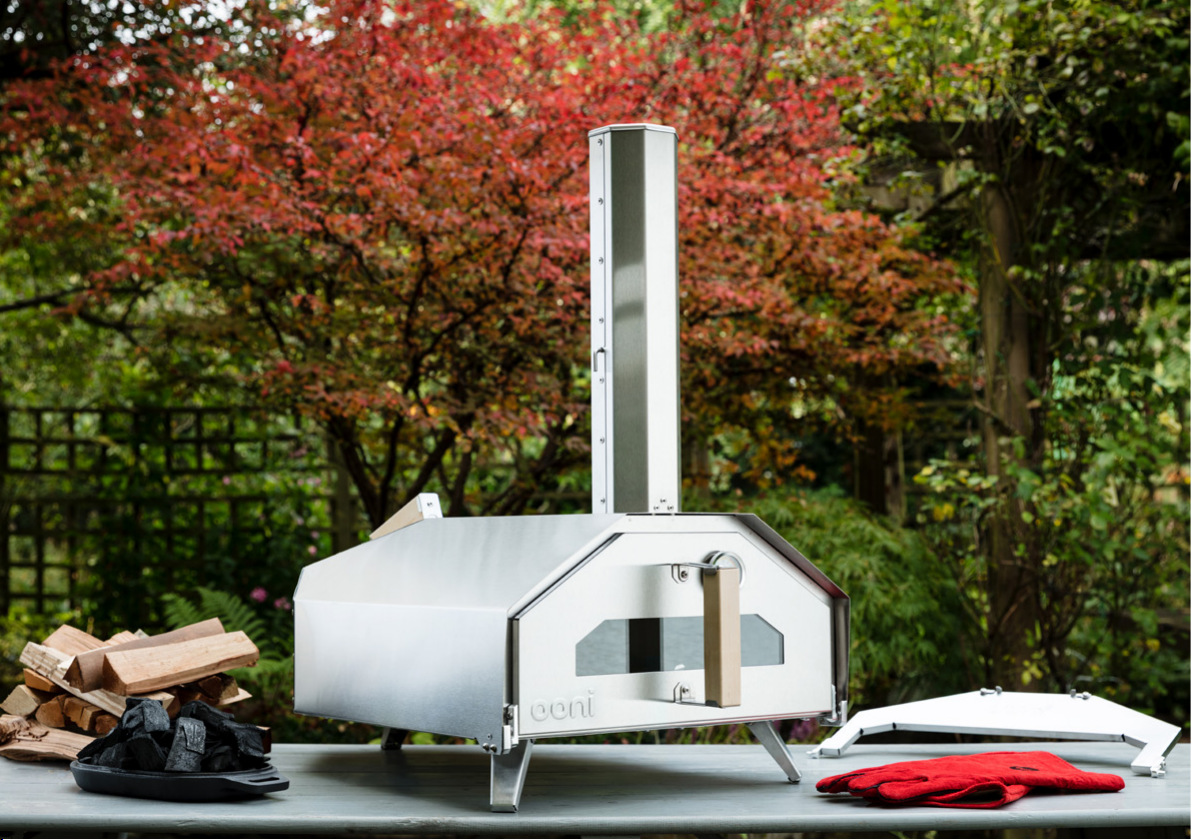
It’s time to find a space for
your Ooni Pro. Some important
things to consider are:
Assembly
Follow our online video guides
on our YouTube channel or use
the step-by-step guide in your
manual.
The table that you choose needs
to be able to hold the weight of
your Ooni Pro and, of course,
anything you wish to cook. We
recommend a sturdy table that
is capable of holding weights
upwards of 30kg (66lbs).
The table material should be
something that can handle the
radiant heat from Ooni Pro.
Wood, metal and stone are
recommended. Glass and plastic
are not suitable.
Place your Ooni Pro away from
structures and buildings. Pro
performs best when set up in
a space sheltered from wind. If
you are cooking on a breezy day,
position your Ooni Pro so that
the air enters through the back
to encourage airflow.
Do not use Ooni Pro on the
ground.
To extinguish your Ooni Pro
when you’re done cooking, allow
it to cool down naturally.
Never expose Ooni Pro to water
while it’s hot.
Protect your Ooni Pro from
adverse weather conditions,
especially rain, when not in use.
Once your Ooni Pro has cooled,
use your Ooni Pro cover to
keep it free from garden debris.
Store your Pro indoors during
extended periods without use
and during rainy spells.
Always store your stone
baking boards in a warm, dry
environment when your Ooni
Pro is not in use.
See page 26 for further care
instructions.
How and where to set up your Ooni Pro
Caution: Wind can cause flames to escape from the rear of your Ooni Pro.
Exercise caution when your Pro is lit and do not leave it unattended.
6

7

Ooni Pro Essentials is a great place to start! This will be your
guide to the features of Ooni Pro and what makes it the world’s
best outdoor oven. You can also find information online: We
have a lot of awesome online resources at ooni.com and video
guides on our YouTube channel.
If you have any questions, queries or comments then you can
Ooni Community!
How to get the best
results from Ooni Pro
8

Fuel goes in the back, food goes in the front
wood
charcoal
pellets*
*Pellet Burner and Gas Burner accessories available separately and depending on region. See ooni.com for more details.
gas*
9

x4
What’s in the box?
2. Stone Baking Boards:
Custom-made from durable
cordierite stone, they retain
heat to cook from below while
the flames cook from above.
3. Hatch: Insulated with ceramic
fibre to hold in heat. Remove
when fuelling the fire with
wood and charcoal.
4. Charcoal/Wood Burner:
Carefully designed to help
Ooni Pro reach optimum
temperatures when cooking
with charcoal and wood. The
holes in the grate serve a dual
purpose: To increase airflow
and to allow excess ash to drop
out of the burning area.
5. Ooni Gloves: To be worn at all
times when using Ooni Pro.
1. Main Body: Insulated all around
with ceramic fibre to hold in
heat. Tripod-style legs keep Ooni
Pro sturdy and safe. Includes
adjustable ceiling vent.
1. 3.
4.
5.
2.
10

8. Door with Thermometer:
Can be used for wood, charcoal
and pellet-fired cooks.
This must not be used when
running Pro on gas.
9. Pizza Door: Suitable for all fuel
types, the pizza door is locked
on to Pro using its tabs. You
can add and remove food easily
throughout your cook. Do not
remove the pizza door while hot.
10. Stone Guard: Protects the
stone baking boards.
6. Chimney Cap: To keep rain
and garden debris out of
Ooni Pro when it is not in use.
Remember to remove this
before lighting Pro.
7. Chimney: Draws heat through
Ooni Pro from the fuel source
and features a simple clip to
help secure and pack away
Ooni Pro with ease.
Before you begin assembly, please read your manual
or watch how it’s done on our YouTube channel.
Caution: Do not expose any parts of Ooni Pro to
water while hot as this may damage Ooni Pro.
6.
7.
8.
9.
10.
11

The choice is yours!
Ooni Pro has been designed
with versatility in mind and we
use different fuels for different
reasons. While cooking with
fire is as much an art as it is
a science, the following table
will give you some idea of what
results to expect from each fuel.
What to do if Pro heats past
1022˚F (550˚C)?
Pro may overheat if too much
fuel is added in one go. To lower
the temperature, stop adding
fuel and remove the hatch to let
heat out.
Which fuel should you use?
Fuel Preheat Time Temperature Benefits
Charcoal &
Wood 20-30 Minutes Up to 932°F
(500°C)
Our favourite fuel source for Ooni Pro.
Keep a steady base temperature with charcoal and add
wood for a burst of heat and wood-fired flavour.
Wood 20-30 Minutes Up to 932°F
(500°C)
Perfect for creating that stone-baked, wood-fired flavour
for authentic Neapolitan style pizzas. Wood is ideal for
anything that enjoys a fast cooking time, such as steaks,
fish and vegetables.
Charcoal 20-30 Minutes Up to 932°F
(500°C)
Charcoal gives you the option to run Ooni Pro at a lower
and consistent heat which is ideal for larger pieces of
meat or bread.
Pellets 20-30 Minutes Up to 932°F
(500°C)
We love cooking at around 300˚C - 350˚C (572˚F -
662˚F) using pellets for a delicious calzone, or even
two at a time! Use your door with thermometer for best
results.
Gas 20-30 Minutes
From
482°F - 932°F
(250°C-
500°C)
Awesome for everything! Lower temperatures for bread,
higher temperatures for pizza.
*Please note that the above figures are estimates and are dependent on weather and ambient temperatures.
12

Chimney and ceiling vent positioning explained
The majority of temperature control can be made through fuel management. The versatility of Pro also comes from the ability to control airflow
and the distribution of heat in the oven by adjusting the chimney and ceiling vents.
The default position for solid fuels in Pro is both vents open. This encourages maximum airflow through the oven, increasing flames from your
fuel source. This is perfect for pizza and other foods that enjoy a fast cooking time.
The chimney vent controls the total airflow through the body and can be adjusted while wearing your Ooni Gloves.
Open (vertical position): Maximum airflow encourages a hot
burn for wood, charcoal and pellets.
Closed (horizontal position): This dampens flame and pulls
less air through the flames and will reduce the output and
temperature.
14

The ceiling vent changes how heat behaves inside the oven. If it’s open, heat escapes straight up the chimney. Close the ceiling vent for a low, slow
cook and for a smokier taste to your food. When the ceiling vent is closed, smoke will gather for longer in the oven body before escaping from the
side air channels.
Ceiling vent: When this is closed, it will reduce air flow and
allows hot air to gather inside the oven for longer.
Side air channels: These allow hot air to escape when the
chimney vent is open and ceiling vent is closed.
Caution:
Do not adjust the ceiling vent while Pro is hot.
15

The doors
Ooni Pro’s doors have both been specially designed for optimum performance. Familiarise yourself with taking the door with thermometer off
and on before you light up. Remember, the pizza door stays on throughout your cook and can be removed when Ooni Pro has cooled.
To close the Door with Thermometer
Align the bottom edge hinges, raise the door until almost closed
then lift and release on to the latch.
Pizza Door
The pizza door is locked in place when cooking with gas, wood,
charcoal or pellets. Raise the door’s tabs to secure the door in place.
16

Important notes:
• When cooking with gas, only use the pizza door.
• Moisture may damage Ooni Pro’s door with thermometer.
• The door with thermometer must be removed during the
cooling process.
17

Cooking with wood
There is something special
about wood-fired food and we
love it at Ooni HQ. The sights,
sounds and smells are hard
to beat. Wood gives Ooni-
cooked dishes extra flavour
and is perfect for an authentic
Neapolitan stone-baked pizza.
Types of wood
We recommend the use of
high-quality, dry hardwood from
deciduous trees such as oak or
beech. We recommend wood
pieces of up to 25cm (10”)
long and around 4cm (1.5”)
in diameter as these will fit
comfortably in your charcoal/
wood burner.
Do not use treated or painted
wood. Wood with high resin
content, such as pine or spruce,
might add unwanted flavours to
your cooking.
Lighting method
To light the wood, add no
more than 4 pieces on the
charcoal/wood burner and
light using either a blow torch
or firestarters. Do not use
petroleum based firestarters
as these may impart unwanted
flavours to your food. Once your
wood is fully lit (5-10 minutes)
begin adding more wood
through the hatch.
Always wear your Ooni Gloves
when using Ooni Pro.
Maintaining temperature
Wood will give a wide range
of temperatures based on the
amount burning. Add little and
often to keep Ooni Pro running
at a consistent temperature.
As with all wood-fired cooking,
it is best to maintain your fire
gradually. Refuel when the wood
has mainly burnt to embers but
before all visible flames have
disappeared.
Do not overload the grate as too
much wood may damage your
Ooni Pro and cause excess smoke
or soot.
18
Other manuals for Pro
5
Table of contents
Other Ooni Kitchen Appliance manuals
Popular Kitchen Appliance manuals by other brands

Concept2
Concept2 CE 3510 operating manual

Silvercrest
Silvercrest SGR 150 A1 operating instructions

Silvercrest
Silvercrest SPCM 1200 A1 operating instructions

Twin Eagles
Twin Eagles BREAKFAST CLUB TEBC30-C Installation use and care manual

GARDEN MASTER
GARDEN MASTER FD-1040 Product information

Twin Eagles
Twin Eagles BREAKFAST CLUB TEBC30-CN Installation use and care manual