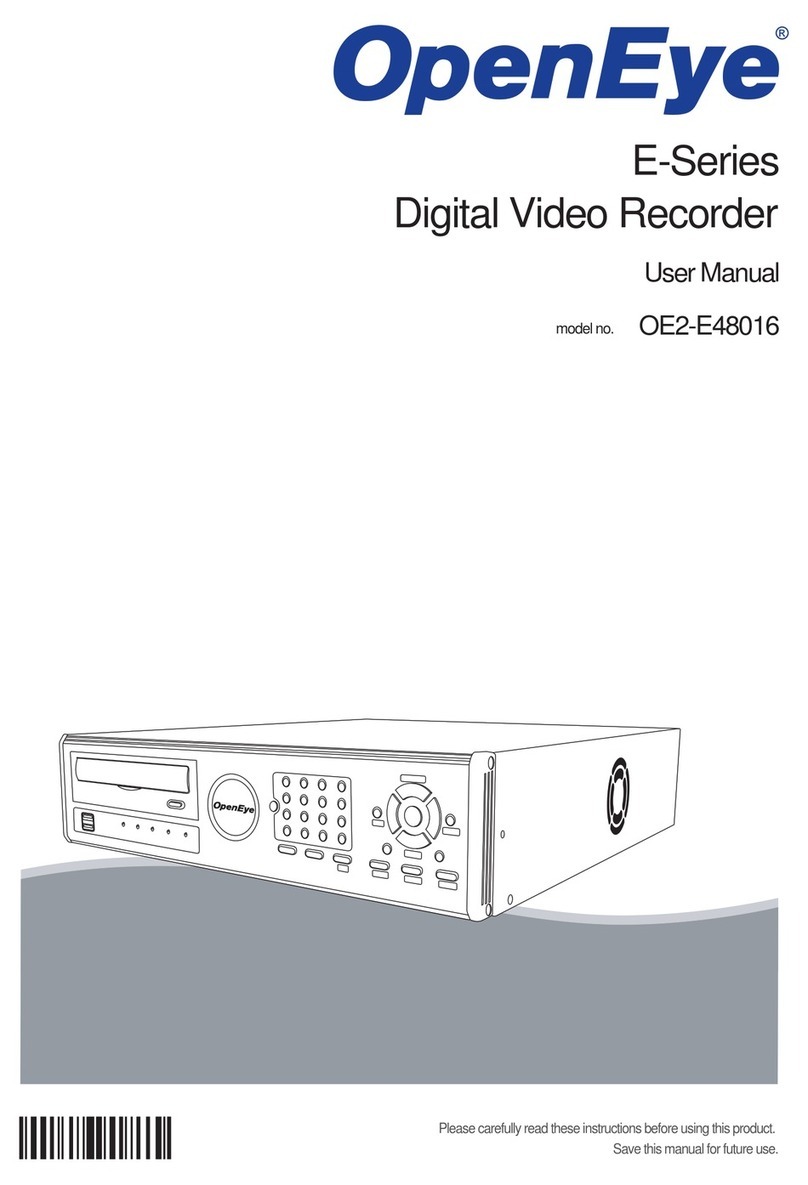
OpenEye OE2-E12016 User manual

27717AH
Please carefully read these instructions before using this product.
Save this manual for future use.
E-Series
Digital Video Recorder
User Manual
model no.model no. OE2-E12016
OE2-E12008
OE2-E12004

ii 27717AH

27717AH iii
OpenEye® E120 DVR
User Guide
Manual Edition 27717AH – APRIL 2008
©2000-2008, OpenEye
All Rights Reserved.
No part of this document may be reproduced in any means, electronic or mechanical, for any purpose, except as expressed in the Software
License Agreement. OPENEYE shall not be liable for technical or editorial errors or omissions contained herein. The information in this
document is subject to change without notice.
The information in this publication is provided “as is” without warranty of any kind. The entire risk arising out of the use of this information
remains with recipient. In no event shall OPENEYE be liable for any direct, consequential, incidental, special, punitive, or other damages
whatsoever (including without limitation, damages for loss of business profits, business interruption or loss of business information), even if
OPENEYE has been advised of the possibility of such damages and whether in an action or contract or tort, including negligence.
This software and documentation are copyrighted. All other rights, including ownership of the software, are reserved to OPENEYE. OPENEYE
and OpenEye are registered trademarks of OPENEYE in the United States and elsewhere. All other brand and product names are trademarks
or registered trademarks of the respective owners.
The following words and symbols mark special messages throughout this guide:
WARNING: Text set off in this manner indicates that failure to
follow directions could result in bodily harm or loss of life.
CAUTION:Text set off in this manner indicates that failure to follow
directions could result in damage to equipment or loss of
information.
OPENEYE
Liberty Lake, WA ●U.S.A.

iv 27717AH
IMPORTANT SAFEGUARDS
1. Read Owner’s Manual – After unpacking this product, read the owner’s manual carefully, and follow all the operating and other
instructions.
2. Power Sources – This product should be operated only from the type of power source indicated on the label. If not sure of the
type of power supply to your home or business, consult product dealer or local power company
3. Ventilation – Slots and openings in the cabinet are provided for ventilation and to ensure reliable operation of the product and to
protect it from overheating, and these openings must not be blocked or covered. The product should not be placed in a built-in
installation such as a bookcase or rack unless proper ventilation is provided or OpenEye’s instructions have been adhered to.
4. Heat – The product should be situated away from heat sources such as radiators, heat registers, stoves, or other products that
produce heat.
5. Water and Moisture – Do not use this product near water. Do not exceed the humidity specifications for the product as detailed in
the Appendix section in this manual
6. Cleaning – Unplug this product from the wall outlet before cleaning. Do not use liquid cleaners or aerosol cleaners. Use a damp
cloth for cleaning.
7. Power Cord Protection – Power-supply cords should not be routed so that they are likely to be walked on or pinched by items
placed against them, paying particular attention to cords at plugs, receptacles, and the point where they exit the product.
8. Overloading – Do not overload wall outlets; extension cords, or integral convenience receptacles as this can result in a risk of fire
or electrical shock.
9. Lightning – For added protection for this product during storm, or when it is left unattended and unused for long periods of time,
unplug it from the wall outlet. This will prevent damage to the product due to lightning and power line surges.
10. Object and Liquid Entry Points – Never insert foreign objects into the DVR, other than the media types approved by OpenEye,
as they may touch dangerous voltage points or short-out parts that could result in a fire or electrical shock. Never spill liquid of any
kind on the product.
11. Accessories – Do not place this product on an unstable cart, stand, tripod, bracket, or table. The product may fall, causing serious
personal injury and serious damage to the product.
12. Disc Tray – Keep fingers well clear of the disc tray as it is closing. Neglecting to do so may cause serious personal injury.
13. Burden – Do not place a heavy object on or step on the product. The object may fall, causing serious personal injury and serious
damage to the product.
14. Disc – Do not use a cracked, deformed, or repaired disc. These discs are easily broken and may cause serious personal injury
and product malfunction.
15. Damage Requiring Service – Unplug the unit from the outlet and refer servicing to qualified service personnel under the following
conditions:
When the power-supply cord or plug is damaged.
If liquid has been spilled, or objects have fallen into the unit.
If the unit has been exposed to rain or water.
If the unit does not operate normally by following the operating instructions. Adjust only those controls that are covered by the
operating instructions as an improper adjustment of other controls may result in damage and will often require extensive work by a
qualified technician to restore the unit to its normal operation.
If the unit has been dropped or the enclosure has been damaged.
When the unit exhibits a distinct change in performance - this indicates a need for service.
16. Servicing – Do not attempt to service this product unless instructed to by an OpenEye engineer. Opening or removing covers may
expose the user to dangerous voltage or other hazards. Refer all servicing to qualified personnel.
17. Replacement Parts – When replacement parts are required, be sure the service technician has used replacement parts specified
by OpenEye or have the same characteristics as the original part. Unauthorized substitutions may result in fire, electric shock or
other hazards.
18. Safety Check – Upon completion of any service or repairs to this unit, ask the service technician to perform safety checks to
determine that the unit is in proper operating condition.
27717AH v
NOTES ON HANDLING
Please retain the original shipping carton and/or packing materials supplied with this product. To ensure the integrity of this product when
shipping or moving, repackage the unit as it was originally received from OpenEye.
Do not use volatile liquids, such as aerosol spray, near this product. Do not leave rubber or plastic objects in contact with this product for
long periods of time. They will leave marks on the finish.
The top and rear panels of the unit may become warm after long periods of use. This is not a malfunction.
NOTES ON LOCATING
Place the unit on a level surface. Do not use it on a shaky or unstable surface such as a wobbling table or inclined stand.
If this unit is placed next to a TV, radio, or VCR, the playback picture may become poor and the sound may be distorted. If this happens,
place the DVR away from the TV, radio, or VCR.
NOTES ON CLEANING
Use a soft dry cloth for cleaning.
For stubborn dirt, soak the cloth in a weak detergent solution, wring well and wipe. Use a dry cloth to wipe it dry. Do not use any type of
solvent, such as thinner and benzene, as they may damage the surface of the DVR.
If using a chemical saturated cloth to clean the unit, follow that product’s instructions.
NOTES ON MAINTENANCE
This DVR is designed to last for long periods of time. To keep the DVR always operational we recommend regular inspection maintenance
(cleaning parts or replacement). For details contact the nearest dealer.
NOTES ON MOISTURE CONDENSATION
Moisture condensation could damage the DVR. Read the following information carefully.
Moisture condensation might occur under the following circumstances:
When this product is brought directly from a cool location to a warm location.
When this product is moved to a hot and humid location from a cool location.
When this product is moved to a cool and humid location from a warm location.
When this product is used in a room where the temperature fluctuates.
When this product is used near an air-conditioning unit vent
When this product is used in a humid place.
Do not use the DVR when moisture condensation may occur.
If the DVR is used in such a situation, it may damage discs and internal parts. Remove any CD discs, connect the power cord of the DVR to
the wall outlet, turn on the DVR, and leave it for two to three hours. After two to three hours, the DVR will warm up and evaporate any
moisture. Keep the DVR connected to the wall outlet and moisture will seldom occur.

vi 27717AH
WARNING
TO REDUCE THE RISK OF ELECTRICAL SHOCK, DO NOT EXPOSE THIS APPLIANCE TO RAIN OR MOISTURE.
DANGEROUS HIGH VOLTAGES ARE PRESENT INSIDE THE ENCLOSURE.
DO NOT OPEN THE CABINET.
REFER SERVICING TO QUALIFIED PERSONNEL ONLY.
CAUTION
CAUTION: TO REDUCE THE RISK OF ELECTRIC SHOCK,
DO NOT REMOVE COVER (OR BACK).
NO USER-SERVICEABLE PARTS INSIDE.
REFER SERVICING TO QUALIFIED SERVICE PERSONNEL.
CAUTION
RISK OF ELECTRIC SHOCK
DO NOT OPEN
EXPLANATION OF GRAPHICAL SYMBOLS
The lightning flash with arrowhead symbol, within an equilateral triangle, is intended to
alert the user to the presence of un-insulated "dangerous voltage" within the product
enclosure that may be of sufficient magnitude to constitute a risk of electric shock to
persons.

27717AH vii
FCC STATEMENT
This equipment has been tested and found to comply with the limits for a Class A digital device, pursuant to Part 15 of the FCC Rules.
These limits are designed to provide reasonable protection against harmful interference when the equipment is operated in a commercial
environment. This equipment generates, uses, and can radiate radio frequency energy and, if not installed and used in accordance with the
instruction manual, may cause harmful interference to radio communications. Operation of this equipment in a residential area is likely to
cause harmful interference in which case the user will be required to correct the interference at his own expense.

viii 27717AH
Standard Warranty
Openeye warrants all products to be free from defects in workmanship and material under normal use for a period of one year after the
date of purchase. Any defective product that falls under this warranty will, at OpenEye's discretion, be repaired or replaced at no additional
charge. Openeye may elect to replace defective products with new or factory reconditioned products of equal or greater value. Repairs
made necessary by reason of misuse, alteration, normal wear, or accident are not covered under this warranty.
Exceptions to this are listed below:
•Two years on all X-Series, XR Series, H Series, and HR Series Digital Recorders
•Two years on all PTZ Dome Cameras
•Three Years on all E-Series Digital Recorders
•Three years on all fixed cameras
All products shall be covered by a one year advance replacement warranty*.
OpenEye will warrant all otherwise out of warranty replacement parts and repairs for 90 days from the date of OpenEye shipment.
The above warranty is the sole warranty made by OpenEye and is in lieu of all other warranties by OpenEye express and implied, including
without limitation the warranties of merchantability and fitness for a particular purpose. Under no circumstances will OpenEye be liable for
any consequential, incidental, special or exemplary damages arising out of or connected with the sale, delivery, use or performance of the
product, even if OpenEye is apprised of the likelihood of such damages occurring. In no event shall OpenEye liability exceed the purchase
price of the product.
This warranty gives you specific legal rights and you may also have other rights which vary from state to state or country to country.
*Requires corresponding security deposit.

27717AH ix
NOTES:

x 27717AH
NOTES:

27717AH xi
Table of Contents
INTRODUCTION............................................................................................................................................................1
Product Description...................................................................................................................................................1
Features....................................................................................................................................................................2
PTZ Compatibility List ...............................................................................................................................................2
Quick Start Guide......................................................................................................................................................3
INSTALLATION.............................................................................................................................................................5
Front Panel Controls .................................................................................................................................................5
Rear Panel Connectors.............................................................................................................................................6
4 Channel.............................................................................................................................................................6
8 Channel.............................................................................................................................................................7
16 Channel ...........................................................................................................................................................7
Remote Control.........................................................................................................................................................8
Connection Guide .....................................................................................................................................................9
Connecting the Monitor.........................................................................................................................................9
Video Inputs and Looping Outputs........................................................................................................................9
Connecting to a Network ......................................................................................................................................9
Connecting Audio .................................................................................................................................................9
Connecting a PTZ Camera...................................................................................................................................9
Connecting to a Sensor Input .............................................................................................................................10
Connecting to a Relay Output.............................................................................................................................10
Turning on the DVR.................................................................................................................................................10
SETUP.........................................................................................................................................................................13
Setup Menus...........................................................................................................................................................13
System....................................................................................................................................................................14
System Setup .....................................................................................................................................................14
Disk Management...............................................................................................................................................15
User Management..............................................................................................................................................16
Server............................................................................................................................................................16
Client..............................................................................................................................................................16
Configuration ......................................................................................................................................................17
Shutdown............................................................................................................................................................17
Camera ...................................................................................................................................................................18
Camera Setup ....................................................................................................................................................18
Color Setup (Adjust) ......................................................................................................................................18
PTZ Setup ..........................................................................................................................................................18
Spot /Sequence Setup........................................................................................................................................19
Monitor Setup .....................................................................................................................................................19
Record.....................................................................................................................................................................20
Record Setup......................................................................................................................................................20
Frame Setup..................................................................................................................................................20
Schedule Setup .............................................................................................................................................20
Audio Setup...................................................................................................................................................20
Instant Recording Setup ................................................................................................................................21
Instant Recording......................................................................................................................................21
Quick Record Setup............................................................................................................................................21
Motion/Event.......................................................................................................................................................22
Input Setup ....................................................................................................................................................22
Sensor Setup.................................................................................................................................................22
Action Setup ..................................................................................................................................................23
EA (Emergency Agent)..................................................................................................................................23

xii 27717AH
Network...................................................................................................................................................................24
Network Setup....................................................................................................................................................24
Enabling Free DDNS .....................................................................................................................................24
Serial Setup........................................................................................................................................................25
Client Setup........................................................................................................................................................25
E-mail Setup.......................................................................................................................................................26
Information..............................................................................................................................................................27
System Log View................................................................................................................................................27
Status View.........................................................................................................................................................27
Version View.......................................................................................................................................................27
OPERATION................................................................................................................................................................29
Search.....................................................................................................................................................................29
Searching Recorded Data ..................................................................................................................................29
Search Methods..................................................................................................................................................29
Search Details ....................................................................................................................................................30
Monitoring ...............................................................................................................................................................30
Select Channel ...................................................................................................................................................30
Popup Menu.......................................................................................................................................................31
Recording Schedule................................................................................................................................................31
Set Schedule ......................................................................................................................................................31
Backup....................................................................................................................................................................32
Manual Backup...................................................................................................................................................32
Auto Backup.......................................................................................................................................................32
Play Back Backup Image ........................................................................................................................................33
S/W Upgrade...........................................................................................................................................................33
Save Settings..........................................................................................................................................................34
Save Settings .....................................................................................................................................................34
Import Settings ...................................................................................................................................................34
Motion Detection Recording....................................................................................................................................35
PTZ Camera Control...............................................................................................................................................36
Create PTZ Preset Position................................................................................................................................36
REMOTE SOFTWARE ................................................................................................................................................39
Setup Remote Connection......................................................................................................................................39
Configuring the DVR...........................................................................................................................................39
Configuring A Remote PC ..................................................................................................................................39
Access Remote connection.....................................................................................................................................40
Using the Remote Software ....................................................................................................................................40
Setting the Time and Date..................................................................................................................................40
Display Screen ...................................................................................................................................................41
Camera View.................................................................................................................................................42
Screen Division Buttons.................................................................................................................................43
Setup Overview ..................................................................................................................................................44
Setup Screen Overview.................................................................................................................................44
Camera Setup................................................................................................................................................44
Camera Setup...........................................................................................................................................44
PanTilt Setup ............................................................................................................................................44
Sequence Setup .......................................................................................................................................44
SPOT Setup..............................................................................................................................................45
Record Setup.................................................................................................................................................45
Schedule Setup.........................................................................................................................................45
Time Setup................................................................................................................................................45
Audio Setup ..............................................................................................................................................45
Event Input................................................................................................................................................45

27717AH xiii
Motion Event.............................................................................................................................................47
Sensor Event ............................................................................................................................................47
Video Loss................................................................................................................................................47
Event Record Setup..................................................................................................................................47
HDD Setup................................................................................................................................................47
Sensor Setup.................................................................................................................................................47
Sensor.......................................................................................................................................................47
Search Overview ................................................................................................................................................48
Play Controls .................................................................................................................................................48
Performing a Basic Search............................................................................................................................49
Adjust the Brightness of an Image.................................................................................................................49
Zooming in on an Image................................................................................................................................49
Zooming in on a Portion of an Image.............................................................................................................49
Time Sync......................................................................................................................................................49
Clean Image ..................................................................................................................................................49
Save Clip as JPG...........................................................................................................................................50
Printing an Image...........................................................................................................................................50
PTZ Overview.....................................................................................................................................................51
Accessing PTZ Menus...................................................................................................................................51
Controlling a PTZ Camera.............................................................................................................................51
Using the Graphical PTZ Controller...............................................................................................................52
Using the On-screen Compass......................................................................................................................53
APPENDIX...................................................................................................................................................................56
DVR FAQ................................................................................................................................................................56
TroubleShooting......................................................................................................................................................57
Specifications (E120) ..............................................................................................................................................58

xiv 27717AH
NOTES:

27717AH 1
INTRODUCTION
PRODUCT DESCRIPTION
Operating as a standalone DVR system, the OpenEye E-Series DVR functions much like a normal PC DVR. The E-Series DVR runs on an
on-die micro-operating system, providing 120 PPS recording with integrated search and export functions. Firmware upgradeable, the on-die
OS offers unparalleled stability and protects the E-Series DVR from viruses and other performance degrading problems, which can affect
PC based DVRs. The OpenEye E-Series DVR is a cost effective and versatile solution for applications where the full functionality of a PC
based DVR is not needed.

2 27717AH
FEATURES
The OpenEye E-Series DVRs include the following features:
•Up to 16 Composite Video Input Connectors
•Compatible with Color (NTSC or PAL) and B&W Video Sources
•Multiple Search Methods (Date/Time, Calendar, Event)
•Records 120 NTSC Frames Per Second (100 PAL Frames Per Second)
•Live Real Time Video Display (480 NTSC Frames Per Second (400 PAL Frames Per Second))
•Up to 16 Looping Video Outputs
•Auto Termination (75Ohm) on Looping Outputs
•Continuous Recording with Disk Overwrite Mode
•Continuous Recording on Archiving, Transmitting to Remote, and Playback
•Motion Based Recording Uniquely Configurable for Each Channel
•Customizable Motion Detection Grids Uniquely Configurable for Each Channel
•Multiple Recording Modes (Manual / Schedule / Event)
•Audio (Mono) Recording and Playback
•Up to16 Built in Sensor Input (Normally Open or Normally Closed)
•Up to 4 Built in Relay Output (Normally Open or Normally Closed)
•Built-in Alarm Buzzer
•Remote Access via Ethernet and/or Modem
•PTZ Camera Control
•Supports CD-RW & DVD±RW
PTZ COMPATIBILITY LIST
The OpenEye E-Series DVRs are compatible with the following PTZ camera protocols:
360 Vision
AcutVista
AlfaVision
KalatelDome
Cynix Speed Dome
CoVi EVQ-1000
CRR-1600I
DMP23-H2
Dongyang
DRX-500
DRX-502A
DS120
DSC-230/240
DY-255RXB
DynaColor
ERNA Tech
EyeView Dome
FastraxII
FilTech (DSC-230/PT-201)
Focvision
Ganz-PT
HMC-250
Honeywell (GC-655P)
Honeywell (HSD-250)
Honeywell (HSD(251)
HSCP
Inter-M (VRX-2101)
Inter-M (VSD-640)
LG (LPT-A100L)
LG (LVC-A70x s)
LG SpeedDome
Merit Li-Lin
Merit Li-Lin V6
NVCC-Z42N
NICE CAM
NIKO
Optix I
Pelco-D
Pelco-P
PIH-7600
SAE
Samsung
Samsung (MRX-1000)
Samsung (SCC-641)
Samsung Techwin
Sensormatic
Sungjin
Tamron
Toshiba
Visiontech
WONWOO
WSD-7425D

27717AH 3
QUICK START GUIDE
1. Turn on the DVR. See the Turning on the DVR section for more details.
2. Log in -- Use the number buttons to enter the password when prompted – The password is <none> – Press the ENT Button.
3. Complete System Setup to setup the date, time and system ID. See the System Startup section for more details.
4. Complete Sensor Setup to enable any external devices connected to sensor inputs or relay outputs. See the Motion/Event
Setup section for more details.
5. Complete Disk Management Setup to set overwrite options and enable SMART Check. See the Disk Management section for
more details.
6. Complete User Management Setup to change the Admin password and add additional users. See the User Management
section for more details.
7. Complete Camera Setup for all attached cameras. See the Camera Setup section for more detail.
8. Complete PTZ Setup for any attached Pan / Tilt / Zoom cameras. See the PTZ Setup section for more details.
9. Create a recording schedule. See the Record section for more details.
10. Complete Input Setup to trigger recording on an event: motion, sensor, video loss. See the Motion/Event Setup section for more
details.
11. The DVR is now configured to record, search and playback video. See the Operations section in this manual for more
information on using the DVR.

4 27717AH
NOTES:

27717AH 5
INSTALLATION
FRONT PANEL CONTROLS
1 2 3 4
5 6 7 8
910 11 12
13 14 15 16
1 2 3 4
5 6 7 8
910 11 12
13 14 15 16
USB Ports LED Lights
•Power
•HDD
•Record
•Network
•Fan
DVD±RW Drive Numeric Keypad* Arrow Buttons
Live Displa
y
Setup Menu
Lock (logout)
Search Mode
Backup Menu
Rotate
*The numeric keypad layout differs on the 4 and 8 Channel models

6 27717AH
REAR PANEL CONNECTORS
The rear panel of the DVR contains virtually all of the connectors you will be using. The diagram below outlines the location and
description of each connector:
4 CHANNEL
OUT
IN
Spot Monitor Outputs
Power Switch
AC Power Input
Network Port RS-232 Input
VGA Output
Audio Input / Output
Video In Ports
Video Out Ports
Relay Outpu
t
Sensor Inpu
t
Other manuals for OE2-E12016
1
This manual suits for next models
2
Table of contents
Other OpenEye DVR manuals

OpenEye
OpenEye OE2-E12016 User manual

OpenEye
OpenEye OE3-X12004M User manual

OpenEye
OpenEye EasyDVR OE1-D12004 User manual

OpenEye
OpenEye H Series User manual

OpenEye
OpenEye OE3-E12004 User manual

OpenEye
OpenEye EasyDVR User manual

OpenEye
OpenEye OE-SHM2416 User manual

OpenEye
OpenEye OE3-E48016 User manual

OpenEye
OpenEye 960H User manual

OpenEye
OpenEye E-Series User manual