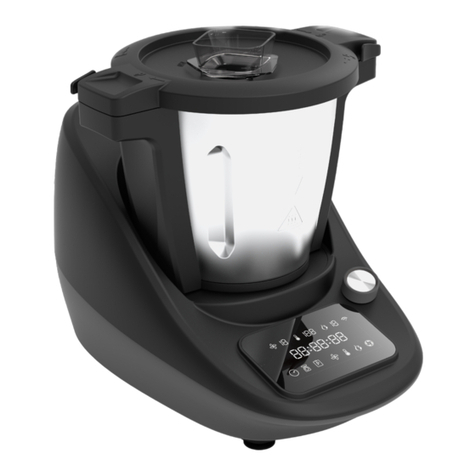
Optimum ThermoCook User manual

Manual 1
USER’SMANUAL
PROFESSIONALCOOKINGASSISTANT
ThermoCook

2Manual
WELCOMETOYOURNEWKITCHENASSISTANT! 1
SAFETYFIRST 2
GETTINGTOKNOWYOUROPTIMUMTHERMOCOOK 4
ACCESSORIES 7
QUICKSTART 10
USINGTHECONTROLPAD 13
CLEANINGANDMAINTENANCE 17
TROUBLESHOOTING 18
SPECIFICATIONS 19
WARRANTYTERMSANDCONDITIONS 20
CONTACTUS 21
CONTENTS

Manual 1
WELCOME TO YOUR NEW KITCHEN ASSISTANT!
Congratulations on the purchase of the Optimum ThermoCook Multi-Function Appliance. Your new Optimum ThermoCook is suitable for use
in a domestic environment and you’ll very quickly see why we describe it as “your new kitchen assistant”. From the first time you use your
Optimum ThermoCook, it will become your “secret ally”, helping you to cook like a five-star chef.
The Optimum ThermoCook features over 20 convenient functions designed to help you to create a range of impressive, nutritious and
preservative-free meals your whole family will love. Here’s just a selection of its functions: chopping, whipping, mixing, emulsifying, milling,
kneading, cooking, blending, stirring, steaming, weighing, precise heating and much more. The unique DYI function oers the ability to
memorise your favourite recipes to prepare on a regular basis.
The Optimum ThermoCook is a powerful, high quality appliance yet aordable enough for the average household – your ThermoCook
will last a lifetime. Think of it as your personal kitchen assistant in a single appliance.
FOR BEST RESULTS, AND TO ENSURE YOUR SAFETY, PLEASE READ THE INSTRUCTIONS IN THIS
MANUAL CAREFULLY.
FOR ADDITIONAL INSPIRATIONAL IDEAS FOR DELICIOUS RECIPES, PLEASE REFER TO THE OPTIMUM
THERMOCOOK MULTI‑FUNCTION APPLIANCE RECIPE BOOK.

2Manual
SAFETY FIRST
BEFOREUSINGYOUROPTIMUM THERMOCOOK,PLEASEREADTHESESAFETY
INSTRUCTIONS CAREFULLY.
Your Optimum ThermoCook Multi-Function Appliance is designed for household use, but can also be used in other similar environments,
such as:
• sta kitchen areas in shops, oces and other working environments
• hotel and motel guestrooms
• bed and breakfast type environments
• other residential type environments
• Appliances can be dangerous if they are used incorrectly. Please ensure that anyone who uses your Optimum ThermoCook clearly
understands how to operate it safely to avoid potentialhazards.
• Your Optimum ThermoCook is not a toy. Do not allow children to use it; and keep it and the cord that comes with it out of their reach.
• The cutting blades on your Optimum ThermoCook are extremely sharp, and can injure you. Take care when you handle them, e.g. when
you empty the bowl or clean it. Do not touch the edge of blades, and be careful to only hold the top part of the blade assembly when
you place or removeit.
• Switch o your Optimum ThermoCook and disconnect it from any power supply before you change the accessories or handle any
moving parts.
• Always disconnect your Optimum ThermoCook from the power supply if you need to leave it unattended; and before you assemble,
disassemble or clean it.
• Please disconnect your Optimum ThermoCook from the power supply when you clean the appliance or put it away for long-
termstorage.
• If the supply cord is damaged, it must be replaced by the manufacturer, its service agent or similarly qualified persons in order to avoid
ahazard.
• Accessories, other than those supplied with the appliance, should not be used when operation the Optimum ThermoCook. Misuse may
damage your appliance and void your warranty.
• Do not remove the lid while your Optimum ThermoCook is boiling water.
• Do not immerse your Optimum ThermoCook in water.

Manual 3
.• Dropping your Optimum ThermoCook or allowing it to fall can seriously damage it. Please place it on stable, flat, heat-resistant surface
(e.g. a bench or table); and ensure that it is at a safe distance from the edge to avoid falling. Please be aware that when you use the unit
to knead dough or cut food, vibration may cause it to move; so do not leave it operating unsupervised.
• Any damage to components – including the main body, jar, and steamer – can make your Optimum ThermoCook less safe to use.
Regularly check all components for damage, and if you find something wrong, please stop using the appliance and contact our After
Sales Servicecentre.
• If your Optimum ThermoCook stops unexpectedly or appears to malfunction, switch o the power supply, unplug it from the mains, and
stop using it immediately. Seek professional advice from the manufacturer, its service agent, or a similarly qualified person to identify the
fault and make any repairs.
• The measuring cup is the only part that can be safely used to cover the round hole in the jar lid. Please do not use a cloth or anything
similar to cover this hole, and ensure the measuring cup is placed correctly to cover it when you process food. Pay attention to the
capacity mark on the blender jar.
• Be careful with hot food when you open the jar lid. Do not touch the jar when you process food that is hotter than 60°C.
• When you use the steamer, make sure that it is connected properly to the jar, and that the steamer lid is in place. Be careful of any
vapour that flows out through the top or sides of the cover, as this may scald you. Regularly check that the vent hole on the steamer lid is
clear to prevent the vapour from escaping elsewhere.
• When the steamer is operating, the handles are the only safe place to touch it. Touching it anywhere else may result in injury.
• After using your Optimum ThermoCook, please keep it and any of its parts that are still hot well out of children’s reach.
• Food leakage can damage your Optimum ThermoCook. To avoid this, make sure that you place the blade sealing ring correctly, and use
the fixing bracket to ax the blade assembly to the bottom.
• Poor ventilation can also damage your Optimum ThermoCook. To avoid this, ensure that the vents on the back of the main body are
clear of any blockages.
• The appliance is not intended for use by persons (including children) with reduced physical, sensory or mental capabilities, or lack
of experience and knowledge, unless they have been given supervision or instruction concerning us of the appliance by a person
responsible for their safety
IMPORTANT: FAILURE TO FOLLOW THESE SAFETY INSTRUCTIONS AND WARNINGS COULD RESULT
IN SERIOUS INJURY. ADDITIONALLY, MISUSING YOUR OPTIMUM THERMOCOOK MAY DAMAGE IT AND
VOID YOUR WARRANTY.
4Manual
Screw
Handle
Metal
gasket
Handle
base
Silicon
gasket
Glass
lid
5. Steamer Lid
GETTING TO KNOW YOUR THERMOCOOK
This section introduces you to the key components of your new Optimum ThermoCook Multi-Function Appliance.
1. Blending bowl
2. Blade assembly 3. Bowl lid 4. Measuring cup

Manual 5
1. BLENDING BOWL
The stainless steel bowl has a maximum capacity of 2L, with intervals of 0.5 litres marked on thebowl.
Caution Do not immerse the bowl in water or place it in the dishwasher. Keepthe surface underneath the bowl dry.
Important:
• Do not put more than 2.0L of food into the bowl.
• Your Optimum ThermoCook will not operate if the bowl is not securely axed to the main unit. To fix it correctly, place the bowl on the
main unit body with its handle pointing to the front.
2. BLADE ASSEMBLY
• The blades in the assembly have sharp edges, and are intended for blending, chopping, mincing, ice crushing and grinding functions.
•The blades can be easily removed for cleaning.
Removing the blade assembly
• Turn the bowl upside down, and place a tea towel inside it.
• Turn the fixing bracket anti-clockwise. This will allow the blade assembly to drop down onto the tea towel.
• To re-insert the blade assembly, ensure that the black sealing ring is in place. Push the blade through the opening of the bowl. Hold it in
place with one hand, while positioning the fixing bracket with the other hand. Turn the fixing bracket clockwise and the blade assembly
will lock into place.
Important:
• The blades are very sharp. Cover the blade assembly with a tea towel when assembling or removing the blade base.
• Please make sure that the fixing bracket and the sealing ring are in place and locked tightly with the blade assembly. If the sealing ring is
positioned incorrectly, the food inside the bowl may leak out and damage the appliance.

6Manual
GETTING TO KNOW YOUR THERMOCOOK (CONTINUED)
3. BOWL LID
Your Optimum ThermoCook will only operate if both the bowl and lid are properly secured. To secure the lid, turn it clockwise until it clicks
into place.
Important:
• Do not open the lid to your Optimum ThermoCook until the food in the jar stopsrotating.
4. MEASURING CUP
The measuring cup serves as a part of the lid, and performs three functions:
• to prevent heat loss during cooking;
• to keep ingredients from splashing up;
• to measure ingredients with a full capacity of 100ml.
To place the measuring cup correctly, insert it into the hole of the lid and turn it.
Important:
• The measuring cup is the only part that can safely be used to cover the round opening in thelid.

Manual 7
1. Cooking basket
2. Mixing tool
3. Spatula
4. Steamer
5. Kneading shaft
ACCESSORIES
This section introduces you to the accessories that come with your new Optimum ThermoCook Multi-Function Appliance.
1. COOKING BASKET
The cooking basket serves many functions:
• Sieving fruit and vegetable juices. After using your Optimum ThermoCook to grind fruit orvegetables, or making fruit puree, put the
basket into the bowl to help pour out the juice.
• Stewing. Delicate foods such as meatballs or fishballs cannot be prepared in the bowl. Placethese foods into the cooking basket where
they can be stewed.
• Cooking side dishes. Use the cooking basket to make dishes such as rice, potatoes etc.
Note: Use the small groove on the handle of the spatula to put in or take out the cooking basket.
Caution Hot steam and splashing liquids may escape from the hole in the lid if the measuring cup is not in place. Also be careful
when you remove the cooking basket, as it may be hot.

8Manual
ACCESSORIES (CONTINUED)
2. MIXING TOOL
The Mixing tool is ideal for whipping cream or beating egg whites. It is also ideal for preparing creamy mixtures.
Ax the mixing tool onto the blade assembly by the hole, and press it with enough force to create a good connection. Then turn the
butterfly bar anticlockwise to hook the tool onto theblade.
To remove the mixing tool, simply turn it clockwise to unhook it from the blade, and pull it o.
Important:
• Do not start your Optimum ThermoCook until the mixing tool is fully fixed in place.
• Do not use above speed 4 when using the mixing tool.
• Do not use the spatula when using the mixing tool.
• Do not add ingredients into the bowl when the appliance is operating with the mixing tool installed. Doing so may damage or block the
mixing tool.
• Do not use the mixing tool to knead dough.
3. SPATULA
• The included spatula is specifically designed to be used without damaging the bowl. To avoid any damage, please do not use any other
tools (e.g. cooking spoons) to scrape, mix or stir food in thebowl.
Important:
• Only use the spatula in the bowl when the blades are stationary. Do not use it if the butterfly isattached.
• You can use the small groove on the handle of the spatula to hold the cooking basket.
4. STEAMER
• There are three parts to the steamer: the small 2.6 Litre steamer, large 3 Litre steamer and lid.
• The glass lid can be used on both the small steamer and large steamer, and the large steamer can sit on the small steamer. For lid
assembly instructions, please see page 4.
How to use the steamer:
1. Place the bowl correctly on the unit, and add 0.5 litres of water into it.
NOTE: 30 minutes of steam cooking requires a 0.5 litre of water. For every additional 15 minutes, add an extra 250ml of water.
2. Position the steamer on the bowl so that it completely seals the bowl opening.
3. Loosely fill the steamer tray(s) with the food you want to steam. Make sure that some slots remain open so that the steam can spread evenly.

Manual 9
Tip: Place food that requires a longer cooking time in the small steamer; and foods that require less cooking in the large steamer.
4. Place the steamer lid on top.
5. Select ‘STEAM’ program and set the desired time.
The ingredients will start to cook when the water begins to boil in steam mode.
Important:
• Do not overfill the steamer with food when you operate it.
• Always ensure the steamer lid is correctly in place before you use it.
Caution • Your Optimum ThermoCook will become very hot during steaming, and may burn you if you touch it incorrectly.
The handles on each side of the steamer attachment are the only place that is safe to touch while the steamer
isoperating.
• Do not use the steamer in a microwave oven, in or any other electricappliance.
• During the steaming process, hot steam can escape from the steamer. Pleasebe careful of this steam when you
remove the steamer lid.
5. KNEADING SHAFT
The kneading shaft can be used for kneading or stirring and mixing without cutting the food. Follow the instructions to remove the blade
assembly and simply attached the kneading shaft.
• Do not go above speed level 4 when using the kneading shaft.
• Food may become stuck between the bowl walls and kneading shaft and the motor may stop for self-protection. Stop operation and use
the spatula to unblock and continue operation.
Important:
• Please make sure that the fixing bracket and the sealing ring is in place and locked tightly with the kneading bracket. If the sealing ring
isn’t well placed, the food being mixed or cooked may leak out and damage the appliance.
TO ORDER REPLACEMENT PARTS, SIMPLY VISIT WWW.FROOTHIEINTERNATIONAL.COM
AND SELECT YOUR COUNTRY.

10 Manual
QUICK START
1. Place your Optimum ThermoCook on a clean, stable and even surface. Do not position it too close to the edge of the surface
2. Thoroughly clean the appliance before using it (See the Cleaning and Maintenance section)
3. Plug the unit in, and turn on the switch at the back of the machine.
4. Firmly press the bowl down onto the unit with the handle pointing to the front.
5. Place the lid on top, and secure it by turning it clockwise until it clicks and locks intoplace.
NOTE: The Lock Failure icon will flash on the screen if the bowl and/or lid is not fixed properly. The Lock icon will display on the
screen when the bowl and lid are fixedproperly.
A. Stop/Cancel
B. Start/Pause knob
C. Timer
D. Speed
E. Temperature
F. Heat Power
G. DIY
I. Pulse
J. Menu
C
A
G
B
J
I
D E F

Manual 11
Stop/Cancel
When the Stop/Cancel button is pressed, the LCD backlight will illuminate allowing you to select your desired setting.
Pressing this button during dierent stages will return your Optimum ThermoCook to the standby mode,
• During the process of choosing your desired settings.
• During operation, your Optimum ThermoCook will stop operating immediately.
• During the DIY recording process, your recording will be cancelled.
For more information about the Stop/Cancel setting refer to page 13.
Start/Pause knob
After selecting the desired setting or program on your Optimum ThermoCook, press the button on positioned on the
front of the knob to start operating.
• To open the lid and remove the bowl press this button to PAUSE the operation.
• The Start/Pause knob can be used to select the desired setting. Turn the knob clockwise to increase the value, and
anticlockwise to decrease it.
For more information about the Start/Pause setting refer to page 13.
Timer
To set the timer for the required length of time press the timer button and the timer icon will flash on the LCD screen
indicating that you can adjust the timer.
• Use the knob to adjust the minutes between 1-60minutes.
• Press the timer button again, the seconds will flash. Turn the knob to adjust between 1-60 seconds.
• Press the timer button a third time to adjust the hours. Turn the knob to adjust between 1-12 hours.
For more information about the timer setting refer to page 13.
Speed
To adjust the speed at which your Optimum ThermoCook operates, press the speed button during the stand by mode
or the operating process.
• When you push this button, the icon will flash on the LCD screen, indicating that you can adjust the speed. Turn the
knob to select your desired speed, ranging from Level 1-10.
For more information about the speed setting refer to page 14.

12 Manual
QUICK START (CONTINUED)
C
Temperature and Heat Power
To adjust the temperature of your Optimum ThermoCook press the temperature button either during the stand by mode
or the heatingprocess.
• The icon will flash on the LCD screen, indicating that you can adjust the temperature. Turn the knob to select your
desired temperature, ranging from 37 120°C.
• The heat power setting will automatically change to the default heating power for that temperature level.
For more information about temperature and heat power refer to page 14.
DIY
DIY
Your Optimum ThermoCook oers the ability to programme and record your own custom made settings for future use.
Please refer to the steps outlined on page 15 to record your own DIY programmes.
Pulse
The Pulse function allows you to chop and mix ingredients at maximumspeed.
• Simply press and hold the pulse button for the required time (usually 3-4 seconds).
• To crush ice or grind hard food, press the button in short bursts until you achieve your desired result.
For more information about the pulse setting refer to page 15.
Menu
The menu button provides access to 15 auto programmes included with your Optimum ThermoCook.
• The functions include Smoothie, Quick Soup, Thick Soup, Chop, Saute, Stir, Knead, Steam, Stew, Warm, Reheat, Boil,
Yogurt, Rice andPorridge.
• Turn the knob to select your desired programme.
For more information about the menu setting refer to page 16.

Manual 13
USING THE CONTROL PAD
Stop/ Cancel
• When this button is pressed, the LCD backlight will illuminate, and the lights around the knob will flash as your Optimum ThermoCook
goes into standby mode. From here, you can select your desired functions.
• Pressing this button during the process of choosing your desired settings will clear all the existing settings, and return your Optimum
ThermoCook to standby mode.
• Pressing this button during operation will stop your Optimum ThermoCook from operating immediately and return it to standby mode.
• Pressing this button during the DIY recording process will cancel the recording.
• Your Optimum ThermoCook will turn o automatically if you leave it idle for 30 seconds during standby mode.
Start/ Pause knob
• After selecting your desired setting or program on your Optimum ThermoCook, press this button to start it operating.
• Pressing this button during the operating process will pause operation, and put your Optimum ThermoCook into standby mode. The LCD
will display PAUSE. During this pause, you can open the lid, take away the bowl, etc. However, you must ensure that you properly reposition
it again before restarting operation by pressing the button again.
• Your Optimum ThermoCook will turn o automatically if you leave it idle for 10 minutes during PAUSE mode.
• You can also use this knob to select and set the timer, speed, temperature, and heat power. Turn the knob clockwise to increase the
value, and anticlockwise to decrease it. Alternatively, you can choose between the 15 auto programmes.
Timer
• The LCD screen for the timer displays 88:88:88, which indicates the hour:minute:second.
• To set the timer, press the timer button, and the minutes and timer icon will flash on the LCD screen. Turn the knob to adjust the minutes
between 1-60 min. If you press the timer button again, the seconds will flash. Again, turn the knob to adjust them between 1-60 seconds.
Pressing the timer button a third time will cause the hours to flash. Turn the knob to adjust them between 1-12hours.
• If you press the timer during the operating process, your Optimum ThermoCook will start to count down directly.
• If you do not set a time or choose an auto programme, your Optimum ThermoCook will operate for 1 hour before automatically stopping.
If you choose an auto programme, the maximum working time will be up to 12 hours.
• If the motor is working or selected to work, and you do not choose an auto programme, the maximum working time is also 1 hour.
Again,some auto programmes may have maximum working times of up to 12 hours.

14 Manual
USING THE CONTROL PAD (CONTINUED)
Speed
• To adjust the speed at which your Optimum ThermoCook operates, press this button during either stand-by mode or the operating
process (Note: in some auto programmes, the speed is fixed and cannot be adjusted).
• When you push this button, the speed icon will flash on the LCD screen, indicating that you can adjust the speed. Turn the knob to select your
desired speed, ranging from Level 1-10.
• You can adjust the speed between Levels 1-10 during both the blending and heating processes. However, if the temperature is set to –
or reaches – over 60°C, you can only adjust the speed up to Level 4. If your Optimum ThermoCook was working at a higher speed, it will
drop to Level 4 automatically when it reaches this temperature.
• Do not increase the speed higher than Level 4 when using the mixing tool.
• Your Optimum ThermoCook has two gears, so it is normal to hear a brief noise before the motor starts working. You will also hear this
noise when you change the speed between Levels 5 and 6.
• Crushing or chopping hard food, or large volumes of food at high speeds can cause vibration. To avoid this, select Level 5 speed first,
then gradually increase to Level 10.
C
Temperature
• To adjust the temperature, press this button either during stand-by mode, or during the heating process (Note: in some auto programmes
the temperature is fixed, and cannot be adjusted).
• The temperature icon will flash on the LCD screen, indicating that you can adjust the temperature. Turn the knob to select your desired
temperature, ranging from 37-120°C.
Heat Power
• When you adjust the temperature, the heat power setting will automatically change to the default heating power for that temperature level.
• To change the heat power, press this button either during stand-by mode, or during the heating process (Note: in some auto
programmes, the temperature is fixed and cannot be adjusted).
• The heat power icon will flash on the LCD screen, indicating that you can now adjust the heat power. Turn the knob to select your desired
heat power, ranging from Level 1-10.
• Low power will allow you to have more precise control over the temperature; while High power will heat food quicker.
• However, some sticky foods may end up burning the base of the bowl at high temperatures. To reduce this risk, select a low heat power
for these foods. Additionally, if you only have a small volume of food that requires a precise temperature, select Low heat power.
• Your Optimum ThermoCook will not operate if you have selected a heat power setting, but not a temperature setting. We recommend
following the default heat power setting when you select dierent temperature levels.

Manual 15
DIY
DIY
• Your Optimum ThermoCook has three DIY programmes. Use these programmes to record custom settings for future use.
• To record your own DIY programme: Press this button, and the icon will flash on the LCD screen. Press the button again to select
between the three options:
• When the icon flashes, press and hold the DIY button for 5 seconds until the screen showsSTEP:01
• Set your desired speed, temperature, heat power, and time; then press the DIY button again. You will see STEP:02 flash on the screen.
Adjust the settings for this step, repeat the previous until the end of the programme, up to maximum STEP:20. When you are finished,
hold the DIY button again for 5 seconds to save and record.
• To operate your desired DIY programme: Press the DIY button, select your desired DIY function, and press START to begin the recorded
programme .
• If you press the Stop/Cancel button while you are recording, the machine will stop recording and abandon the programme.
• To revise any DIY programme settings: If you need to revise previous settings while you are recording the programme, press the DIY
button. This will cycle through the available programme steps from STEP:01 until STEP:20, then return back to STEP:01.
• When a DIY programme is operating, your Optimum ThermoCook will stop for 10 seconds at the end of each step and beep. This
allows you to PAUSE the machine and add any ingredients you need for the next step. If you leave it idle during these 10seconds, your
ThermoCook will continue with the next step in the programme.
• While the DIY programme is operating, you can adjust all settings without changing the recordedprogramme.
Pulse
• The Pulse function allows you to chop and mix ingredients at maximum speed. To use this function, simply press and hold this button for
the required time (usually 3-4seconds).
• To crush ice or grind hard food, press the button in short bursts until you achieve your desiredresult.
Note: You cannot use the Pulse function if the temperature in the bowl is over 60°C.
Caution • If the measuring cup is not locked into position when using this function, ingredients might splash, resulting in burns.
We recommend always locking the measuring cup into place before using the Pulse function.
• Do not use mixing tool with this function.

16 Manual
USING THE CONTROL PAD (CONTINUED)
Menu
• Press the Menu button to access any of the 15 auto programmes:
• Turn the knob to select your desired programme.
• Once the programmes QUICK SOUP, THICK SOUP, STIR, STEW, REHEAT, BOIL, RICE, or PORRIDGE finish, “End” will appear on the LC
screen. If you leave your Optimum ThermoCook idle for 5 minutes after this, it will automatically enter WARM mode for up to 12 hours
until you manually stop it.
• Some settings in certain auto programmes are fixed, and cannot be adjusted.
Programme setting
Although the settings for some auto programmes are not adjustable, many can be adjusted to suit your needs. The table below outlines
which settings you can adjust for each programme.
Program Description Program Description Program Description
SMOOTHIE No settings adjustable STEW Time adjustable from 1-12 hours CHOP Time adjustable from
1-10minutes
QUICK SOUP Time adjustable from
15-60 minutes
WARM Time adjustable from 1-12 hours SAUTE Time adjustable from
1-30minutes
THICK SOUP Time adjustable from
15-60 minutes
REHEAT Time adjustable from
30-60 minutes
BOIL No settings adjustable
YOGURT Time adjustable from 3-12 hours RICE No settings adjustable PORRIDGE No settings adjustable
STIR Time adjustable from
5-60 minutes
Speed adjustable from level 0-3
Temperature adjustable from
90-120°C
KNEAD Time adjustable from 5-20
minutes
Speed adjustable from level 2-3
Temperature adjustable from
0to 37°C
STEAM Time adjustable from 15-
60minutes

Manual 17
CLEANING AND MAINTENANCE
Before you use your Optimum ThermoCook for the first time, and again after each use, clean the machine, its components and any
accessories thoroughly.
• To clean the blending bowl, first dismantle the blending bowl and blade assembly (refer to page5).
Remove the mixing knife if relevant, then clean the inside and outside of the bowl with cleansing agent and a soft sponge/cloth. You can
clean the mixing knife, spatula, mixing tool, steamer, measuring cup, bowl lid and cooking basket in the same way.
NOTE: Remove the black seal ring before you wash the blade assembly, and ensure that both parts are completely dry before fitting
them back together.
• Clean the body of your Optimum ThermoCook with a damp cloth only. Do not use harsh abrasives or chemicals.
• Components listed under the accessories are dishwasher safe. Please note the blending bowl and lid are not dishwasher safe.
• Once the machine is clean, dry it, and then store it in a well-ventilated and dry place.
• Ensure that the 6 contact pins at the bottom of the bowl are always clean and dry.
Caution • Turn o the machine, and disconnect it from the power supply before cleaning it. Never immerse the main body in
water or otherliquids.
• Do not immerse the blending bowl in water or put it in the dishwasher. Keepthe bottom of the bowl dry.

18 Manual
TROUBLE SHOOTING
Error Description Possible reasons Solution
E1 Safety switch not fixed
intoplace
The jar or jar lid is not fixed in place properly Re-assemble the jar and jar lid, making sure all the parts are
assembled properly and tightly
E2 Temperature sensor missing The jar is not in place, or the temperature sensor
connection at the jar base is damaged
Re-assemble the jar, and make sure it is fixed properly and
tightly in place
E3 Motor blocked Loading too much food intothejar Decrease the volume of the food in the jar, or cut the food
into smaller pieces and re-start the machine
E4 Too high temperature No food or very little food in the jar, with a High
temperature setting for too long
Add food into the jar
E5 Motor temperature too high Too much food loaded in the jar for too long Stop the machine and let it cool before restarting it
E6 Motor electric current too
high
Loading too much food, or big pieces of food blocking
the stirring shaft
Decrease the amount of food. Alternatively, Pause and use
the spatula to remove any stuck food, then restart
E7 Speed change failure Speed changing between low level (1-5) and high level
(6-10) is blocked
Remove the jar, turn the lower clutch manually, then re-fix
the jar into place, and restart the machine
E8 Motor NTC missing Motor temperature sensor connection is loose
ordamaged
Stop using the machine and contact the Froothie Support
and Warranty team via www.froothiesupport.com.
E9 Fan doesn’t work The fan is damaged or the connection is loose Stop using the machine and contact the Froothie Support
and Warranty team via www.froothiesupport.com.
E10 Electric current for Fan is
not strong enough
The fan is damaged or the connection loose Stop using the machine and contact the Froothie Support
and Warranty team via www.froothiesupport.com.
E11 Cannot use Pulse The temperature in the jar is over 60°C Cool down the food, then use Pulse again, or use a lower
speed, e.g. Level 4
E12 Smell from themotor Lubricants used in the manufacturing process
arecuring
Over the next 1-3 months (depending on frequency of use)
the electrical ozone (strong smell)
Table of contents
Other Optimum Kitchen Appliance manuals

Optimum
Optimum RK-0050 User manual

Optimum
Optimum P300 User manual

Optimum
Optimum RK-0134 User manual

Optimum
Optimum P200 User manual

Optimum
Optimum SP-2002 User manual

Optimum
Optimum opti ST-0770 User manual

Optimum
Optimum SP-2001 User manual

Optimum
Optimum Sous Vide User manual

Optimum
Optimum ST-1412 User manual

Optimum
Optimum ST-1412 User manual

Optimum
Optimum GR-2000 User manual

Optimum
Optimum THERMOCOOK PRO M User manual

Optimum
Optimum RK-1210 User manual

Optimum
Optimum RK-1240 User manual

Optimum
Optimum ST-1410 User manual

Optimum
Optimum ZG-0300 User manual

Optimum
Optimum ST-1416 User manual

Optimum
Optimum MAMMA MIA User manual

Optimum
Optimum RK-0132 User manual

Optimum
Optimum ST-1600 User manual