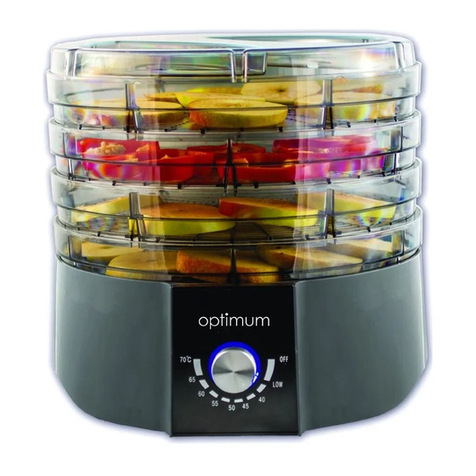
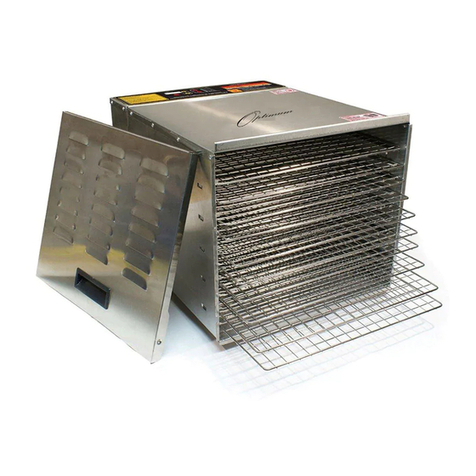
Optimum P200 User manual

QUALITY YOU CAN TRUST
USER’S MANUAL
FOOD DEHYDRATOR

1
INTRODUCTION + DEHYDRATION 1
IMPORTANT SAFEGUARDS 2
GETTING TO KNOW YOUR DEHYDRATOR 3
OPERATING INSTRUCTIONS 4
PREPARATION OF FOOD (PRE-TREATMENT) 5
FOOD STORAGE + RE-HYDRATING 6
FOOD DRYING GUIDES
VEGETABLES 7
FRUITS 8
JERKY 9
CLEANING 10
REVIEWING THE DEHYDRATING PROCESS 11
WARRANTY TERMS AND CONDITIONS 12
CONTACT US 13
Dehydration is one of the oldest and most eective forms of food preservation. The North American
Indians preserved meat by sun-drying, the Japanese dried fish and rice and the Chinese have been
drying eggs for centuries. Dehydration allows you to preserve many types of food for indefinite
periods by removing the moisture in meats, fruits and vegetables which enables them to last for
months instead of days without refrigeration. There are numerous health benefits associated with
dehydrated foods, including concentrated taste, retention of valuable vitamins and minerals and no
preservatives, additives or chemicals.
The information in this manual is intended to help you get the best results from this appliance.
Please read this booklet carefully and call the manufacturer if you have any questions.
DEHYDRATION
Foods are considered RAW with the majority of phytonutrients, vitamins and minerals intact when it
is unheated and remains under 40-48°C (105-118°F) for an extended period of time. Dehydration is a
popular gourmet food preparation method that creates a natural crisp and crunchy texture.
There are many variables that aect food dehydration such as room temperature, humidity and
the moisture levels in the food that you are drying. To master the various dehydration techniques, it
will be necessary to experiment with your drying processes. Too much heat may harden your food,
whilst too little heat may increase your drying periods. Just about anything can be dehydrated, so
start experimenting and discover a whole new world of healthy food freshness.
CONTENTS INTRODUCTION + DEHYDRATION

2 3
IMPORTANT SAFEGUARDS
1. Read ALL of these instructions thoroughly before using your dehydrator.
2. Save these instructions for future reference.
3. Never leave your dehydrator unattended when in use.
4. Adult supervision is required if this unit is used around young children.
5. Only for use indoors in a clean, dry location, free of flammable objects.
6. This unit gets hot. Do not touch surfaces while operating.
7. Continuous operation above 68°C (155°F) is not recommended as surfaces will become very hot.
8. This unit may scratch household surfaces.
9. Do not use if the cord or controls have been damaged in any way. Contact the distributor before
attempting to make any repairs.
10. Do not use sharp utensils inside the unit.
11. Turn o unit before plugging into or unplugging from an electrical outlet.
12. Unplug the unit when not in use.
13. Allow unit to cool before cleaning.
14. Never immerse unit or cord in water or other liquids.
15. Never plug unit into a damaged electrical outlet.
16. Do not allow the cord to contact the edge of a counter, table or hot surface.
17. The use of attachments or accessories is not recommended by the distributor and will void
thewarranty.
18. Do not attempt to move this unit while it is operating.
GETTING TO KNOW YOUR DEHYDRATOR
Dehydrator tray
On/O
Power
Switch
Temperature
dial
Drying guide Timer
Dehydrator
Control panel

4 5
For the safest results, read all of the instructions first.
1. Make sure the power switch is turned o. Place the unit on a clean, dry surface away from
young children and pets. Plug into an undamaged electrical outlet. Warning: Do not use an
extension cord with your dehydrator.
2. Turn on the unit.
3. Set the temperature by turning the knob on top of the unit. Monitor the internal temperature and
adjust as needed.
4. Heat the unit at 32°C (90°F) for 45 minutes to remove any moisture.
5. If the unit stops for any reason, turn o, unplug and then repeat Steps 2 and 3. If the unit does
not operate normally, turn o, unplug and call the distributor.
6. Follow your recipe to prepare the food that you wish to dehydrate.
7. For best results, do not overlap the product and be sure to leave space between the items to
allow for maximum air circulation.
8. Using both hands for maximum stability, slide the dehydrator trays back into the unit.
9. Note: Moisture may collect on the surface of the food during the drying process. This can be
blotted o with paper towel.
INSTRUCTIONS OF TIMER
The dehydrator is equipped with a 40 hour electric timer.
The following are instructions on the setting of the timer.
1. Turn on the unit using the On/O switch
2. Press and hold the select button (SEL) until the hour light flashes.
3. Select the hours to dry and press SEL, then select the minutes to dry and press SEL. The timer
will no longer flash.
4. Press the DOWN button on the timer and the unit will turn on.
OPERATING INSTRUCTIONS PREPARATION OF FOODS (PRE-TREATMENT)
The quality of food before it is placed in the dehydrator is critical to successful drying. For best
results, always select only the freshest foods available and be aware that immature fruits and
vegetables do not have as much colour and flavour as fully matured fresh produce. Foods should be
dehydrated as soon as possible after purchase. Foods high in sugar such as apples, pears, peaches
and bananas are prone to darkening as a result of oxidation. Below are some pre-treatments that will
help reduce this eect.
• Lemon and pineapple juicer are natural antioxidants and sliced produce can be placed in the
juice for a few moments to reduce oxididation. Drain before placing on the dehydrator shelf.
Forextra flavour, try sprinkling with cinnamon or other sweeteners.
• Ascorbic acid mix, is a form of vitamin C which is available at most health food stores, it’s
purchased in either tablet or powder form. Use about 2-3 tablespoons of powder or ground
tablets per 100mls of water. Stir to completely dissolve powder. Place fruit into the solution for
2-3 minutes. Remove, drain and place on the dehydrator shelf.
• This method is very eective in preventing discolouration, but may cause some change in taste.
Blanching is used primarily to prepare fruits and vegetables (for dehydrating) that have skins which
may toughen during the drying process. This process helps lock in the colour and flavour as well as
soften the skin of grapes, cherries, prunes and plums. Below are the two blanching methods:
• Water blanching Fill a large pan about half full of water and bring the water to a boil. Use tongs
to place the food directly into the water, cover the pan and blanch for about 3 minutes. Remove,
drain and place on the dehydrator shelf.
• Steam blanching Using a steamer pot such as one used in Chinese cooking, put 2-3 inches of
water in the pan and bring to a boil. Place the food into the steamer basket, place in pan and
cover. Steam food for about 5 minutes.
Remove and place on the dehydrator shelf

6 7
FOOD STORAGE
Dried foods should be allowed to cool before being sealed in an airtight container. This will prevent
the formation of condensation and ensure your produce has the longest possible shelf life.
When properly used, vacuum-sealed bags provide ideal storage. The less air present, the
less potential for the formation of bacteria and micro-organisms. Stored foods should be checked
monthly for bacteria, insects and mould. If any mould is detected, it is best to dispose of the produce
and ensure that you check your dehydration processing times and use a clean dry container in future
to prevent this occurring.
RE-HYDRATING
Dried foods do not need to be reconstituted for consumption. Many people prefer to eat them in
their dried state. However, if you want to reconstitute your food, here are some basic guidelines.
Soak the food in clean (ideally filtered) water for 3-7 minutes and then prepare as usual. If you are
boiling them, use the same water they soaked in to preserve nutrients.
If you plan to soak the food for more than 1 hour, it should be placed in the refrigerator to prevent
the growth of bacteria and micro-organisms. One cup of dried vegetables will reconstitute to about
2cups. One cup of dried fruit will reconstitute to about 1½ cups.
Reconstitution times will vary depending on the thickness of the food and the water temperature
used. Warm water will speed reconstitution but may result in a loss of flavour.
FOOD DRYING GUIDES
The following charts are guidelines for the preparation of various fruits, vegetables and meats. Drying
times will vary depending on the room temperature, relative humidity and moisture levels in the food
that you are drying. If the moisture level is low, the drying time will be short. However, if the moisture
level is high, the drying time will be longer.
When dehydrating foods, it is important to check on the dryness of the product. If the product is
not thoroughly dried, mould may form during storage (see Food Storage). To test for dryness, remove
a piece of food from the dehydrator and allow to cool to room temperature. Bend and tear the piece
to check for internal moisture.
Keep in mind that drying times are also aected by the amount of food placed on the shelves,
mesh or non-stick inserts. Over-loading the shelves will slow the drying time and may produce poor
quality results.
INCLUSIONS
Mesh tray insert
2 x Mesh tray insert, reusable and ideal for placing on top or underneath the ingredients being dried.
Non-stick insert
2 x Flexible non-stick tray insert, reusable and suitable to prepare fruit leathers, roll ups, cookies and
more.
FOOD STORAGE + RE-HYDRATING
FOOD PREPARATION TEST TIME
Asparagus Wash and cut into 1” pieces Crunchy 4-6 hours
Beans Wash, remove ends and cut into 1” pieces or
French style Crunchy 9-12 hours
Beets
Remove ½” of the top, scrub thoroughly,
steam blanch until tender. Peel and cut into
¼” thickslices.
Pliable 9-12 hours
Broccoli Wash and trim. Cut stems into ¼” pieces.
Dry florets whole. Crunchy 10-14 hours
Cabbage Wash and trim, Cut into ⅛” strips. Crunchy 8-11 hours
Carrots Wash and trim tops. Peel or scrape if desired.
Cut into ⅛” thick slices. Pliable 7-11 hours
Celery Wash, separate leaves and stalks.
Cut stalks into ¼” strips. Crunchy 3-10 hours
Corn
Shuck corn and trim silk. Steam until milk is set.
Cut kernels from cob and spread on plastic screen.
Stir several times during drying.
Crunchy 7-10 hours
Cucumber Wash and trim. Cut into ⅛” slices. Pliable 4-8 hours
Eggplant Wash and peel. Cut into ¼” slices. Pliable 4-8 hours
Mushroom Wash and cut into ⅜” slices. Pliable 4-7 hours
Parsnips Scrub thoroughly, steam blanch until tender.
Peel if desired and cut into ⅜” thick slices. Pliable/ Tough 7-11 hours
Peppers Wash and remove stems, seeds and white section.
Pat dry. Cut into ¼” thick strips or rings. Pliable 4-8 hours
Potatoes
Use new potatoes. Wash, peel if desired.
Steam blanch 4-6 minutes. Cut french-fry style,
¼” slices, ⅛” thick circles or grate.
Crunchy/
Pliable 7-13 hours
Summer Squash Wash and peel. Cut into ¼” slices. Pliable 10-14 hours
Tomatoes Wash and remove stems. Slice into ¼” circles. For
cherry tomatoes, slice in half, dry skin side down. Pliable 5-9 hours
Zucchini Wash, peel if desired. Cut into ¼” slices or chips. Crunchy 7-11 hours
VEGETABLES AT 52°C (125°F)
8 9
FRUITS AT 57°C (135°F)
FOOD PREPARATION TEST TIME
Apples Wash, core and peel if desired.
Cut into ¼” slices. Dust with cinnamon if desired. Pliable 7-15 hours
Apricots Wash, halve and remove pit.
Slice if desired and dry skin side down. Pliable 21-29
hours
Bananas Wash, peel and slice into ⅛” slices. Pliable 7-10 hours
Figs Wash, cut out blemishes, quarter.
Dry skin side down. Pliable 22-30
hours
Kiwi Wash, peel and slice in ¼” slices. Crisp 8-15 hours
Nectarines Wash, halve and remove pit.
Slice if desired and dry skin side down. Pliable 8-17 hours
Peaches Wash, halve and remove pit.
Slice if desired and dry skin side down. Pliable 8-16 hours
Pears Wash, core and peel if desired.
Cut into ¼” slices or quarter. Pliable 8-16 hours
Pineapple Peel, remove fibrous eyes, remove core.
Cut into ¼” slices or wedges. Pliable 11-18 hours
Rhubarb Wash, cut into 1” lengths. Pliable 6-10 hours
Strawberries Wash, cut out caps, slice ¼” thick. Crisp 7-15 hours
Watermelon Cut o rind, cut into wedges and remove seeds. Pliable
and Sticky 8-10 hours
JERKY AT 63-66°C (145-150°F)
FOOD PREPARATION TEST TIME
Jerky
Use lean meat and remove as much
fat as possible. Fat turns rancid with time.
Cut uniform ¼” thick or less slices.
Do not overlap slices on the shelves.
Pliable
3-4 hours
Meat temperature
should reach
145-150°F
Your meat should be as lean as possible. Using lean meat will help the meat dry faster and aid in
cleanup by decreasing fat drippings. Ground meat should be 80% to 90% lean. Ground turkey,
venison, bualo and elk are other excellent choices for jerky.
Jerky seasonings are available for all tastes, or you can get creative and make your own.
Whenever you make jerky, you should cure the mixture with cure (sodium nitrite). The cure is used to
help prevent botulism during drying at low temperatures. Follow the manufacturer’s directions on the
cure packet.
Keep raw meats and their juices away from other foods. Marinate meats in the refrigerator. Do not
leave meats un-refrigerated. Prevent cross-contamination by storing dried jerky away from raw meat.
ALWAYS wash hands thoroughly with soap and water before and after working with meat products.
Use clean equipment and utensils.
Keep meat and poultry refrigerated at 5°C (40°F) or slightly below; use or freeze ground beef and
poultry within 2 days; whole red meats, within 3 to 5 days. Defrost frozen meat in the refrigerator, not
on the kitchen counter.
When using a Dehydrator, check the temperature of the Dehydrator with a dial thermometer
before drying jerky. The minimum recommended temperature or drying meats is 63°C (145°F).
IMPORTANT: Before you place the meat in a dehydrator, it is highly recommended to heat the
meat to 71°C (160°F) BEFORE the dehydrating process. This step assures that any bacteria present
will be destroyed by wet heat. After heating to 71°C (160°F) maintaining a constant dehydrator
temperature of 55-60°C (130-140°F) during the drying process is important because:
1. the process must be fast enough to dry food before it spoils; and
2. it must remove enough water so that microorganisms are unable to grow.
If you are using a marinade, shake o excess liquid before placing the meat in evenly spaced
single layers approximately (0.64 cm) apart on the Dehydrator racks.
Dry meat at 63-66°C (145-150°F) for 4-7 hours. You may need to blot fat droplets from the
surface of the meat occasionally, using a paper towel. Drying times may vary based on many
circumstances including but not limited to: the relative humidity of the room, the temperature of the
meat at beginning of drying process, the amount of meat in the dehydrator, leanness of meat, etc.
Alwaysallow jerky to cool before taste testing.

10 11
CLEANING
Cleaning the dehydrator is a simple process. Simply remove trays and wipe down both the exterior
and interior surfaces of the unit with a warm damp cloth and mild detergent. Each if the individual
shelves are conveniently dishwasher safe.
The non-stick and mesh sheets are reusable, simply wash in warm soapy water and leave to
airdry.
NEVER IMMERSE THE UNIT OR POWER CORD IN WATER OR OTHER LIQUIDS
To obtain the best results:
1. Use high quality food- the better the food the better the results.
2. Wash food, use clean utensils and keep work area clean.
3. Pre-treat foods to prevent discolouration.
4. Do not overlap food on shelves as drying times are also aected by the amount of food placed
on the shelves, mesh or non-stick inserts.
5. Drying times will vary depending on food thickness, moisture in the food, relative humidity and
temperature of the room.
6. Cool food before testing for dryness.
7. Let the food cool to room temperature before placing it in airtight containers.
8. Reconstitute as needed.
9. Last but not least, ENJOY!
REVIEWING THE DEHYDRATING PROCESS
Only for EU countries. Do not dispose of electric appliances together with household
waste material! In observance of European Directive 2002/96/EC on waste electrical
and electronic equipment and its implantation in accordance with national law, electric
appliances that have reached the end of their life must be collected separately and
returned to an environmentally compatible recycling facility.

12 13
Eective as of 1st January 2014
This warranty as outlined below solely covers distributors. Please contact your distributor for full product warranty.
1. Athena Solutions® warrants this appliance to be free from defects in materials and workmanship and to
perform satisfactorily in household use for a period of 2 years and in commercial use for a period of 12
months from the date of purchase when used in accordance with the accompanying instruction book.
2. Any warranties exceeding this standard period are oered as extended terms by the selling distributor and
claimable only though that provider.
3. Defects that occur within this manufacturers warranty period, under normal use and care will be repaired or
replaced at our discretion only if the selling distributor is unable to do so. This is done solely at our option
with no charge for parts. This warranty does not extend to accessories included or purchased separately.
Replacements can be oered for major faults as determined by your distributor and at their own discretion.
4. In the event that the goods requiring repair are under warranty, and this distributor is unable to provide the
repairs the customer is responsible for the cost of the return of the product to Athena Solutions® (or their
approved service provider) and also the cost of return to the customer.
5. Whilst in transit the goods are at the owner’s risk and any further damage during this transportation is not
covered under warranty.
6. Customers should ensure that the product being returned is properly packaged so as to ensure that no
damage occurs to the product during transit. To be able to process the warranty claim ensure you have
included an explanation of any problem, Athena Solutions® will not fault-find and will only repair described
faults as covered under warranty.
7. This full warranty is void if this appliance has been subjected to abuse, negligence, accident, alteration, failure
to follow operating instructions, or the product has been exposed to abnormal or extreme conditions.
8. Cosmetic changes that do not aect performance, such as discolouration of parts of the product in the hands
of the user or the eects of the use of abrasive cleaners will not be warranted or considered defects. The
cleaning or removal of food products along with any damage caused by allowing them to build up is not
covered by this full warranty.
9. This warranty does not cover normal wear and tear of the product or parts.
10. This warranty does not cover any defect caused by an accident, misuse, abuse, improper installation or
operation, lack of reasonable care, unauthorized medication, loss of parts, tampering or attempted repair by a
person not authorized by Athena Solutions®.
11. The warranty will not apply if damage, malfunction or failure resulting from alterations, accident, misuse,
abuse, fire, liquid spillage, maladjustment of customer controls, use on an incorrect voltage, power surges
and dips, thunderstorm activity, acts of God, voltage supply problems, tampering or unauthorized repairs by
any persons, use of defective or incompatible accessories, exposure to abnormally corrosive conditions or
entry by any insect, vermin or foreign object in the product.
12. Warranty does not cover damage done to any product by using the machine with an alternate power source
(solar, inverter, generator, etc.) and the use of these devices to power your appliance is not recommended.
13. You must keep your purchase docket/receipt as proof of purchase and as proof of the date on which
the purchase was made. The purchase docket or receipt must be presented when making a claim under
thiswarranty.
14. In the event the receipt of purchase is not presented, then this warranty is invalid. Consumer Law allows us to
request reasonable proof of purchase to service a warranty claim.
15. This warranty does not imply, intend to or detract any consumer rights listed in and able to be enforced
from Regulated Consumer Law, any condition which is found to be in breach of the consumer law, the single
condition shall be void only and all other conditions remain in place.
WARRANTY TERMS & CONDITIONS (INTERNATIONAL) CONTACT US
Please contact the distributor located in the Country where you made your original purchase for
all Support, Servicing and Warranty.

ATH P200 Dehydrator Manual v9
Table of contents
Other Optimum Kitchen Appliance manuals

Optimum
Optimum ST-1405 User manual

Optimum
Optimum ZG-0300 User manual

Optimum
Optimum ST-1412 User manual

Optimum
Optimum RK-0133 User manual

Optimum
Optimum RK-1240 User manual

Optimum
Optimum KOMBIWAR AX-777M User manual

Optimum
Optimum SP-2002 User manual

Optimum
Optimum ST-1416 User manual

Optimum
Optimum SP-2001 User manual

Optimum
Optimum LP-0005 User manual

Optimum
Optimum GR-2000 User manual

Optimum
Optimum RK-0050 User manual

Optimum
Optimum Sous Vide User manual

Optimum
Optimum MAMMA MIA User manual

Optimum
Optimum RK-0132 User manual

Optimum
Optimum RK-0134 User manual

Optimum
Optimum LP-0600 User manual

Optimum
Optimum LP-0001 User manual

Optimum
Optimum RK-1235 User manual

Optimum
Optimum SVD150 User manual