Organomation N-EVAP 11106-O User manual

N-EVAP®
Nitrogen Evaporation System
Models
11106-O (6 Position)
11155-O(12 Position)
11250-O(24 Position)
INSTRUCTION MANUAL
266 RIVER ROAD WEST
BERLIN, MA 01503
U. S. A.
Tel: 888-838-7300 Fax: 978-838-2786
Email: sales@organomation.com


TABLE OF CONTENTS
N-EVAP®
Product designs are subject to change without notice
Introduction
Instrument Items Shipped…………………………………………………….. 1
Instrument Description……………………………………………………….. 3
Safety Considerations - Read before operation ……………………………………… 4
Installation
Instrument Part Identification…………………..…………………………….. 5
Instrument Setup……………………………………………………………… 6
Options
Pressure Reducing Regulator…………………………………………………. 14
Pasteur Pipette Adapter and Flow Controller………………………………… 15
Operation
Planning and Preparation……………………………………………………... 16
Instrument Operation…………………………………………………………. 17
Maintenance and Cleaning…………………………………………………………… 22
Trouble Shooting……………………………………………………………………… 23
Technical Information
Service and Returns…………………………………………………………... 24
Shipping - Claims for damage or shortage…………………………………… 25
Specifications…………………………………………………………………. 26

266 River Road West
Berlin MA 01503-1699 USA
Tel: 888 838-7300 Fax: 978 838-2786
e.mail: sales@organomation.com
Dear Customer,
Thank you for choosing a Sample Preparation Instrument from Organomation
Associates. We appreciate your business and believe that the instrument and
accessories you purchased will work very satisfactorily for many years to come.
Whether you have added another instrument to your laboratory, or have purchased
one for the first time, we will stand behind our equipment.
Should you have questions regarding the set up or operation of this instrument or
questions regarding other Organomation products please contact us. The toll free
telephone number for sales support and customer service is 888 838-7300. If you
purchased the instrument through one of our dealers you should contact them first.
Any comments from you would be much appreciated. We listen to our customers
which, in turn, enables us to provide the best instruments available. Please fill out the
Warranty and Service Registration Form and return it within ten days of receipt of
instrument. Once we have the completed form, your warranty will be activated as
stated. The Warranty Form can be mailed or faxed to us at 978 838-2786.
The operating manual contains literature and product lists describing our complete
line of laboratory instruments. It provides a convenient way to order new instruments,
accessories or repair parts. If you need a verbal or written quote on specific items
please call us at our toll free number or e.mail us at the address above.
Again, thank you for selecting ORGANOMATION ASSOCIATES products.
Sincerely,
Andrew McNiven
President

-1-
V20.5
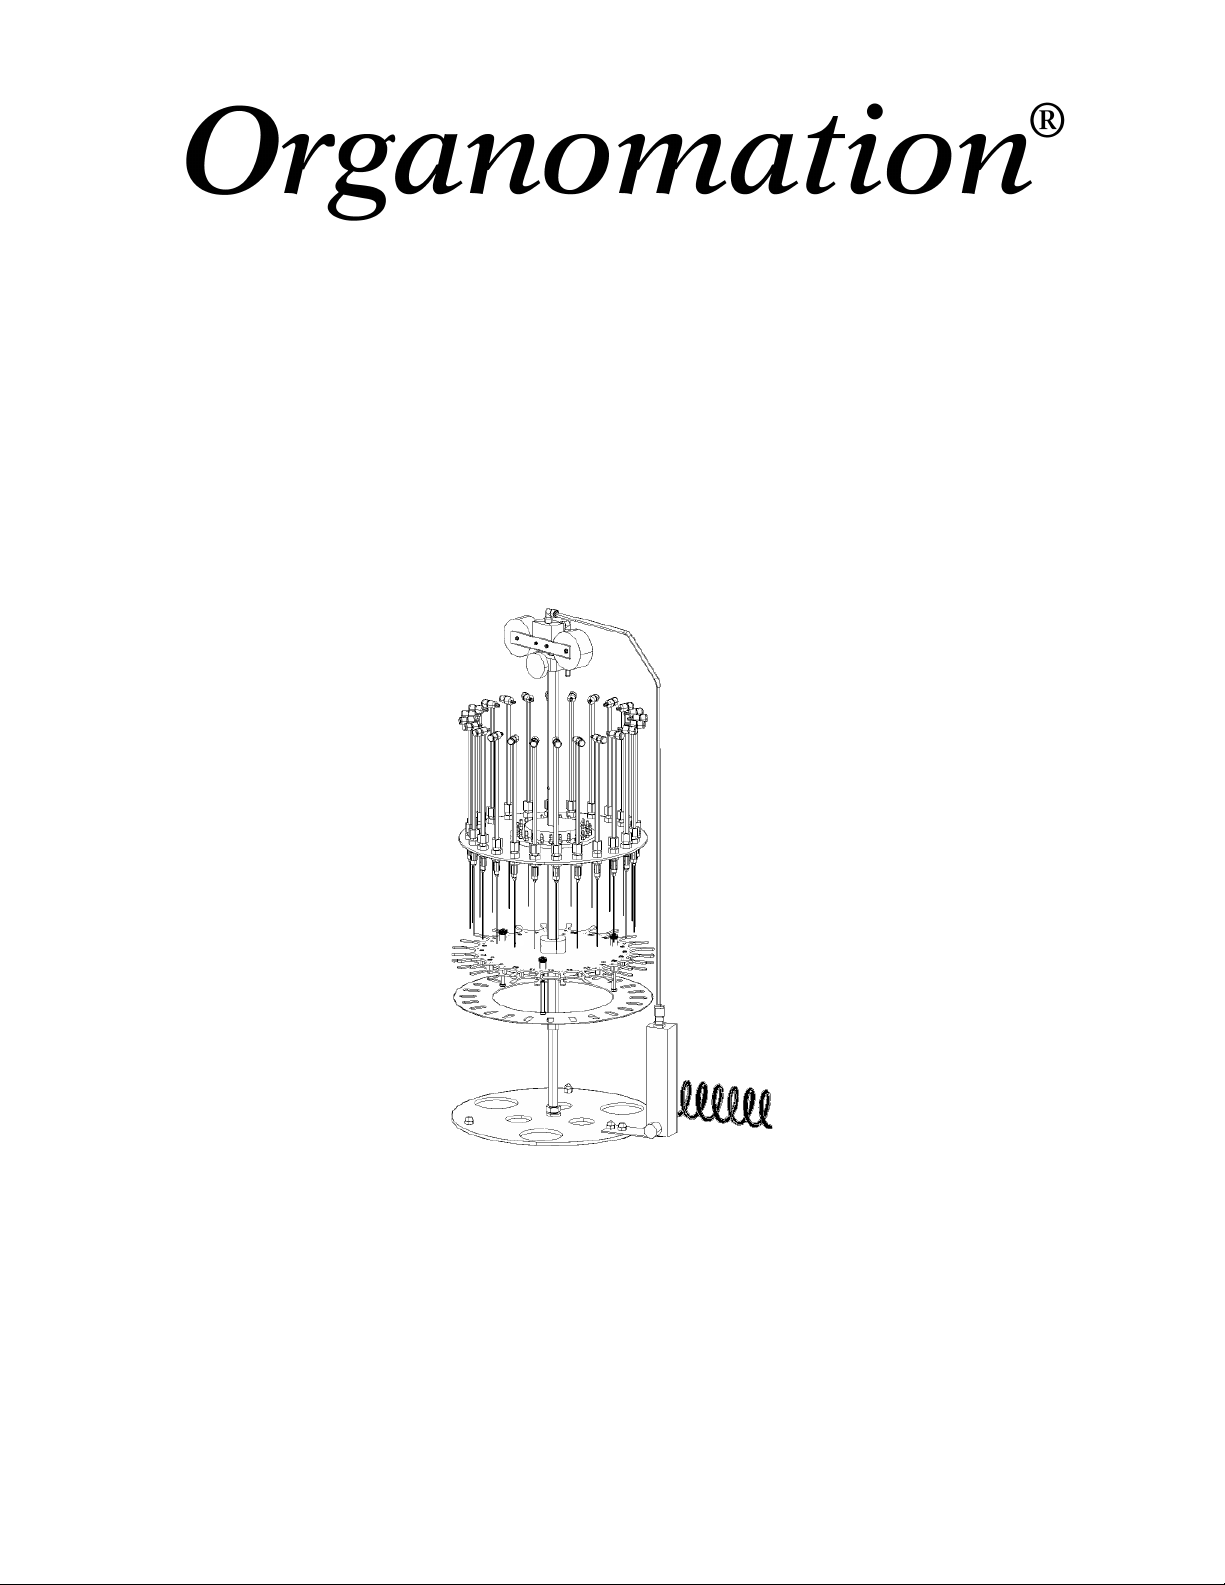
N-EVAP®INTRODUCTIONN-EVAP®
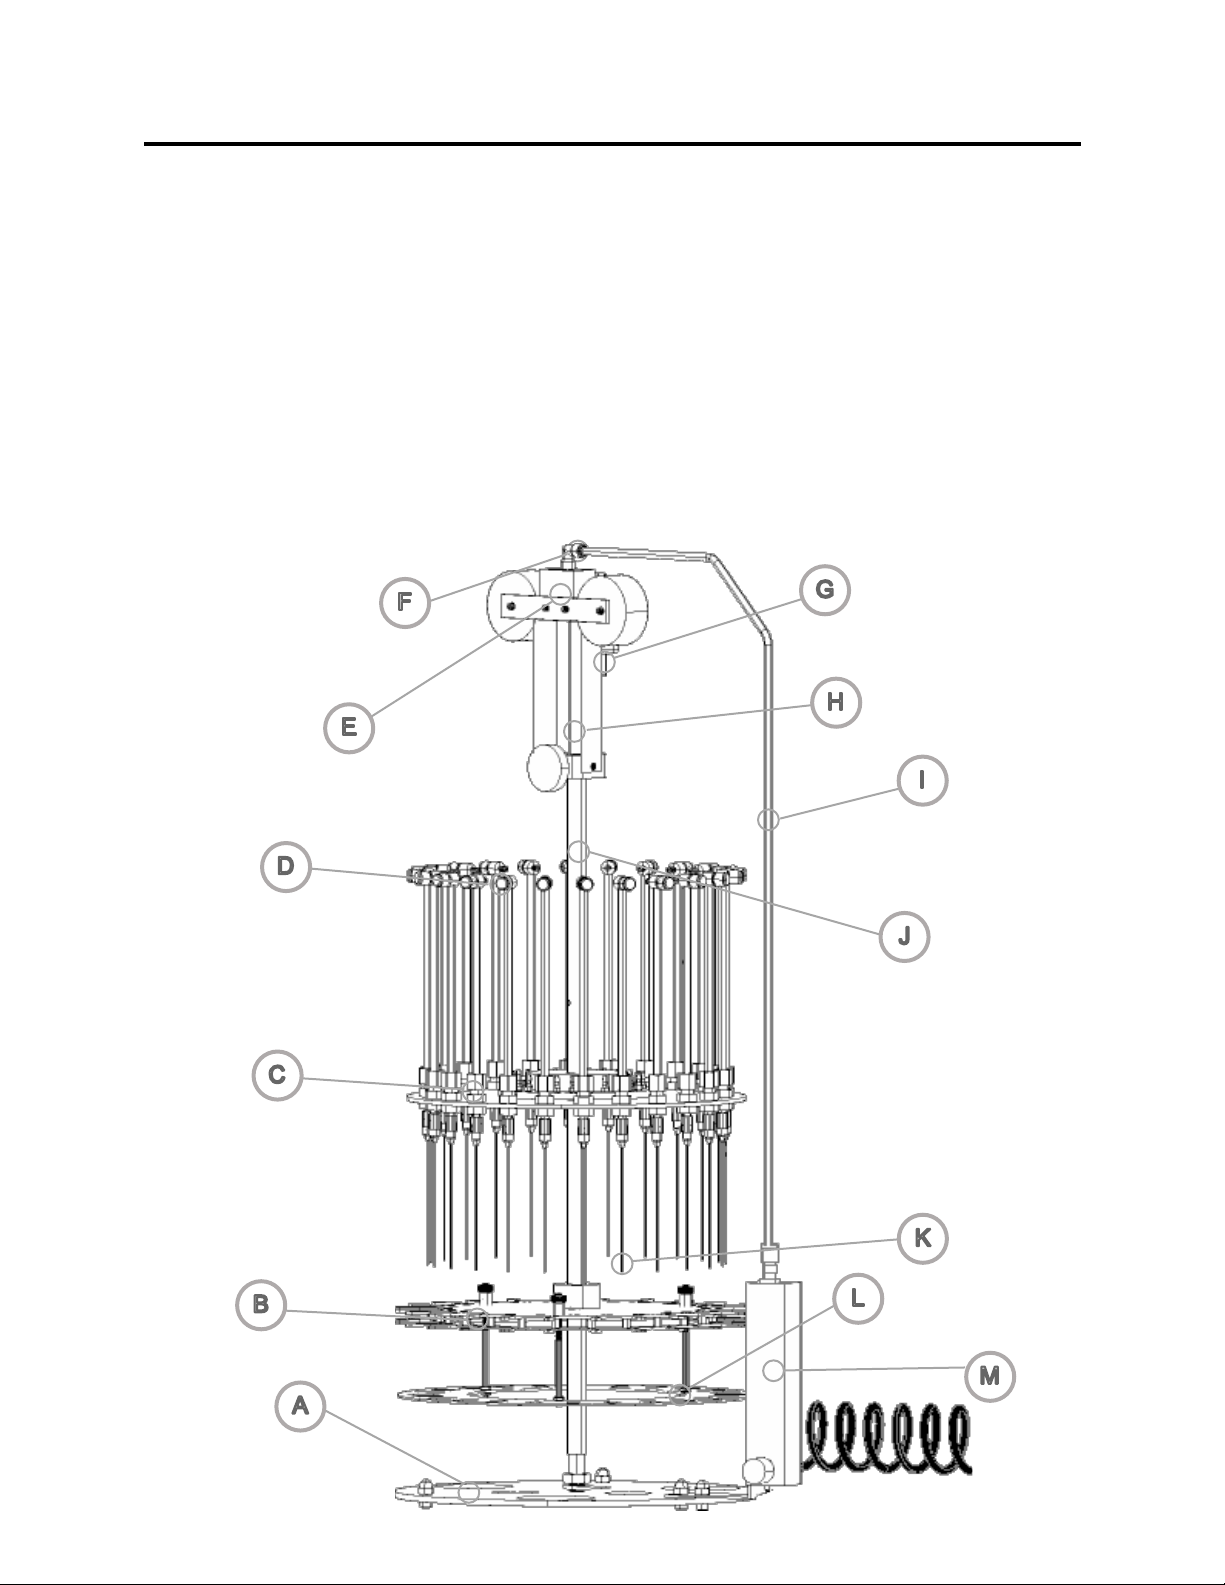
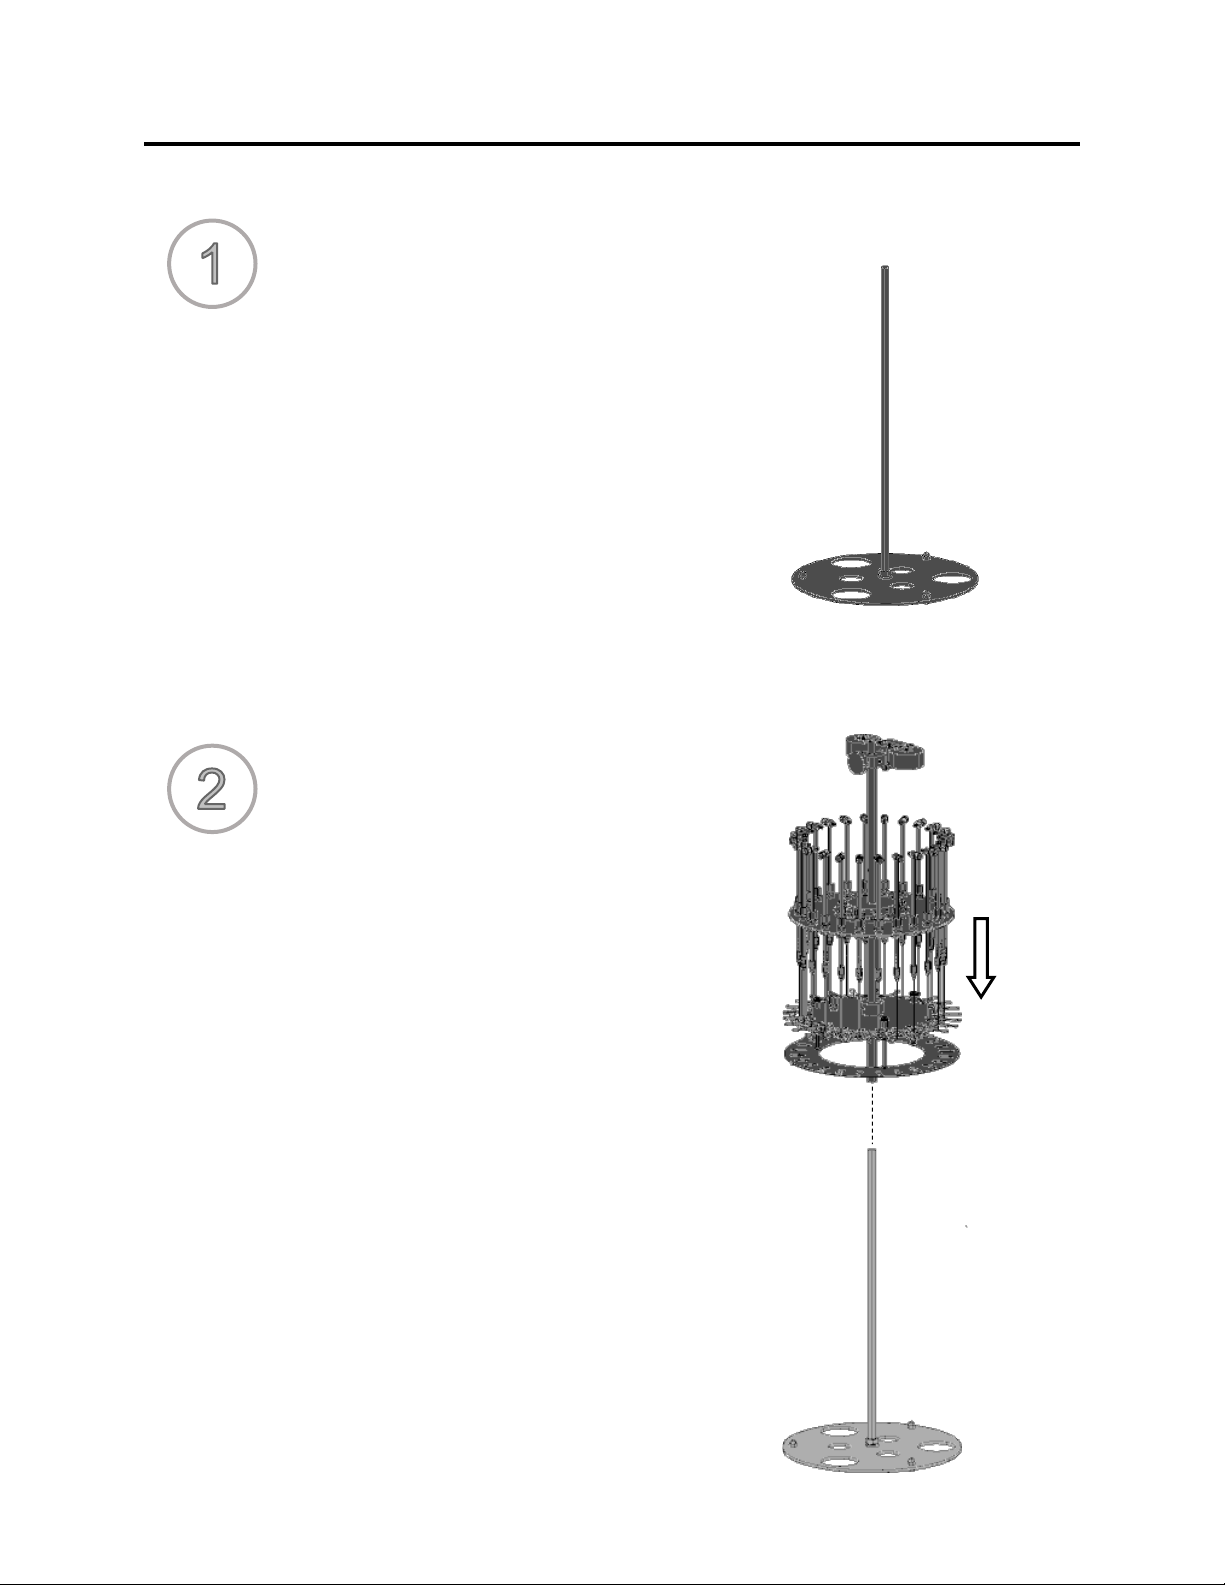
Items Shipped
Carefully check the contents of all cartons received for damage which may have occurred in
transit. Retain all cartons and packaging materials until all components have been checked
against the packing slip, the component list below, and the equipment has been assembled and
tested. Contact Organomation immediately if any damage or discrepancies are found.
Your shipment should contain one or more of the instruments shown below. Option codes are
listed on the next page.
Instrument Size
6 Position N-EVAP Nitrogen evaporation system
12 Position N-EVAP Nitrogen evaporation system
24 Position N-EVAP Nitrogen evaporation system
Flowmeter Assembly with Mounting Bracket & Connector Tube
0-10 LPM for 6 and 12 position N-EVAP
0-20 LPM for 24 position N-EVAP
19ga x 4” Stainless Steel Luer Lock Needles, blunt end
6 Needles for 6 Position N-EVAP
1 Dz for 12 Position N-EVAP
2 Dz for 24 Position N-EVAP
Stainless Steel Gas Tube 1/4” (7mm) OD
T-Handle Hex Key adjustment tools
1 ea. 1/8” x 6” Long, for 6, 12 & 24 position N-EVAP
1 ea. 5/32” x 6” Long, for 6, 12 & 24 position N-EVAP
Manual for N-EVAP models 11106-O, 11155-O, 11250-O
Pasteur Pipette Adapter, 1 Dozen per set (Optional)
Cat #
11106-O
11155-O
11250-O
NA1221
NA1521
NA0603
P1230
NA0636
NA0637
N-EVAP and OA-HEAT are Trademarks of Organomation Associates Inc.

-2-
V20.5
N-EVAP®INTRODUCTION
Option Codes and additional items shipped
The following list contains option codes and items which may have been shipped in
conjunction with the standard parts shown on the previous page. Please check your packing
list and order information carefully to determine if these items are included in your shipment.
For a complete list of available accessories, please refer to the Accessories Section.
Your shipment may contain the following optional items:
Description
6, 12 or 24 N-EVAP Instrument ordered without OA-HEAT water bath,
includes a flowmeter mounting bracket (included with flowmeter) for
direct mounting to stand base versus to the bath.
Pasteur Pipet Adapters replace SS needles on the N-EVAP. 1 or 2 dozen
are provided with the respective N-EVAP size ordered, reference part #
NA0636.
6, 12 or 24 Position N-EVAP Instrument and are coated in PTFE
Instrument is black in color.
SS Needles 19 gauge x 4” (100mm) Long, are coated in PTFE and are
black in color.
Option
-O
-P
-RT
-T

-3-
V20.5
N-EVAP®INTRODUCTION
Instrument Description
The N-EVAP Nitrogen Evaporation System is designed for general evaporation of
analytical or biological samples in a variety of test tube based glassware under controlled and
reproducible conditions.
The instrument portion is circular and is designed to hold test tubes from 10 to 30 mm OD.
The unit will rotate in any direction and may be raised or lowered at will. All units have spring
lift assemblies. The instrument may be used with OA-HEAT or other heating baths or may be
ordered as a standalone unit. Construction is primarily 304 and 316 stainless steel, anodized
aluminum, chrome plated brass, and Delrin (Acetal). Unit may be used with SS needles or
disposable glass pipets. Coating in PTFE is available for acidic applications. All tubing
provided is phthalate free.

-4-
V20.5
N-EVAP®SAFETY
Safety Considerations
READ THIS SECTION BEFORE EQUIPMENT OPERATION!
This equipment is designed for use in the Analytical or Environmental Laboratory by trained
laboratory personnel for evaporative applications. Use of this equipment beyond its stated
intended purpose and operating parameters is not recommended and will be the sole
responsibility of the user. This equipment should not be modified or altered. Organomation
assumes no liability for any misuse of or modification to this product and such misuse or
modification will immediately void all warranties.
This equipment should be used in accordance with the operating instructions contained in this
manual. For alternative uses not covered in this manual, please contact Organomation
Technical Support at 978-838-7300 for product suitability, safety, and alternative operating
instructions.
The following are general safety guidelines recommended when using this product. Please
consult your laboratory safety officer for any additional safety steps which may be necessary
for your specific application or material.
1. Thoroughly review your MSDS (Material Safety Data Sheets) for all chemicals to be used
with this equipment.
2. Hand and eye protection are recommended when using this product. Additional protection
may be required with respect to the materials being used. Please consult your laboratory
safety officer.
3. This product should be used in a chemical fume hood with adequate ventilation.
4. Incorrect replacement parts or assembly may damage the product and create a serious
safety hazard for the user. Factory repair is strongly recommended.
5. Use of acidic or base materials may damage this product and are not recommended unless
the product was ordered with the optional protective coating in PTFE .

-5-
V20.5
N-EVAP®INSTALLATION
Assembly Instructions:
Gather and identify all components.
Instrument
A. Stand H. 8 Inch Rod
B. Sample Holder and Sample Spring I. Gas Tube
C. Tube Fitting J. Center Tube Assembly
D. Valve Tube Assembly K. Blunt Needle
E. Hoist Pulley and Band Spring L. Support Tray
F. Swivel Fitting M. Flowmeter and Bracket
G. Filter N. Silicone Tubing (Not Shown)

-6-
V20.5
N-EVAP®INSTALLATION
Instrument Setup
Place the instrument stand [A]
onto a flat level surface.
Sleeve the instrument over the
instrument stand.

-7-
V20.5
N-EVAP®INSTALLATION
Rotate instrument stand so
that the side with 2 nuts is
on the right.
Remove the cap nuts on
those feet.
Place the flowmeter bracket
over the screws so that the
flowmeter faces forward.
Replace and tighten the cap
nuts.

-8-
V20.5
N-EVAP®INSTALLATION
Loosen the thumb screw at the
top of the instrument.
Exploded View

-9-
V20.5
N-EVAP®INSTALLATION
Raise the instrument up along the 8
inch rod [I]
Tighten the thumb screw right below
the top of the rod.
With both hands, lift and rotate the
entire pulley and band spring
assembly [F] 90°.
Seat the assembly on the rod.
Be careful not to cut hands on the band spring

-10-
V20.5
N-EVAP®
Connect the lower end of the
gas tube [J] to the fitting on
the top of the flow meter.
Tighten nut with a wrench.
INSTALLATION
Connect the gas tube [J]
into the swivel fitting [G]
at the top of the instrument.

-11-
V20.5
N-EVAP®INSTALLATION
CW
CCW
For larger test tubes:
Use a hex key to loosen the upper manifold set screws.
Raise the upper manifold. Aligning it with the secondary hole (approximately
35 mm).
Tighten the set screws to secure in place.
To adjust for various test tube sizes:
Turn the thumb screws clockwise to raise the lower support tray.
Turn counter clockwise to lower it.
The tray can be tilted to support multiple test tube sizes by unevenly
adjusting the thumb screws.

-12-
V20.5
N-EVAP®INSTALLATION
The sample holder plate may need occasional adjustment to realign.
Use a hex key to loosen the set
screw on the plate collar.
Raise the sample holder to the
desired height.
Align the test tube positions so
that the valve tubes are centered.
Tighten the set screws to hold the
sample holder plate securely.
Align the needle hub with the luer fitting.
Rotate the needle 90°.
Stainless Steel Needles or Pipette Adapters can be used on this instrument. See
page 15 for Pipette Adapter instructions.
The sample tray is originally set to be flush with the top of the bath.

-13-
V20.5
N-EVAP®INSTALLATION
Raise all valve tubes to their
highest position.
Adjust the tube fitting [D] for
controlled valve movement.
Turn all needle valves
clockwise until they are off. Turn the valve on the flowmeter
clockwise until it is closed.

-14-
V20.5
N-EVAP®Pressure Reducing Regulator
Pressure Reducing Regulator Option - NA0630
When used with an Organomation Instrument recommended pressure is 10-30 psi. To
install a pressure reducing regulator, please follow the instructions and figure below:
Parts:
For 1/4 Outer Diameter (OD) input tube
A. Cut yellow tubing [B] to desired length to fit your lab space
B. Connect yellow tubing to flowmeter or gas input and to the output push connect
fitting [D] (the unlabeled side)
C. Connect source tube to input push connect fitting [C1] (labeled in)
(Optional) For 1/4 Inner Diameter (ID) input tube
A. Cut yellow tubing [B] to desired length to fit your lab space
B. Connect yellow tubing to flowmeter or gas input and to the output push connect
fitting [D] (the unlabeled side)
C. Unscrew push connect fitting [C1] on the input side (labeled in)
D. Screw barb fitting [C2] into input side
C. Connect source tube to input barb fitting [C2]
(Optional) Reverse Gauge Position
A. Unscrew set screw [G]
B. Unscrew gauge [E]
C. Screw gauge into reverse side
D. Screw set screw into remaining hole
A. Adapter D. 1/4” Push to connect fitting
B. Yellow tubing E. Pressure gauge [0-60 psi]
C1. 1/4” Push to connect fitting F. Regulator [One directional]
C2. 1/4” Barb fitting G. Set screw

-15-
V20.5
N-EVAP®Pasteur Pipette Adapter and Flow Controller
Pasteur Pipette Adapter and Flow Controller
Two types of Pasteur pipette adapters are offered. Both are compatible with all N-Evap
models.
Pasteur Pipette Adapter and Flow Controller, Male Luer to Fluted Nut - NA0636
A. Loosen the fluted nut
B. Push pipette into the fluted nut and tighten.
C. Screw the adapter onto the luer fitting like you would a needle.
Pasteur Pipette Adapter and Flow Controller, Male Luer to 1/8 Hose Barb - NA0637
A. Choose the tube that fits your pipette.
B. Put the tube on the end of the adapter.
C. Push the pipette onto the tube on the adapter.
D. Screw the adapter onto the luer fitting like you would a needle.

-16-
V20.5
N-EVAP®OPERATION
Operation
Planning and Preparation
It is important to thoroughly understand the procedures and equipment operation prior
to the use of the equipment. Nitrogen evaporation requires a balance of sample volume,
nitrogen flow, needle position and adjustment. Improper use can impair performance,
contaminate samples or result in loss of samples. Environmental conditions are also
important, examples include use of dry or wet heating media, hood airborne
contaminates, gas purge purity, and sample handling procedures. If you are unfamiliar
with the use of the N-Evap System or are working with a new procedure, it is
recommended that a trial run be made using a sample blank to determine optimal
operating conditions.
The N-EVAP System is designed to handle multiple samples simultaneously up to the
capacity of the equipment. Glass or plastic tubes with an outer diameter of 10 to 30mm
and up to 150mm height may be accommodated. Centrifuge tubes, scintillation vials,
small beakers and Erlenmeyers (50 ml) may also be used. Choice of SS needles or
disposable glass pipets (adapters) are available.
The N-EVAP System is manufactured utilizing inert materials. The translucent silicone
rubber tubing used in the gas distribution system is certified 100% Phthalate free.
This manual suits for next models
5
Table of contents
Other Organomation Laboratory Equipment manuals
Popular Laboratory Equipment manuals by other brands

Kinematica
Kinematica Reactron System RT 1 operating instructions

Drucker Diagnostics
Drucker Diagnostics 642E Operator's manual

Eco Physics
Eco Physics CLD 780 TR manual

Biohit
Biohit Proline 710520 instruction manual

Cypress Diagnostics
Cypress Diagnostics CYANExpert 130 user manual

Teledyne Cetac Technologies
Teledyne Cetac Technologies Oils 7400 Series installation guide