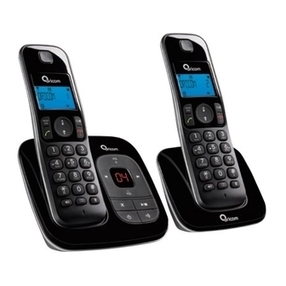
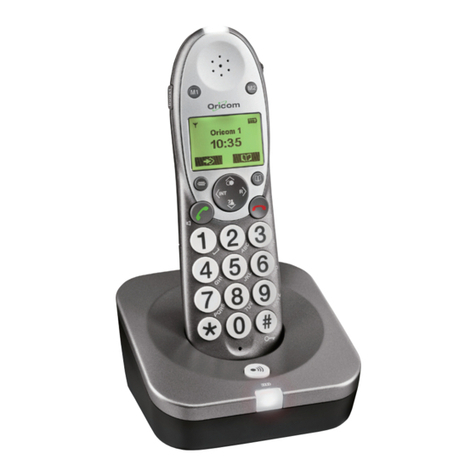
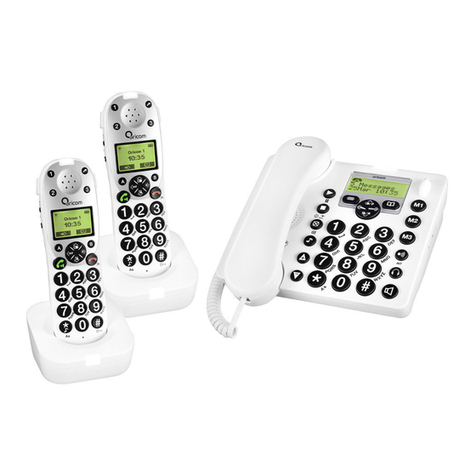
Oricom CARE620 Series User manual

CARE620/CARE820
Amplied Big Button Cordless Phone
Keep this user guide for future reference. Always retain your
proof of purchase in case of warranty service.
USER GUIDE

2
Table of Contents
IMPORTANT SAFETY INSTRUCTIONS........................................... 3
PACKAGE CONTENTS..................................................................... 6
INSTALLING YOUR PHONE............................................................. 7
GETTING TO KNOW YOUR PHONE................................................ 9
USING YOUR PHONE..................................................................... 16
SMART CALL BLOCK FUNCTIONS .............................................. 20
PRIVATE PHONEBOOK ................................................................. 26
CALLER DISPLAY (NETWORK DEPENDENT) ............................. 28
PHONE SETTINGS.......................................................................... 30
ANSWERING MACHINE (FOR CARE820 ONLY) .......................... 38
TROUBLESHOOTING..................................................................... 46
APPENDIX ....................................................................................... 48
Express Warranty (Australia) ........................................................ 50
Need Help?
If you need assistance setting up or using your Oricom product now
or in the future, call Oricom Support.
Australia 02 4574 8888
www.oricom.com.au
Mon-Fri 8am – 6pm AEST
New Zealand 0800 67 42 66
Mon-Fri 10am – 8pm NZST

3
Important Safety Instructions
When using your telephone equipment, basic safety precautions should
always be followed to reduce the risk of re, electric shock and injury,
including the following:
1) Read and understand all the instructions.
2) Follow all warnings and instructions marked on the product.
3) Unplug this product from the wall outlet before cleaning. Do not use
liquid cleaners or aerosol cleaners. Use a damp cloth for cleaning.
4) Do not use this product near water (for example, near a bath tub,
kitchen sink, swimming pool).
5) Do not expose the telephone to direct sunlight or extreme cold
environment.
6) Do not put the telephone close to heating sources such as radiators,
cookers, etc.
7) Do not overload wall outlets and extension cords as this can result in
the risk of re or electric shock.
8) Unplug this product from the wall outlet and refer servicing to
qualied service provider under the following conditions:
• When the power supply cord or plug is damaged or frayed.
• If the product does not operate normally by following the operating
instructions.
• If the product has been dropped and the cabinet has been
damaged.
• If the product exhibits a distinct change in performance.
9) Avoid using a telephone (other than a cordless type) during an
electrical storm. There may be a remote risk of electric shock from
lightning.
10) Do not use the telephone to report a gas leak in the vicinity of the
leak.
11) Use only the supplied NiMH (Nickel Metal Hydride) batteries. The
operation periods for the handsets are only applicable with the
default battery capacities
12) The use of other battery types or non-rechargeable batteries/primary
cells can be dangerous. These may cause interference and/or unit
damage. The manufacturer will not be held liable for damage arising
from such non-compliance.

4
Important Safety Instructions
13) Do not use third party charging bays. The batteries may be
damaged.
14) Please note the correct polarity while inserting the batteries.
15) Do not immerse batteries in water, do not place in re.
IMPORTANT NOTICE
Under power failure conditions, this telephone may not operate. Please
ensure that a separate telephone, not dependent on local power, is
available for emergency use.
Notes for operation in New Zealand
The grant of a Telepermit for any item of terminal equipment indicates
only that Spark has accepted that the item complies with the minimum
conditions for connection to its network. It indicates no endorsement of
the product by Spark, nor does it provide any sort of warranty. Above all,
it provides no assurance that any item will work correctly in all respects
with another item of Telepermitted equipment of a different make or
model, nor does it imply that any product is compatible with all of Spark’s
network services.
This equipment may not provide for the effective hand-over of a call to
another device connected to the same line.
This equipment should not be used under any circumstances that may
constitute a nuisance to other Spark Customers.
REN (RN for New Zealand)
The REN (Ringer Equivalence Number) or (RN) is of signicance only
if you wish to connect more than 1 telephone to your telephone line.
A standard telephone line has a maximum REN capacity of 3 (RN of
5). It is possible to connect 3 devices with a REN of 1 (RN of 1) with
no degradation to the product’s performance. Exceeding this limit may
cause the volume of the ringer in any phone to decrease or not ring at
all.

5
Important Safety Instructions
Important: This equipment may not provide for the effective hand-over
of a call to another device connected to the same line. The recall facility
of this product may not always operate correctly on some parts of the
Spark network or on some PABXs available on the market. If this is the
case then 'recall' can be activated by 'ashing' the switch-hook or repeat
use of the recall button. RECALL PROBLEMS WITH THIS PRODUCT
ARE NOT TO BE REPORTED TO THE SPARK FAULTS SERVICE.
All persons using this device for recording telephone conversations shall
comply with New Zealand law. This requires that at least one party to
the conversation is to be aware that it is being recorded. In addition, the
Principles enumerated in the Privacy Act 1993 shall be complied with in
respect to the nature of the personal information collected, the purpose
for its collection, how it is used and what is disclosed to any other party.

6
Package contents
Package contents:
The package contains the following:
Oricom CARE620-1/CARE820-1 Pack Contents
- 1 x Cordless Handset
- 1 x Base
- 1 x Line Cord
- 1 x AC Power Adaptor
- 2 x AAA NiMH Batteries
- 1 x User Guide
Oricom CARE620HS Pack Contents
- 1 x Additional Handset
- 1 x Charging Base Station

7
INSTALLING YOUR PHONE
Connecting the base station
1) Plug the power supply & line cord into the base station.
2) Plug the power supply & line cord into the mains socket.
3) Always use the cables provided in the box.
Oricom CARE620-1 Oricom CARE820-1
Installing and charging the batteries
1) Slide off the battery compartment cover to remove it.
2) Place the 2 batteries as indicated. Respect polarity.
3) Slide the battery compartment cover back.
4) Place handset on base and charge batteries for 16 hours for the rst
charge. A beep indicates that the handset is properly placed on the
base or charger.

8
INSTALLING YOUR PHONE
Please note:
1. Use only the power adaptor provided for the base station.
2. Use only NiMH rechargeable batteries.
3. If the handset will not be used for a long time, disconnect and remove
the batteries to prevent possible leakage.

9
GETTING TO KNOW YOUR PHONE
Overview of the Handset
1. MENU/OK
In standby mode: Press to access the
main menu
In sub-menu mode: Press to confirm
the selection
During a call: Press to access
Intercom/ Phonebook/ Redial List/ Call
List
1
8
5
7
2
4
6
11
3
9
10
12
2. SMART CALL BLOCK/CLEAR/BACK
In main menu mode: Press to select
the Call Block Setting menu
In ringing mode: Press to block
incoming call* if BLOCK SET. is set to
ON.
In sub-menu mode: Press to go back
to previous menu.
In editing / predialing mode: Press to
clear a character / digit. Press and
hold to delete all characters / digits.
3. UP
In standby mode: Press to access the
phonebook
In menu mode: Press to scroll up the
menu items
In Phonebook list / Redial list / Call
List: Press to scroll up the list
During a call: Press to increase the
volume
In editing mode: Press to move the
cursor one character to the left.

10
GETTING TO KNOW YOUR PHONE
4. DOWN
In standby mode: Press to access the
redial list
In menu mode: Press to scroll down
the menu items
In Phonebook list / Redial list / Call
List: Press to scroll down the list
During a call: Press to decrease the
volume
In editing mode: Press to move the
cursor one character to the right.
1
8
5
7
2
4
6
11
3
9
10
12
5. TALK ON/SPEAKER
In standby / predialing mode : Press to
make a call
In Redial list / Call List / Phonebook
entry: Press to make a call to the
selected entry in the list
During ringing: Press to answer a call
During a call: Press to switch to
speaker mode
6. TALK OFF
During a call: Press to end a call and
go back to standby screen
In menu / editing mode: Press to go
back to standby screen
In standby mode: Press and hold to
power off the handset
During call blocking: Press to unsave
the incoming call to Call Block list*

11
GETTING TO KNOW YOUR PHONE
7. ALPHANUMERIC KEYPAD, * (STAR),
# (HASH)
Press to insert a digit / character / * / #
1, 2, 3, key in standby mode: Press
and hold to dial pre-recorded number
stored in DIRECT MEM.
0 key in predialling mode / during a
call: Press and hold to insert ash
* key in standby mode: Press and hold
to intercom other handset(s)
# key in predialling mode / during a
call: Press and hold to insert pause
* key during a call: Press and hold to
start conference call(in intercom mode)
1
8
5
7
2
4
6
11
3
9
10
12
8. M1, M2
In standby mode /During a call: Press
to dial pre-recorded number stored in
DIRECT MEM.
9. AUDIO BOOST
During a call: Press to audio boost on/
off (inactive in speakerphone mode)
10.EARPIECE
11.MICROPHONE
12.HANDSET LED
During charging: On
In ringing mode / Paging mode: Flashing
quickly
(for CARE820) When new voice mail: Flash
slowly
(for CARE820) When new voice mail or new
voice message (TAM): Flash slowly

12
GETTING TO KNOW YOUR PHONE
Oricom CARE620-1 Base Station Overview
1. IN USE LED- BLUE LIGHT
Light is steady when in talk mode.
Light flashes when receiving an incoming call, or handset is off cradle
during registration.
2. PAGE
Press to page your handset(s). It will ring for approximately 60 seconds.
Press and hold to enter registration mode for 5 seconds
Oricom CARE820-1 Base Station Overview
1
8
5
7
2
4
6
3
9

13
GETTING TO KNOW YOUR PHONE
1. IN USE LED-BLUE LIGHT
Light is steady while the handset is charging, in use, or handset is on
cradle during registration.
Light ashes when receiving an incoming call, or handset is off cradle
during registration.
2. TAM ON/OFF
Press to turn on the answering machine.
Press again to turn off the answering machine.
3. PLAY / STOP
Press to play the message
Press again to stop message playback
4. SKIP BACKWARD
Press to skip backward to the previous message.
5. SKIP FORWARD
Press to skip the current message and play the next message
6. VOLUME UP (+)
Increase (+) speaker volume during message playback
7. VOLUME DOWN (-)
Decrease (-) speaker volume during message playback
8. DELETE
Press once to delete the message during playback
Press and hold to delete all the messages
Note: New voice messages will not be deleted.
9. 7-SEG LED DISPLAY
0F-> - When answering machine is OFF.
-
-- When answering machine is OFF and no new TAM
messages received
0n-> When answering machine is ON where XX is number of
messages in TAM memory.
XX
00 Steadily ON: No voice messages in TAM.
XX Flash: There are XX new voice messages received where XX
is from 01 to 59.
ZZ Steadily ON: There are ZZ old voice messages kept in the
TAM memory (no new voice messages).

14
GETTING TO KNOW YOUR PHONE
XX/FF Flashing XX alternatively with FF: There are XX new voice
messages received where XX is from 01 to 59 and the TAM
memory is full.
FF Flashing FF: TAM memory is full and there are no new
messages, only old messages are kept in TAM memory.
- - /XX Flashing XX alternatively with - -: Time is not set and there
are XX new voice messages received where XX is from 01 to
59.
- - Flashing - -: Time is not set and there are old voice messages
kept in the TAM memory only (no new voice messages).
XX Steadily ON: Playing the current XX incoming message.
A1/A2 Steadily ON: Playing the current outgoing message (OGM)
where A1 is the Answer & Record OGM and A2 is the
Answer Only OGM.
XX/An Flashing XX alternatively with An: XX new incoming message
is now recording. An denotes that the incoming message
recording is in progress.
rA Flashing: Remote access is in progress.
LX Steadily ON: Indicates the current volume level where X is
from 1 to 8 (non-cyclic).
10.PAGE
Press to page your handset(s). It will ring for approximately 60
seconds.
Press and hold to enter registration mode for 5 seconds
Display Icons and Symbols
The LCD display gives you information on the current status of the
telephone.

15
GETTING TO KNOW YOUR PHONE
Symbol ON and steady indicates the handset is within the range
of the base.
Symbol is OFF if the handset is out of range or is searching for
the base.
Symbol ON and steady indicates a call is in progress.
Symbol ashes when there is an incoming call.
Symbol ON and steady indicates that handsfree is being used.
(For CARE820 model)
Symbol ON and steady indicates when the telephone answering
machine (TAM) is turned on.
Symbol ashes when new TAM messages are received.
Symbol ON and steady indicates the ringer is switched off
Symbol ON and steady indicates when an alarm is set.
Symbol ashes when the alarm time set before reaches.
Symbol ON and steady indicates when there are newly received
Voice Message Waiting (VMWI) not yet read.
Symbol ON and steady indicates the battery is fully charged.
Internal block symbol flashes when the battery is in final
charging stage.
Symbol ashes when low battery power level is detected.
Symbol ON and steady indicates a new call which has not been
read in call log.
Off When new call has been read.
Symbol ON and steady indicates audio boost is on (earpiece of
handset will be louder)
Symbol ON and steady indicates either Call Block Setting is set
to ON or Block Anonymous Setting is set to ON
Hearing Aid Compatibility:
- Special feature which helps to eliminate background noise and
interference when you use this telephone with a hearing aid.

16
USING YOUR PHONE
USING YOUR PHONE
Make a Call
Preparatory Dialing
Enter the phone number and press <TALK ON> to dial the number.
Press <C> to clear the entry.
Post Dialing
Press < TALK ON> to take the line and enter the phone number.
Call from the phonebook
Press <UP> to access the phonebook and press <UP> or <DOWN>
to select the desired phonebook entry. Press < TALK ON> to dial the
selected phonebook entry. Alternatively, press <MENU/OK> to access
the phonebook to get the desired phonebook entry.
Call from the Call List
Press <MENU/OK>, then press <DOWN> to select CALL LIST, press
<MENU/OK>, press <UP> or <DOWN> to access the Call List from the
main menu. Press <TALK ON> to dial the selected number.
Call from the redial list
Press <DOWN> to access the redial list and press <UP> or <DOWN> to
select the desired redial number. Press <TALK ON> to dial the selected
number.
Answer a Call
When the phone rings, press <TALK ON> to answer a call.
If the handset is on the charging cradle or the base station and if AUTO
ANSWER is set to ON:
When the phone rings, pick up the handset to answer a call.

17
USING YOUR PHONE
End a Call
During a call connection, press <TALK OFF> to end the call.
OR
Place the handset on the base station or the charging cradle to end the
call.
Adjust Earpiece and Handsfree Volume
There are 5 levels (VOLUME 1 to VOLUME 5) to choose from for
earpiece and handsfree volume.
During a call:
Press <UP> or <DOWN> to select volume 1-5. The current setting is
shown. When you end the call, the setting will remain at the last selected
level.
Redial the last number
You can redial up to 10 of the last numbers called. If you have stored
a name in the phonebook to match with the number, the name will be
displayed instead. The most recent number will display at the top of the
redial list.
Redial a Number from the Redial List
1. In standby mode, press <DOWN> to access the redial list.
2. Press <UP> or <DOWN> to browse the redial list.
3. Press <TALK ON> to dial the selected redial number.
Note: If there are no numbers in the redial list, the display shows
“EMPTY”.
Store a Redial Number into the Phonebook
1. Follow Steps 1 and 2 in “redial a number”.
2. Press <MENU/OK> and <UP> or <DOWN> to select ADD TO PB.
3. Press <MENU/OK> to enter the name.
4. Press <MENU/OK> to edit the number if necessary.
5. Press <MENU/OK> to browse the melody list, and then press
<MENU/OK> to conrm the melody, “ADD TO VIP?” will be shown.
6. Press <MENU/OK> to conrm to save it in VIP list or Press <C> to
conrm to save it in Phonebook only.

18
USING YOUR PHONE
Store a Redial Number into the Call Block list
1. Follow Steps 1 and 2 in “redial a number”.
2. Press <MENU/OK> and <UP> or <DOWN> to select ADD TO BLIST.
3. Press <MENU/OK> to edit the number if necessary.
4. Press <MENU/OK> to conrm to save it in Call Block List.
Delete a Redial Number
1. Follow Steps 1 and 2 in “redial a number”.
2. Press <MENU/OK> and <UP> or <DOWN> to select DELETE, press
<MENU/OK>, CONFIRM? is shown.
3. Press <MENU/OK> to conrm.
Delete the Entire Redial List
1. Follow Steps 1 and 2 in “redial a number”.
2. Press <MENU/OK> and <UP> or <DOWN> to select DELETE ALL.
3. Press <MENU/OK>, CONFIRM? is shown.
4. Press <MENU/OK> to conrm.
Find the Handset
You can locate the handset by pressing <PAGE> on the base station.
All the handsets registered to the base will produce the paging tone and
“PAGING” is displayed on the LCD. You can stop the paging by pressing
< TALK ON> / <TALK OFF> / <C>/<OK/MENU> on any handset or
<PAGE> on the base again.
Note: If there is an incoming call during paging, the phone will ring with
the incoming call instead of paging.
Make an Internal Call
This feature is only applicable when there are at least two registered
handsets. It allows you to make internal calls, transfer external calls from
one handset to another handset and make conference calls. If the called
handset is not answered within 60 seconds, the called handset will stop
ringing and the calling handset will return to standby mode.

19
USING YOUR PHONE
Intercom Another Handset
1. In standby mode, press and hold <*> and the registered handsets will
display except the calling handset.
2. Enter the desired handset number to intercom with.
3. The called handset rings, press <TALK ON> on the called handset to
establish the internal call.
Note:
1. If only two handsets are registered to the base station, press <INT>
will call another handset immediately.
Call All Handsets
1. In standby mode, press and hold <*> and the registered handsets will
display.
2. Press [UP] or [DOWN] to select registered handset.
Transfer an External Call to another handset
During an external call:
1. Press <MENU/OK> and <UP> or <DOWN> to select INTERCOM.
2. Press <MENU/OK> to select the desired handset to intercom with.
3. The external call is put on hold automatically and the called handset
rings.
4. Press < TALK ON> on the called handset to establish an internal call.
5. Press < TALK OFF> on the calling handset or put the calling handset
on the charging cradle to end the current call with the external party.
6. The external call is transferred to the called handset.
Make a 3-way Conference Call
The conference call feature allows one external call to be shared with
two handsets (in intercom).
During an external call:
1. Follow Steps 1 to 4 in “Transfer an External Call to another handset”.
2. Press and hold <*> on the calling handset to establish the conference
call.

20
SMART CALL BLOCK FUNCTIONS
This telephone is built-in with Smart Call Block feature*. This feature will
help you avoid nuisance calls by only allowing some numbers to make
your phone ring.
Default setting of Smart Call Block in this telephone is OFF but you
can enable it via your phone settings, as explained in the following
paragraphs.
*This feature requires a subscription of Caller Line Identification service
from your telephone service provider.
CALL BLOCK OVERVIEW
Setting Explanations
OFF Call Block function (Block all call with numbers) is
Disabled. This is the default mode.
ON Call Block function is set to Manual. Numbers
registered in the block list will not go through and the
phone will ring silently.
Numbers can be added to the list while the phone is
ringing and/or after a call.
CONTACTS In this automatic mode, any number not registered
to your phonebook will be automatically blocked, you
phone will not ring. All calls from contacts registered to
your phonebook will proceed normally.
When this mode is chosen, CONTACTS OK is
displayed on LCD in standby mode unless you have
unread messages/missed calls.
VIPS In this second automatic mode, only calls from
contacts registered as VIP in your phonebook will go
through and ring. Any other number will not ring. When
this mode is chosen, VIPS OK is displayed on the LCD
in standby mode unless you have unread messages/
missed calls.
ANONYM This extra feature allows you to block calls that do
not have a number attached to them (ie private calls,
international calls, etc). This option can be enabled in
addition to any of the previous four.
This manual suits for next models
4
Table of contents
Other Oricom Cordless Telephone manuals

Oricom
Oricom Pro810 User manual

Oricom
Oricom M800 Series User manual

Oricom
Oricom S209 User manual

Oricom
Oricom P80 User manual

Oricom
Oricom M2400 Series User manual

Oricom
Oricom IP-7 User manual

Oricom
Oricom 8000 User manual

Oricom
Oricom pro600 DECT User manual

Oricom
Oricom M5200 Series User manual

Oricom
Oricom ECO800 User manual

Oricom
Oricom BB100 User manual

Oricom
Oricom M5050 User manual

Oricom
Oricom IP800 User manual

Oricom
Oricom M900 User manual

Oricom
Oricom eco71 User manual

Oricom
Oricom BB200 User manual

Oricom
Oricom M500 User manual

Oricom
Oricom ECO600 User manual

Oricom
Oricom eco700 User manual

Oricom
Oricom ECO90 User manual