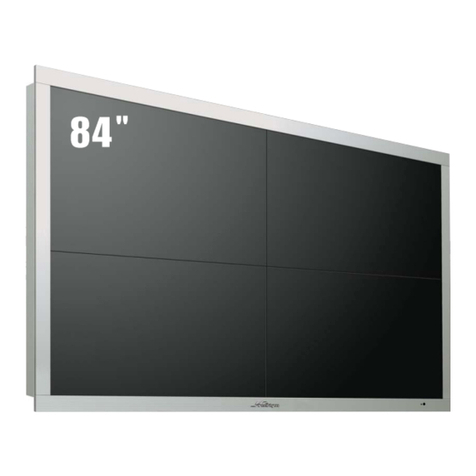
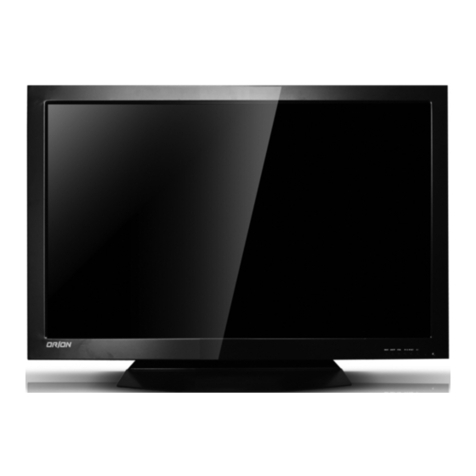
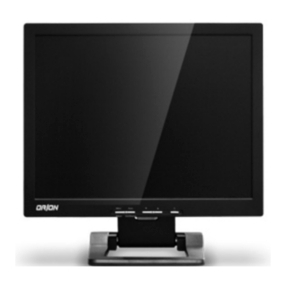
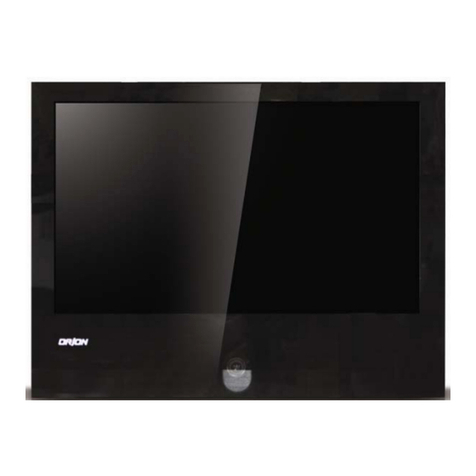
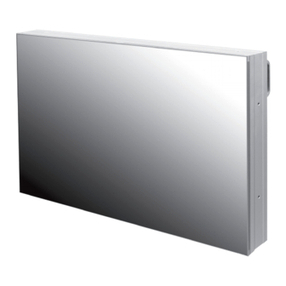
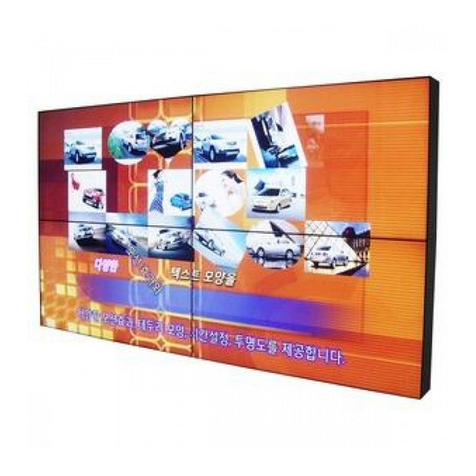
Orion OLS-3201PGB User manual

OLS-PGB/P Series
1 of 33
Ver. 1.0 E
OLS-PGB/P Series
User’s Guide

OLS-PGB/P Series
2 of 33
CONTENTS
Safety Instru tions ------------------------------------------------------------------- 3-7.
Introdu tion
-------------------------------------------------------------------------- 8-10.
Remote ontrol ------------------------------------------------------------------------ 11.
Viewing the Menus ---------------------------------------------------------------- 12-26.
Spe ifi ations ----------------------------------------------------------------------- 27-32.
EWF -------------------------------------------------------------------------------------- 33.

OLS-PGB/P Series
3 of 33
Safety Instru tions
Do not use a damaged or loose plug.
This may ause ele tri sho k or fire.
Do not pull the plug out by the wire nor tou h the plug with wet hands.
This may ause ele tri sho k or fire.
Use only a properly grounded plug and re epta le.
An improper ground may ause ele tri sho k or equipment damage.
Insert the power plug firmly so that it does not ome loose.
A bad onne tion may ause fire.
Do not ex essively bend the plug and wire nor pla e heavy obje ts
upon them, whi h ould ause damage.
This may ause ele tri sho k or fire.
Do not onne t too many extension ords or plugs to one outlet.
This may ause fire.

OLS-PGB/P Series
4 of 33
Do not dis onne t the power ord while using the LCD Display.
A surge may be aused by the separation and may damage the
LCD Display.
Do not use the power ord when the onne tor or plug is dusty.
If the onne tor or plug of the power ord is dusty,
lean it with a dry loth.
Using the power ord with a dusty plug or onne tor may ause
ele tri sho k or fire.
Do not drop the LCD Display when moving it.
This may ause damage to the produ t or the person arrying it.
Keep any flammable obje ts su h as andles, inse ti ides or
igarettes away from the produ t.
Otherwise, this may ause fire.
Keep any heating devi es away from the power able.
A melted oating may ause ele tri sho k or fire.
Put down the LCD Display arefully.
Failing to do so may damage the LCD Display.

OLS-PGB/P Series
5 of 33
Do not pla e the LCD Display fa e down.
This may damage the TFT-LCD surfa e.
The installation of the bra ket must be done by a qualified
professional.
Installing the bra ket by unqualified personnel may result in injury.
Always use the mounting devi e spe ified in the owner's manual.
When installing the produ t, make sure to keep it away from the wall
(more than 10 m / 4 in hes) for ventilation purposes.
Poor ventilation may ause an in rease in the internal temperature
of the produ t, resulting in a shortened omponent life and degraded
performan e.
Do not spray water or detergent dire tly onto the LCD Display.
This may ause damage, ele tri sho k or fire
.
.
Keep the produ t away from pla es exposed to oil, smoke or
moisture; do not install inside a vehi le.
This may ause a malfun tion, ele tri sho k or fire.
In parti ular, avoid operating the LCD Display near water or outdoors
Where the LCD Display ould be exposed to snow or rain.
Dis onne t the plug from the outlet during storms or lightning or if
it is not used for a long period of time.
Failure to do so may ause ele tri sho k or fire.

OLS-PGB/P Series
6 of 33
Do not install the produ t on an unstable, uneven surta e or a
lo ation prone to vibrations.
Dropping the produ t may ause damage to the produ t or the
person arrying it.
Using the produ t in a lo ation prone to vibrations mayshorten
the lifetime of the produ t or may ause the produ t to
at h fire.
When removing batteries from the remote ontrol, be areful that
they are not swallowed by hildren. keep the batteries out of
hildren's rea h.
If the batteries are swallowed, see a do tor immediately.
When repla ing batteries, pla e the batteries in the orre t +/-
polarity position as indi ated on the battery holder.
The in orre t polarity may ause a battery to break or leak and
Cause fire, injury, or ontamination (damage).
Use only spe ified standard batteries. Do not use new
and used batteries together.
` This may ause a battery to break or leak and may ause
fire, injury, or ontamination (damage).
The batteries (and re hargeable batteries) is not ordinary refuse
and must be returned for re y ling purposes.
The ustomer is responsible for returning the used or
re hargeable batteries for re y ling purposes as the onsumer.
The ustomer an return used or re hargeable batteries to a nearby
Publi re y ling enter or to a store selling the same type of
the battery or re hargeable battery.

OLS-PGB/P Series
Important Safety Instructions
1. Read these instru tions.
2. Keep these instru tions.
3. Heed all warnings.
4. Follow all instru tions.
5.
Do not use this apparatus near water.
6. Clean only with dry loth.
7.
Do not blo k any ventilation openings. Install in a ordan
8.
Do not install near any heat sour es su h as radiators, heat registers, stoves, or other apparatus
(in luding amplifiers) that produ e heat.
9.
Do not defeat the safety purpose of the polarized or grounding
blades with one wider than the other. A grounding type plug has two blades and a third grounding prong.
The wide blade or the third prong are provided for yo
outlet, onsult an ele tri ian for repla ement of the obsolete outlet.
10.
Prote t the power ord from being walked on or pin hed parti ularly at plugs, onvenien e re epta les,
and the point where they ex
it from the apparatus
11.
Only use atta hments/a essories spe ified by the manufa turer.
12.
Use only with the art, stand, tripod, bra ket, or table spe ified by the manufa turer, or sold with the
apparatus. When a art is used, use aution when moving the art
injury from tip-over.
13.
Unplug this apparatus during lightning storms or when unused for long periods of time.
14.
Refer all servi ing to qualified servi e personnel. Servi ing is required when the apparatus has been
damaged
in any way, su h as power
have fallen into the apparatus, the apparatus has been exposed to rain or moisture, does not operate
normally, or has been dropped.
15.
Do not expose this apparatus to dripping or splashing and ensure that no obje ts filled with liquids, su h
as vases, are pla ed on the apparatus.
16.
To ompletely dis onne t this apparatus from the AC Mains, dis onne t the power supply ord plug from
the AC re epta le.
17.
The mains plug of the power supply ord shall remain readily operable.
18.
An apparatus with CLASS I onstru tion shall be onne ted to a Mains so ket outlet with a prote tive
earthing onne tion.
Note: Prolonged use of headphones at a high volu
The lightning flash with arrowhead symbol within an equilateral triangle, is
intended to alert the user to the presen e of
within the produ t's en losure
onstitute a risk of ele tri sho k to persons.
The ex lamation point within an equilateral triangle is intended to alert the
user to the presen e of important operating and maintenan e (servi ing)
instru tions in
Important Safety Instructions
Do not use this apparatus near water.
Do not blo k any ventilation openings. Install in a ordan
e with the manufa turer’s instru tions
Do not install near any heat sour es su h as radiators, heat registers, stoves, or other apparatus
(in luding amplifiers) that produ e heat.
Do not defeat the safety purpose of the polarized or grounding
-
type plug. A polarized plug has two
blades with one wider than the other. A grounding type plug has two blades and a third grounding prong.
The wide blade or the third prong are provided for yo
ur safety. If the provided plug does not fit into your
outlet, onsult an ele tri ian for repla ement of the obsolete outlet.
Prote t the power ord from being walked on or pin hed parti ularly at plugs, onvenien e re epta les,
it from the apparatus
Only use atta hments/a essories spe ified by the manufa turer.
Use only with the art, stand, tripod, bra ket, or table spe ified by the manufa turer, or sold with the
apparatus. When a art is used, use aution when moving the art
/apparatus ombination to avoid
Unplug this apparatus during lightning storms or when unused for long periods of time.
Refer all servi ing to qualified servi e personnel. Servi ing is required when the apparatus has been
in any way, su h as power
-
supply ord or plug is damaged, liquid has been spilled or obje ts
have fallen into the apparatus, the apparatus has been exposed to rain or moisture, does not operate
normally, or has been dropped.
Do not expose this apparatus to dripping or splashing and ensure that no obje ts filled with liquids, su h
as vases, are pla ed on the apparatus.
To ompletely dis onne t this apparatus from the AC Mains, dis onne t the power supply ord plug from
The mains plug of the power supply ord shall remain readily operable.
An apparatus with CLASS I onstru tion shall be onne ted to a Mains so ket outlet with a prote tive
Note: Prolonged use of headphones at a high volu
me may ause health damage on your ears.
The lightning flash with arrowhead symbol within an equilateral triangle, is
intended to alert the user to the presen e of
uninsulated "dangerous voltage
within the produ t's en losure
that may be of suffi ient magnitude to
onstitute a risk of ele tri sho k to persons.
The ex lamation point within an equilateral triangle is intended to alert the
user to the presen e of important operating and maintenan e (servi ing)
instru tions in
the literature a ompanying the produ t.
7 of 33
e with the manufa turer’s instru tions
.
Do not install near any heat sour es su h as radiators, heat registers, stoves, or other apparatus
type plug. A polarized plug has two
blades with one wider than the other. A grounding type plug has two blades and a third grounding prong.
ur safety. If the provided plug does not fit into your
Prote t the power ord from being walked on or pin hed parti ularly at plugs, onvenien e re epta les,
Use only with the art, stand, tripod, bra ket, or table spe ified by the manufa turer, or sold with the
/apparatus ombination to avoid
Unplug this apparatus during lightning storms or when unused for long periods of time.
Refer all servi ing to qualified servi e personnel. Servi ing is required when the apparatus has been
supply ord or plug is damaged, liquid has been spilled or obje ts
have fallen into the apparatus, the apparatus has been exposed to rain or moisture, does not operate
Do not expose this apparatus to dripping or splashing and ensure that no obje ts filled with liquids, su h
To ompletely dis onne t this apparatus from the AC Mains, dis onne t the power supply ord plug from
An apparatus with CLASS I onstru tion shall be onne ted to a Mains so ket outlet with a prote tive
me may ause health damage on your ears.
The lightning flash with arrowhead symbol within an equilateral triangle, is
uninsulated "dangerous voltage
"
that may be of suffi ient magnitude to
The ex lamation point within an equilateral triangle is intended to alert the
user to the presen e of important operating and maintenan e (servi ing)
the literature a ompanying the produ t.
OLS-PGB/P Series
8 of 33
Introdu tion
LCD Display
Manual
User Manual CD
Cable
AC Power Cable
HDMI Cable (Option)
Other
Remote Control
Batteries (AAA X 2)

OLS-PGB/P Series
9 of 33
Front
1. IR
- Aim the remote ontrol towards this spot on the LCD Display.
2. LED
- LCD Power Status display(On : BLUE / Off : RED)
3. OSD KEY Input(Power / Menu / Sour e / Left / Right / Up / Down)
a) Power : Turns the LCD Display On/ Off.
b) Menu :
Displays the main On-S reen menu
.
) Sour e :
Sele t Input Sour e
- DVI PC
d) Left/Right : Moves from one menu item to another horizontally or adjusts sele ted menu
values. Adjusts the audio volume.
e) Up/Down : Moves from one menu item to another verti ally or adjusts sele ted menu values.
1
2
a
b
d
e
3

OLS-PGB/P Series
10 of 33
Rear
1. AC Power S/W On/Off.
2. AC Power In.(100V ~ 240V)
3. HDMI Out.
4. VGA Out.
5. DVI Out.
6. ESATA (2EA).
7. PS/2 Keyboard.
8. USB2.0 (6EA)
9. RJ45 LAN.
10. Audio Port.(Line-In / Line-Out / MIC-In)
11. HDD.
3
4
5
6
7
8
9
10
11
2
1

OLS-PGB/P Series
11 of 33
Remote ontrol
1. POWER: Turns the LCD Display On and Off & PC Power On and Off.
2. UP : Control the UP ursor in the menu
3, LEFT : Control the LEFT ursor in the menu
4, RIGHT : Control the RIGHT ursor in the menu
5, ENTER : Control the ENTER ursor in the menu
6, DOWN : Control the DOWN ursor in the menu
7. MENU: Displays the main On-S reen menu
8. SOURCE : Sele t Input Sour e
- DVI PC
9. EXIT: Exit the On-S reen menu
2
1
3
4
5
7
6
8
9

OLS-PGB/P Series
12 of 33
Viewing the Menus
Press the MENU button.
The main menu is displayed on the s reen.
Its left side has five Text: Color, Image Setting, Position , OSD Meuu, Language, Misc., udio and Exit.
Changing the Color Standard
Your television has several setting options that allow you to ontrol the pi ture quality.
1. Press the MENU button to display the menu.
2. Press the ▲ or ▼ button to sele t Color, then press the ENTER button.

OLS-PGB/P Series
13 of 33
3. Sele t the required mode by pressing the ▲ or ▼ button, then press the ENTER button.
Contrast –Brightness– Color djust –Color Temp –Back
djusts the Contrast and Brightness.
3-1. Sele t the required mode by pressing the ▲ or ▼ button, then press the ENTER button.
3-2 Press the or button until you rea h the optimal setting.

OLS-PGB/P Series
14 of 33
djust the Color.
: It adjusts the intensity of the olor.
3-3. Sele t the required mode by pressing the ▲ or ▼ button, then press the ENTER button.
3-4.Sele t the required mode by pressing the or button, then press the ENTER button.
Red –Green– Blue
3-5. Press the or button until you rea h the optimal setting.

OLS-PGB/P Series
15 of 33
djusts the Color Temp.
3-6. Sele t the required mode by pressing the ▲ or ▼ button, then press the ENTER button.
3-7. Press the or button until you rea h the optimal setting.
9300 – 6500 – 5800 - sRGB - USER
9300: This results in a blue tone.
6500: This results in a reddish tone.
5800: This results in a more reddish tone.
sRGB: This is standard olor setting.
USER: This is user olor setting.
4. Press the EXIT button or Ba k Sele t to exit.
Changing the Image Standard

OLS-PGB/P Series
16 of 33
1. Press the MENU button to display the menu.
2. Press the ▲ or ▼ button to sele t Image Setting, then press the ENTER button.
3. Sele t the required mode by pressing the ▲ or ▼ button, then press the ENTER button.
Clock –Phase– Gamma(not available) –Sharpness –Back
djusts the Clock.
3-1. Sele t the required mode by pressing the ▲ or ▼ button, then press the ENTER button.
3-2 Press the or button until you rea h the optimal setting.

OLS-PGB/P Series
17 of 33
djusts the Phase.
3-3. Sele t the required mode by pressing the ▲ or ▼ button, then press the ENTER button.
3-4. Press the or button until you rea h the optimal setting.
djusts the Sharpness.
3-5. Sele t the required mode by pressing the ▲ or ▼ button, then press the ENTER button.
3-6. Press the or button until you rea h the optimal setting.
4. Press the EXIT button or Ba k Sele t to exit.

OLS-PGB/P Series
18 of 33
Changing the Position Standard
1. Press the MENU button to display the menu.
2. Press the ▲ or ▼ button to sele t Position, then press the ENTER button.
3. Sele t the required mode by pressing the ▲ or ▼ button, then press the ENTER button.
H.Position –V.Position –Back

OLS-PGB/P Series
19 of 33
djusts the H.position and V.Position.
3-1. Sele t the required mode by pressing the ▲ or ▼ button, then press the ENTER button.
3-2 Press the or button until you rea h the optimal setting.
4. Press the EXIT button or Ba k Sele t to exit.
Changing the OSD Menu Standard
1. Press the MENU button to display the menu.
2. Press the ▲ or ▼ button to sele t OSD Menu, then press the ENTER button.

OLS-PGB/P Series
20 of 33
3. Sele t the required mode by pressing the ▲ or ▼ button, then press the ENTER button.
OSD H.Pos – OSD V.Pos – OSD Time –Back
djusts the
OSD H.Pos
and
OSD V.Pos.
3-1. Sele t the required mode by pressing the ▲ or ▼ button, then press the ENTER button.
3-2 Press the or button until you rea h the optimal setting.
Other manuals for OLS-3201PGB
1
This manual suits for next models
5
Table of contents
Other Orion Monitor manuals

Orion
Orion VALUE SERIES User manual

Orion
Orion 5Q740 User manual

Orion
Orion F9S936 User manual

Orion
Orion 9A956 User manual

Orion
Orion 430LED4K User manual

Orion
Orion OPM-4240 User manual

Orion
Orion MLCD OLMU-4620S User manual

Orion
Orion OPM-4260 User manual

Orion
Orion OLMU-K4650 User manual

Orion
Orion OIC-7002 Operation manual

Orion
Orion 20" User manual

Orion
Orion 17" TFT-LCD MONITOR User manual

Orion
Orion OLMU-K4940 User manual

Orion
Orion OLS-32 User manual

Orion
Orion RNK22SNH User manual

Orion
Orion 9REDP User manual

Orion
Orion 15RTLE User manual

Orion
Orion 9S946 User manual

Orion
Orion OBM-050-TBBSV User manual

Orion
Orion OLM-5510 User manual