Ortovox 3+ Assembly instructions

S1+S1+S1+SMART-ANTENNA
BeSSer gefunden werden!
Automatische Umschaltung auf die optimale Sende-Antenne.
Be found eaSier!
Automatic switchover to the best transmission antenna.
etre retrouvé pluS facilement!
Connexion automatique à l‘antenne émettrice optimale.
Sarete trovati più facilmente!
Commutazione automatica alla migliore antenna trasmittente.
¡Se localiza máS fácilmente!
Conmutación automática a la antena emisora óptima.
3+
Made in Germany
ortovox.com
geBrauchSanleitung
Lawinen-Verschütteten-Suchgerät
manual
Avalanche Transceiver
mode d‘emploi
DVA
iStruzioni per i‘uSo
Localizzatore a.r.t.va.
inStruccioneS de uSo
Aparato de búsqeuda de victimas de avalanchas
OX-GAL-3+-COVER-130529-vh.indd 1-3 29.05.13 15:52

S1+S1+SMART-ANTENNA-TECHNOLOGIE
die ortovox-geräte haBen
3 antennen (x, y, z) an Board
Bei der Suche kommen alle Antennen zum Einsatz. Für die Anzeige
der Entfernung und der Laufrichtung dienen die x- und y-Antenne. Die
z-Antenne wird ausschließlich für die Feinsuche benötigt.
Die ORTOVOX Geräte S1+, 3+und zoom+können als einzige Geräte
auf dem Markt die Position der Antennen analysieren mit der Smart-
Antenna-Technologie Sowohl üBer die x-alS auch üBer die
y-antenne Senden.
Dadurch erhöht sich die Sendereichweite des Verschüttenen
enorm (bis zu doppelt) und wird dadurch wesentlich besser gefunden
(verBeSSerte SichtBarkeit)
vertikale poSition ohne Smart-antenna
=Schlechte SichtBarkeit
Eine vertikal ausgerichtete Sendeantenne (x-Antenne) strahlt nur
vertikal aus und verursacht eine schlechte Sichtbarkeit durch minimale
Flächenabdeckung (Reichweite) im Suchbereich. Ein vertikaler Sender
ohne Smart-antenna ist daher Schwerer zu finden.
vertikale poSition mit Smart-antenna
=Sehr gute SichtBarkeit
Die patentierte Smart-antenna-technologie löst das Problem
der schlechten Sichtbarkeit der vertikalen Position. Der Lagesensor
analysiert die Position des Gerätes in der Lawine und Schaltet
automatiSch auf die y-antenne um. Dadurch sendet die Antenne
wieder horizontal und vergrößert die Flächenabdeckung annäherend
auf maximale Reichweite.
X
Y
Z
© ortovox / Änderungen und Fehler vorbehalten. concept Dieter Kotlaba, Volker Heuer deSign www.volkerheuer.com
photo Leonhard Habersetzer
SMART
ANTENNA
cover Leonhard Habersetzer
OX-GAL-3+-COVER-130529-vh.indd 4-6 29.05.13 15:52

EN
+SMART-ANTENNA-TECHNOLOGY
THE ORTOVOX DEVICES HAVE
THREE ANTENNAS (X, Y, AND Z)
All three antennas are used during SEARCHES. The x and
y antennas are used to display the distance and the direction
of movement. The z antenna is solely used for the fine search.
The ORTOVOX device S+, +and ZOOM+are the only devices
on the market that can analyze the position of the antennas using
smart antenna technology and TRANSMIT VIA BOTH THE X AND
THE Y ANTENNA.
This vastly increases (UP TO DOUBLES) the victim’s transmission
range, making him or her far easier to find (IMPROVED VISIBILITY).
VERTICAL POSITION WITHOUT SMART-ANTENNA
=poor visibility
A vertically positioned transmitter antenna (x antenna) only emits a
signal vertically and results in poor visibility due to minimum area
coverage (range) in the search area. A vertical TRANSMITTER WITHOUT
A SMART ANTENNA is therefore MORE DIFFICULT TO LOCATE.
VERTICAL POSITION WITH SMART-ANTENNA
=very good visibility
The PATENTED SMART-ANTENNA-TECHNOLOGY resolves this
problem of poor visibility in the vertical position. The position sensor
analyzes the device’s position in the avalanche and AUTOMATICALLY
SWITCHES TO THE Y-ANTENNA. As a result, the antenna once again
transmits horizontally and expands the area coverage to almost the
maximum range, making it easier to locate victims in less time.
OX-GAL-3+-BUCH-vh.indd 26 06.06.13 15:26

EN
+
DT
GEBRAUCHSANLEITUNG -
Lawinen-Verschütteten-Suchgerät
DEUTSCH
ENGLISH
MANUAL -
Avalanche Transceiver
MODE D‘EMPLOI -
DVA
FRANÇAIS
ISTRUZIONI PER I‘USO -
Localizzatore a.r.t.va.
ITALIANO
INSTRUCCIONES DE USO -
Aparato de búsqueda de victimas de avalanchas
ESPAÑOL
-
SERVICE
OX-GAL-3+-BUCH-vh.indd 27 06.06.13 15:26

EN
+MANUAL
SMART AND EASY
With the +you are in charge! The PATENTED
SMART-ANTENNA-TECHNOLOGY™ with intelli-
gent position recognition automatically switches
to the best transmission antenna. YOU WILL BE
FOUND EASIER. We make no compromises in
terms of searching either. The +is equipped
with all the features of a modern, digital -an-
tenna device.The ILLUMINATED REAL-TIME
DISPLAY tells you the direction, distance and
number of victims. The PATENTED CIRCULAR
DISPLAY, combined with the INTUITIVE
SEARCH ACOUSTICS, leaves no doubt when
operating in fine search mode. Once located,
victims can be removed from the display using
the flagging function. The motion-sensor-based
FOLLOW-UP AVALANCHE SWITCHOVER ensu-
res additional safety. We have also thought
about the future: the + can be UPDATED and
protects the environment with just a single
battery.
Valuable information on how to help compa-
nions, accident prevention and the latest safety
products from ORTOVOX can be found at:
www.ortovox.com
You can reach us by e-mail at:
ortovox@ortovox.com
ORTOVOX hopes you have wonderful, safe trips!
ENGLISH
RECCO
REFLECTOR
INSIDE!
So professional
rescuers can quickly
find avalanche
victims! The backup
technology is used
by more than
ski areas and rescue
teams around the
world.
ocial
supplier
OX-GAL-3+-BUCH-vh.indd 28 06.06.13 15:26

EN
+OPERATING ELEMENTS
Sliding switch
‘search mode’
Transmission switch over
‘transmission mode’
Direction arrow
Distance indicator
Battery capacity
Number of signals
Flagging button
Loudspeaker
Comfort carrier bag
ON/OFF switch
+ battery compartment
Locking slide
OX-GAL-3+-BUCH-vh.indd 29 06.06.13 15:26

EN
+REGISTRATION / INFO
EXTENDED WARRANTY
Register your +at:
www.ortovox.com/registration
In doing so, your warranty period
will extend from two to five years
from the date of purchase.
If you opt in, we will regularly inform you about
updates and the latest news in relation to the +.
This keeps you and your device up to date at all
times. Further information about software up-
dates can be found at: www.ortovox.com/update
Avalanche transceivers are designed
to support the assistance oered
by companions in the event of
avalanche burial.
Your presence in areas where
avalanche hazards exist is fraught
with potential risk. The eective
use of an avalanche transceiver
requires appropriate training and
constant practice.
ORTOVOX strongly recommends
that you carefully read the operating
instructions provided with the
avalanche transceiver and take
the appropriate avalanche educa-
tion courses.
In addition, always take a shovel
and a probe when you go o-piste
in areas where avalanche hazards
exist, and never head out alone.
Plan your o-piste activities using
the current avalanche report at:
www.ortovox.com
Before you enter an area at risk of
an avalanche, you should make sure
that all avalanche transceivers are
working properly and all batteries
are in good condition.
The + fulfills the maximum safety
requirements and is characterized
by its simple operation!
OX-GAL-3+-BUCH-vh.indd 30 06.06.13 15:26

EN
+
INSTRUCTIONS
HOW TO CARRY THE DEVICE
IMPORTANT NOTICE
People with pacemakers should wear the +on the right
side of their body. It is essential to observe the pacemaker
manufacturer’s instructions!
The +is carried close to your body in the
comfort carrier bag () and should always
be covered by at least one layer of clothing.
In warmer temperatures, the +can also
be carried in a zippered pant pocket (not
in sewn-on pockets).
In TRANSMISSION MODE,
no electronic devices
(wireless devices, mobile
phones, other avalanche
transceivers) or other metal objects
should be located in the immediate
vicinity (within a few centimeters).
In SEARCH MODE other electronic
devices should be switched o
or carried at a distance of at least
cm away.
Interference can also be caused
by approaching storms, lifts and
power systems.
AVOIDING INTERFERENCE
OX-GAL-3+-BUCH-vh.indd 31 06.06.13 15:26

EN
+
SWITCHING ON
Turn the ON/OFF switch () counter-
clockwise. The rotary switch clicks into
the position “I” and is now secured against
being unintention-ally switched o.
SWITCHING OFF
Undo the unlocking slide () and
turn the ON/OFF switch () clockwise
to the position “O”.
INITIAL USE
INSTRUCTIONS
After switching on the +, the -digit
serial number appears.
The automatic self-test begins with the
display check.
The transmitter, receiver, smart antenna,
and sensors are then tested.
The remaining battery capacity is also
displayed as a percentage (e.g. “”).
For further information about the battery, see p.
The installed software version then follows
(e.g. “.”).
SELF-TEST, TRANSMISSION MODE (device in transmission mode)
OX-GAL-3+-BUCH-vh.indd 32 06.06.13 15:26

EN
+
After the self-test, the smart antenna
function is shown on the display for
seconds.
If positioned horizontally, the +
transmits on the X-antenna.
If positioned vertically, the +
transmits on the Y-antenna.
SMART ANTENNA
TRANSMISSION
Once the self-test has successfully concluded,
the +will transmit and the transmission
lights flash on the screen.
The battery icon shows the remaining
battery capacity.
X
Y
Z
INSTRUCTIONS
OX-GAL-3+-BUCH-vh.indd 33 06.06.13 15:26

+
EN
FAULT
INSTRUCTIONS
If a malfunction or fault is detected during
the self-test, “EE” appears on the screen.
A warning can be triggered in the immediate
vicinity of a transmitting avalanche transceiver,
mobile phone, wireless appliance, large metal
objects, or particularly strong magnetic fields.
If the malfunction warning is displayed during
the self-test, then carry out the test again in
the open in surroundings without interference.
When doing so, it is essential to make sure that no other transmitters are
nearby. SWITCH OFF all SOURCES OF INTERFERENCE (mobile phones,
wireless devices etc.) or move them well away.
If the warning is displayed again, the device must be sent to the ORTOVOX
service department.
Further information about the service department can be found on p.
During the partner check, the transmission
signal of the other participants’ avalanche
transceivers is checked.
•Before switching on, switch the +into
search mode by pushing apart the two
sliding switches () simultaneously. The
transmission switch over button () appears.
PARTNER-CHECK
OX-GAL-3+-BUCH-vh.indd 34 06.06.13 15:26

+
EN
INSTRUCTIONS
•Now turn on the +. To do so, turn the
ON/OFF switch () counter-clockwise.
The self-test begins.
•During the self-test, press the flagging
button () until “PC” appears. The +is
now in the partner check function but
there is no transmission signal.
•Only one transmission signal can ever be
tested at a time. The minimum distance during
the partner check is m; the distance to other
transmitters must be at least m.
•The check looks at the transmission frequency,
the transmission duration, and the cycle
duration. “EO” means that the transmission
signal tested is fully functional.
•Warnings and defects for the inspected
transmitters are displayed as “EE”.
•The partner check is completed by pressing in
the transmission switch over button () in
transmission mode or by pressing the flagging
button () in search mode ().
OX-GAL-3+-BUCH-vh.indd 35 06.06.13 15:26

v
EN
+INSTRUCTIONS
< m
< m
X
SIGNAL SEARCH
Search the avalanche debris in
the indicated manner during the
signal search.
When using the +, a search
strip width of m (equates to
- steps) must not be excee-
ded. The distance from the edge
of the avalanche must remain
less than m.
At the same time, keep an eye
out for objects or partially buried
victims.
VICTIM’S POINT OF
DISAPPEARANCE KNOWN
If the point of disappearance is
known or objects are visible, the
search area is narrowed down to
below this point in the avalanche
flow direction.
This can save valuable time.
Simultaneously press apart
both SLIDING SWITCHES ().
The TRANSMISSION SWITCH
OVER BUTTON () springs up.
The search situation is automatic-
ally displayed on the screen.
SEARCHING - LOCATING - RESCUING
PHOTO Klaus Fengler
OX-GAL-3+-BUCH-vh.indd 36 06.06.13 15:26

< m < m
< m
v
EN
+
Number of
signals ()
INSTRUCTIONS
X
Y
Z
COARSE SEARCH
Hold the +in a horizontal position
during the coarse search!
From a distance of approx. m to the
avalanche victim, move the direction
pointer () and distance indicator ()
along the field line to the target point.
The distance indicator ()
goes down and confirms
that you are getting closer.
INTUITIVE SEARCH ACOUSTICS
After the first signal, move quickly
during your search. The intuitive
search acoustics confirm your
approach. At m you should move
slower and get more precise in
your search. An acoustic change
will help you to do so.
SEVERAL SEARCHERS
The searchers move across the search area in parallel.
The distance between the searchers must remain less than m.
PHOTO Klaus Fengler
After first signal: QUICK
Under m: SLOW
Fine search: PRECISE
OX-GAL-3+-BUCH-vh.indd 37 06.06.13 15:26

EN
+
T
INSTRUCTIONS
FINE SEARCH AND TENDENCY INDICATOR
Fine search starts automatically when you are
. m away. The direction arrow is switched o.
The closer you are to the victim, the lower
the distance displayed () and the faster the
intuitive search acoustic signal beeps ().
The tendency indicator (T) formulates the fine
search process simply quickly, and precisely.
If you move away from the victim, the tendency
indicator (T) gets smaller and the distance
indicator () larger again.
PHOTO Klaus Fengler
During the fine search,
determine the smallest
distance.
Move the device for-
ward and back once
and left and right once
in a cross shape.
Do not turn the +
during this process!
The smallest distance
corresponds to the
burial depth.
OX-GAL-3+-BUCH-vh.indd 38 06.06.13 15:26

EN
+
INSTRUCTIONS
PHOTO Klaus Fengler
SEARCHING FOR MULTIPLE VICTIMS
The +also allows you to maintain an
overview in the event of multiple burials.
The number of victims is shown by
the multiple signal indicator ().
FLAGGING
The sharp signal analysis on the +leads
you to the next victim. Once you have found
the first victim, this signal can be hidden
by pressing the flagging button ().
The victim is quickly and reliably displayed
as flagged and you can immediately continue
your search for additional victims.
A flagged transmission signal is displayed
as a white icon on a black background ().
If or more transmitters are detected,
“+” appears on the display.
Flagged transmitters can be unflagged
again quickly and easily.
To do this, press the transmission switch
over button () to switch the +to trans-
mission mode. Now switch straight back to
search mode by pushing apart the sliding
switches () simultaneously.
OX-GAL-3+-BUCH-vh.indd 39 06.06.13 15:26

EN
+INSTRUCTIONS
PHOTO Klaus Fengler
PINPOINTING (PROBING)
Mark the point with the smallest
distance reading (using crossed
poles or a shovel).
To now determine the precise
location of the victim, probe in
the displayed cm grid.
Insert the probe quickly and
deeply at a ° angle to the snow.
A clear decrease in the penetration
depth indicates a hit.
The probe remains in the ground
as a point of reference while you
dig out the victim.
DIGGING OUT
Read the burial depth ()
on the probe. Move this
distance down the slope
and start shoveling in a
V-shape.
If there are several res-
cuers, the person shove-
ling at the top should cut
out blocks. Those behind
should shovel and move
the snow away. The air
passages should be
exposed as quickly as
possible.
TIP Shovels with a CLEARING FUNCTION can save valuable time.
cm
OX-GAL-3+-BUCH-vh.indd 40 06.06.13 15:26

EN
+INSTRUCTIONS
SIGNAL OVERLAP
The transmission signals are
measured and analyzed by the +.
If several transmission signals are
received and these transmission
signals are transmitting at the same
time then a signal overlap occurs.
The signals overlap and can no
longer be technically distinguished.
In the worst cases, this can last for
several seconds.
This situation is illustrated without
a direction arrow (e.g. “” and
signals).
You must wait until the signal over-
lap period has passed before you
continue your search.
PHOTO Klaus Fengler
Sec
AUTOMATIC TRANSMISSION SWITCH OVER
In the event of a SECONDARY AVALANCHE
to which you fall victim (with your device in
search mode), the +automatically switches
to transmission mode after minutes of non-
movement. This is indicated by a -second
warning tone.
This makes it possible for you to also be found
if buried in an avalanche while searching.
OX-GAL-3+-BUCH-vh.indd 41 06.06.13 15:26

EN
+
INSTRUCTIONS
ORTOVOX recommends that you change the batteries when their remaining
capacity falls below %.
CHANGING THE BATTERY
(when the device is switched o)
Loosen the locking slide () and
press in the ON/OFF switch ()
WHILE TURNING it clockwise.
Now pull out the battery compartment () from the +and
insert a new battery (. V, alkaline, AA, mignon, LR ).
When changing the battery, make sure the polarity is correct.
The battery must be inserted with the + pole first.
Remove the battery from the +during the summer months.
Damage caused by battery leakage will void the ORTOVOX warranty.
BATTERIE
RECHARGEABLE BATTERIES
NEVER use rechargeable batteries (such as nickel-cadmium
batteries, lithium-ion batteries etc.).
Rechargeable batteries have a significantly lower operating voltage,
and thus a lower range and limited service life. In addition, defective
rechargeable batteries cannot be detected immediately.
After recharging they initially show the full operating voltage,
only to severely drop o again after a very short operating period
(THIS CAN BE VERY DANGEROUS).
OX-GAL-3+-BUCH-vh.indd 42 06.06.13 15:26
Other manuals for 3+
4
Table of contents
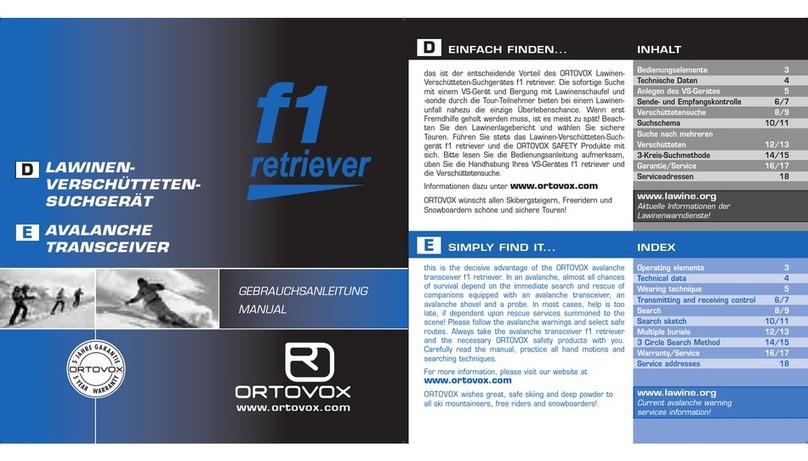
Other Ortovox Transceiver manuals

Ortovox
Ortovox Zoom+ User manual

Ortovox
Ortovox 3+ User manual

Ortovox
Ortovox S1 User manual

Ortovox
Ortovox Zoom+ User manual

Ortovox
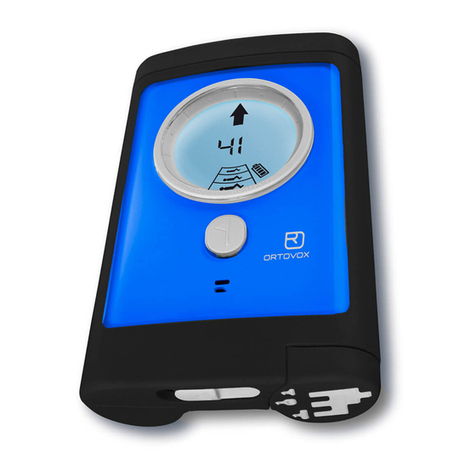
Ortovox f1 focus User manual
Ortovox
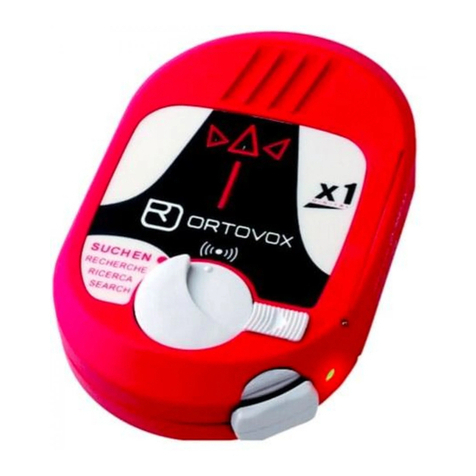
Ortovox X1 User manual

Ortovox
Ortovox RECCO 3+ User manual

Ortovox
Ortovox S1 User manual

Ortovox
Ortovox d3 User manual

Ortovox
Ortovox f1 focus User manual

Ortovox
Ortovox S1 User manual

Ortovox
Ortovox F1 retriever User manual

Ortovox
Ortovox f1 focus User manual

Ortovox
Ortovox DIRACT User manual

Ortovox
Ortovox Zoom+ User manual

Ortovox
Ortovox S1 User manual

Ortovox
Ortovox M2 User manual

Ortovox
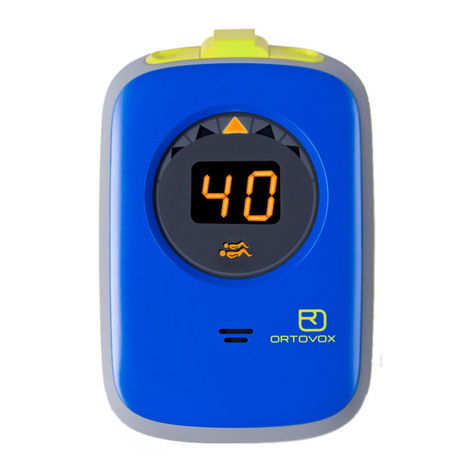
Ortovox 3+ User manual
Ortovox
Ortovox 3+ User manual

Ortovox
Ortovox S1 User manual