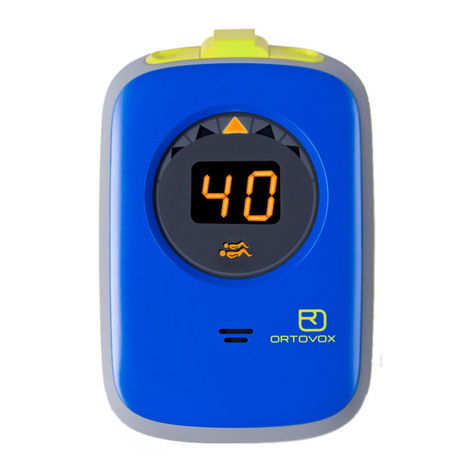
Ortovox d3 User manual

15
14
16
23
14 Protective case with
carrying system
15 Quick lock
16 Shoulder strap
marking (ORANGE)
Fast, simple, and precise pinpoint locating,
these are the decisive advantages of the
ORTOVOX d3 avalanche transceiver. In an
avalanche, virtually any chance of survival
depends on immediate search and rescue by
companions equipped with an avalanche
transceiver, an avalanche shovel, and a pro-
be. In most cases, if you depend upon res-
cue services to be summoned, help will be to
late! Heed the avalanche warnings and
select safe routes. Always take the d3 ava-
lanche transceiver and the necessary
ORTOVOX SAFETY products like an avalanche
shovel and probe with you. Carefully read the
operating instructions provided with the d3,
learn how to handle the d3, and regularly
practice avalanche search procedures.
ORTOVOX product information and safety-
related information (Safety Camps, avalan-
che search training equipment) are available
on the ORTOVOX website www.ortovox.com
Contact us via e-mail at
ORTOVOX extends its best wishes
for wonderful and safe tours!
CONTENTS
Operating components 23
Technical data 24
EU Declaration of
Conformity 24
Quick reference 25
Emergency Equipment 28
Operating instructions 29
Wearing technique 29
Switching-on, trans-
mitting, receiving,
switching back 29
Daily function check 31
Victim search 32
Search routines 33
Search strategies for
multiple avalanche victims 35
90° search method 35
3 circle search method 36
Emergency reception 38
Carrying case and
wrist strap 39
Guarantee / Service 40
Service addresses 104
www.ortovox.com
Current avalanche warning
service information!
1 Visual and digital
LED direction arrows
2 Earphone connection
for group search
3 Loudspeaker
4 Battery compartment
5 Transmit mode
6 Locking and
Emergency Switch
7 Transmit control light
8 Forced ON/OFF
bayonet switch
9 Receive mode
10 Display/digital
distance indicator
11 Quick switch to
receive mode
12 Red LED signal for
multiple victims
13 Three (3) antennae
ENGLISH
3
1
2
10
12
11
9
8
7
6
5
4
13
OPERATING COMPONENTS

QUICK REFERENCE FOR THE ORTOVOX d3 AVALANCHE TRANSCEIVER
24 25
TECHNICAL DATA
DEVICE DESIGNATION: ORTOVOX d3
FUNCTION: digital (triple antenna device)
CASING: ergonomic, waterproof, impact-resistant
DIMENSIONS: 130 x 80 x 25 mm
FREQUENCY: 457 kHz; reception bandwidth tolerance:
+- 200 Hz (thus the d3 can receive signals from any
standard avalanche transceiver with no limitations).
Digital RECEPTION RANGE: Up to 40 m, this high re-
ception range is achieved by two antennas that are vir-
tually the same size, arranged in the x and y direction.
SEARCH STRIP WIDTH: up to 30 m
TEMPERATURE RANGE: -20° C to +45° C
If the transceiver gets wet, do not use direct heat,
i.e. such as a hair dryer, to dry it out. Heat applied
in a direct manner may permanently damage the
device beyond repair.
POWER SUPPLY: 2 alkaline AA LR6 Mignon 1.5 V
E91 AM3 batteries
OPERATING TIME
TRANSMITTING: about 300 hours
RECEIVING: about 40 hours
EARPHONE (optional): 3.5 mm jack
(min. 32 Ohm), stereo earphone
WEIGHT: approximately 230 g incl. batteries and
wrist strap, carrying case approximately 120g
The ORTOVOX d3 surpasses the high requirements
of European standard EN 300 718.
EU DECLARATION OF CONFORMITY
Manufacturer:
X-log Elektronik GmbH
Responsible person:
Mr. Nowotny,
Bahnhofstr. 95,
D-82166 Gräfelfing
declares that the product:
Type: ORTOVOX
Model: d3
Intended Purpose:
Searching for avalanche victims
when used as intended satisfies
the basic requirements in accor-
dance with Article 3 of the R&TTE
guidelines, Directive 1999/5/EC,
and that the following standards
have been applied:
1. Health
(Article 3.1.a of the R&TTE guidelines)
Applied standard(s):
ETS 300 718 issue: 05/01
2. Safety
(Article 3.1.a of the R&TTE guidelines)
Applied standard(s):
ETS 300 718 issue: 05/01
3. Electromagnetic compatibility
(Article 3.1.b of the R&TTE guidelines)
Applied standard(s):
ETSI EN 300 718-1
issue: 05/01
4. Efficient use of the radio
frequency spectrum
(Article 3.2 of the R&TTE guidelines)
Applied standard(s):
ETSI EN 300 718-2
issue: 05/01
5. Electromagnetic compatibility
and radio spectrum matters
(Article 3.3.e of the R&TTE
guidelines)
Applied standard(s):
ETSI EN 300 718-3
issue 2004/02
Gräfelfing, 09/07/2007
(City/date of the Declaration of Conformity)
p. p. Andrea Reintges
(name)
ENGLISH
QUICK REFERENCE FOR THE ORTOVOX d3 AVALANCHE TRANSCEIVER
Coarse search (= Search for first receive signal):
Move through the presumed search area to pick up
the first signal (search strip width: 30 m).
Slowly TURN the d3 in all directions to obtain an optimal
coupling situation with the transmitting device.
2. Receiving = Search:
Move the locking and
emergency switch (6) to
the right, turn the quick
switch to receive mode
(11) to the left and allow
the locking and emer-
gency switch (6) to
engage. After "CH"
(for check) in the display
goes out, the d3 is
ready to receive.
3. Switching back
to transmit:
Move the llocking and
emergency switch (6) to
the right. The quick
switch to receive mode
(11) will automatically
return to the locked
transmit mode position
(5). The d3 will transmit
and the transmit control
light will flash.
1. Switching on and
transmitting:
Insert the forced ON/
OFF bayonet switch (8),
press slightly and at the
same time turn 90°,
(a quarter-turn). The
transmit control light
will flash (7). The device
is ready for operation
and is transmitting.

IMPORTANT INFORMATION!
Avalanche transceivers are designed to support
the assistance offered by companions in the event
of avalanche burial! Your presence in areas where
avalanche hazards exist is fraught with potential
risk; only remain in such areas in the company of
experienced participants. Effective use of an ava-
lanche transceiver requires appropriate training
and constant practice. Wear your avalanche
transceiver close to your body under your outer
clothing. ORTOVOX strongly recommends that you
carefully read the operating instructions provided
with the avalanche transceiver. Always take a sho-
vel and a probe when you go off-piste in areas
where avalanche hazards exist, and never tour
alone. Please check the avalanche reports prior
to planning your off-piste activities at:
www.ortovox.com Before you travel in an area
where an avalanche hazard exists, ensure that all
avalanche transceivers are functioning properly
and that all batteries are in good operating con-
dition. The d3 satisfies maximum safety require-
ments and is impressive with its clear digital
guidance. Its micro-processor control enables
short search times.
QUICK REFERENCE FOR THE ORTOVOX d3 AVALANCHE TRANSCEIVER
ZIEL
2.0
1.8 0.5 1.5
26 27
ENGLISH
PINPOINT SEARCH:
The three d3 receiving
antennae facilitate and
make the pinpoint
search more precise.
The lowest number in
the display window (10)
shows the victim’s loca-
tion and the depth of
their burial. For the pin-
point search, use the
probe. For easier orien-
tation, put a probe on
the ground horizontal to
the search direction.
Mark the lowest num-
bered point (fade point).
Check to the right and
left of the probe with the
d3 to determine if this
lowest numbered point
gets any smaller – this
is where the victim is
located.
IMPORTANT:
Do not turn or tilt the
d3 during the pinpoint
search.
Under 2m:
Pinpoint search with
digital distance display!
TARGET
START
2.0
1.8 0.5 1.5
10
40
FINESEARCH:
At a distance of appro-
ximately 40 m to the
transmitting signal the
digital distance reading,
40, will be shown in the
display (10), the middle
search direction arrow
(1) is illuminated and
indicates the direction
in which to proceed and
the acoustic signal from
the speaker confirms
the measurement result.
TURN the d3, to deter-
mine the shortest
distance and proceed in
this direction.
To obtain precise search
results move the avalan-
che transceiver in a deli-
berately slow and steady
manner.
The closer you get to
the target, the more
slowly and precise you
should move the d3!
Deviating from the
search direction:
When deviating from
the correct search
path, either the left or
the right green digital
direction arrow (1) will
flash to indicate the
right direction
Confirmation of
direction:
The middle search
direction arrow (1) is
illuminated to confirm
the correct direction.
Moreover, the tone
sequence becomes
faster as you approach
the victim. At a dis-
tance of about 2 m or
less from the victim,
the 3 direction arrows
are turned off. This
signals the searcher,
that he is close (about
2 m) to the victim. Now
pass the d3 over the
snow pack surface.
Under 2m:
Pinpoint search with digital distance display!
Between 40m
and 20m:
Finesearch with
search direction
arrows and
digital distance
display!
First signal
received
at 40m to
the avalanche
victim
3.5

OPERATING INSTRUCTIONS
28 29
ENGLISH
Average time required to free a person buried at a depth of
approximately 1m under the snow
The graphic shows in detail how usable complete and functional equipment
are effective in the rescue of an avalanche victim at a depth of 1m
You should check the EMERGENCY EQUIPMENT on the
day before the tour to ensure that it is complete and functional
(good, working batteries for the avalanche transceivers).
Avalanche transceiver, probe + shovel
11 minutes
Avalanche transceiver + shovel
25 minutes
Only
avalanche transceiver
, hands, ski, snowboard
1–2 hours
Grafik: Dominique Stumpert
EVERY MEMBER OF THE GROUP SHOULD HAVE THE FOLLOWING BASIC EQUIPMENT:
Avalanche victim search device (avalanche transceiver)
Mere possession of an avalanche transceiver does not suffice.
Each member of the group must be familiar with his device and practice
with it regularly. (See www.ortovox.com for practice opportunities).
Avalanche shovel
Rescuing avalanche victims is only possible with a shovel.
Avalanche probe
A probe is required for fastest possible precise locating with the pinpoint
search procedure.
First-aid kit For administration of first-aid to the injured
Bivouac sack
Protects against hypothermia and can be used as a transport aid
Supplemental equipment for added safety:
Mobile phone – for organizing professional help.
Each member of the group has an avalanche transceiver on their person,
and a shovel and probe in their backpack.
SWITCHING ON
THE AVALANCHE
TRANSCEIVER
Switch the quick switch
to receiver mode (11)
to transmit mode (5).
ON/OFF - insert the for-
ced ON/OFF bayonet
switch (8) in the opening
of the d3 casing. Now
press the switch lightly
and turn it a quarter
turn (90 degrees) until it
engages. The transmit
control light (7) will now
start to flash in synch
with the transmitter
rhythm. The d3 is now
transmitting.
WEARING THE
CARRYING CASE
Grasp the shoulder
strap loop of the carry-
ing case on the orange
sewed-on badge (16)
with the lettering "shoul-
der strap" and place
this loop over head and
shoulder.
Guide the free end of
the strap with the forced
ON/OFF bayonet switch
(8) around the back and
connect the forced
ON/OFF bayonet switch
with the device. The
ergonomic shape of the
d3 is based on the body
contour – consequently
always wear the d3
with the display side
facing inside.
15
14
16

99
CH
30 31
ENGLISH
Transmitting:
After switching on the
device the display test
appears in the display
window (10). Available
battery capacity is
shown in % (99-01) for
10 seconds.
When the remaining
capacity drops to 10%
the battery display will
flash in the display wind-
ow. Afterwards the dis-
play will shut-off to con-
serve battery power.
(When 10% residual
battery capacity is dis-
played it is time to
replace the batteries.)
The transmit/control
light (7) will also flash.
Now the device is ready
to operate and it is
transmitting. The trans-
mit function can be
checked with a second
avalanche transceiver
that is set to receive.
Change-over to receive:
To receive, push the
locking and emergency
switch (6) to the right,
turn the quick switch
to receive mode (11) to
the left and ensure that
the locking switch (6)
engages.
TRANSMITTING, RECEIVING, SWITCHING BACK TO TRANSMIT
Switching back to
transmit/emergency
changeover to transmit:
To return to transmit
mode (5), push the
locking and emergency
switch (6) to the right.
The quick switch to
receive mode (11) will
automatically return to
the locked transmit
position (5).
Now set a second device
to transmit mode (5).
After the d3 switches
over to receive, you will
hear the signal of the
transmitter; in the dis-
play you can read the
distance to the trans-
mitter, and the three
direction arrows indicate
the search direction.
The transmission con-
trol light is switched off
in receive mode.
For a few seconds "CH"
(=CHeck) will be display-
ed. During this time the
d3 checks the display
functions and determi-
nes the optimal receive
mode. After "CH" disap-
pears the d3 is ready
for searching. Uninten-
tional switch-over to
transmit mode is not
possible.
Checking
the earphone function:
The d3 is equipped with
an earphone connection
for a trouble-free group
searching.
Insert the earphone plug
into the earphone socket
(2) and switch the d3 to
receive mode. Now you
can hear the signal of
the transmitter that is
being searched in the
earphone, the search
direction arrows indicate
the search direction,
and the distance to the
transmitter is shown in
the display. The integra-
ted loudspeaker (3) is
switched off when the
earphone is plugged in.
DAILY FUNCTION CHECK
BEFORE STARTING A TOUR!
Check the receivers:
• All group members set their avalanche
transceivers to RECEIVE MODE.
• One member (preferably the group leader) sets
their avalanche transceiver to TRANSMIT MODE.
• If all avalanche transceivers receive acoustic and
visual signals, the receivers are working correctly.
Checking the transmitters:
• After checking the RECEIVERS, group members
must test the function of their TRANSMITTERS.
• The group members set their avalanche trans-
ceivers to TRANSMIT MODE and pass by the
group leader’s receiver ONE BY ONE at a dis-
tance of about 15 m. When the group leader
receives acoustic and visual signals from every
single group member’s avalanche transceiver,
the transmission function is OK.
If you notice any deviations from the functions de-
scribed, please send your device directly to the
ORTOVOX service centre for repair (see page 104).

VICTIM SEARCH
Open the quick lock
(15):Pull the d3 trans-
ceiver out of the carry-
ing case and pull it about
0.5m away from your
body. The strap system
and the elastic cord will
still secure the device
to your body so there is
no risk of losing it.
Switch-over to receive
mode: Turn the quick
switch to receive mode
(11) from transmit mode
(5) to receive mode (9).
To do this the locking
switch (6) must be pus-
hed to the right. The
signals of the other devi-
ces can now be recei-
ved.
Emergency change-
over to TRANSMIT -
in the event of a
second avalanche!
Push the locking and
emergency switch (6) to
the right with your
thumb. The emergency
switch will automatically
return to the secured
transmit position and the
d3 will start transmitting.
Optimizing reception:
Due to the laws of phy-
sics, reception depends
on the relative position
of the receiving and
transmitting devices'
antennas. Maximum
range can only be ob-
tained when the two
devices are arranged
on a longitudinal axis,
one behind the other.
Consequently we recom-
mend that you delibera-
tely turn the ORTOVOX
d3 in all directions to
find the best receiving
position when searching
for the first signal.
Failures in the perfor-
mance of the transmis-
sion and reception func-
tions can be caused by
lightning, lift and power
systems, radio equip-
ment, mobile telephones
and other electronic
equipment. Mobile tele-
phones and radio equip-
ment should be swit-
ched off during a search.
The minimum distance
between two avalanche
transceivers or to me-
tal, radio equipment,
mobile telephones etc.
should be at least 30 cm.
32 33
ENGLISH
COARSE SEARCH
(= Search for first receive signal):
If searching alone, walk through the
presumed area in 30 m wide search
strips to pick up the first signal.
Pay attention to the lateral distance
to the edge of the avalanche.
The d3 allows a search strip width
of 30 m.
After the first signal is received,
proceed in the indicated direction
(= lowest number in the display).
COARSE SEARCH
with several helpers
(=search after first receive signal):
For searching with multiple helpers
search through the avalanche deposit
in 30 m wide search strips.
Pay attention to the lateral distance
to the edge of the avalanche. This
distance should not exceed 15 m.
When a transceiver picks up the first
signal it immediately starts with fine-
search.
The other searchers should continue
with the planned search path and the
search strips as described.

34
PINPOINT SEARCH:
The triple antennae
system of the d3 facili-
tates a precise pinpoint
search.
During the pinpoint
search at a distance of
2 - 0 m the digital direc-
tion arrows are swit-
ched off. This indicates
to the searcher that he is
very close (approximately
2 m) to the victim.
Now pass the d3 over
the snow pack at a
distance of several cm.
IMPORTANT:
At this point stop
turning the d3.
Pinpoint search is carried
out with the help of the
digital distance reading
and the increasing fre-
quency of signal tones.
The victim is located at
the position of the lowest
display (= buried depth).
Use the avalanche probe
as an orientation aid for
rescue with the shovel
and shovel laterally away
from the probe!
FINESEARCH:
At a distance of appro-
ximately 40 m to the
transmit signal the digi-
tal distance reading of
40 will be displayed
(10); the middle search
direction arrow will be
illuminated, indicating
the direction to follow.
The loudspeaker`s acou-
stical signal confirms the
measurement results.
To obtain precise locating
results move the trans-
ceiver deliberately, yet,
simultaneously, at a
moderate speed.
35
Under 2m:
Pinpoint search with
digital distance display!
Between 40m and 20m:
Finesearch with search
direction arrows and
digital distance display!
First signal
received at
40m to the
avalanche
victim
TARGET
START
2.0
1.8 0.5 1.5
10
40
Correcting
the search direction:
When deviating from the
correct search direction,
either the left or the right
green digital direction
arrow (1) will flash to in-
dicate the right direction.
Confirmation of direction:
When approaching the
correct direction, the
middle digital direction
arrow (1) will flash. In
addition, a faster tone
sequence acoustically
signals that you are on
the right approach.
TARGET
2.0
1.8 0.5 1.5
Under 2m:
Pinpoint search with
digital distance display!
STRATEGIES FOR
SEARCHING FOR
MULTIPLE VICTIMS
(SIGNAL SEPARATION):
90° METHOD
Use of, compliance with,
and consistent execution
of the selected search
strategy is crucial for the
success of the search!
The signal display by the
red LED (12) on the d3 is
an important aid in recog-
nizing a situation with
several victims. The red
LED lights up if several
persons have been buried
in the reception area. If
the constant light begins
to flash then the second
victim is less than 10 m
away. The red LED is illu-
minated approx. 5 se-
conds after activating the
receiver. If several signals
overlap, this process can
take up to 20 seconds. If
a group needs more than
5 seconds to switch to
the receive mode then the
display can be switched off
by briefly switching the d3
3.5

36 37
ENGLISH
signal the searcher moves
to the right, to the left or
forwards as required until
the second signal is recei-
ved. The distance monitor
for the first signal will be
the first to increase in
size. As soon as the d3
receives a stronger signal
from the second transmit-
ter, the new walking direc-
tion and distance figure
is automatically shown on
the display. In order to
ensure that all existing
signals are received, all
search directions (left,
right and forwards) must
be carefully searched right
up to the edges of the
avalanche path.
off while in receiver mode.
This may also be necessa-
ry if atmospheric distur-
bances cause display in-
terruptions.
The red LED switches off
if it can be ensured that
no more than one beacon
is transmitting in the
reception area of the d3.
The red LED will not
switch off if a transmitter
is located within approxi-
mately 15 m.
If the display should be
erased during a search
then the d3 must also be
switched off briefly while in
the reception mode.
After locating the first
3 CIRCLE SEARCH
METHOD:
The 3 circle search
method is the best proce-
dure for locating several
persons buried close
together. For the "3 CIR-
CLE SEARCH METHOD"
the searcher must execu-
te the signal separation
The signal display by the
red LED (12) on the d3 is
an important aid in recog-
nizing a situation with
several victims. The red
LED lights up if several
persons have been buried
in the reception area. If
the constant light begins
to flash then the second
victim is less than 10 m
away. The red LED is illu-
minated approx. 5 se-
conds after activating the
receiver. If several signals
overlap, this process can
take up to 20 seconds. If
a group needs more than
5 seconds to switch to
receive mode then the
display can be switched
off by briefly switching the
d3 off while in receive
mode. This may also be
necessary if atmospheric
disturbances cause dis-
play interruptions.
The red LED switches off
if it can be ensured that
no more than one beacon
is transmitting in the re-
ception area of the d3.
The red LED will not
switch off if a transmitter
is located within approxi-
mately 15 m. If the dis-
play should be erased
during a search then the
d3 must also be switched
off briefly while in the
reception mode.
• After locating the first
victim, helpers rescue
the person.
• To find additional signals
the searcher moves in
successive circles with
radii of 3, 6, and 9
meters respectively. The
centre of each circle is
the point where the first
victim was found. In this
process the searcher
must pay close attention
to the display, the LEDs
and be alert to any pro-
nounced changes. A
pronounced change in
the distance reading
indicates the signal
reception of a second
transmitter. At this point
follow the new signal.
• When the searcher
receives no further
signals in the smallest
circle, he moves to the
next circle.
SPECIAL CASE
VICTIMS ARE CLOSE TOGETHER
In searching for multiple
signals, the right and
left search direction
arrows can also flash in
alternation, in addition
to the red
LED (12).
This infor-
mation
means
that the searcher
has reached an
intersection point
of two (multiple)
signals.
If two signals of appro-
ximately the same-
strength are received,
then the direction
arrows flash alternately.
The red LED is illumi-
nated. In this case the
searcher will decide
which of the two direc-
tions he will follow.
IMPORTANT:
Walk the circle com-
pletely and hold the
d3 on the surface
of the snow!

If battery replacement
has been delayed
(residual capacity less
than 10 %) then micro-
processor and display
will be switched off
automatically to con-
serve battery power.
Instead of the digital
search, now analog
emergency reception
is available until the bat-
teries are completely
dead.
To determine the stron-
gest receive direction
the searcher moves in
this direction. Volume
increases as the sear-
cher gets closer to the
victim.
The searcher moves
5 meters in the direc-
tion with the loudest
tone signal, reorients
38 39
ENGLISH
IMPORTANT INFORMATION!
Remove the batteries from the avalanche trans-
ceiver during the summer months. The ORTOVOX
factory guarantee is invalid by damage due to bat-
tery leakage. Never use rechargeable batteries
(rechargeable batteries such as Ni-Cd cells).
Rechargeable batteries have significantly lower
operating voltage, and thus lower range and limi-
ted service life. In addition defective rechargeable
batteries cannot be detected immediately. Once
they have been recharged they show full battery
voltage, however they can drop off to 0 after
extremely short service (life threatening hazard!).
If you delay changing batteries (capacity <10%),
the micro-processor, the distance display, and
direction display will switch off. In such case,
approximately only twenty hours of emergency
analog transmit operation and one hour of emer-
gency receive operation are possible.
CHANGING BATTERIES
Remove the screw from
the battery compart-
ment (4) and pull the
batteries out of the bat-
tery compartment using
the strap. Insert fresh
AA batteries and pay
attention to the correct
insert position of + pole
and - pole. Only use
brand name batteries.
Cheap batteries can be
slightly thinner and/or
shorter, which means
that correct contact of
the battery poles is not
ensured.
The carrying case can
be removed from the
avalanche transceiver
for cleaning purposes.
The wrist strap can be
mounted instead of the
carrying case. Use a
screwdriver to loosen
the small wedge in the
centre of the cord
anchoring. Pull out the
wedge and put it where
it will not get lost.
Remove the pear-sha-
ped connecting piece
from the casing with a
strong tug.
Instead of the carrying
case the wrist strap
can be attached. After
attaching the wrist
strap put the connecti-
on back together and
secure with the wedge.
For safety reasons
ORTOVOX recom-
mends that you only
use the supplied and
mounted carrying case.
EMERGENCY RECEPTION - SAFETY CIRCUIT
4
the d3 in the direction
of the loudest tone
signal, and then moves
another 5 meters. This
procedure must be
repeated until the point
with the loudest signal
is reached. The victim is
located at the point with
the loudest signal.
INFORMATION FOR THE USER
Registration Number: FCC ID No. KF5ORTOVOXd3
This device complies with Part 15 of the FCC Rules. Operation is subject to the following two conditions:
(1) the device may not cause harmful interference and
(2) the device must accept any interference received, including
interference that may cause undesired operation.
This equipment has been tested and found to comply with the limits for an intentional radiator pursuant to part
15 of the FCC Rules. These limits are designed to provide reasonableprotection against harmful interference in
a residential installation. This equipment generates, uses, and can radiate radio frequency energy and if not
installed and used in accordance with the instructions may cause harmful interference to radio communications.
However, there is no guarantee that interference will not occur in a particular installation. If this equipment does
cause harmful interference to radio or television reception, which can be determined by turning the equipment
off and on, the user is encouraged to try to correct the interference by one or more of the following measures:
- Reorient or relocate the receiving antenna.
- Increase the separation between the equipment and receiver.
- Connect the equipment into an outlet on a circuit different from that to which the receiver is connected.
- Consult the dealer or an experienced radio/TV technician for help.
Increase of the Voilume Deacrease of the Voilume
Receiver Transmitter
REMOVING THE
CARRYING CASE
FROM THE AVALANCHE
TRANSCEIVER
AND MOUNTING
THE WRIST STRAP

40
STORAGE
After the tour take off
the d3 and store it in
its switched off status
in a well-ventilated dry
location. Most often,
the well-designed casing
prevents condensation
for the most part. To
ensure that the device
will function for several
years we recommend a
gentle drying of the car-
rying system and the
avalanche transceiver,
itself. If your transceiver
gets wet, do not use
direct heat, i.e. hair
dryer, to dry it out.
Heat applied in such a
direct manner may cau-
se permanent damage.
Protect the avalanche
transceiver from exces-
sive moisture or exces-
sive heat. Protect the
batteries from cold tem-
peratures.
GUARANTEE
With the purchase of a new
ORTOVOX avalanche trans-
ceiver and submission of the
filled-out guarantee card
(page 41) a full five-year fac-
tory guarantee starting from
the date of manufacture is
provided. The valid guaran-
tee period is shown on the
test seal in the battery com-
partment and on the device
packaging. For example, if
the symbols IV/11 are writ-
ten on the test seal, it
means that the factory gua-
rantee will expire at the end
of the 4th quarter 2011.
Also, the seal is a reminder
of the time period during
which the recommended
device inspection is free of
charge. Within the guaran-
tee period, faulty parts will
be repaired or replaced at
no cost. The exceptions are
damage due to improper
handling and normal wear
and tear. The ORTOVOX fac-
tory guarantee is invalid if
there is damage due to bat-
tery leakage. Earphones and
batteries are excluded from
the guarantee. Any further
performance guarantees
and subsequent damages
are expressly excluded. Gua-
rantee services performed
neither cause the guarantee
period to be extended or
restarted.
SERVICE
The ORTOVOX d3 is a
rescue device. Its per-
fect operation might be
crucial for life. To ensure
your unit is functioning
properly, send the device
for factory inspection
according to the dates
shown on the test seal.
Please use our inspec-
tion service in the
summer months, so
that your device will
be ready for operation
when winter starts.
For repair or factory
inspection please send
the avalanche transcei-
ver directly toour service
centre (see page 104).
11
2011
In case of service please fill out this card and send it to the responsible
ORTOVOX service centre (see page 104).
IMPORTANT!
Please hold in
safe keeping
GUARANTEE CARD
Ms/Mrs/Mr
Street
Postal code, City E-mail
Telephone Model ORTOVOX d3
Serial number
(inside of battery compartment lid)
Purchased at
Please provide below a detailed explanation and description of your unit`s faulty performance!!!!
✃
www.ortovox.com
Other manuals for d3
1
Table of contents
Other Ortovox Transceiver manuals

Ortovox
Ortovox S1 User manual

Ortovox
Ortovox S1 User manual

Ortovox
Ortovox S1 User manual

Ortovox
Ortovox Zoom+ User manual

Ortovox
Ortovox f1 focus User manual

Ortovox
Ortovox 3+ User manual

Ortovox
Ortovox X1 User manual

Ortovox
Ortovox Zoom+ User manual

Ortovox
Ortovox S1 User manual

Ortovox
Ortovox M2 User manual

Ortovox
Ortovox f1 focus User manual

Ortovox
Ortovox RECCO 3+ User manual

Ortovox
Ortovox 3+ User manual

Ortovox
Ortovox Zoom+ User manual

Ortovox
Ortovox Zoom+ User manual

Ortovox
Ortovox M2 User manual

Ortovox
Ortovox DIRACT User manual

Ortovox
Ortovox 3+ User manual

Ortovox
Ortovox 3+ Assembly instructions

Ortovox
Ortovox F1 retriever User manual