_______________________________________________________________________________________
ORVED S.P.A Rev.01 – 09/2019 – cod. 1500735-00EN – User Manual for
IDEA
vacuum packing machines
Pag. 6 a 76
• When disconnecting the plug, or if the cord is not provided with plug, make sure the appliance is
connected to the electrical mains by a qualified electrician.
• If anomalies are found in the equipment (for example, the power cord is damaged or the control panel
is not working properly), do not use the machine and promptly inform your authorised service centre.
• Never use the appliance with wet hands or where there is any contact with water.
• Use suitable work clothes and protection gloves.
• Do not insert objects in the machine vents: risk of electric shock!
• The warranty shall be invalidated in case the vacuum packaging machine is not repaired by an
authorised service centre.
• Only replace any faulty or defective parts with original spare parts supplied by your dealer (qualified
personnel must replace these parts).
• In the event of a power failure during the vacuum process, the vacuum state is maintained in the
chamber and the lid cannot be opened. Never attempt to open the lid by applying force or using
tools. Once the electrical power is restored, it will be possible to open the lid again.
• When carrying out special maintenance, installation or repair works, disconnect the appliance from
the electrical mains and remove the plug from the outlet. If the plug is not accessible, deactivate the
electrical system where the appliance is connected by the main switch. Before performing any
repair or installation works, make sure the appliance is disconnected from the mains.
• When the appliance is ready to be scrapped, cut the power cord and remove the lid to make the
appliance unusable and make it difficult for children to access the inside of the appliance.
1.4 Proper use
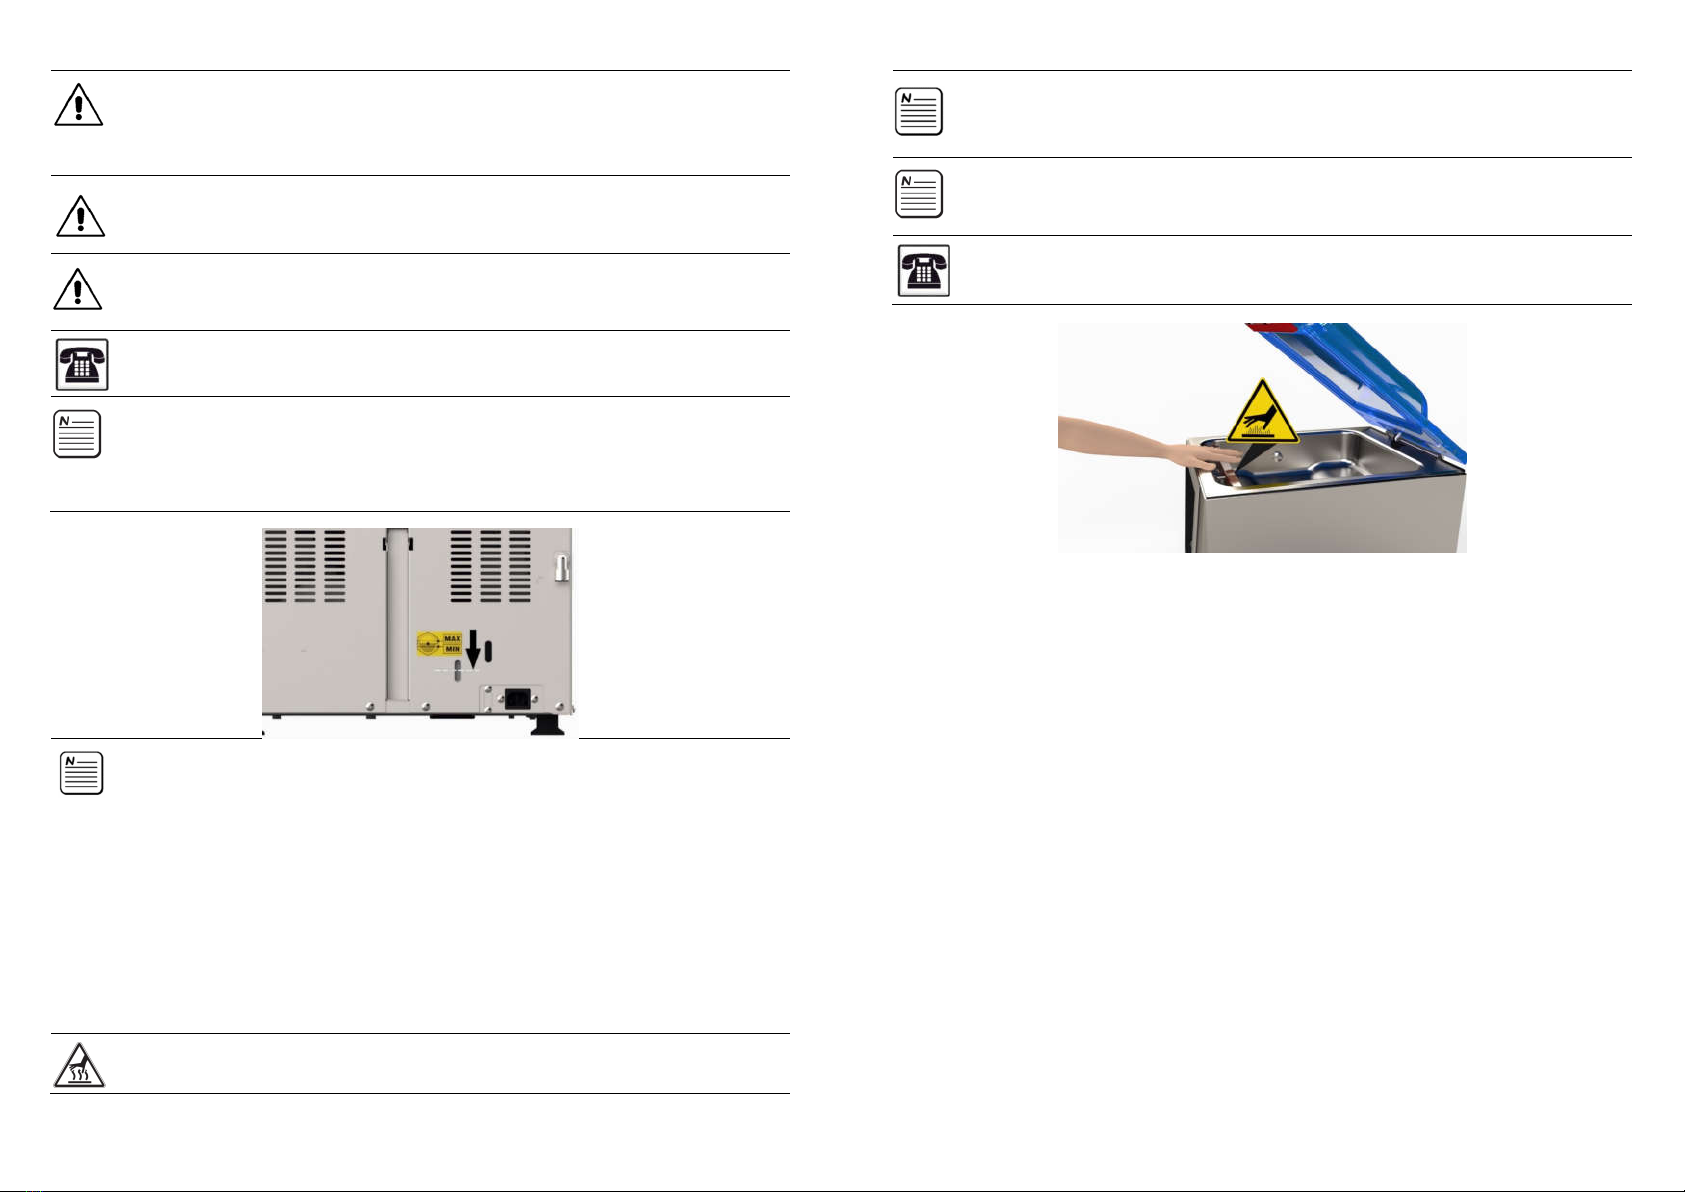
• Burning risk! After the bag sealing process, the sealing bar and bag seal itself are very hot. Do not
touch the sealing bar or the sealing line immediately after the sealing process.
• Fire hazard! Do not store flammable materials or substances nearby the vacuum packaging machine.
• Any damage to the lid may cause an implosion. Do not place any object on the lid and avoid striking its
surface with any object. In the case of accidental impact with the lid, carefully inspect it for damage. If
in doubt, contact your authorised service centre.
• Do not use the appliance or lid as a work, support or cutting surface.
• Always pack foods cooled to +3°C: this will ensure best preservation results. Moreover, this will prevent the
steaming that may affect the vacuum packaging machine operation. In particular, the vacuum pump
can be damaged by oxidation resulting from condensed vapors. Monitor the vacuum process carefully
and if bubble appear in the liquid, prevent leakage by sealing in advance.
• If liquids reach the pump inlet, they may cause serious damages.
• Before using any type of containers or jars, make sure they are strong enough to withstand the vacuum,
even if placed in the fridge, thus preventing an implosion that may be hazardous.
• If the machine is not used for long, it must be switched off removing the plug from the socket (see
SCHEDULED ROUTINE MAINTENANCE table at Chapter 14).
1.5 Cleaning and care
• Use only damp cloths and non-aggressive disinfectants and detergents to clean the appliance. Never
use sponges or abrasive cloths to prevent damaging the steel surfaces and lid surfaces.
• Water or steam may reach live parts and cause a short circuit. Never use running water or steam cleaning
equipment: risk of electric shock!
• The user is responsible for cleaning and routine maintenance. These operations must not be carried out
by children without proper supervision.
2 advices for environmental protection
1) Packaging:
The packaging materials is 100% recyclable and is marked with the recycling symbol. Follow local waste
disposal regulations. The packaging material (plastic bags, polystyrene parts, etc.) must be kept out of reach
of children as they are a potentially dangerous.
2) Scrapping/Disposal:
The appliance is made using recyclable materials. This appliance is labelled in compliance with European
Directive 2012/19/EU, Waste Electrical and Electronic Equipment (WEEE). By making sure that this appliance
is properly scrapped, you are contributing to preventing potential negative consequences to the
environment and human health.
_______________________________________________________________________________________
ORVED S.P.A Rev.01 – 09/2019 – cod. 1500735-00EN – User Manual for
IDEA
vacuum packing machines
Pag. 7 a 76
If this symbol is used on the appliance or in the accompanying documentation, this means that the
product must not be treated as domestic waste and must be delivered to an authorised collection
centre for electrical and electronic equipment at the end of its useful life.
When the appliance is ready to be scrapped, cut the power cord and remove the lid to make the
appliance unusable and make it difficult for children to enter it.
Scrap the appliance in accordance with local standards regarding waste disposal and deliver it to
appropriate collection points. Do not leave the appliance unattended, not even for just a few days, as it is
potentially dangerous to children.
For further information regarding the treatment, recovery and recycling of this appliance, contact your local
office, waste collection centre or the dealer where the appliance was purchased.
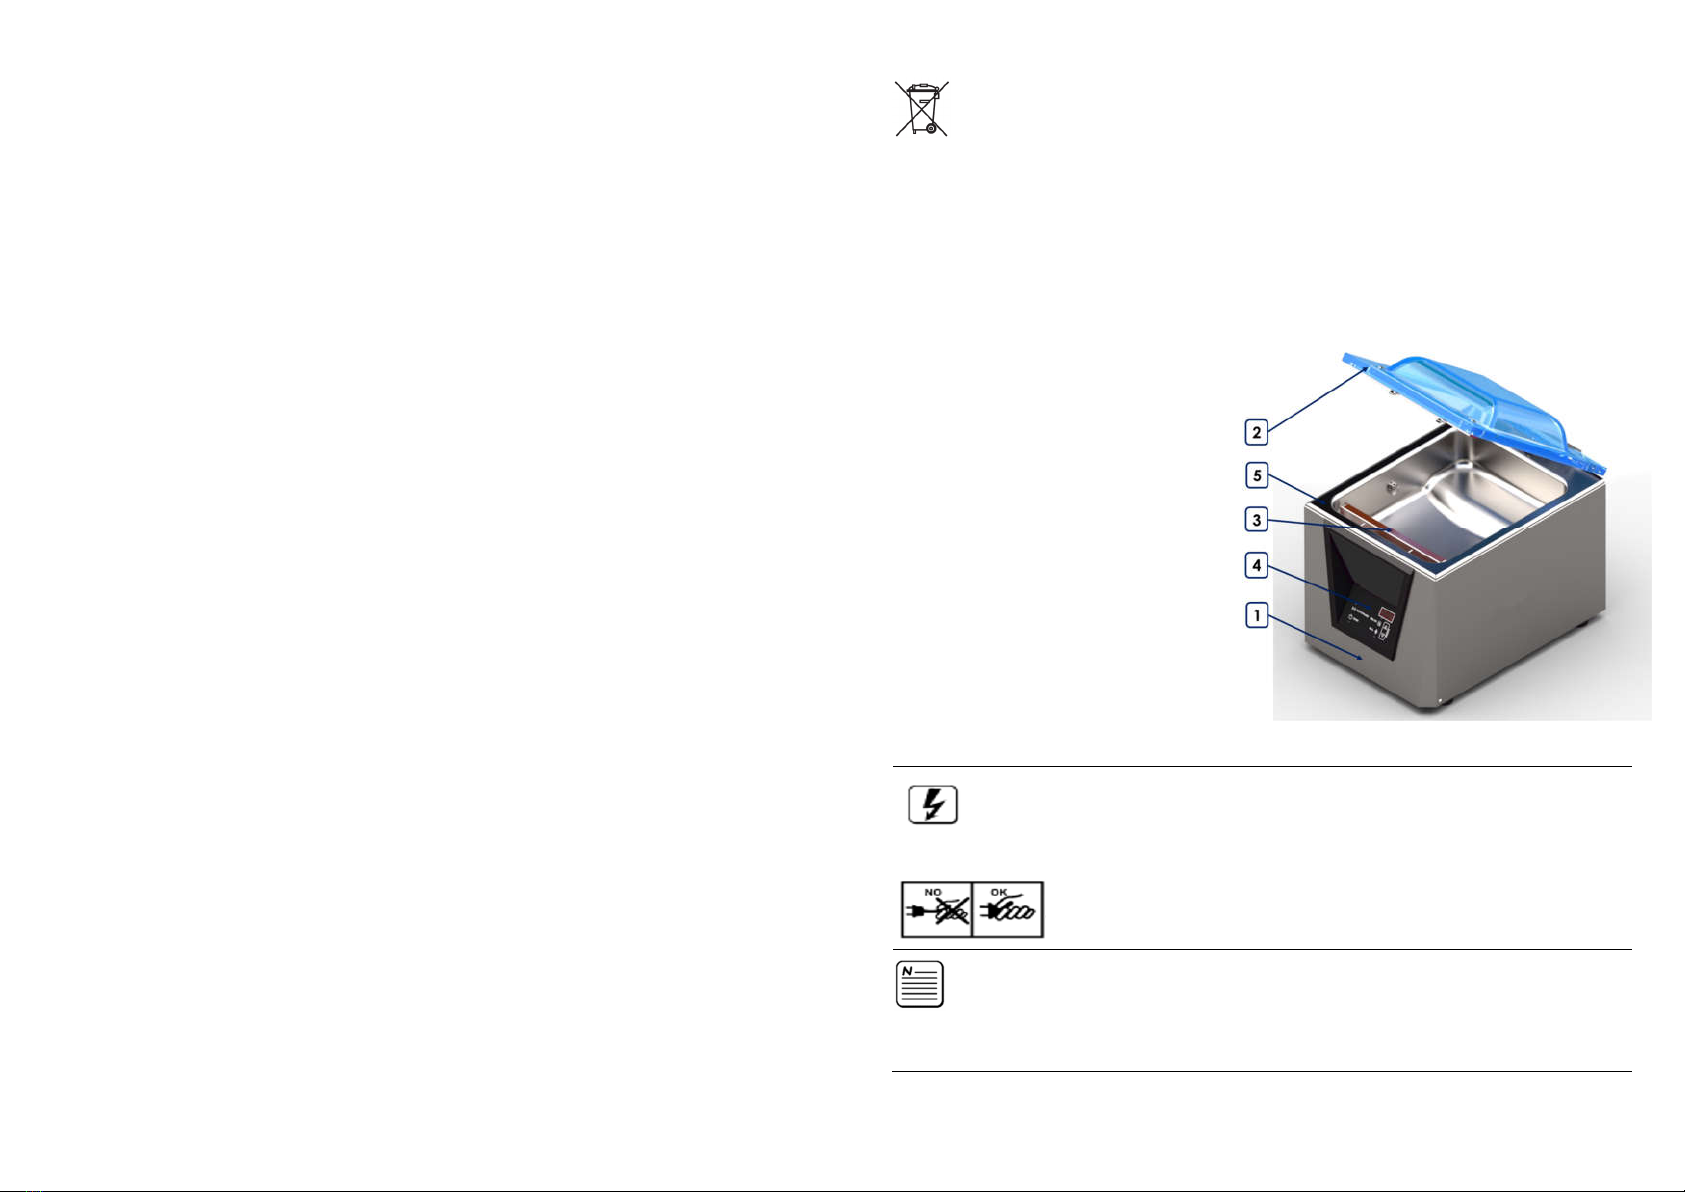
3 vacuum machine description
(The model shown in the below image may not exactly correspond to the vacuum packing machine you
purchased)
1) Machine body
2) Lid
3) Sealing bar
4) Command panel
5) Vacuum chamber
4 terms of use
ELECTRICAL HAZARD!
Verify in advance that the voltage indicated on the machine identification
plate corresponded to the one of your electric system.
The electrical safety for this appliance is guaranteed only if correctly connected to an efficient
earthing system, as required by the current regulations, the manufacturer declines all
responsibility for any damage caused by the lack or inefficiency of earthing system.
ELECTRICAL HAZARD! Insert and remove the plug from the socket when the machine
is switched of only. Do not pull on the cable, but directly on the plug. Access to the
live part is allowed to qualified personnel only.
CAUTION! Place the machine on a solid and safe horizontal work surface.
CAUTION! The appliance must be placed in position
accessible from all sides. This will ensure the
machine the necessary ventilation.
CAUTION! In case the machine is provided with Gas injection system, it is recommended to anchor
the gas bottle to the wall. After use, when the machine is off, it is recommended to close the gas
bottle and the pressure reducer valve.