Oster Planetary Stand Mixer User manual

For product questions:
Oster Consumer Service
USA : 1.800.334.0759
Canada : 1.800.667.8623
www.oster.com
© 2013 Sunbeam Products, Inc. doing business as Jarden Consumer Solutions. All rights reserved.
Distributed by Sunbeam Products, Inc. doing business as Jarden Consumer Solutions,
Boca Raton, Florida 33431.
SPR-062013-289P
Para preguntas sobre los productos llame:
Oster Consumer Service
EE.UU. : 1.800.334.0759
Canadá : 1.800.667.8623
www.oster.com
© 2013 Sunbeam Products, Inc. operando bajo el nombre de Jarden Consumer Solutions.
Todos los derechos reservados. Distribuido por Sunbeam Products, Inc. operando bajo el nombre de
Jarden Consumer Solutions, Boca Raton, Florida 33431.
Printed in China Impreso en China

Planetary
Stand Mixer
Batidora
Planetaria
Visit us at www.oster.com P.N. 116170 Rev A
FPSTSMPL1

When using electrical appliances, basic safety precautions should
always be followed, including the following:
READ ALL INSTRUCTIONS BEFORE USE
1 . To protect against risk of electrical shock, do not put mixer in water or other liquid.
This may cause personal injury or damage to the product.
2. Close supervision is necessary when mixer is used by or near children or incapacitated persons.
3. Unplug from outlet while not in use, before putting on or taking off parts, and before cleaning.
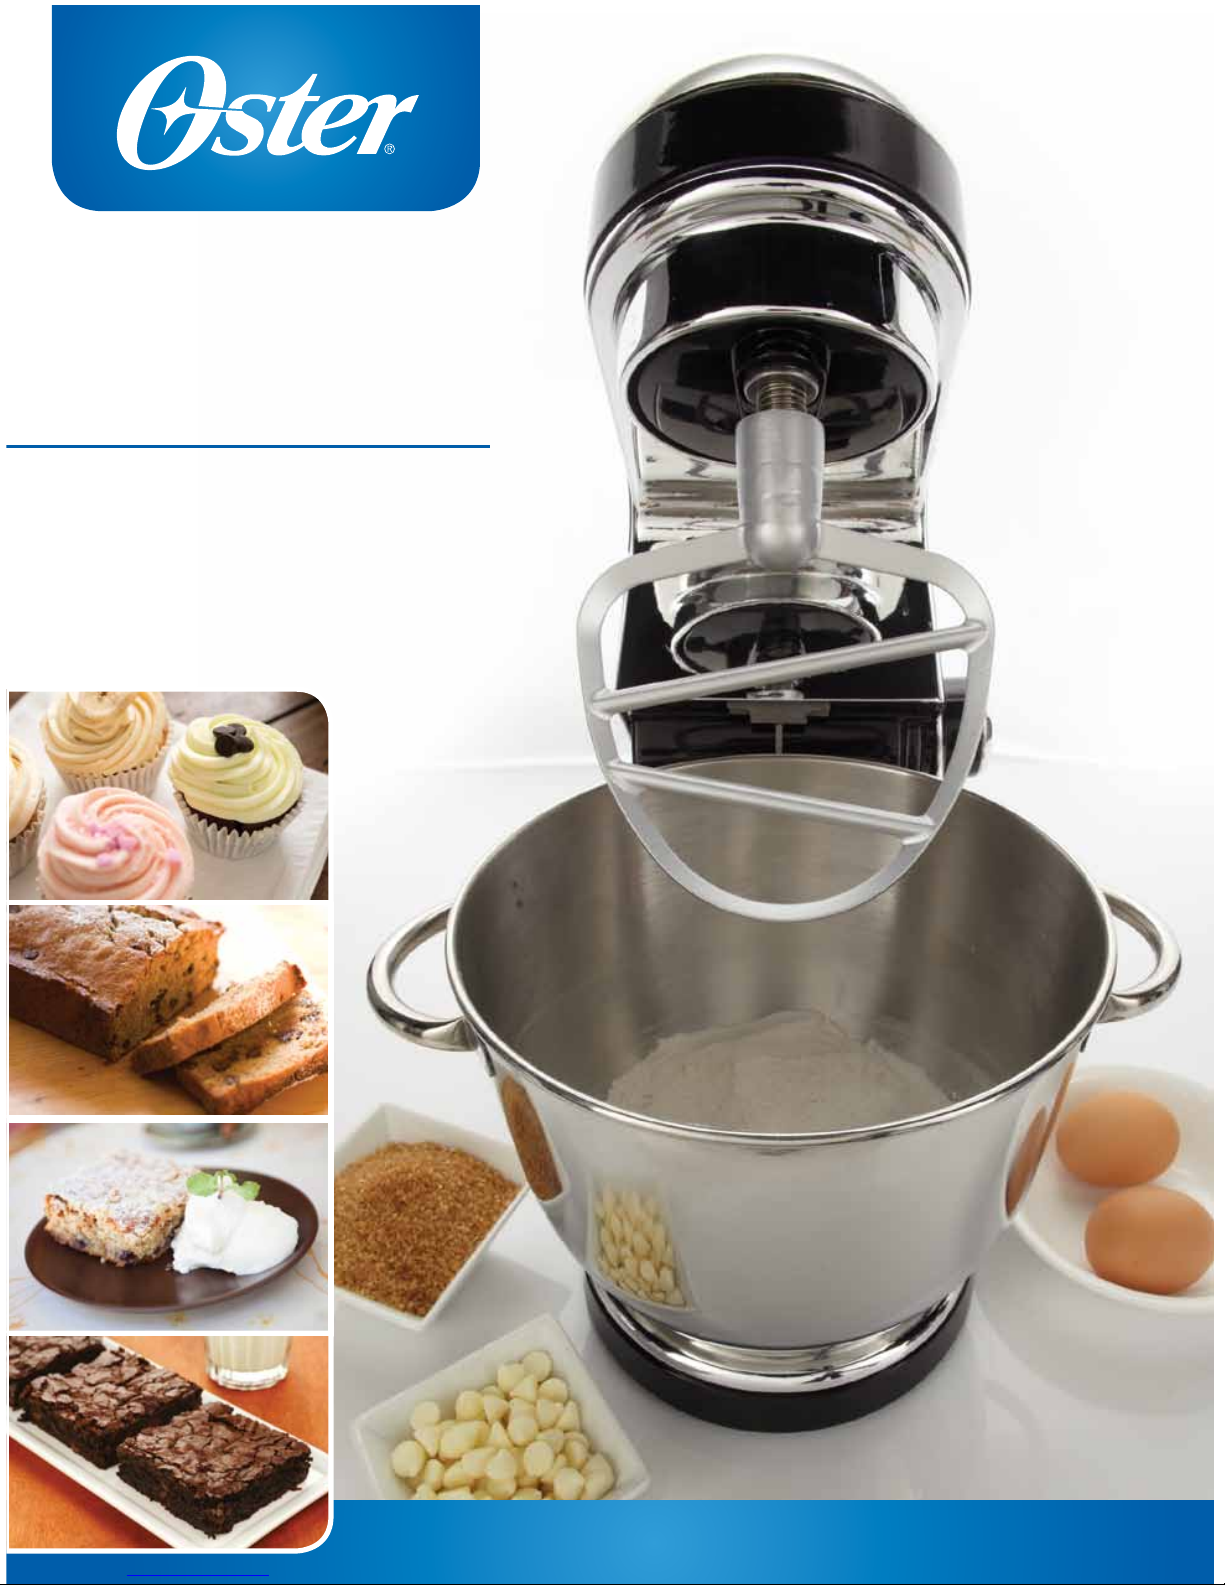
4. Avoid contacting moving parts. Keep hands, hair, clothing, as well as spatulas and other utensils away
from beaters during operation to reduce the risk of injury to persons and/or damage to the mixer.
5. To disconnect, turn off all controls and remove plug from outlet.
6. Do not operate mixer with a damaged cord or plug or after the appliance malfunctions,
or is dropped or damaged in any manner. If the mixer becomes damaged please contact
Consumer Services for assistance.
7. Do not use extension cord.
8. The use of attachments not recommended or sold by Jarden Consumer Solutions may
cause fire, electrical shock or injury.
9. Do not use outdoors or for commercial purposes.
10. Do not let cord hang over edge of table or countertop or touch hot surfaces, including the stove.
1 1. Remove beaters from mixer before washing.
12. Do not place mixer or bowls on or near a hot gas or electric burner, in a heated oven
(microwave, convention, convection, etc.), or on any other heated surface.
13. Do not use mixer for other than intended use.
14. Do not leave mixer unattended while it is operating.
15. Mixer has an internal safety to prevent overheating. If the mixer shuts down because of overheating,
reset the speed control dial to OFF and unplug unit from wall. Wait 1 minute and plug back in. If unit
still does not start, wait 30 minutes to allow unit to cool completely before turning back on.
16. Any servicing, other than cleaning and user maintenance shall be performed by an authorized
service representative.
17. When mixing liquids, especially hot liquid, use a tall container or make small quantities at a time
to reduce spillage.
18. Don’t Abuse Cord. Never carry the mixer by the cord or yank it to disconnect from an outlet;
instead, grasp the plug and pull to disconnect.
19. THIS UNIT IS FOR HOUSEHOLD USE ONLY.
SAVE THESE INSTRUCTIONS
For Products Purchased in the u.s. and canada only
To reduce the risk of electrical shock, this appliance is equipped with a 3-prong plug. If you are unable to
insert the plug into the outlet, contact a qualified electrician to replace the obsolete outlet. Do not attempt
to defeat the safety purpose of the 3-prong plug by modifying it in any way. Also, do not pull, twist or
otherwise abuse the power cord; instead, grasp the plug and pull to remove from the outlet.
NOTE: The motor of your Mixer is protected by a heat cured insulation. This is a standard process. Due to
the heat curing of the insulation, you may experience an odor and possibly a slight wisp of smoke from
your mixer’s motor. This effect will disappear after the first few uses.
QUESTIONS?
CONTACT CUSTOMER SERVICE AT 800-334-0759 IN THE U.S. OR 800-667-8623
IN CANADA OR VISIT WWW.OSTER.COM
DO NOT RETURN THIS PRODUCT TO PLACE OF PURCHASE
2
Important SafeguardS

Important Safeguards 2
Welcome 4
Features 4
Accessories 5
Preparing for Use
5
Installing Your Attachments 7
Splash Guard 8
Helpful Hints 8
Speed Control Guide 9
Care and Maintenance 9
Recipes 10
Warranty 13
3
table ofContentS

WelCome
Congratulations on your purchase of an Oster® Planetary Stand Mixer. We’re delighted you chose
us to work with you in the kitchen and assure that you’ll be pleased with your new Stand Mixer.
Once you get started, you’ll find you can’t do without this versatile kitchen tool. We've equipped
you with all the must-have attachments to whip up dough for cookies and breads, handmade
marshmallows and meringues, and your favorite mashed potatoes side-dish. The possibilities are
endless when using your new Oster® Stand Mixer. Let's get mixing!
4
featureS Mixer Head
Tilt Release
Button
Stainless
Steel Bowl
Bowl
Locking
Plate
Beater
Speed
Control
Knob
Attachment
Shaft
Splash
Guard

5
preparIng the Stand mIxer for uSe
gettIng toKnoW Your aCCeSSorIeS
flat beater
for normal to
heavY mIxtureS
cakes, biscuits,
creamed frostings,
quick breads, candies,
meat loaf, cookies,
mashed potatoes,
pie pastry
WIre WhISK
for mIxtureS
that need aIr
InCorporated
eggs, sponge cakes,
egg whites, angel
food cakes, heavy
cream, mayonnaise
dough hooK
for mIxIng and
KneadIng
yeast, doughs:
breads, coee cakes
Before preparing the mixer for use, be sure the speed control dial is in
the OFF position and the electric cord is unplugged.
Be sure to wash bowls and attachments before initial use.
SplaSh guard
for preventIng
SplaSh out and
addIng IngredIentS
WhIle mIxIng

6
preparIng the Stand mIxer for uSe
raISIng and loWerIng
the mIxIng head
To tilt mixer head, push Tilt Release button
(Figure A) and slowly lift mixer head until it locks in
the upright position. (Figure B)
To lower mixer head, grab head, push Tilt Release
button and gently lower mixer head, ensuring it locks
in downward position. A "click" sound will indicate
the mixer head has locked securely into position.
(Figure C)
operatIng Speed Control Knob:
The speed control dial is used for turning the mixer
ON and OFF and for selecting its 12 mixing speeds.
Rotate the speed control dial in a CLOCKWISE
direction to increase mixing speed, and in a
COUNTERCLOCKWISE direction to decrease
mixing speed.
Rotate the speed control dial until the indicator is
aligned with the indicator line for the desired speed.
(Figure D)
NOTE: Always begin mixing at the lowest possible
speed setting, then gradually move to desired
higher speed to avoid splashing ingredients
out of bowl.
DO NOT OPERATE WITHOUT ATTACHMENTS AND
SEE NEXT SECTION "INSTALLING YOUR ATTACHMENTS"
TO BEGIN.
Figure B
Figure C
Figure D
Figure A

7
InStallIng Your attaChmentS
toattaCh boWl
(figure A):
1. Rotate Control Knob to OFF position to turn unit off.
2. Unplug Stand Mixer.
3. Press Tilt Release button and tilt mixer head back.
4. Place bowl on bowl locking plate.
5. Turn bowl gently in a clockwise direction so that bowl
handles are perpendicular to base.
6. Plug into a grounded 3 prong outlet.
toremove boWl
(figure B):
1. Rotate Control Knob to OFF position to turn unit off.
2. Unplug Stand Mixer.
3. Press Tilt Release button and tilt mixer head back.
4. Turn bowl counterclockwise and lift off locking plate.
toremove attaChmentS
(figure D):
1. Rotate Control Knob to OFF position to turn unit off.
2. Unplug Stand Mixer.
3. Tilt mixer head back.
4. Press attachment upward as far as possible and
turn clockwise.
5. Pull attachment from beater shaft.
NOTE: It is recommended to scrape food off attachment
with a spatula/scraper before removing.
toInStall attaChmentS
(figure C):
1. Rotate Control Knob to OFF position to turn unit off.
2. Unplug Stand Mixer.
3. Press Tilt Release button and tilt mixer head back.
4. Align the key positions of the beater shaft and
attachment, push upward.
5. Twist counterclockwise so that pin aligns with
attachment notch and clicks into position.
6. Plug into a grounded 3 prong outlet.
NOTE: Align the key positions of the beater shaft
and attachment.
Figure A
Figure B
Figure C
Figure D

8
hoW touSe the SplaSh guard
toattaCh SplaSh guard
(figure A):
1. Rotate Control Knob to OFF position to turn unit off.
2. Unplug Stand Mixer.
3. After bowl and attachment are in place, lock mixer
head into the downward position.
4. From the front of the mixer, slide the Splash Guard over
the bowl until centered and chute is to the right. The inner
rim of the Splash Guard should fit against the inside edge
of the bowl.
NOTE: Splash Guard should fit loosely on bowl for easy
assembly. Be sure to hold lid in place while pouring.
touSe SplaSh guard:
1. For best results, rotate Splash Guard so the mixer head fits into
the opening of the Splash Guard. The pouring chute will be just
to the right of the attachment hub as you face the mixer.
2. While securing Splash Guard with one hand, pour the
ingredients into the bowl through the pouring chute.
toremove SplaSh guard
(figure B):
1. Rotate Control Knob to OFF position to turn unit off.
2. Unplug Stand Mixer.
3. Lift the front of the Splash Guard clear of the bowl rim
and pull forward.
• When mixing liquids, especially hot liquid, make small quantities at a time to reduce spillage.
• Ingredients should be added to the mixing bowl in the order they are specified in the recipe.
• Use the mixing speed that is recommended in the recipe. Use the speed control dial of the
mixer to help you find the correct speed to use.
• Use mixing times as specified in recipes. BE CAREFUL NOT TO OVERMIX. Overmixing can
cause the mixture to become very tough.
• Should an object, such as a spatula, fall into the bowl while the mixer is operating, turn the
mixer OFF immediately, then remove the object.
• For easier clean-up remove attachments and rinse immediately with warm water.
• Mixer is designed to operate in orbital pattern; periodic scraping of bowl sides may be
required during mixing. Turn OFF before scraping.
helpful hIntS
Figure A
Figure B

9
Speed Control guIde
Speed Mixing guide exaMpleS
1FOLD Use when mixing dry ingredients or when folding two portions of a recipe together,
such as a beaten egg white into a batter or when directions call for LOW speed.
2STIR-KNEAD Use when stirring liquid ingredients or when gentle action is needed to
moisten dry ingredients. Use for kneading bread.
3BLEND Use when quick breads require a brisk action, just enough to blend ingredients
but not enough to develop a smooth batter.
4MIX Use when mixing dry ingredients and liquid ingredients together alternately
in a recipe.
5COMBINE Use when recipe calls for combining ingredients together.
6CAKE MIXES Use when preparing packaged cake mixes or when directions call for MEDIUM speed.
7CREAM Use when creaming sugar and butter together.
8WHIP Use to whip potatoes or to develop a smooth batter.
9WHIP/CREAM Use to whip cream or to develop a light, fluffy texture.
10 DESSERTS Use to beat air into whipped desserts.
11 FROSTINGS Use when preparing light, fluffy frostings and candies.
12 EGG WHITES Use when aerating eggs and egg whites. Use when directions call for HIGH speed.
NOTE: Mixer may not maintain fast speeds under heavy load, such as when the heavy-duty
attachments are used. This is a normal condition.
CleanIng Your mIxer
To clean the mixer, turn it OFF and unplug it from the outlet. Wipe the mixer head, stand,
bowl locking plate and unit base with a damp cloth, then dry. DO NOT FULLY IMMERSE THE
STAND MIXER IN WATER. Avoid the use of abrasive cleaners, as they may damage the finish
of the mixer. Mixing Bowl is safe for cleaning in an automatic dishwasher. Beater, whisk and
dough hooks are safest in top rack ONLY. For best results hand wash with hot, soapy water
after each use. Rinse thoroughly and dry with a soft cloth.
StorIng Your mIxer
Store the mixer in a dry location, such as on a countertop or table top, or in a closet or
cupboard. DO NOT store the beaters on the shaft, instead, place the dough hooks and other
attachments in the mixing bowl. Store the bowl on the locking plate.
maIntenanCe
The motor of your stand mixer has been carefully lubricated at the factory and does not
require any additional lubricant. Other than the recommended cleaning, no further user
maintenance should be necessary. For servicing or repairs please contact Consumer Services
for assistance. (1-800-334-0759 in the U.S. or 1-800-667-8623 in Canada)
CarIng for Your mIxer

10
tIpS for perfeCtIng anY reCIpe:
maKe ahead maShed potatoeS
3 lbs (1.5 kg) white or golden potatoes, peeled and quartered
6 oz (170 gm) cream cheese, cut into 1-inch (2.5cm) cubes
1 cup (259 ml) sour cream
2 tbsp (30 gm) butter or margarine
In saucepan, cover potatoes with cold salted water. Cook till tender; drain. With flat beater, beat potatoes
until fluffy on speed 4. Add remaining ingredients and blend well; season to taste. Spoon potatoes into
buttered 2-quart (2 liter) glass baking dish. Cover and refrigerate up to 3 days.
TO BAKE: Dot potatoes with 1 tbsp butter. Bake, covered at 350° F (180° C) until hot, about 30 minutes.
TIP: When making mashed potatoes, to keep finished dish light and creamy, always beat potatoes until
fully mashed before adding additional ingredients.
Yield: 12 servings
• For best results, turn off mixer and lift beater to scrape bowl and beater with
rubber spatula occasionally as you mix and fold in ingredients.
• For best dough results, when preparing kneaded doughs do not use more
than 4 cups of flour.
• Do not use mixer above Speed 2 for yeast dough.
• When adding dry ingredients, turn off mixer and add as close to the sides of the bowl
as possible. To resume mixing, start at low and gradually increase speed to medium.
Combine all ingredients in mixer bowl. Beat with flat beater on speed 2 until blended.
Increase speed to 6 until light and fluffy. Spoon batter into 2 greased and floured 9-inch (23 cm)
round cake pans. Bake at 375° F (190° C) for 25 minutes or until cakes test done. Place pans on rack
for 10 minutes; unmold and let cool.
TIP: When preparing cakes and cookies that require creaming butter and sugar, begin at a low speed
and increase to speed 3 or 4 until butter mixture is light and lemon colored.
Yield: 12 servings
YelloW CaKe
2
½
cups (375 gm) unsifted all-purpose flour 2 large eggs
1
½
cups (318 gm) granulated sugar 1 cup (250 ml) milk
1 tbsp (12 gm) baking powder 1
½
tsp (7 ml) vanilla extract
½
cup (112 gm) butter, softened 1 tsp (6 gm) salt
reCIpeS
Combine sugar, butter and vanilla in mixer bowl. With flat beater, using speed 42, gradually add milk to
make desired consistency. Gradually increase to speed 11 and beat till light and fluffy.
Yield: enough to frost 8 or 9 (20 – 23 cm) inch 2 layer cake
3 cups (360 gm) confectioners’ sugar 1 tsp (5 ml) vanilla extract
½
cup (112 gm) butter or margarine, softened 3 to 4 tbsp (45-60 ml) milk
butter Cream froStIng

11
reCIpeS
heavenlY angel food CaKe
1 cup (120gm) unsifted cake flour 1
½
tsp (6 gm) cream of tartar
1
¾
cup (289 gm) granulated sugar
½
tsp (3 gm) salt
1
½
cup (375 ml) egg whites, (10 to 12) 1 tsp (5ml) vanilla extract
at room temperature
½
tsp (2
½
ml) almond extract
Sift together cake flour and
¾
cup sugar; set aside. In mixer bowl, with flat beater, beat egg whites,
cream of tartar and salt on speed 6 to soft peaks. Increase speed to 11 and gradually add remaining
1 cup sugar till stiff peaks form. Sift
¼
flour mixture over egg whites and fold in gently, using a rubber
spatula. Add both extracts with last batch of flour. (Do not over mix.) Spoon into ungreased 10-inch
(25 cm) tube pan. Gently cut through batter with small metal spatula or knife to eliminate air bubbles.
Bake on lowest rack of oven at 350° F (180°C) until top of cake springs back when lightly touched.
Immediately invert pan and let cool completely. To remove, loosen sides of cake with small metal
spatula.
TIP: When preparing cakes and cookies that require creaming butter and sugar, begin at a low speed
and increase to speed 3 or 4 until butter mixture is light and lemon colored.
Yield: 12 servings
bItterSWeet ChoColate froStIng
2 cups (240gm) confectioners’ sugar 2 tbsp (28 gm) butter, softened
2 squares (1 oz, ea) unsweetened chocolate, 1 tsp (5 ml) vanilla extract
cut into small pieces
¼
cup (60 ml) hot milk
In mixer bowl, with flat beater, combine sugar, chocolate, butter and vanilla. Gradually add milk and
beat on speed 4 until desired consistency. Increase speed to 8 and beat until beat till light and fluffy.
Yield: about 1 cup
1 cup (250 ml) milk 3 tbsp (38 gm) granulated sugar
⅓
cup (84 ml) water 1 pkg (2
¼
tsp) active dry yeast
2 tbsp (30 gm) unsalted butter 1
½
tsp (8.5 gm) salt
3 cups plus 2 tbsp (450 gm) unsifted bread flour
In small saucepan, combine milk, water and butter; heat to luke warm (110° to 115° F). Using dough
hook, combine 2 cups flour, sugar, yeast and salt on speed 2 until blended. Add milk mixture and mix
until fully blended, about 2 minutes. Add remaining flour,
½
cup at a time, and beat on speed 2 until
mixture leaves the sides of the bowl. Gradually increase speed to 4 and knead dough 5 to 7 minutes
till smooth and elastic.
Turn dough out onto lightly floured board and shape into a ball. Place in large greased bowl,
turning to coat top of dough. Cover and let rise in draft free place until doubled, about 1 hour.
Punch dough down and roll into 12 by 8-inch rectangle. Starting at short end, roll up tightly.
Pinch edges to seal and turn ends under. Place in greased 9 x 5 x3-inch loaf pan. Cover and let rise
till doubled, about 30 minutes.
Bake at 400° F for 30 minutes or until bread sounds hollow when tapped on bottom.
Remove from pan and cool on wire rack at least 2 hours.
Yield: 1 loaf of bread
ClaSSIC WhIte bread

12
unbaKed moCha CheeSe pIe In ChoColate CooKIe CruSt
1
½
cups (140 gm) chocolate wafers, finely crushed
½
cup (50 ml) melted butter
½
tsp (2 gm) ground cinnamon
⅓
cup (75 ml) coffee flavored liqueur
2 pkg (8 oz, ea) cream cheese, softened 2 tsp (10 ml) vanilla extract
⅓
cup (80 gm) butter, softened 2 cups (500 ml) heavy cream, whipped
2 cups (340 gm) semi-sweet chocolate morsels, melted to soft peaks
In medium bowl, combine chocolate wafers, cinnamon and melted butter. Blend with fork.
Pat mixture on bottom and up sides of 9-inch (23 cm) glass pie plate. Chill or bake at 350° F (180°C)
for 10 minutes. Cool on wire rack before filling.
Using flat beater beat cream cheese and butter on speed 4 until creamy and smooth. On speed 2,
blend in melted chocolate, liqueur and vanilla. On speed 1 fold in whipped cream until well blended.
Pour into crust and chill 8 hours or overnight. If desired, decorate with sweetened whipped cream
and chocolate curls.
Yield 8 to 10 servings
1 cup (250 ml) water 1 tsp (6 gm) salt
2 tbsp (30 ml) olive oil 1 pkg (2
¼
tsp) active dry yeast
3 cups (432 gm) unsifted bread flour
In small saucepan, combine water and oil; heat to luke warm (120° to 130° F). In mixer bowl, using
dough hook, combine 2 cups flour, yeast and salt on speed 2 until blended, about 30 seconds. Add oil
mixture and mix until fully blended, about 2 minutes. Add remaining flour and gradually increase speed
to 4 and knead dough 5 to 7 minutes until smooth and elastic.
Shape into ball and place in large greased bowl, turning to coat top of dough. Cover and let rise in a
draft free place till doubled in bulk, about 45 minutes. Divide in half. Press one half into large pizza pan
or peel which has been greased and sprinkled with cornmeal. Bake at 400° F for 12 minutes till crust is
beginning to brown. Add desired toppings; bake 15 minutes longer, till fully baked and crust is browned.
Repeat with remaining half or wrap tightly in plastic wrap and refrigerate up to 2 days. Cover and let
stand at room temperature for 20 minutes before using.
Yield: two 14-inch pizza crusts
eaSY pIzza dough
¾
cup (168 gm) butter or margarine, softened 2 large eggs
½
cup (120 gm) firmly packed brown sugar 1
½
tsp (7.5 ml) vanilla extract
½
cup (106 gm) granulated sugar 1
¾
cups (265 gm) unsifted all-purpose flour
1 tsp (4 gm) baking powder 2 cups (240 gm) rolled oats
¼
tsp (1 gm) baking soda 1
½
cups (225 gm) raisins
¾
tsp (2 gm) ground cinnamon
In mixer bowl, with flat beater, combine butter, sugars, baking powder, baking soda and cinnamon.
Beat at speed 7 until creamy. Add egg and vanilla and beat on speed 5 until well combined.
Add flour and blend well. Remove from mixer and stir in oatmeal and raisins.
Drop by rounded teaspoons onto ungreased baking sheets. Bake at 375° F (190°C) until edges are
golden. Let rest on baking sheets 3 minutes. Cool on wire rack.
TIP: When adding sticky, dry ingredients, such as raisins or dates, toss the fruit in a small amount of
flour before adding to mixer to avoid clumping.
Yield: about 4 dozen cookies
oatmeal raISIn CooKIeS

13
Two Year Limited Warranty
Sunbeam Products, Inc. doing business as Jarden Consumer Solutions or if in Canada, Sunbeam Corporation (Canada) Limited
doing business as Jarden Consumer Solutions (collectively “JCS”) warrants that for a period of two years from the date of
purchase, this product will be free from defects in material and workmanship. JCS, at its option, will repair or replace this product
or any component of the product found to be defective during the warranty period. Replacement will be made with a new or
remanufactured product or component. If the product is no longer available, replacement may be made with a similar product of
equal or greater value. This is your exclusive warranty. Do NOT attempt to repair or adjust any electrical or mechanical functions on
this product. Doing so will void this warranty.
This warranty is valid for the original retail purchaser from the date of initial retail purchase and is not transferable. Keep the original
sales receipt. Proof of purchase is required to obtain warranty performance. JCS dealers, service centers, or retail stores selling JCS
products do not have the right to alter, modify or any way change the terms and conditions of this warranty.
This warranty does not cover normal wear of parts or damage resulting from any of the following: negligent use or misuse of the
product, use on improper voltage or current, use contrary to the operating instructions, disassembly, repair or alteration by anyone
other than JCS or an authorized JCS service center. Further, the warranty does not cover: Acts of God, such as fire, flood, hurricanes
and tornadoes.
What are the limits on JCS’s Liability?
JCS shall not be liable for any incidental or consequential damages caused by the breach of any express, implied or statutory
warranty or condition.
Except to the extent prohibited by applicable law, any implied warranty or condition of merchantability or fitness for a particular
purpose is limited in duration to the duration of the above warranty.
JCS disclaims all other warranties, conditions or representations, express, implied, statutory or otherwise.
JCS shall not be liable for any damages of any kind resulting from the purchase, use or misuse of, or inability to use the product
including incidental, special, consequential or similar damages or loss of profits, or for any breach of contract, fundamental or
otherwise, or for any claim brought against purchaser by any other party.
Some provinces, states or jurisdictions do not allow the exclusion or limitation of incidental or consequential damages or limitations
on how long an implied warranty lasts, so the above limitations or exclusion may not apply to you.
This warranty gives you specific legal rights, and you may also have other rights that vary from province to province, state to state
or jurisdiction to jurisdiction.
How to Obtain Warranty Service
In the U.S.A.
If you have any question regarding this warranty or would like to obtain warranty service, please call 1.800.334.0759 and a
convenient service center address will be provided to you.
In Canada
If you have any question regarding this warranty or would like to obtain warranty service, please call 1.800.667.8623 and a
convenient service center address will be provided to you.
In the U.S.A., this warranty is offered by Sunbeam Products, Inc. doing business as Jarden Consumer Solutions located in Boca
Raton, Florida 33431. In Canada, this warranty is offered by Sunbeam Corporation (Canada) Limited doing business as Jarden
Consumer Solutions, located at 20 B Hereford Street, Brampton, Ontario L6Y 0M1. If you have any other problem or claim in
connection with this product, please write our Consumer Service Department.
PLEASE DO NOT RETURN THIS PRODUCT TO ANY OF THESE ADDRESSES OR TO THE PLACE OF PURCHASE.
PLEASE ALSO SEE WWW.OSTER.COM
FOR MORE INFORMATION.
WarrantY
1 ¾ cups (450 ml) all-purpose flour
2 teaspoons (10 ml) baking powder
1 teaspoon (5 ml) salt
¾ cup (200 ml) cocoa powder
2 ½ cups (625 ml) sugar
4 eggs
1 cup (250 ml) vegetable oil
2 teaspoons (10 ml) vanilla extract
1 cup (250 ml) semi sweet chocolate morsels
Preheat oven to 350°F (180°C). Grease a 15½ x 10½ inch (39 x 27cm) jellyroll pan. In the large mixing bowl at a low
speed, stir together the first 5 ingredients. Gradually add eggs, oil and vanilla. Increase mixer to a moderate speed.
Mix until combined. Reduce speed to a low speed and stir in chocolate morsels. Spread into prepared pan and
bake for 20-25 minutes. Do not overbake. Cool and cut into bars.
double ChoColate broWnIeS

Cuando use algún aparato eléctrico siempre deben seguirse precauciones básicas de
seguridad incluyendo las siguientes:
LEA TODAS LAS INSTRUCCIONES ANTES DE USAR
1 . Para protegerse contra peligros de electricidad no sumerja la batidora en agua u otros líquidos ya que
podría ocasionar lesiones personales o daños al producto.
2. Es necesario contar con supervisión continua cuando la Batidora es usada o está cerca de
niños o personas incapacitadas.
3. Desconecte la batidora del tomacorriente cuando el aparato no está en uso, antes de poner o
quitar partes y antes de limpiarla.
4. Evite el contacto con las partes en movimiento. Mantenga las manos, cabello, ropa, así como también
espátulas y otros utensilios lejos de los batidores durante el funcionamiento del aparato, para reducir el
riesgo de lesiones personales o daños a la batidora
5. Para desconectar, apague todos los controles y retire el enchufe del tomacorriente.
6. No opere la batidora que tenga el cable o enchufe dañado, ni después de haber detectado un mal
funcionamiento o si se cae o está dañada de modo alguno. Si la batidora está dañada, comuníquese con
Servicios al Consumidor para solicitar asistencia.
7. No utilice cable de extensión.
8. El uso de accesorios no recomendados o vendidos por Jarden Consumer Solutions puede causar incendios,
descargas eléctricas o lesiones.
9. No use la tostadora al aire libre o para propósitos comerciales
10. No deje el cable colgado sobre el borde de la mesa ni que toque superficies calientes, incluyendo el horno.
11. Quite los batidores de la batidora antes de lavarlos.
12. No coloque la batidora o el tazón sobre o cerca de quemadores de estufas de gas o de quemadores
eléctricos, o dentro de un horno caliente.
13. No use la Batidora más que para lo que ha sido diseñada.
14. No opere la batidora sin continua supervisión.
15. La batidora tiene una seguridad interna que evita el sobrecalentamiento. Si la batidora deja de funcionar por
sobrecalentamiento, lleve el disco de control de velocidades a la posición OFF y desenchufe la batidora.
Espere 1 minuto y vuelva a enchufarla. No lo haga si la velocidad no ha sido seleccionada como OFF.
16. Cualquier mantenimiento, aparte de la limpieza y el cuidado de parte del usuario, debe ser realizado por un
representante de servicio autorizado.
17. Al mezclar liquidos, especialmente calientes, utilize el tazón de fuente que se mezcla grande o hace
antidades pequeñas a la vez para reducir derramamiento.
18. No Abuse del Cordón. Nunca jale el mezclador por la cuerda ni dé tirones para desenchufar del
tomacorriente; más bien, agarre del enchufe para jalar y desenchufar.
19. ESTA UNIDAD ES SÓLO PARA USO DOMÉSTICO
GUARDE ESTAS INSTRUCIONES
Para Productos adquiridos en ee.uu. y canadá exclusivamente
Para reducir el riesgo de descarga eléctrica, este electrodoméstico viene equipado con un enchufe de 3
patas. Si no puede insertarlo en el tomacorriente, comuníquese con un electricista calificado para cambiar el
tomacorriente obsoleto. De ninguna manera intente modificar esta medida de seguridad del enchufe de tres
patas. También, no tire, no tuerza ni abuse de otra manera del cable eléctrico; en lugar, agarre el enchufe y
tire para quitar del enchufe.
NOTA: El motor de su Batidora está protegido por una aislación curada térmicamente. Se trata de un proceso
estándar. Debido al curado térmico de la aislación, puede sentir un olor desagradable y, posiblemente,
observar vestigios de humo del motor de la batidora. Este efecto desaparecerá después de los primeros usos.
PREGUNTAS?
CONTACTE SERVICIO AL CLIENTE AL 800-334-0759 EN U.S. O 800-667-8623 EN CANADA
O VISITE WWW.OSTER.COM.
NO DEVUELVA ESTE PRODUCTO AL LUGAR DE COMPRA.
14
preCauCIoneS ImportanteS

Precauciones Importantes 14
Bienvenido 16
Funciones 16
Accesorios 17
Preparando para Usar 17
Instalando sus Accesorios 19
Protector de Salpicaduras 20
Guía para Control de Velocidad 21
Consejos Útiles 21
Cuidado y Mantenimiento 22
Recetas 22
Garantía 27
15
ContenIdo

bIenvenIdo
Felicitaciones por su compra de un Oster® Planetary Stand Mixer. Estamos encantados que nos
haya seleccionado para trabajar con Usted en la cocina y le aseguramos que estará contenta con
su nueva Batidora. Una vez que haya comenzado a usarla, se dará cuenta que sin ésta versátil
herramienta no podrá estar en la cocina. La hemos equipado para usted de todos los accesorios
que debe tener además para hacer masas de galletas, panes, merengues, marshmallows y su
puré de papas favorito. Las posibilidades son interminables cuando use su nueva Batidora
Oster.® Comencemos a mezclar!
16
funCIoneS Cabeza de la
Batidora
Botón para
Liberar
Inclinación
Bol de
Acero
Inoxidable
Plato
Fijador
del Bol
Batidor
Disco de
Control de
Velocidades
Eje para
Accesorios
Protector de
Salpicaduras

17
preparando labatIdora para SuuSo
batIdor plano
para mezClaS
normaleS haSta
peSadaS
de pasteles, biscochos,
glaseados, panes
rápidos, caramelos,
rollos de carne,
galletas, puré de
papas, masas de pie
batIdor/
eSpumador
dealambre
para mezClaS que
neCeSItan aIre
InCorporado
huevos, pasteles
esponjosos, crema
para batir, mayonesa
ganCho para
amaSar
para mezClar Y
amaSar
levaduras, masas:
panes, pasteles para
acompañar café
ConoCIendo loS aCCeSorIoS
Antes de preparar la batidora para su uso, asegúrese que el disco de control de velocidades
esté en OFF y el cable de electricidad esté desenchufado.
Lave los bols y accesorios antes utilizarlos por primera vez.
proteCtor de
SalpICaduraS
para prevenIr
SalpICaduraS haCIa
afuera Yagregar
loS IngredIenteS
mIentraS eStá
mezClando

18
preparando labatIdora para SuuSo
Cómo SubIr Y bajar
laCabeza delabatIdora:
Para inclinar la cabeza de la batidora, presione el
Botón para Liberar Inclinación.(Figura A ) y lenta-
mente levante la cabeza de la batidora hasta que
encaje en posición vertical. (Figura B)
Para bajar la cabeza de la batidora, agarre la cabeza,
presione Botón para Liberar Inclinación y suave-
mente baje la cabeza de la batidora, asegurándose
que encaja en la posición de abajo. Un sonido de
"click" indicará que la batidora se ha encajado en
posición.(Figura C)
operando eldISCo
deControl develoCIdadeS:
El Disco de Control de Velocidades es utilizado para
prender la batidora (ON) y apagarla (OFF) y para
seleccionar 12 velocidades de mezcla.
Gire el disco de control de velocidades en sentido
de LAS AGUJAS DEL RELOJ para aumentar la
velocidad y en sentido CONTRARIO DE LAS AGUJAS
DEL RELOJ para disminuir.
Gire el disco de control de velocidades hasta que el
indicador esté alineado con la línea indicadora de la
velocidad deseada. (Figura D)
NOTA: Siempre comience mezclando a la menor
velocidad posible, entonces gradualmente
vaya moviendo a una mayor velocidad si lo
desea para evitar que salpique fuera del bol.
NO OPERE SIN ACCESORIOS Y VEA LA SIGUIENTE
SECCIÓN DE “INSTALANDO SUS ACCESORIOS”
PARA COMENZAR.
Figura A
Figura B
Figura C
Figura D

19
InStalando SuS aCCeSorIoS
para InStalar bol (
Figura A
)
:
1. Asegúrese que la unidad esté apagada, girando el disco
de control de velocidades a la posición (OFF).
2. Desenchufe la Batidora
3. Apriete el Botón de Liberación de la Inclinación e incline
la cabeza de la batidora hacia atrás
4. Coloque el bol en el plato fijador del bol
5. Gire suavemente en dirección de las agujas del reloj
de tal forma que las agarraderas del bol estén
perpendiculares a la base.
6. Enchufe en un tomacorriente de 3 terminales.
para retIrar elbol (
Figura B
)
:
1. Asegúrese que la unidad esté apagada, girando el disco
de control de velocidades a la posición (OFF).
2. Desenchufe la Batidora.
3. Apriete el Botón de Liberación de la Inclinación e incline
la cabeza de la batidora hacia atrás
4. Gire en dirección contraria a las agujas del reloj y sáquelo
del plato fijador del bol.
para remover aCCeSorIoS (
Figura D
)
:
1. Asegúrese que la unidad esté apagada, girando el disco
de control de velocidades a la posición (OFF).
2. Desenchufe la Batidora
3. Apriete el Botón de Liberación de la Inclinación e incline la
cabeza de la batidora hacia atrás
4. Presione el accesorio hacia arriba tan lejos como pueda y
gírelo en sentido de las agujas del reloj.
5. Saque el accesorio del eje del batidor.
NOTA: Es recomendable raspar la comida del accesorio con
una espátula antes de removerlo.
para InStalar aCCeSorIoS (
Figura C
)
:
1. Asegúrese que la unidad esté apagada, girando el disco
de control de velocidades a la posición (OFF).
2. Desenchufe la Batidora.
3. Apriete el Botón de Liberación de la Inclinación e incline
la cabeza de la batidora hacia atrás.
4. Alinee las posiciones claves del eje del batidor y el
accesorio, presione hacia arriba.
5. Gire en sentido contrario a las agujas del reloj de tal forma
que la clavija se alinee con la ranura del accesorio y encaje
en posición.
6. Enchufe en un tomacorriente de 3 terminales.
NOTA: Alinee las posiciones claves del eje del batidor
Figura A
Figura B
Figura C
Figura D
This manual suits for next models
1
Table of contents
Languages:
Other Oster Mixer manuals

Oster
Oster FPSTSM5101 User manual

Oster
Oster FPSTSM2710 User manual

Oster
Oster 2610-049 User manual

Oster
Oster 2604 User manual

Oster
Oster 2612 User manual

Oster
Oster 2384 Technical specifications

Oster
Oster FPSTSMPL4W User manual

Oster
Oster FPSTSMPL1 User manual

Oster
Oster 2612 User manual

Oster
Oster MIXMASTER 2700 User manual

Oster
Oster 2382 Quick guide

Oster
Oster FPSTHS3610 User manual

Oster
Oster FPSTHB460A User manual

Oster
Oster Kitchen Center User manual

Oster
Oster 6625 User manual

Oster
Oster 2610 User manual

Oster
Oster 2381 Product guide

Oster
Oster MGSTSL7500-449 User manual

Oster
Oster BLSTPB220 User manual

Oster
Oster MGSTSL7500-449 User manual