manuals.online logo
Brands
  1. Home
  2. •
  3. Brands
  4. •
  5. Overland Storage
  6. •
  7. Storage
  8. •
  9. Overland Storage REO 9100 How to use

Overland Storage REO 9100 How to use

Part Number 10400099-101 04/2007 ©2007 Overland Storage, Inc. WPage Part Number 10400099-101 04/2007 ©2007 Overland Storage, Inc. WPage
REO™ 9100 Disk-Based Backup-and-Recovery
Appliance with Protection OS™ Software
Setup Poster
This document describes how to unpack and install a
REO™ 9100 Disk-Based Backup-and-Recovery Appliance
into a standard RETMA 19" rack, and how to get it
running and ready for operation. When that is
accomplished, you should start using the Setup Guide
provided on the Software and Documentation CD for
detailed configuration procedures.
1. Register Your Product and Activate Warranty
Before installing your new unit, it is essential that you
register your product to activate your REO warranty.
Technical and warranty support are not available until
this is done.
1. Go to the Overland Technical Support website at:
http://support.overlandstorage.com/
2. If you already have a logon account, sign in via the
MEMBER LOGIN section; otherwise, click SIGN UP
NOW, and follow the on-screen steps.
3. Under MY PRODUCTS, click Add or Register a New
Product, and follow the on-screen steps.
2. Unpack and Verify Contents
Because of its weight when loaded with disk drives, each
REO 9100 array ships in two boxes.
1. Box one contains:
•Array chassis
•USB SoftKey
•Power cords (U.S.) (Approved cord sets shall be used
in countries outside North America.)
•Rack-mount slide rail kit and hardware
•Documentation CD-ROM and this Poster
2. Box two contains:
•Twenty-four disk carriers. (Depending on which version
of the product that you purchased, either all 24 or only
12 of the carriers will come with drives installed.)
IMPORTANT: Before unpacking the unit, ensure that the
area is free from conditions that cause electrostatic
discharge (ESD). Discharge static electricity from your body
by touching a known grounded surface. Also, avoid
touching pins, leads, or circuitry.
3. Prepare the Installation Site
Review the following prior to installing the array and
connecting it to your network.
•Make sure that the installation area is accessible.
•Make sure there is unrestricted air flow around and
through the vents in the sides and rear of the case.
•Protect the array from extreme temperature and
humidity. Overland recommends that you install the
unit in a clean, air-conditioned environment where
water and moisture cannot enter the case of the array.
Keep the air as free from dust as possible.
•Make sure that the inlet air temperature within the
rack remains below the specified limit.
•Protect the array from physical shock and vibration.
•Route external cables so that they can be connected
without blocking air vents or impeding air flow.
•Keep the array and cabling away from sources of
electrical noise,such as elevator shafts, stereo speakers,
microwave ovens, air conditioning units, and even
telephones. Electromagnetic fields can interfere with
the signals on copper cabling and introduce errors,
slowing down the network.
7. Power Up and Log In
CAUTION: The REO is intended to be grounded. Ensure it is
connected to earth ground during normal use. Installing proper
grounding helps to avoid damage from lightning and power
surges.
IMPORTANT: Power problems can be the cause of serious
failures and downtime on your network. Ensure that the
power input to your system is clean and free from sags and
surges to avoid unforeseen network outages. Overland
strongly recommends that you install power conditioning
and an adequately rated uninterruptible power supply
(UPS), especially in areas prone to blackouts, power dips,
and electrical storms.
Power up the array as follows:
1. To turn the array ON, press and hold the Power button
(Figure 5) for about 1 second to begin the power-up
sequence.
Figure 5. Power button on front panel
2. After two-and-a-half minutes, listen for the series of
three beep tones spaced about 1 second apart.
NOTE: On startup, the array might reach an error state and
begin an endless loop of alerts. The pattern repeats every
four seconds. If this occurs, turn the array OFF and then back
ON.
3. After you hear the three beep tones, you are ready to
continue. (If you are unable to hear the tones in your
physical environment, wait approximately five minutes
before continuing.)
NOTE: You must leave the USB SoftKey inserted while
completing the configuration process.
4. In a Web browser on the PC connected to Data Port 1
on the array, enter 10.0.0.1 to access the REO GUI.
5. When prompted for your user name and password,
enter the following in case-sensitive format:
Username: Administrator
Password: system
NOTE: Note: If you receive a message indicating that a new
target file was created, click OK to continue.
6. In the GUI menu, click Network Configuration.
You are now ready to configure your REO 9100 array. See
Setup Guide on the Software and Documentation CD for
detailed procedures.
NOTE: You must leave the array ON while completing the
configuration process for your application and backup servers.
8. Additional Information
The REO is preconfigured to use Data Port 1 as the initial
communication mechanism for your management system.
It uses default IP address 10.0.0.1 and subnet mask
255.255.255.0. You can connect your management system
to Data Port 1 and then configure the port information via
the REO GUI (you will need to move the connection to the
management system from Data Port 1 to the Management
Port after you have completed the configuration process).
NOTE: If your management system is connected to Data Port 1
and access is lost after you change the Data Port 1 settings,
switch the cable to the Management Port, and then reconnect. If
the system attached to the Management Port is unable to
access the GUI, use the original system and the 10.0.0.1
address to reconnect and double-check the information you
specified for the Default Gateway and Management Port.
All information contained in or disclosed by this document is considered proprietary by Overland Storage. By accepting this material, the recipient agrees that this material and the information contained therein are
held in confidence and in trust and will not be used, reproduced in whole or in part, nor its contents revealed to others, except to meet the purpose for which it was delivered. It is understood that no right is conveyed
to reproduce or have reproduced any item herein disclosed without express permission from Overland Storage. Overland Storage provides this document as is, without warranty of any kind, either expressed or
implied, including, but not limited to, the implied warranties of merchantability and fitness for a particular purpose. Overland Storage may make improvements or changes in the product(s) or program(s) described
in this document at any time. These changes will be incorporated in new editions of this publication.
Overland Storage assumes no responsibility for the accuracy, completeness, sufficiency, or usefulness of this document, nor for any problem that might arise from the use of the information in this document.
Power
button
Additional Help
You can get additional technical support on the Internet at http://support.overlandstorage.com,
or call 1-877-654-3429 (toll-free U.S. & Canada), +44 (0) 118-9898050 (Europe), or
+1 (858) 571-5555 Option 5 (International).
1 of 4
4 of 4
Part Number 10400099-101 04/2007 ©2007 Overland Storage, Inc. WPage Part Number 10400099-101 04/2007 ©2007 Overland Storage, Inc. WPage
4. Install Chassis in a Rack
WARNING: INSTALL MULTIPLE UNITS IN THE RACK FROM THE
BOTTOM UP. EXTENDING A UNIT THAT HAS EMPTY SPACES
BENEATH IT MIGHT CAUSE THE RACK TO TIP FORWARD AND
CAUSE PERSONAL INJURY OR DAMAGE TO EQUIPMENT.
Overland RECOMMENDS THAT TWO PEOPLE ARE USED TO
SUPPORT AND SLIDE THE UNIT INTO THE RACK.
Your REO 9100 array comes with a set of slide rails for
mounting the array chassis in the 19-inch rack. The unit
has a 5U form factor. The inner rail segments are already
attached to the chassis.
Install chassis in rack as follows:
1. Identify the screw holes in the front and rear vertical
rails of the rack where the slide rails will be installed.
2. Slide out the middle slide rail segments from the outer
rails and set them aside.
3. Assemble the outer rail with the bracket to the
required length.
a. Fit the outer rail in the bracket so that the rail slides
freely inside the bracket.
b. Position the unsecured rail/bracket assembly in the
rack and adjust the length.
NOTE: The slide rail assembly ears must fit against the
inside surfaces of the vertical rack rails.
c. Align the proper bracket holes with the slots at the
end of the rail.
d. Insert the screws from the rail side, then through
the bracket holes, and secure loosely with the nut
plate against the bracket (Figure 1). Do not tighten
the screws at this time.
Figure 1. Attaching bracket to outer slide rail
4. Attach the rail/bracket assembly to the vertical rack
rails (Figure 2).
a. Position the rail/bracket assembly inside the rack,
with the bracket to the rear of the rack.
b. Ensure the mounting ears fit against the inner
surfaces of the vertical rack rails.
c. Insert screws from the outside through the rack rail,
then through the mounting ear of the rail/bracket
assembly, and secure into the nut plate positioned
on the inside, against the mounting ear.
Figure 2. Attaching slide rail assembly to rack
5. Verify that the rail assemblies are installed properly
and tighten all the screws.
NOTE: The screws that secure the bracket to the outer rail
should be tightened last (they were left loose in Step 3.d).
6. Insert the previously removed middle rail segments
into the mounted outer rails from the rear of the rack.
7. Pull out the middle slides from the front of the rack so
that they lock (click) in the extended position.
CAUTION: The next step should be performed by at least
two people, or by using a mechanical lift. Make certain that
when the chassis is fully extended, a force of 20% of the
rack’s weight, but not more than 130 lb. (59 Kg), applied in
any direction other than upwards, does not cause the rack
to tip over.
8. Install the Chassis in the slide rails.
a. At the front of the rack, lift the chassis to its install
height and engage the inner slides mounted on the
chassis with the middle slides protruding from the
rack. Slide the chassis in until you hit a stop.
b. Simultaneously press both lock buttons on the
chassis-mounted inner rails to allow them to slide
farther into the rail assembly. You will hit a stop
(click) when the locks engage.
c. Press the same lock buttons again and slide the
chassis all the way into the rack.
9. Slide the
chassis
in and out several times, ensuring
that the inner and outer slide locks engage and the
chassis does not bind against the slides.
If binding occurs, loosen the screws that secure the
slides to the front and rear rails and adjust as needed.
10.Secure the
chassis
in the rack with screws through the
front panel ears (left and right side) into the nut plates.
5. Install Hard Drives in the Chassis
The disk drive assemblies (disks mounted in carriers) are packaged separately, which allows you to insert them into the
array chassis after you have installed the chassis in the rack. Each disk carrier contains a label that identifies the slot
into which you must insert it (Figure 3).
Figure 3. Drive numbering and location in chassis
IMPORTANT: The array is configured to use the RAID 5 and
Logical Volumes setup option. Failure to install the disks in
the corresponding slots may result in the need to create a
new configuration.
IMPORTANT: Do not remove the drives from their trays.
Doing so will void the drive warranty.
Install drive carriers in chassis as follows:
1. Insert the first disk carrier in to the applicable slot in
the chassis.
2. Push firmly on both sides of the carrier to ensure that
the latch and connector are fully seated. The lever
should be in open position.
3. Press the lever in until it clicks into the locked position.
This draws the carrier fully into the slot and seats it
properly inside the chassis.
4. Repeat these steps for each disk carrier.
NOTE: To maintain proper airflow and cooling, a disk drive or a
blank drive carrier must be installed in every slot of the chassis.
6. Connect USB SoftKey and Management PC
All cabling and power connections are located on the rear
panel of your REO array (Figure 4).
Figure 4. REO 9100 array rear panel connections
NOTE: You can manually edit the files on the USB SoftKey to
enter the applicable gateway address and the different address
for each port, or you can connect your management system to
Data Port 1 and configure all the port information via the REO
GUI. The following steps tell you how to configure via the GUI.
(This procedure is for Windows. If you are using UNIX, the steps
may be slightly different.)
Connect USB SoftKey and cables as follows:
1. Make a backup copy of all the files on the USB SoftKey
before and after you configure it.
2. Using a Category 5e (or better) cable, connect Data Port
1(GbE) on the array to a PC that is temporarily
configured to use a 10.0.0.<n> IP address and a subnet
mask of 255.255.255.0.
3. Insert the USB SoftKey into one of the USB ports.
Overland strongly recommends that you use the upper
slot on the back.
4. Attach all power cords to the array, and plug them into
the AC mains.
IMPORTANT: You must connect and use all power cords. If
one of the cords is disconnected or malfunctioning, the
array beeps repeatedly until the situation is resolved.
Overland recommends that you use separate power mains
for the power sources.
5. If power is automatically enabled when you attach the
cords to an AC power source, shut down the array using
the Power button (Figure 5) before continuing with the
setup process.
00
04
08
12
16
20
01
05
09
13
17
21
02
06
10
14
18
22
03
07
11
15
19
23
61 2 3 4 5
1 - Dual USB ports
2 - Data Ports 1 (right) and 2 (left)
3 - FC Ports 0 (lower) and 1 (upper)
(present on FC units only)
4 - SCSI Connectors
5 - Management Port (RJ45)
6 - AC Power connectors (4 pl.)
2 of 4 3 of 4

Other Overland Storage Storage manuals

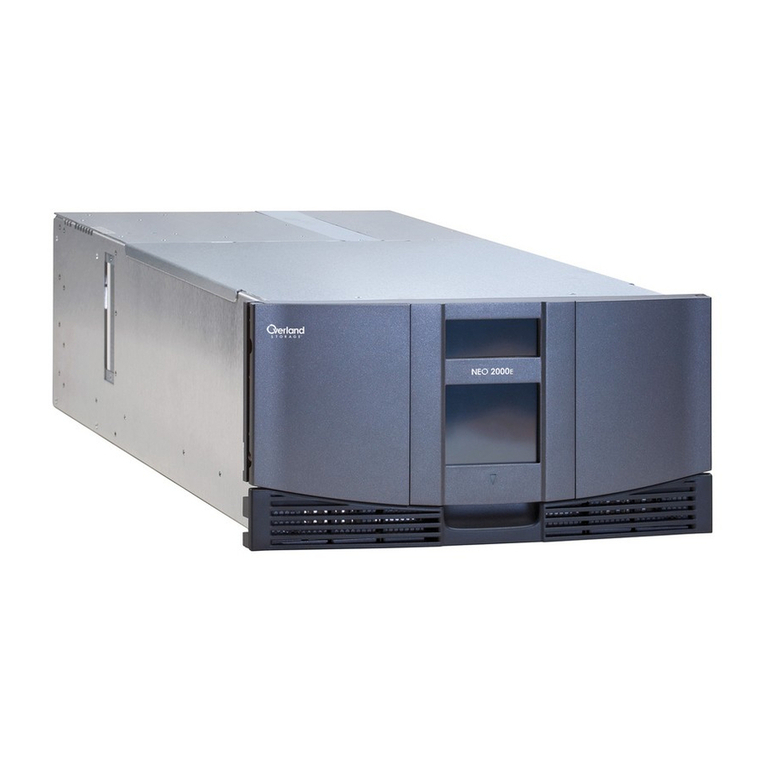
Overland Storage NEO 8000E User manual

Overland Storage

Overland Storage NEO 8000E User manual

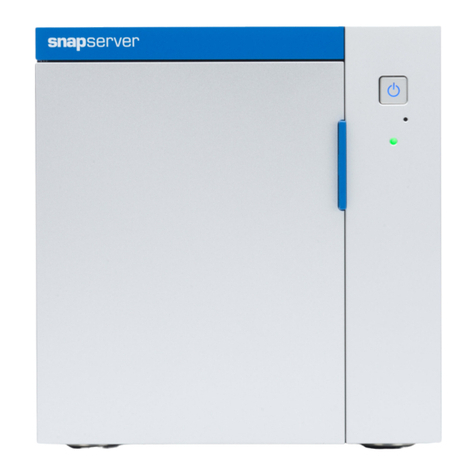
Overland Storage SnapScale X2 Node User manual

Overland Storage

Overland Storage SnapScale X2 Node User manual

Overland Storage NEO 8000 User manual

Overland Storage

Overland Storage NEO 8000 User manual

Overland Storage NEO 8000 User manual

Overland Storage

Overland Storage NEO 8000 User manual

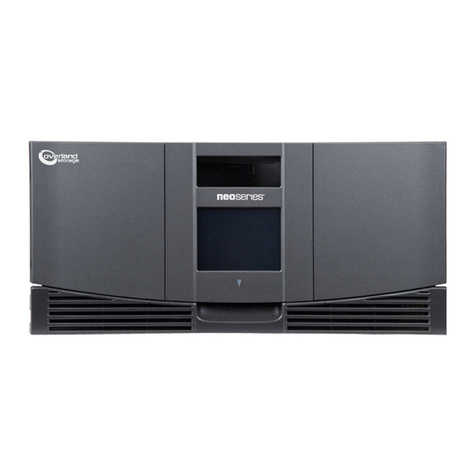
Overland Storage NEO Series User manual

Overland Storage

Overland Storage NEO Series User manual

Overland Storage SnapExpansion XSR User manual

Overland Storage

Overland Storage SnapExpansion XSR User manual

Overland Storage NEO XL Series User manual

Overland Storage

Overland Storage NEO XL Series User manual

Overland Storage ARCvault 2U Series User manual

Overland Storage

Overland Storage ARCvault 2U Series User manual

Overland Storage ARCvault 48 User manual

Overland Storage

Overland Storage ARCvault 48 User manual

Overland Storage NEOs StorageLoader User manual

Overland Storage

Overland Storage NEOs StorageLoader User manual

Overland Storage SnapServer DX2 User manual

Overland Storage

Overland Storage SnapServer DX2 User manual

Overland Storage SnapServer XSD 40 User manual

Overland Storage

Overland Storage SnapServer XSD 40 User manual

Overland Storage NEO XL Series User manual

Overland Storage

Overland Storage NEO XL Series User manual

Overland Storage NEO S-Series User manual

Overland Storage

Overland Storage NEO S-Series User manual

Overland Storage NEO 200S User manual

Overland Storage

Overland Storage NEO 200S User manual

Overland Storage NEO 8000 User manual

Overland Storage

Overland Storage NEO 8000 User manual

Overland Storage NEO 8000 User manual

Overland Storage

Overland Storage NEO 8000 User manual

Overland Storage REO 9000 User manual

Overland Storage

Overland Storage REO 9000 User manual

Overland Storage NEO 8000E User manual

Overland Storage

Overland Storage NEO 8000E User manual

Overland Storage NEO 4000e User manual

Overland Storage

Overland Storage NEO 4000e User manual

Overland Storage Neo Series Library User manual

Overland Storage

Overland Storage Neo Series Library User manual

Overland Storage ARCvault Series Guide

Overland Storage

Overland Storage ARCvault Series Guide

Overland Storage SnapServer XSD 40 User manual

Overland Storage

Overland Storage SnapServer XSD 40 User manual

Overland Storage NEO Series User manual

Overland Storage

Overland Storage NEO Series User manual

Popular Storage manuals by other brands

B. Braun Aesculap ECCOS Instructions for use

B. Braun

B. Braun Aesculap ECCOS Instructions for use

Closet Maid 2-Door Versa Cabinet 12075 Assembly instructions

Closet Maid

Closet Maid 2-Door Versa Cabinet 12075 Assembly instructions

Alpha ESS SMILE5 AU Installation, operation & maintenance manual

Alpha ESS

Alpha ESS SMILE5 AU Installation, operation & maintenance manual

SecureData BackupDrive user manual

SecureData

SecureData BackupDrive user manual

WISEUP SHOP U9 user guide

WISEUP SHOP

WISEUP SHOP U9 user guide

Delta Rackman Australia MonkeyMESH manual

Delta

Delta Rackman Australia MonkeyMESH manual

Gardeners 8593617 quick start guide

Gardeners

Gardeners 8593617 quick start guide

Apricorn Aegis Padlock DT user manual

Apricorn

Apricorn Aegis Padlock DT user manual

IBM TotalStorage SAN256N Director 2045-N16 Installation and maintenance guide

IBM

IBM TotalStorage SAN256N Director 2045-N16 Installation and maintenance guide

Kennedy 9600A Operation and maintenance manual

Kennedy

Kennedy 9600A Operation and maintenance manual

HP A5585A - SureStore DLT E Tape Library 4/40 Upgrade and Replacement Instructions

HP

HP A5585A - SureStore DLT E Tape Library 4/40 Upgrade and Replacement Instructions

Iomega Home Network Hard Drive quick start guide

Iomega

Iomega Home Network Hard Drive quick start guide

FreeNAS Mini Replacement guide

FreeNAS

FreeNAS Mini Replacement guide

Fujitsu MBA3300 NP SERIES product manual

Fujitsu

Fujitsu MBA3300 NP SERIES product manual

Sunol Systems Winchester Disk Systems user manual

Sunol Systems

Sunol Systems Winchester Disk Systems user manual

Seagate ST11200 product manual

Seagate

Seagate ST11200 product manual

SanDisk G3 product manual

SanDisk

SanDisk G3 product manual

Stealth SP-HE4850 product manual

Stealth

Stealth SP-HE4850 product manual

manuals.online logo
manuals.online logoBrands
  • About & Mission
  • Contact us
  • Privacy Policy
  • Terms and Conditions

Copyright 2025 Manuals.Online. All Rights Reserved.