manuals.online logo
Brands
  1. Home
  2. •
  3. Brands
  4. •
  5. Panasonic
  6. •
  7. Juicer
  8. •
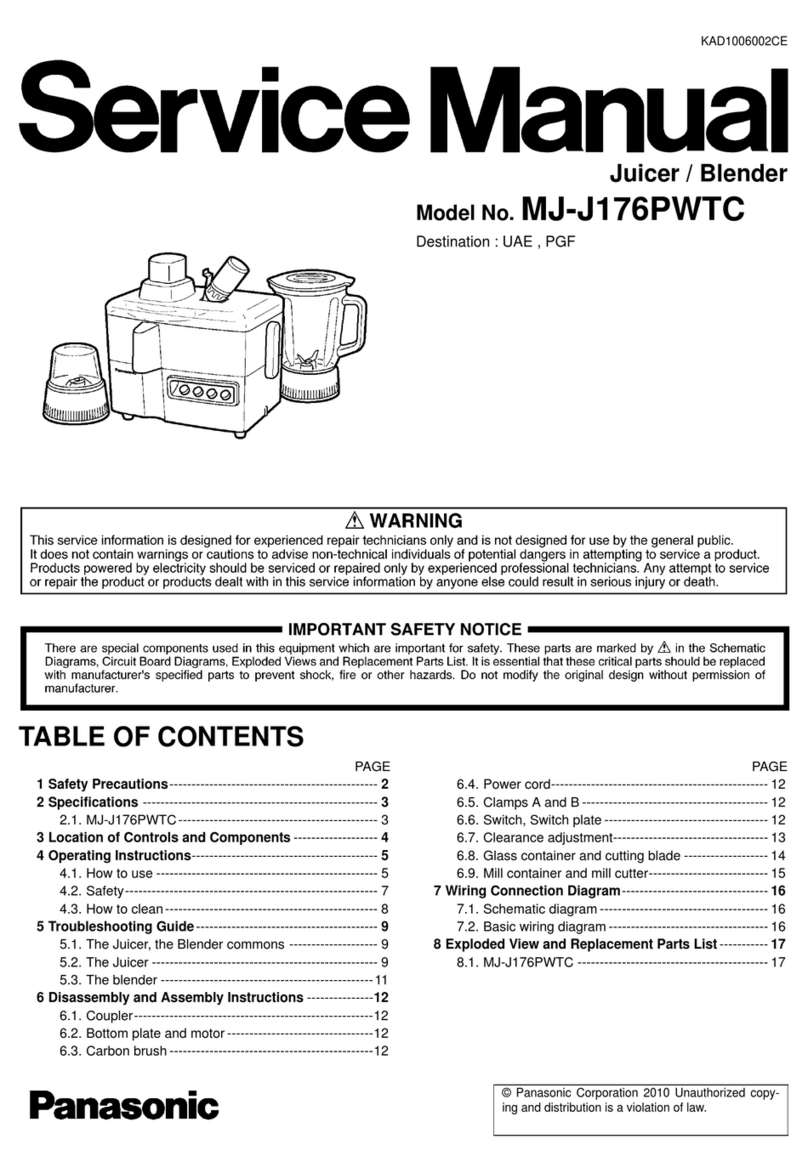
  9. Panasonic MJ-H300 User manual

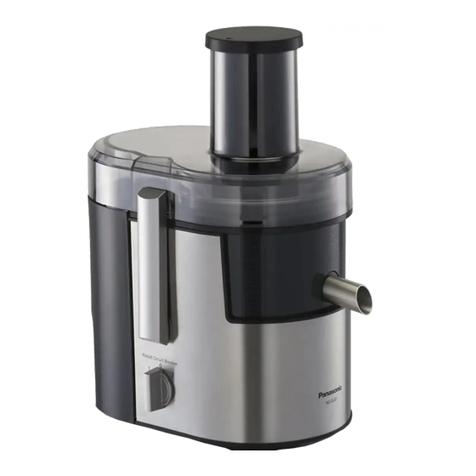
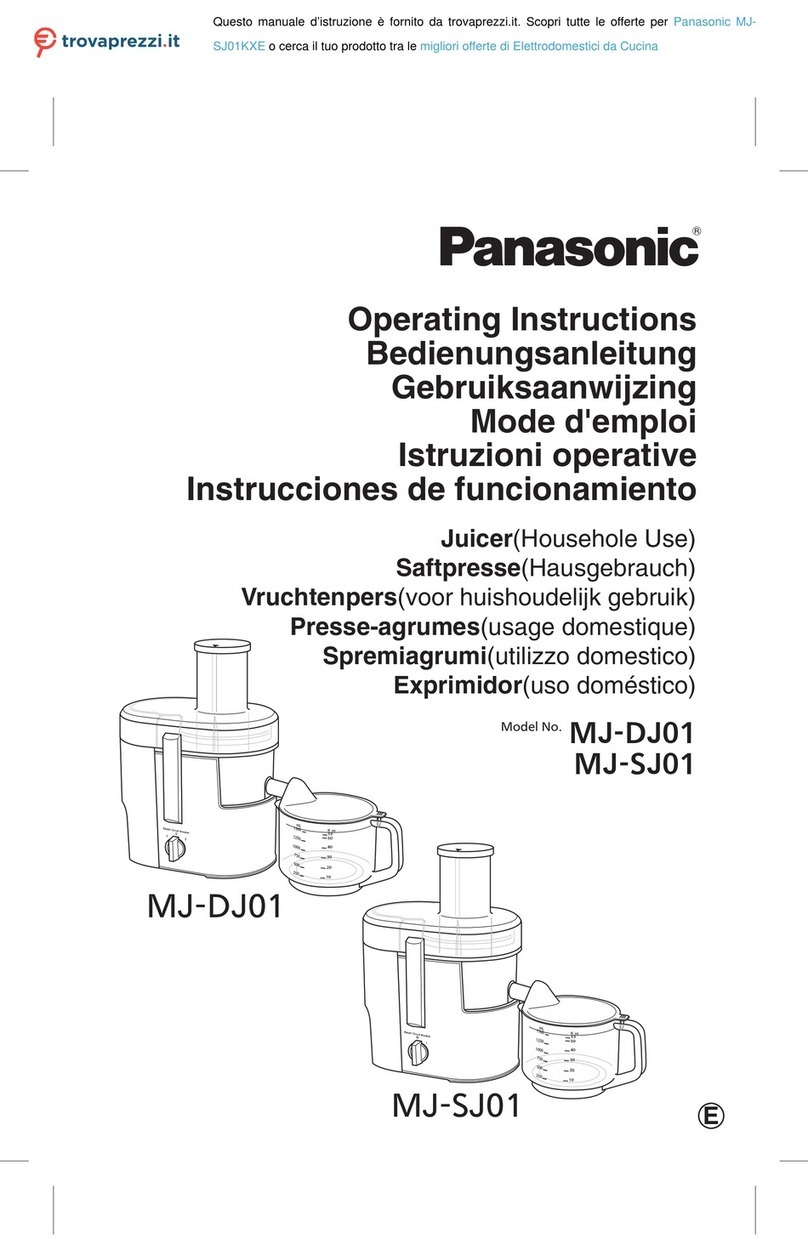
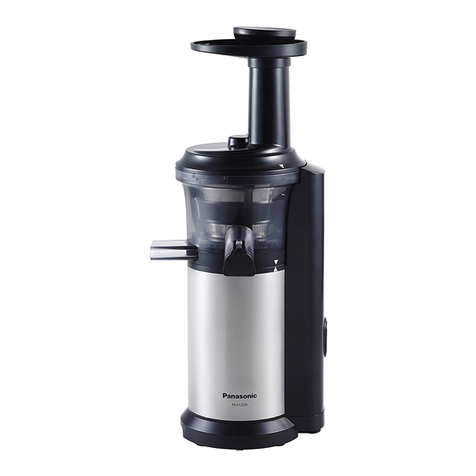
Panasonic MJ-H300 User manual

Operating Instructions
Juicer / Blender (Household Use)
MJ-H300
Thank you for purchasing this Panasonic product.
• This product is intended for household use only.
• Please read these instructions carefully in order to use
this product correctly and safely.
• Before using this product please give your special
attention to the section "SAFETY PRECAUTIONS"
(Page 2-3).
• Please keep these Operating Instructions for future use.
Model No.
.ﻢﻳﺮﮑﺸﺘﻣ ﮏﻴﻧﻮﺳﺎﻧﺎﭘ ﻝﻮﺼﺤﻣ ﻦﻳﺍ ﺪﻳﺮﺧ ﻭ ﺎﻤﺷ ﺏﺎﺨﺘﻧﺍ ﻦﺴﺣ ﺯﺍ
.ﺖﺳﺍ ﻩﺪﺷ ﻰﺤﺍﺮﻁ ﻰﮕﻧﺎﺧ ﻑﺭﺎﺼﻣ یﺍﺮﺑ ﻂﻘﻓ ﻝﻮﺼﺤﻣ ﻥﻳﺍ •
ﻪﭼﺮﺘﻓﺩ ﻦﻳﺍ ًﺎﻔﻄﻟ ،ﻝﻮﺼﺤﻣ ﻦﻳﺍ ﺯﺍ ﺢﻴﺤﺻ ﻭ ﻦﻤﻳﺍ ﻩﺩﺎﻔﺘﺳﺍ یﺍﺮﺑ •
.ﺪﻴﻨﮐ ﻪﻌﻟﺎﻄﻣ ﺖﻗﺩ ﻪﺑ ﺍﺭ ﺎﻤﻨﻫﺍﺭ
ﺖﻤﺴﻗ ًﺎﻔﻄﻟ ،ﻝﻮﺼﺤﻣ ﻦﻳﺍ ﺯﺍ ﺢﻴﺤﺻ ﻭ ﻦﻤﻳﺍ ﻩﺩﺎﻔﺘﺳﺍ یﺍﺮﺑ •
ﺖﻗﺩ ﻪﺑ ﺍﺭ (22-23 ﻪﺤﻔﺻ)"
ﻰﻧﻤﻴﺍ ﺕﺎﮑﺑ
"
.ﺩﻴﻨﮐ ﻪﻌﻟﺎﻄﻣ
.ﺩﻳﺭﺍﺩ ﻪﮕﻧ یﺪﻌﺑ ﺕﺎﻌﺟﺍﺮﻣ ی ﺍﺮﺑ ﺎﻤﻨﻫﺍﺭ ﻪﭼﺮﺘﻓﺩ ﻥﻳﺍ ًﺎﻔﻄﻟ •
....................................2-3
.........................................................4
.......................................................5
.......................6
........................................................6
......................................................7-8
.......................................................9-10
...................................................11
ﻰﻧﻤﻴﺍ ﺕﺎﮑﺑ
ﺕﺎﻌﻄﻗ ﻡﺎﻧ
ﻩﺎﮕﺘﺳﺩ ﻥﺩﺮﮐ ﺯﺎﺑ
ﻆﻓﺎﺤﻣ ﻦﮑﺷﺭﺍﺪﻣ
ﻰﻧﻤﻴﺍ ﻝﻓﻘ
ﻩﺩﺎﻔﺘﺳﺍ ﺵ
ﻭ
ﺭ
ﻥﺩﺭﮐﺰﻴﻤﺗ ﻩﻮﺤﻧ
ﻰﻧﻓ ﺕﺎﺼﺨﺸﻣ
ﻥﺎﻤﻻﺍ ﺕﺎﻁﺎﻴﺘﺣﺍ
ءﺍﺰﺟﻷﺍ ءﺎﻤﺳﺃ
ﺯﺎﻬﺠﻟﺍ ﻚﻓ
ﺔﻴﺋﺎﺑﺮﻬﻜﻟﺍ ﺓﺮﺋﺍﺪﻟﺍ ﻊﻁﺎﻘﺑ ﺔﻳﺎﻤﺤﻟﺍ
ﻥﺎﻣﻷﺍ ﻝﻓﻘ
ﻝﺎﻣﻌﺘﺳﻻﺍ ﺔﻴﻔﻴﻛ
ﻒﻴﻈﻨﺘﻟﺍ ﺔﻴﻔﻴﻛ
ﺕﺎﻔﺻﺍﻮﻤﻟﺍ
.ﻚﻴﻧﻮﺳﺎﻧﺎﺑ ﺞﺘﻨﻣ ءﺍﺮﺷ ﻰﻠﻋ ﻚﻟ ﺍًﺮﻜﺷ
.ﻂﻘﻓ ﻲﻟﺰﻨﻤﻟﺍ ﻡﺍﺪﺨﺘﺳﻻﺍ ﺽﺍﺮﻏﻷ ﺞﺘﻨﻤﻟﺍ ﺍﺬﻫ •
ﻡﺍﺪﺨﺘﺳﺍ ﻰﻨﺴﺘﻳ ﻰﺘﺣ ﺔﻳﺎﻨﻌﺑ ﺕﺎﻤﻴﻠﻌﺘﻟﺍ ﻩﺬﻫ ﺓءﺍﺮﻗ ﻰﺟﺮُﻳ •
.ﻦﻣﺁﻭ ﺢﻴﺤﺻ ﻞﻜﺸﺑ ﺞﺘﻨﻤﻟﺍ
ﺪﻨﺒﺑ ﺔﺻﺎﺧ ﺔﻔﺼﺑ ﻡﺎﻤﺘﻫﻻﺍ ﻰﺟﺮﻳ ،ﺞﺘﻨﻤﻟﺍ ﺍﺬﻫ ﻡﺍﺪﺨﺘﺳﺍ ﻞﺒﻗ •
.(12-13 ﺔﺤﻔﺻ) "ﺔﻣﻼﺴﻟﺍ ﺕﺎﻁﺎﻴﺘﺣﺍ"
.ﻼﺒﻘﺘﺴﻣ ﺎﻬﻴﻟﺇ ﻉﻮﺟﺮﻠﻟ ﻩﺬﻫﻞﻴﻐﺸﺘﻟﺍ ﺕﺎﻤﻴﻠﻌﺘﺑ ﻅﺎﻔﺘﺣﻻﺍ ﻰﺟﺮُﻳ •
English
TABLE OF CONTENTS
SAFETY PRECAUTIONS
PART NAMES
DISASSEMBLY
CIRCUIT BREAKER PROTECTION
SAFETY LOCK
HOW TO USE
AFTER USE
SPECIFICATION
12-13........................................................
14.................................................................
15.......................................................................
16........................................
16.......................................................................
17-18..........................................................
19-20............................................................
21.....................................................................
22-23................................................................
24........................................................................
25..............................................................
26..............................................................
26.........................................................................
27-28............................................................
29-30...........................................................
31.................................................................
SAFETY PRECAUTIONS (Make sure to follow these instructions)
This symbol indicates prohibition. This symbol indicates requirement that
must be followed.
Indicates serious
injury or death. Indicates risk of injury
or property damage.
 The following indication indicate the degree of damage caused by incorrect operation.
 The symbols are classified and explained as follows.
In order to prevent accidents or injuries to the user, other people, and damage to property, please follow
the instructions below.
 Do not damage the Cord or the Plug.
(It may cause electric shock, or fire caused by short circuit.)
Do not use the appliance if the Cord or the Plug is damaged or the Plug is loosely
connected to the outlet.
(It may cause electric shock, or fire caused by short circuit.)
a If the Cord is damaged, it must be replaced by the manufacturer, its service center or
similarly qualified person in order to avoid a hazard.
 Do not plug or unplug the Plug with wet hands.
(It may cause electric shock.)
 Do not operate the appliance when the Cord is in wound condition.
(It may cause electric shock or fire.)
 Do not exceed outlet voltage or use an alternate current other than that specified on the
appliance.
(It may cause electric shock or fire.)
• Make sure the voltage supplied to the appliance is the same as your local supply.
• Plugging other devices into the same outlet may cause over-heating.
Do not immerse the Motor Housing in water or splash it with water.
(It may cause electric shock or fire caused by short circuit.)
 Do not dismantle, repair or modify the appliance.
(It may cause fire, electric shock or injury.)
a Please contact your service center for repairing.
 Do not insert any objects in the vent or the gap.
(It may cause electric shock or malfunction.)
• Especially metal objects such as pins or wires.
 Do not replace any parts of appliance with non-genuine spare parts.
(It may cause injury, electric shock or fire.)
 Do not use hot water (over 60⁰C) for cleaning purpose or fire to dry the appliance.
(It may cause burning or malfunction.)
<Juicer>
 Do not put your finger or utensils such as spoon, fork etc into the Feeding Tube during
operation. If food becomes clogged in the Feeding Tube, use the Food Pusher or another
piece of fruit or vegetable to push it down.
(It may cause injury.)
 Do not use the appliance if the Spinner or the Container Cover is damaged or has visible
cracks.
(It may cause injury.)
<Blender>
 Do not place hot ingredients (over 60⁰C) into the Tumbler.
(It may cause injury or malfunction.)
 Do not operate without the Blender Container Base and the Tumbler in place correctly.
(It may cause injury.)

Do not push the Safety Pin and Safety Lever with any instruments, stick etc as the
appliance might be ON.
(It may cause injury.)
 Be careful if hot liquid is poured into the Tumbler Unit as it can be ejected out of the
appliance due to sudden steaming.
(It may cause burning.)
 Care should be taken when handling the sharp Cutting Blades, emptying the Tumbler
and during cleaning of the Spinner and the Cutting Blades.
(It may cause injury.)
2
WARNING
WARNING
CAUTION
WARNING
CAUTION
3
 This appliance is not intended for use by persons (including children) with reduced
physical, sensory or mental capabilities, or lack of experience and knowledge, unless
they have been given supervision or instruction concerning use of the appliance by a
person responsible for their safety. Children should be supervised to ensure that they
do not play with the appliance.
(It may cause burning, injury or electric shock.)
 Insert the Plug firmly.
(Otherwise it may cause electric shock and fire caused by the heat that may generate around
the Plug.)
 Clean the Plug regularly.
(A soiled Plug may cause insufficient insulation due to moisture, and may cause fire.)
 When abnormal operation or breaking down occurs, discontinue the appliance operation
immediately and unplug.
(It may cause smoke, fire or electric shock.)
e.g. for abnormal operation or breaking down.
• The Plug and the Cord becomes abnormally hot.
• The Cord is damaged or there has been a power failure.
• The Motor Housing is deformed or abnormally hot.
a
Please unplug the appliance immediately and contact the service centre for advice or a repair.
 Make sure to hold the Plug when unplugging the Plug, ie. never pull on the Cord.
(Otherwise it may cause electric shock, or fire caused by short circuit.)
 Do not leave the appliance unattended when it is in operation.
(It may cause fire or burns.)
• When leaving the appliance unattended, turn the power off.
 Do not use the appliance in the following places.
• Any uneven surface, on non-heat resistant carpet or table cloth etc.
(It may cause fire or injury.)
•
In a location where there is risk of the appliance being splashed with water, or near a heat source.
(It may cause electric shock or current leakage.)
 Do not assemble the Spinner when there is food residue left around the Container Unit.
(It may cause unpleasant odour and the Spinner to work improperly.)
 Do not blend more than the maximum capacity marked on the Tumbler. If need to
blend viscous ingredient (example: papaya, mango and others), it is recommended
to fill the Tumbler not more than half of the maximum capacity.
(It may cause vibration.)
 Do not continue operation for a long time. It is recommended to rest the appliance
for at least 2 minutes after 2 minutes operation.
(It may cause over-heating.)
 Do not process hard ingredient (ice, frozen food, dried food and hard meat or meat
with bones) or viscous material.
(It may cause malfunction.)
 Do not store the Tumbler in fridge or freezer.
(It may cause malfunction.)
 Do not place the Tumbler in microwave or oven.
(It may cause breakage.)
 Unplug the Plug when the appliance is not in use.
(Otherwise it may cause electric shock, or fire caused by current leakage.)
 When carrying the appliance, be sure to hold the Motor Housing with both hands.
(It may cause injury.)
 Switch off the appliance and disconnect it from power supply before changing
accessories or approaching parts that are moving during operation.
(It may cause injury.)
English
PART NAMES
4
1Food Pusher
2Feeding Tube
3Container Cover
4Spinner Pad
5Spinner
6Container Unit
7Spout
⑮Gasket
⑯Cutting Blades
⑰Blender Container Base
⑱Opening Cap
⑲Tumbler Lid
⑳Gasket
Blender
Juicer
⑭
⑮
⑯
⑰
⑱
⑳
* The shape of the plug may be different from the illustration.
** Tumbler (BPA Free) material is manufactured without using Bisphenol A
as an additive or ingredient.
8Motor Housing
9Clamp (both side)
⑩Switch
⑪* Plug
⑫ Cord
⑬Tumbler Unit
⑭**Tumbler
1
2
3
5
6
⑫
⑪
4
7
8
⑨
⑩
⑬
Maximum capacity : 500 mL
⑲
DISASSEMBLY
JUICER
1Release the Clamp (both side) while pushing
the Container Cover.
2Lift up the Container Cover
and the Food Pusher.
3Gently lift up the Container Unit. 4Lift up the Spinner.
5Remove the Spinner Pad.
Note: If difficult to wash the Spout, it can be detached for easier cleaning.
5
English
To detach Spout:
1 Turn the Container Unit
upside-down.
2 Gently push the
ribs inward.
3 Slowly pull up the
Spout out.
To reattach Spout:
1Turn the Container Unit
upside-down.
2Gently push the
ribs inward.
3 Slowly push the Spout
in position until a "click"
sound is heard.
45
6
SAFETY LOCK
When the Circuit Breaker automatically stops the motor due to overloading, follow the directions
below. Do not continuously reset for many times.
Switch OFF the appliance.
CIRCUIT BREAKER PROTECTION
FOR JUICER
1. Remove the accumulated food residue from the Spinner and the Container Cover. Then cut the
ingredients into smaller pieces.
2. Attach parts again and resume operation. Push them gently into Feeding Tube using the Food Pusher.
FOR BLENDER
1. Reduce the ingredients to less than half of the total capacity and resume operation.
2. If it still does not start, switch OFF the Switch to “O” position again, then resume.
Juicer
Blender
Note:
Do not push any of the Safety Pins and Safety Lever with any instrument, stick etc.
Do not pour liquids or ingredients at the Safety Pin and Switch area.
Keep the Safety Pin area clean to avoid foreign particles accumulate on the area.
The above actions will ensure the Safety Lock movement to function smoothly otherwise it will damage
the parts related to Safety Lock.
Safety Lever
Juicer Pin
Blender Pin
Container Pin
The safety lock has been designed to prevent the Juicer and the Blender from switching ON when
the Container Unit or the Tumbler Unit is not properly in place.
HOW TO USE
Wash all detachable parts and dry well before using the appliance for the first time, refer to page 9. Unplug
when assembling the unit. Before plugging in, ensure Switch is switched OFF.
JUICER
1Place the Container Unit onto the Motor Housing.
 Make sure the Spout and the Clamp (both side) positioned
same direction as illustrated.
 Make sure the Container Unit sits properly on the
Motor Housing.
2Place the Spinner in the
Container Unit and fix it into
position.
3Place the Container
Cover onto the
Container Unit.
5Place the juicer as shown.
 Make sure the Spout is in the downward
position when juicing.
 It is recommended to use a similar mug as
shown to promote ease of use.
6 Plug in and switch ON.
7Insert the ingredients one by
one and push them slowly into
the Feeding Tube using the
Food Pusher.
4Rotate the Clamp (both side) as
shown while pushing the Container
Cover until a locking sound is heard.
 It is normal for the Container
Cover to float a little causing
a small gap between Container
Cover and Container.
 Make sure hand or fingers are
not in the way during the
clamping process to avoid
injury.
8After use, switch OFF and unplug.
 Ensure the Spinner is fully stopped before
pushing the Spout up to prevent juice from
dripping when removing the cup from the
Juicer.
 Ensure the Spinner is fully stopped before
releasing the Clamp (both side).
 Some pulp might resides on the Container
Cover depending on the ingredients and
amount.
7
Note:
• Ingredients that are not recommended:
Soft fruits that produce puree and can clog the Spinner – e.g. bananas, peaches, apricots etc.
Low juice ingredients which can block the product – e.g. fresh basil leaf etc.
• Hard ingredients which can cause product malfunction - e.g. sugarcane, coconut etc.
• Please remove hard seeds and stones from fruit before juicing such as guava etc. Hard seeds that are
difficult to be removed for juicing, such as pomegranate is prohibited.
• During initial usage, the appliances might have some unpleasant smell (slight burn smell) but this
condition is normal.
• Some ingredients may produce a lot of pulp that will accumulate to the Container Cover which will cause
operation to stop. (CIRCUIT BREAKER PROTECTION: refer to page 6)
• Make sure all parts are correctly mounted before you switch ON the appliance.
• Some ingredients may accumulate at the Container Cover and Spinner. If so, please switch OFF the
juicer and clear the accumulated ingredient before continuing to juice to prevent leakage.
English
2
3
6
7
Gap
8
Note:
• Maximum capacity: 500 mL. Do not operate with an empty Tumbler Unit.
• Fill the Tumbler with solid ingredients first, followed by liquid ingredients. To make a thinner drink, add
more liquid. For smoother operation, dice food into smaller pieces (1~2 cm), and blend with liquid.
• Not recommended to blend hard, high-fiber and viscous ingredients. However, if it is necessary to
blend hard and viscous ingredients, cut the hard ingredients into small pieces (example: cut the carrot
into 1 cm³ cubes) and fill the cut ingredients not exceeding half of the maximum capacity.
• If the Cutting Blade gets stuck, switch OFF the Blender, then unplug. Remove the stuck ingredients by
using a spatula (not provided). Do not use your finger to remove the ingredients.
• Reduce ingredients when appliance makes abnormal sounds or vibrates during operation.
• Replace the Blender Container Base with Tumbler Lid after blending.
• Recommended to pour drink with the Tumbler Lid fitted to the Tumbler. When the Tumbler Lid is fitted
to the Tumbler, always keep the Tumbler upright to avoid leaking.
BLENDER
1 Make sure the Gasket is pushed into the groove
of the Tumbler correctly to avoid leaking during
blending. If the Gasket is not placed correctly,
drink may leak out.
2 Fill the Tumbler with ingredients.
3 Place the Blender Container Base onto the
Tumbler and turn it clockwise until it is tight.
4 Place the Tumbler Unit onto the Motor Housing
by lining up the triangle marks on the Container
Base and Motor Housing as shown in A.
5 Turn the Tumbler Unit clockwise until the triangle
mark on the Blender Container Base is lined up
to the rectangle mark on the Motor Housing as
shown in B and a ‘click’ sound is heard.
6 Plug in and switch ON the rated power supply
source.
7 Support Tumbler Unit while in use.
 Ensure the Clamp (both side) is not
positioned as shown in Figure 1 to prevent
accidental damage on the Clamp (both side).
8 Switch ON the Blender by pressing the ‘I’
marking area.
9 After blending, switch OFF by pressing the
‘O’ marking area.

Support the Tumbler Unit until motor stops
completely.
⑩ Switch OFF and unplug.
⑪ Turn the
Tumbler
r Unit anticlockwise and
remove it from the Motor Housing.
⑫ Turn the
Tumbler
Unit upside-down.
⑬ Turn the Blender Container Base anticlockwise
to remove it from the Tumbler. Be careful and
remove it slowly to avoid spillage.
⑭ Make sure the Gasket
is in place correctly.
Turn the Tumbler Lid
slightly anticlockwise
and then clockwise
until it is tight. Your
drink is ready to
consume now.
78
Figure1
⑩⑪
⑫
⑬
⑭
Gasket
Groove
1 2 3
4
5
6
A
B
Gasket
Tumbler
Lid
1Wash both sides of the spinner filter mesh with a
sponge under running water. Use brush if necessary.
2Wash each part in cold or lukewarm water with a
soft sponge. Rinse and dry thoroughly before storing.
Before detaching parts, make sure the motor has stopped completely, then disconnect the Plug
from the outlet. (DISASSEMBLY: refer to page 5)
All parts must be cleaned immediately after use. Left-over food particles may cause unpleasant odours,
stains or malfunction of the appliance.
Note:
• Do not use benzene, thinner, alcohol, bleach, polishing powder or metal brush; otherwise the surface
will be damaged.
• Do not put in the dishwasher.
• Some discolouration of the Spinner, the Container Cover, or the interior of the Container Unit may
occur upon usage.
• Handle the Spinner and the Spout, carefully during cleaning. This may cause injury.
* Brush and long handled sponges are not provided.
Note:
• Check Safety Lever whether it can move freely before placing on the Tumbler. Make sure there is no
foreign object or ingredient inside the Safety Lever after cleaning in order to ensure the Safety Lever
moves freely.
• Unplug before cleaning. Handle the Cutting Blade carefully during cleaning.
• Do not put in dishwasher.
• Some discolouration of the Tumbler or the interior of the Tumbler Unit may occur upon usage.
• Do not use steel wool, hand brush, nylon sponge, etc. to wash plastic parts.
(Scratch marks may appear on surface)
*Brush and long handled sponges are not provided.
After cleaning
• Reassemble the Gasket and the Blender Container
Base to the Tumbler to avoid the Cutting Blade from
being exposed.
CLEANING
JUICER
BLENDER
AFTER USE
1 2
1 Remove the Gasket. Wash the Tumbler under
running water and clean by using a long handled
sponge. It is recommended to wash the groove of
the Tumbler by using a brush.
2 Wash Tumbler, Gasket, and Tumbler Lid using soapy
water. Rinse and wipe dry.
3 Clean the Cutting Blade with a brush under
running water.
9
Safety Lever
moves freely
1
2
3
MOTOR HOUSING
Wipe Motor Housing with a damp cloth.
STORING
English
10
Plug and Cord
1) Turn over the Motor Housing
and wind the Cord three turns
as illustrated.
Container
It is recommended to place the Container Unit
upside-down to prevent damage on the Spout.
2) Insert the Cord into the
cord clamp to fix the Cord
in position.
3) When in use or after use, make
sure to position the Cord as
shown to prevent damage of
the Cord.
SPECIFICATION
Juicer Blender
11
Power Supply
Power Supply
(For Qatar only)
Power Consumption
Power Consumption
(For Qatar only)
Switch
Operation Rating
Dimension (Approx.)
(W x L x H)
Mass (Approx.)
Capacity (Approx.)
220-240
V ~ 50-60
Hz
240
V ~ 50
Hz
200-220
W
220
W
I (ON), O (OFF)
Continuous (Repetition 2 min ON then, 2 min OFF)
210
mm x 294
mm x 293
mm 210
mm x 193
mm x 354
mm
2.87
kg 2.25
kg
– 500
mL
<ﻁﻼﺧﻟﺍ>
.ءﺎﻋﻭﻟﺍ ﻲﻓ ( ﺱﻭﻳﺳﻠﻳﺳ ﺔﺟﺭﺩ 60˚ ﻥﻋ ﺎﻬﺗﺭﺍﺭﺣ ﺩﻳﺯﺗ ﻲﺗﻟﺍ) ﺔﻧﺧﺎﺳﻟﺍ ﺕﺎﻧﻭﻛﻣﻟﺍ ﻊﺿﺗ ﻻ
(.ﻝﻁﻌﻟﺍ ﻭﺃ ﺔﺑﺎﺻﻹﺍ ﺏﺑﺳﺗ ﺩﻗ)
.ﺢﻳﺣﺻﻟﺍ ﺎﻣﻬﻌﺿﻭ ﻲﻓ ءﺎﻋﻭﻟﺍﻭ ﻁﻼﺧﻟﺍ ﻕﺭﻭﺩ ﺓﺩﻋﺎﻗ ﻊﺿﻭ ﻥﻣ ﺩﻛﺄﺗﻟﺍ ﻝﺑﻗ ﺯﺎﻬﺟﻟﺍ ﻝﻐﺷﺗ ﻻ
(.ﺔﺑﺎﺻﻹﺍ ﺏﺑﺳﻳ ﺩﻗ)
.ﻝﻳﻐﺷﺗﻟﺍ ﻊﺿﻭ ﻰﻠﻋ ﺯﺎﻬﺟﻟﺍ ﻥﻭﻛﻳ ﺩﻘﻓ ،ﺎﻫﺭﻳﻏ ﻭﺃ ﺎﺻﻌﻛ ،ﺓﺍﺩﺃ ﻱﺄﺑ ﻥﺎﻣﻷﺍ ﻉﺍﺭﺫﻭ ﻥﺎﻣﻷﺍ ﺭﺯ ﻰﻠﻋ ﻁﻐﺿﺗ ﻻ
(.ﺔﺑﺎﺻﻹﺍ ﺏﺑﺳﻳ ﺩﻗ)
.ﺯﺎﻬﺟﻟﺍ ﻑﻳﻔﺟﺗﻟ ﺭﺎﻧﻟﺍ ﻭﺃ ﻑﻳﻅﻧﺗﻠﻟ ( ﺱﻭﻳﺳﻠﻳﺳ ﺔﺟﺭﺩ 60˚ ﻥﻋ ﻪﺗﺭﺍﺭﺣ ﺩﻳﺯﺗ ﻱﺫﻟﺍ) ﻥﺧﺎﺳﻟﺍ ءﺎﻣﻟﺍ ﻡﺩﺧﺗﺳﺗ ﻻ
(.ﻝﻁﻌﻟﺍ ﻭﺃ ﻕﻳﺭﺣﻟﺍ ﺏﺑﺳﻳ ﺩﻗ)
<ﺓﺭﺎﺻﻌﻟﺍ>
12
ﺎﻳﺎﺑﺎﺑﻟﺍ :ﻝﺛﻣ) ﺔﺟﺯﻟ ﺕﺎﻧﻭﻛﻣ ﺝﺯﻣ ﻰﻟﺇ ﺔﺟﺎﺣﻟﺍ ﺩﻧﻋﻭ .ﺭﺍﻭﺩﻟﺍ ءﺎﻋﻭﻟﺍ ﻰﻠﻋ ﺓﺩﺩﺣﻣﻟﺍ ﻯﻭﺻﻘﻟﺍ ﺔﻌﺳﻟﺍ ﻥﻣ ﺭﺛﻛﺃ ﺝﺯﻣﺗ ﻻ
.ﻯﻭﺻﻘﻟﺍ ﺔﻌﺳﻟﺍ ﻑﺻﻧ ﻥﻣ ﺭﺛﻛﻷ ءﺎﻋﻭﻟﺍ ﻸﻣ ﻡﺩﻌﺑ ﺢﺻﻧﻳ ،(ﺎﻫﺭﻳﻏﻭ ﻭﺟﻧﺎﻣﻟﺍﻭ
(.ﺯﺍﺯﺗﻫﻻﺍ ﺏﺑﺳﻳ ﺩﻗ)
ﻭﺃ (ﻡﻅﻌﻟﺍ ﻊﻣ ﻡﺣﻠﻟﺍ ﻭﺃ ﺔﺑﻠﺻﻟﺍ ﻡﻭﺣﻠﻟﺍ ،ﺔﻔﻔﺟﻣﻟﺍ ﺔﻣﻌﻁﻷﺍ ،ﺓﺩﻣﺟﻣﻟﺍ ﺔﻳﺫﻏﻷﺍ ،ﺞﻠﺛﻟﺍ) ﺔﺑﻠﺻﻟﺍ ﺕﺎﻧﻭﻛﻣﻟﺍ ﺭﻳﺿﺣﺗﺑ ﻡﻘﺗ ﻻ
.ﺔﺟﺯﻠﻟﺍ ﺕﺎﻧﻭﻛﻣﻟﺍ
(.ﻝﻁﻌﻟﺍ ﺏﺑﺳﺗ ﺩﻗ)
.ﺭﺯﻳﺭﻔﻟﺍ ﻭﺃ ﺔﺟﻼﺛﻟﺍ ﻲﻓ ﺭﺍﻭﺩﻟﺍ ءﺎﻋﻭﻟﺍ ﻥﺯﺧﺗ ﻻ
(.ﻝﻁﻌﻟﺍ ﺏﺑﺳﻳ ﺩﻗ)
.ﻥﺭﻔﻟﺍ ﻭﺃ ﻑﻳﻭﻭﺭﻛﻳﺎﻣﻟﺍ ﻲﻓ ﺭﺍﻭﺩﻟﺍ ءﺎﻋﻭﻟﺍ ﻊﺿﺗ ﻻ
(.ﺭﺳﻛﻟﺍ ﺏﺑﺳﻳ ﺩﻗ)
13
.ﺊﺟﺎﻔﻣﻟﺍ ﺭﻳﺧﺑﺗﻟﺍ ﺏﺑﺳﺑ ﺯﺎﻬﺟﻟﺍ ﻥﻣ ﻉﺯﺗﻧﻳ ﺩﻘﻓ ءﺎﻋﻭﻟﺍ ﺓﺩﺣﻭ ﻲﻓ ﺔﻧﺧﺎﺳﻟﺍ ﻝﺋﺍﻭﺳﻟﺍ ﺏﻛﺳ ﺩﻧﻋ ﺭﺫﺣﻟﺍ ﻲﺧﻭﺗ ﺏﺟﻳ
(.ﻕﺭﺣﻟﺍ ﺏﺑﺳﻳ ﺩﻗ)
.ﻊﻳﻁﻘﺗﻟﺍ ﺕﺍﺭﻔﺷﻭ ﺓﺭﺍﻭﺩﻟﺍ ﺔﻧﻳﻛﺳﻟﺍ ﻑﻳﻅﻧﺗ ءﺎﻧﺛﺃﻭ ءﺎﻋﻭﻟﺍ ﻎﻳﺭﻔﺗ ءﺎﻧﺛﺃﻭ ﺓﺩﺎﺣﻟﺍ ﻊﻳﻁﻘﺗﻟﺍ ﺕﺍﺭﻔﺷ ﻊﻣ ﻝﻣﺎﻌﺗﻟﺍ ﺩﻧﻋ ﺭﺫﺣﻟﺍ ﻲﺧﻭﺗ ﺏﺟﻳ
(.ﺔﺑﺎﺻﻹﺍ ﺏﺑﺳﺗ ﺩﻗ)
14
1
2
3
4
5
6
7
⑮
⑯
⑰
⑱
⑲
⑳
ﻁﻼﺧﻟﺍ
ﺓﺭﺎﺻﻌﻟﺍ
⑭
⑮
⑯
⑰
⑱
⑳
ﻭﺃ ﺕﺎﻧﻭﻛﻣﻟﺍ ﺩﺣﺄﻛ ﺃ ﻝﻭﻧﻳﻔﺳﻳﺑ ﺏﻛﺭﻣ ﻥﻣ ﺔﻳﻟﺎﺧ ﻱﺃ (BPA Free) ﺓﺩﺎﻣ ﻥﻣ ﻁﻠﺧﻟﺍ ءﺎﻋﻭ ﻊﻳﻧﺻﺗ ﻡﺗ
.ﺕﺎﻓﺎﺿﻹﺍ
8
9
⑩
⑪
⑫
⑬
⑭
1
2
3
5
6
⑫
⑪
4
7
8
⑨
⑩
⑬
ﻝﻣ 500 :ﻯﻭﺻﻘﻟﺍ ﺔﻌﺳﻟﺍ
⑲
(ﻥﻳﺑﻧﺎﺟﻟﺍ ﻼﻛ)
ﻁﻠﺧﻟﺍ ءﺎﻋﻭ ﺓﺩﺣﻭ
ﻁﻠﺧﻟﺍ ءﺎﻋﻭ **
ﺏﺭﺳﺗﻟﺍ ﻊﻧﻣ ﻕﻭﻁ
ﻊﻳﻁﻘﺗﻟﺍ ﺕﺍﺭﻔﺷ
ﻁﻼﺧﻟﺍ ﻕﺭﻭﺩ ﺓﺩﻋﺎﻗ
ﺢﺗﻔﻟﺍ ءﺎﻁﻏ
ﻁﻠﺧﻟﺍ ءﺎﻋﻭ ءﺎﻁﻏ
ﺏﺭﺳﺗﻟﺍ ﻊﻧﻣ ﻕﻭﻁ
ﺓﺭﺎﺻﻌﻟﺍ
15
:ﺏﻭﺑﻧﻷﺍ ﻝﺻﻔﻟ
ﻭﺣﻧ ﻕﻓﺭﺑ ﺕﺎﻣﺎﻋﺩﻟﺍ ﻰﻠﻋ ﻁﻐﺿﺍ 2
.ﻝﺧﺍﺩﻟﺍ
ﺝﺭﺎﺧﻟﺍ ﻭﺣﻧ ءﻁﺑﺑ ﺏﻭﺑﻧﻷﺍ ﺏﺣﺳﺍ 3
45
2
4
5
3.ﻕﻓﺭﺑ ءﺎﻋﻭﻟﺍ ﺓﺩﺣﻭ ﻊﻓﺭﺍ
1
.ءﺎﻋﻭﻟﺍ ءﺎﻁﻏ ﻊﻓﺩ ﻊﻣ (ﻥﻳﺑﻧﺎﺟﻟﺍ ﻼﻛ ﻰﻠﻋ) ﻙﺑﺷﻣﻟﺍ ﺥﺭﺍ
.ﻑﻳﻅﻧﺗﻟﺍ ﺔﻟﻭﻬﺳﻟ ﻪﻠﺻﻓ ﻥﻛﻣﻳ ،ﺏﻭﺑﻧﻷﺍ ﻝﺳﻏ ﺏﻌﺻﻟﺍ ﻥﻣ ﻥﺎﻛ ﺍﺫﺇ :ﺔﻅﺣﻼﻣ
ﻰﻠﻋ ﺎًﺳﺃﺭ ءﺎﻋﻭﻟﺍ ﺓﺩﺣﻭ ﺏﻠﻗﺍ 1
.ﺏﻘﻋ
:ﺏﻭﺑﻧﻷﺍ ﺏﻳﻛﺭﺗ ﺓﺩﺎﻋﻹ
ﻭﺣﻧ ﻕﻓﺭﺑ ﺕﺎﻣﺎﻋﺩﻟﺍ ﻰﻠﻋ ﻁﻐﺿﺍ 2
.ﻝﺧﺍﺩﻟﺍ
ﻪﻧﺎﻛﻣ ﻲﻓ ءﻁﺑﺑ ﺏﻭﺑﻧﻷﺍ ﻊﺿ 3
."ﺔﻘﻁﻘﻁ" ﺕﻭﺻ ﻉﺎﻣﺳ ﻥﻳﺣﻟ ﺢﻳﺣﺻﻟﺍ
ﻰﻠﻋ ﺎًﺳﺃﺭ ءﺎﻋﻭﻟﺍ ﺓﺩﺣﻭ ﺏﻠﻗﺍ 1
.ﺏﻘﻋ
16
ﻥﺎﻣﻷﺍ ﻝﻔﻗ
ﻪﻠﻳﻐﺷﺗ ﺓﺩﺎﻋﺇ ﻝﻭﺎﺣﺗ ﻻ .ﺔﻳﻟﺎﺗﻟﺍ ﺕﺍﻭﻁﺧﻟﺍ ﻊﺑﺗﺍ ﺓﺩﺋﺍﺯﻟﺍ ﻝﺎﻣﺣﻷﺍ ﺔﺟﻳﺗﻧ ﺎًﻳﺋﺎﻘﻠﺗ ﺭﻭﺗﻭﻣﻟﺍ ﺔﻳﺋﺎﺑﺭﻬﻛﻟﺍ ﺓﺭﺋﺍﺩﻟﺍ ﻊﻁﺎﻗ ﻑﻗﻭﻳ ﺎﻣﺩﻧﻋ
.ﺭﺍﺭﻣﺗﺳﺎﺑ ﺕﺍﺭﻣ ﺓﺩﻌﻟ
.ﺯﺎﻬﺟﻟﺍ ﺄﻔﻁﺃ
ﺓﺭﺎﺻﻌﻠﻟ
.ﺎًﻣﺟﺣ ﺭﻐﺻﺃ ﻊﻁﻗ ﻰﻟﺇ ﺕﺎﻧﻭﻛﻣﻟﺍ ﻊﻁﻗ .ءﺎﻋﻭﻟﺍ ءﺎﻁﻏﻭ ﺓﺭﺍﻭﺩﻟﺍ ﺔﻧﻳﻛﺳﻟﺍ ﻥﻣ ﺔﻣﻛﺍﺭﺗﻣﻟﺍ ﻡﺎﻌﻁﻟﺍ ﺎﻳﺎﻘﺑ ﺔﻟﺍﺯﺈﺑ ﻡﻗ .1
.ﻡﺎﻌﻁﻟﺍ ﻊﻓﺍﺩ ﻡﺍﺩﺧﺗﺳﺎﺑ ﻡﺎﻌﻁﻹﺍ ﺏﻭﺑﻧﺃ ﻝﺧﺍﺩ ﻕﻓﺭﺑ ﻡﻬﻌﻓﺩﺍ .ﻝﻳﻐﺷﺗﻟﺍ ﻑﻧﺄﺗﺳﺍﻭ ﻯﺭﺧﺃ ﺓﺭﻣ ءﺍﺯﺟﻷﺍ ﺏﻛﺭ .2
ﻁﻼﺧﻠﻟ
.ﻝﻳﻐﺷﺗﻟﺍ ﻑﻧﺄﺗﺳﺍﻭ ﺔﻳﻟﺎﻣﺟﻹﺍ ﺔﻌﺳﻟﺍ ﻑﺻﻧ ﻥﻣ ﻝﻗﺃ ﻰﻟﺇ ﺕﺎﻧﻭﻛﻣﻟﺍ ﻝﻠﻗ .1
.ﻝﻳﻐﺷﺗﻟﺍ ﻑﻧﺄﺗﺳﺍ ﻡﺛ ﻥﻣﻭ ﻯﺭﺧﺃ ﺓﺭﻣ (“O”) ﺔﻳﻌﺿﻭﻟﺍ ﻰﻟﺇ ﻝﻳﻐﺷﺗﻟﺍ ﺭﺯ ﺩﻋﺃ ،ﻝﻣﻌﺗ ﻡﻟ ﺍﺫﺇ .2
ﺓﺭﺎﺻﻌﻟﺍ
ﻁﻼﺧﻟﺍ
ﻥﺎﻣﻷﺍ ﻉﺍﺭﺫ
ﺓﺭﺎﺻﻌﻟﺍ ﺭﺯ
ﻁﻼﺧﻟﺍ ﺭﺯ
ءﺎﻋﻭﻟﺍ ﺭﺯ
.ﺢﻳﺣﺻﻟﺍ ﺎﻣﻬﻧﺎﻛﻣ ﻲﻓ ﻁﻠﺧﻟﺍ ءﺎﻋﻭ ﺓﺩﺣﻭ ﻭﺃ ءﺎﻋﻭﻟﺍ ﺓﺩﺣﻭ ﻥﻭﻛﺗ ﻻ ﺎﻣﺩﻧﻋ ﻁﻼﺧﻟﺍﻭ ﺓﺭﺎﺻﻌﻟﺍ ﻝﻳﻐﺷﺗ ﻊﻧﻣﻳﻟ ﻥﺎﻣﻷﺍ ﻝﻔﻗ ﻡﻳﻣﺻﺗ ﻡﺗ
:ﺔﻅﺣﻼﻣ
.ﺎﻫﺭﻳﻏ ﻭﺃ ﺎﺻﻌﻛ ،ﺓﺍﺩﺃ ﻱﺄﺑ ﻥﺎﻣﻷﺍ ﻉﺍﺭﺫﻭ ﻥﺎﻣﻷﺍ ﺭﺯ ﻰﻠﻋ ﻁﻐﺿﺗ ﻻ 
ﻡﻛﺍﺭﺗ ﺏﻧﺟﺗﻟ ﻥﺎﻣﻷﺍ ﺭﺯ ﺔﻘﻁﻧﻣ ﺔﻓﺎﻅﻧ ﻰﻠﻋ ﻅﻓﺎﺣﻭ .ﻝﻳﻐﺷﺗﻟﺍ ﺔﻘﻁﻧﻣﻭ ﻥﺎﻣﻷﺍ ﺭﺯ ﺔﻘﻁﻧﻣ ﻲﻓ ﺕﺎﻧﻭﻛﻣﻟﺍ ﻭﺃ ﻝﺋﺍﻭﺳﻟﺍ ﺏﻛﺳﺗ ﻻ 
.ﺔﻘﻁﻧﻣﻟﺍ ﻰﻠﻋ ﺔﻳﺟﺭﺎﺧ ﺕﺎﺋﻳﺯﺟ
.ﺔﻘﻁﻧﻣﻟﺍ ﻰﻠﻋ ﺔﻳﺟﺭﺎﺧ ﺕﺎﺋﻳﺯﺟ ﺩﺟﺍﻭﺗ ﺏﻧﺟﺗﻟ ﻥﺎﻣﻷﺍ ﻉﺍﺭﺫﻭ ﻥﺎﻣﻷﺍ ﺭﺯ ﺔﻘﻁﻧﻣ ﺔﻓﺎﻅﻧ ﻰﻠﻋ ﻅﻓﺎﺣ 
.ﻥﺎﻣﻷﺍ ﻝﻔﻘﺑ ﺔﻁﺑﺗﺭﻣﻟﺍ ءﺍﺯﺟﻷﺍ ﺭﺭﺿﺗﺗﺳ ﻻﺇﻭ ،ﺭﺳﻳﺑ ﻥﺎﻣﻷﺍ ﻝﻔﻗ ﻝﻣﻋ ﺔﻛﺭﺣ ﺔﻘﺑﺎﺳﻟﺍ ﺕﺍﻭﻁﺧﻟﺍ ﻥﻣﺿﺗﺳ
ﺓﺭﺎﺻﻌﻟﺍ
1
5 8
4
17
:ﺔﻈﺣﻼﻣ
:ﺎﻬﺑ ﺢﺻﻧﻳ ﻻﺕﺎﻳﻭﺗﺣﻣ •
.ﺦﻟﺍ ﺵﻣﺷﻣﻟﺍﻭ ﻕﺍﺭﺩﻟﺍﻭﺯﻭﻣﻟﺍ ﻝﺛﻣ ﺭﺍﻭﺩﻟﺍ ﻝﺻﻧﻟﺍ ﺔﻛﺭﺣ ﻊﻧﻣﻳ ﺩﻗ ﻱﺫﻟﺍﻭﻪﻳﺭﻭﺑﻟﺍ ﺞﺗﻧﺗ ﻲﺗﻟﺍ ﺔﻧﻳﻠﻟﺍ ﻪﻛﺍﻭﻔﻟﺍ
.ﺦﻟﺍ ﻥﺎﺣﻳﺭﻟﺍ ﻕﺍﺭﻭﺃ ﻝﺛﻣ ،ﺔﻟﻵﺍ ﺩﺍﺩﺳﻧﺍ ﻰﻟﺇ ﻱﺩﺅﺗ ﻥﺃ ﻥﻛﻣﻳﻲﺗﻟﺍﻭﻝﺋﺎﺳﻟﺍ ﺔﺑﺳﻧ ﺎﻬﺑ ﻝﻘﺗﻲﺗﻟﺍ ﺕﺎﻳﻭﺗﺣﻣﻟﺍ
•
،ﻥﺎﻣﺭﻟﺍ ﻝﺛﻣ ﺔﻬﻛﺎﻓ ﻥﻣ ﻪﺗﻟﺍﺯﺇ ﺏﻌﺻﺗ ﺏﻠﺻﻟﺍ ﺭﺫﺑﻟﺍ ﻥﺎﻛ ﺍﺫﺈﻓ .ﺭﺻﻌﻟﺍ ﻝﺑﻗ ،ﺦﻟﺍ ﺔﻓﺍﻭﺟﻟﺍ ﻝﺛﻣ ﻙﻟﺫﻭ ،ﺔﻬﻛﺎﻔﻟﺍ ﻥﻣ ﺏﻠﺻﻟﺍ ﺭﺫﺑﻟﺍﻭ ﻯﻭﻧﻟﺍ ﺔﻟﺍﺯﺇ ﻰﺟﺭﻳ •
.ﺔﻬﻛﺎﻔﻟﺍ ﻩﺫﻫ ﺭﺻﻋ ﻡﺩﻋ ﺏﺟﻳﻓ
.ﻕﻠﻘﻠﻟ ﻲﻋﺍﺩ ﻻ ﻥﻛﻟﻭ (ﺔﻔﻳﻔﺧ ﻕﺍﺭﺗﺣﺍ ﺔﺣﺋﺍﺭ) ﺔﻬﻳﺭﻛ ﺔﺣﺋﺍﺭ ﺔﻟﻵﺍ ﻥﻋ ﺭﺩﺻﻳ ﺩﻗ ،ﻲﻟﻭﻷﺍﻡﺍﺩﺧﺗﺳﻻﺍ ءﺎﻧﺛﺃ •
.ﺔﻟﻵﺍ ﻝﻣﻋ ﻑﻗﻭﺗ ﻰﻟﺇ ﻱﺩﺅﻳﻭ ﺔﻳﻭﺎﺣﻟﺍ ءﺎﻁﻏ ﻲﻓ ﺱﺩﻛﺗﻳ ﻱﺫﻟﺍ ﺏﻠﻟﺍ ﻥﻣ ﺭﻳﺛﻛﻟﺍ ﺞﺗﻧﺗ ﺩﻗ ﺕﺎﻳﻭﺗﺣﻣﻟﺍ ﺽﻌﺑ •
(16 ﻡﻗﺭ ﺔﺣﻔﺻ ﻰﻟﺇ ﻉﻭﺟﺭﻟﺍ ﻰﺟﺭﻳ ﺔﻳﺋﺎﺒﺭﻬﻛﻟﺍ ﺓﺭﺋﺍﺩﻟﺍ ﻊﻁﺎﻗﺒ ﺔﻳﺎﻣﺣﻟﺍ)
.ﺯﺎﻬﺠﻟﺍ ﻞﻴﻐﺸﺗ ﻞﺒﻗ ﺢﻴﺤﺻ ﻞﻜﺸﺑ ءﺍﺰﺟﻷﺍ ﻞﻛ ﺐﻴﻛﺮﺗ ﻦﻣ ﺪﻛﺄﺗ •
•
2
3
6
7


.ﻩﺎﺠﺗﻻﺍ ﺲﻔﻧ ﻲﻓ ﺕﺎﻜﺳﺎﻤﻟﺍﻭ ﺏ ﻮﺒﻧﻷﺍ ﻊﺿﻭ ﻰﻠﻋ ﻲﺻﺮﺣﺍ
.ﺭﻮﺗﻮﻤﻟﺍ ءﺎﻋﻭ ﻲﻓ ﺢﻴﺤﺼﻟﺍ ﻞﻜﺸﻟﺎﺑ ءﺎﻋﻮﻟﺍ ﺓﺪﺣﻭ ﻊﺿﻭ ﻰﻠﻋ ﻲﺻﺮﺣﺍ
2
3


6
7
ﺮﺧﻵﺍ ﻮﻠﺗ ﺍًﺪﺣﺍﻭ ﺕﺎﻧﻮﻜﻤﻟﺍ ﻲﻠﺧﺩﺃ
ﺔﻳﺬﻐﺘﻟﺍ ﺏﻮﺒﻧﺃ ﻲﻓ ءﻂﺒﺑ ﺎﻬﻴﻌﻓﺩﺍﻭ
.ﻡﺎﻌﻄﻟﺍ ﻊﻓﺩ ﺓﺍﺩﺃ ﻡﺍﺪﺨﺘﺳﺎﺑ
ﻚﻓ ﻞﺒﻗ ﻞﻣﺎﻛ ﻞﻜﺸﺑ ﺭﺍﻭﺪﻟﺍ ﻞﺼﻨﻟﺍ ﻒﻗﻮﺗ ﻦﻣ ﻱﺪﻛﺄﺗ 
.ﺕﺎﻜﺳﺎﻤﻟﺍ
ًءﺎﻧﺑ ،ءﺎﻋﻭﻟﺍ ءﺎﻁﻏ ﻰﻠﻋ ﺏﻠﻟﺍ/ﺔﻧﻳﺟﻌﻟﺍ ﺽﻌﺑ ﻡﻛﺍﺭﺗﺗ ﺩﻗ 
.ﺔﻳﻣﻛﻟﺍﻭ ﺕﺎﻧﻭﻛﻣﻟﺍ ﻰﻠﻋ
ﺯﻳﺯﻌﺗﻟ ﺢﺿﻭﻣ ﻭﻫ ﺎﻣﻟ ﻝﺛﺎﻣﻣ ﺏﻭﻛ ﻡﺍﺩﺧﺗﺳﺎﺑ ﺢﺻﻧُﻳ
.ﻡﺍﺩﺧﺗﺳﻻﺍ ﺔﻟﻭﻬﺳ
.ﺎﻫﺭﻳﻏﻭ ﺩﻧﻬﻟﺍ ﺯﻭﺟﻭ ﺭﻛﺳﻟﺍ ﺏﺻﻗ ﻝﺎﺛﻣﻟﺍ ﻝﻳﺑﺳ ﻰﻠﻋ – ﺞﺗﻧﻣﻠﻟ ﻝﻁﻋ ﺙﻭﺩﺣ ﻲﻓ ﺔﺑﻠﺻﻟﺍ ﺕﺎﻧﻭﻛﻣﻟﺍ ﺏﺑﺳﺗﺗ ﺩﻗ
19

ﻝﻛﺷﻟﺎﺑ (ﻥﻳﺑﻧﺎﺟﻟﺍ ﻼﻛ ﻰﻠﻋ) ﻙﺑﺷﻣﻟﺍ ﺭﺩﺃ
ﻉﺎﻣﺳ ﻰﺗﺣ ﺓﻭﺑﻌﻟﺍ ءﺎﻁﻏ ﻊﻓﺩ ﻊﻣ ﺢﺿﻭﻣﻟﺍ
.ﻝﻔﻘﻟﺍ ﺕﻭﺻ
ﺎًﻛﺭﺎﺗ ً
ﻼﻳﻠﻗ ءﺎﻁﻐﻟﺍ ﻭﻔﻁﻳ ﻥﺃ ﻲﻌﻳﺑﻁﻟﺍ ﻥﻣ

.ءﺎﻋﻭﻟﺍﻭ ءﺎﻁﻐﻟﺍ ﻥﻳﺑ ﺓﺭﻳﻐﺻ ﺔﺣﺗﻓ
ﺔﻳﻠﻣﻋ ءﺎﻧﺛﺃ ﻊﺑﺎﺻﻷﺍﻭ ﺩﻳﻟﺍ ﺩﺎﻌﺑﺇ ﻥﻣ ﺩﻛﺄﺗ

.ﺔﺑﺎﺻﻹﺍ ﺏﻧﺟﺗﻟ ﺕﻳﺑﺛﺗﻟﺍ
ﺭﻭﺑﻧﺻﻟﺍ ﻊﻓﺩ ﻝﺑﻗ ﺎًﻣﺎﻣﺗ ﺓﺭﺍﻭﺩﻟﺍ ﻥﻳﻛﺳﻟﺍ ﻑﻗﻭﺗ ﻥﻣ ﺩﻛﺄﺗ
ﺩﺎﻌﺑﺇ ﺩﻌﺑ ﺭﻳﺻﻌﻟﺍ ﻥﻣ ﺕﺍﺭﻁﻗ ﺏﺎﻛﺳﻧﺍ ﻱﺩﺎﻔﺗﻟ ﻙﻟﺫﻭ
.ﺭﻳﺻﻌﻟﺍ ﺔﻌﻧﺎﺻ ﻥﻋ ﺱﺄﻛﻟﺍ
.ﺭﻳﺻﻌﻟﺍ ﺔﻌﻧﺎﺻ ﻥﻋ ﺱﺄﻛﻟﺍ ﺩﺎﻌﺑﺇ ﺩﻌﺑ ﺭﻳﺻﻌﻟﺍ ﻥﻣ ﺕﺍﺭﻁﻗ ﺏﺎﻛﺳﻧﺍ ﻱﺩﺎﻔﺗﻟ ﻙﻟﺫﻭ ﺭﻭﺑﻧﺻﻟﺍ ﻊﻓﺩ ﻝﺑﻗ ﺎًﻣﺎﻣﺗ ﺓﺭﺍﻭﺩﻟﺍ ﻥﻳﻛﺳﻟﺍ ﻑﻗﻭﺗ ﻥﻣ ﺩﻛﺄﺗ
ﻍﺍﺭﻔ
18
:ﺔﻅﺣﻼﻣ
.ﺎًﻏﺭﺎﻓ ﻁﻠﺧﻟﺍ ءﺎﻋﻭ ﻥﻭﻛﻳ ﺎﻣﺩﻧﻋ ﺯﺎﻬﺟﻟﺍ ﻝﻐﺷﺗ ﻻ .ﻝﻣ 500 :ﻯﻭﺻﻘﻟﺍ ﺔﻌﺳﻟﺍ •
ﻡﺎﻌﻁﻟﺍ ﻊﻁﻗ ،ﺔﻳﻠﻣﻌﻟﺍ ﻝﻳﻬﺳﺗﻟﻭ .ﻝﺋﺎﺳﻟﺍ ﻥﻣ ﺩﻳﺯﻣﻟﺍ ﺔﻓﺎﺿﺈﺑ ﻡﻗ ،ﻑﺧﺃ ﺏﻭﺭﺷﻣ ﻝﻣﻌﻟﻭ .ﺔﻠﺋﺎﺳﻟﺍ ﺕﺎﻧﻭﻛﻣﻟﺍ ﻡﺛ ً
ﻻﻭﺃ ﺔﺑﻠﺻﻟﺍ ﺕﺎﻧﻭﻛﻣﻟﺎﺑ ﻁﻠﺧﻟﺍ ءﺎﻋﻭ ﻸﻣﺍ •
.ﻝﺋﺎﺳﻟﺍ ﻊﻣ ﺎﻬﺟﺯﻣﺍﻭ (ﻡﺳ 2 – 1) ﺭﻐﺻﺃ ءﺍﺯﺟﺃ ﻰﻟﺇ
ﻁﻠﺧ ﻱﺭﻭﺭﺿﻟﺍ ﻥﻣ ﻥﺎﻛ ﺍﺫﺇﻭ ،ﻙﻟﺫ ﻊﻣﻭ .ﺔﺟﺯﻠﻟﺍ ﺕﺎﻧﻭﻛﻣﻟﺍﻭ ﻑﺎﻳﻟﻷﺍ ﻥﻣ ﺔﻳﻟﺎﻋ ﺔﺑﺳﻧ ﻰﻠﻋ ﻱﻭﺗﺣﺗ ﻲﺗﻟﺍ ﻭﺃ ﺔﺑﻠﺻﻟﺍ ﺕﺎﻧﻭﻛﻣﻟﺍ ﻁﻠﺧﺑ ﺢﺻﻧﻳ ﻻ •
ﺕﺎﻧﻭﻛﻣﻟﺍ ﻊﺿﻭ (1cm³ ﻡﺟﺣﺑ ﺕﺎﺑﻌﻛﻣ ﻰﻟﺇ ﺭﺯﺟﻟﺍ ﻊﻁﻗ :ﻝﺎﺛﻣﻟﺍ ﻝﻳﺑﺳ ﻰﻠﻋ) ﺓﺭﻳﻐﺻ ﻊﻁﻗ ﻰﻟﺇ ﺔﺑﻠﺻﻟﺍ ﺕﺎﻧﻭﻛﻣﻟﺍ ﻊﻁﻗ ،ﺔﺟﺯﻠﻟﺍﻭ ﺔﺑﻠﺻﻟﺍ ﺕﺎﻧﻭﻛﻣﻟﺍ
.ﻯﻭﺻﻘﻟﺍ ﺔﻌﺳﻟﺍ ﻑﺻﻧ ﺯﻭﺎﺟﺗﺗ ﻻ ﺙﻳﺣﺑ ﺔﻌﻁﻘﻣﻟﺍ
.(ﺔﻘﻓﺭﻣ ﺭﻳﻏ) ﻁﺳﺑ ﺓﺍﺩﺇ ﻡﺍﺩﺧﺗﺳﺎﺑ ﺔﻘﻟﺎﻌﻟﺍ ﺕﺎﻧﻭﻛﻣﻟﺍ ﺔﻟﺍﺯﺈﺑ ﻡﻗ .ءﺎﺑﺭﻬﻛﻟﺍ ﻥﻣ ﺱﺑﺎﻘﻟﺍ ﻉﺯﻧﺍﻭ ﻁﻼﺧﻟﺍ ﻝﻳﻐﺷﺗ ﻑﻗﻭﺃ ،ﻊﻳﻁﻘﺗﻟﺍ ﺓﺭﻔﺷ ﺕﻘﻠﻋ ﻝﺎﺣ ﻲﻓ •
.ﺕﺎﻧﻭﻛﻣﻟﺍ ﺔﻟﺍﺯﻹ ﻙﻌﺑﺎﺻﺃ ﻡﺩﺧﺗﺳﺗ ﻻ
.ﻝﻣﻌﻟﺍ ءﺎﻧﺛﺃ ﺯﺗﻬﻳ ﻭﺃ ﺔﻳﺩﺎﻳﺗﻋﺍ ﺭﻳﻏ ﺎًﺗﺍﻭﺻﺃ ﺯﺎﻬﺟﻟﺍ ﺭﺩﺻﻳ ﺎﻣﺩﻧﻋ ﺕﺎﻧﻭﻛﻣﻟﺍ ﻝﻠﻗ •
.ﻁﻠﺧﻟﺍ ﺔﻳﻠﻣﻋ ءﺎﻬﺗﻧﺍ ﺩﻌﺑ ﻁﻠﺧﻟﺍ ءﺎﻋﻭ ءﺎﻁﻐﺑ ﻁﻼﺧﻟﺍ ﻕﺭﻭﺩ ﺓﺩﻋﺎﻗ ﻝﺩﺑﺗﺳﺍ •
ﻪﻌﺿﻭ ﻰﻠﻋ ﺹﺭﺣﺍ ،ءﺎﻋﻭﻟﺍ ﻕﻭﻓ ءﺎﻋﻭﻟﺍ ءﺎﻁﻏ ﺩﻭﺟﻭ ﻝﺎﺣ ﻲﻓﻭ .ءﺎﻋﻭﻟﺍ ءﺎﻁﻏ ﻊﺿﻭ ﻰﻠﻋ ءﺎﻘﺑﻹﺍ ﻊﻣ ﻁﻠﺧﻟﺍ ءﺎﻋﻭ ﻥﻣ ﺏﺍﺭﺷﻟﺍ ﺏﻛﺳﺑ ﺢﺻﻧﻳ •
.ﺏﺭﺳﺗﻟﺍ ﺏﻧﺟﺗﻟ ﻡﻳﻘﺗﺳﻣ ﻝﻛﺷﺑ
ﻝﻛﺷﺑ ﻁﻠﺧﻟﺍ ءﺎﻋﻭ ﻑﻳﻭﺟﺗ ﻲﻓ ﺏﺭﺳﺗﻟﺍ ﻊﻧﻣ ﻕﻭﻁ ﻊﻓﺩ ﻥﻣ ﺩﻛﺄﺗ 1
ﻊﺿﻭ ﻡﺩﻋ ﺔﻟﺎﺣ ﻲﻓﻭ .ﻁﻠﺧﻟﺍ ءﺎﻧﺛﺃ ﺏﺭﺳﺗ ﺙﻭﺩﺣ ﺏﻧﺟﺗﻟ ﺢﻳﺣﺻ
.ﻝﺋﺍﻭﺳﻟﺍ ﺏﺭﺳﺗﺗ ﺩﻗ ،ﺢﻳﺣﺻ ﻝﻛﺷﺑ ﻪﻧﺎﻛﻣ ﻲﻓ ﻕﻭﻁﻟﺍ
.ﺕﺎﻧﻭﻛﻣﻟﺎﺑ ﻁﻠﺧﻟﺍ ءﺎﻋﻭ ﻸﻣﺍ 2
ﻩﺎﺟﺗﺍ ﻲﻓ ﻩﺭﺩﺃﻭ ﻁﻠﺧﻟﺍ ءﺎﻋﻭ ﻕﻭﻓ ﻁﻼﺧﻟﺍ ﻕﺭﻭﺩ ﺓﺩﻋﺎﻗ ﻊﺿ 3
.ﺩﻳﺟ ﻝﻛﺷﺑ ﻕﻠﻐﻳ ﻰﺗﺣ ﺔﻋﺎﺳﻟﺍ ﺏﺭﺎﻘﻋ
ﻯﺯﺍﻭﺗﺗ ﺙﻳﺣﺑ ﺭﻭﺗﻭﻣﻟﺍ ﺔﺑﻠﻋ ﻕﻭﻓ ﻁﻠﺧﻟﺍ ءﺎﻋﻭ ﺓﺩﺣﻭ ﻊﺿ 4
ﺎﻣﻛ ﺭﻭﺗﻭﻣﻟﺍ ﺔﺑﻠﻋﻭ ءﺎﻋﻭﻟﺍ ﺓﺩﻋﺎﻗ ﻥﻣ ً
ﻼﻛ ﻰﻠﻋ ﺙﻠﺛﻣﻟﺍ ﺕﺎﻣﻼﻋ
.ﺃ ﻝﻛﺷﻟﺍ ﻲﻓ ﺢﺿﻭﻣ ﻭﻫ
ﻯﺯﺍﻭﺗﺗ ﻰﺗﺣ ﺔﻋﺎﺳﻟﺍ ﺏﺭﺎﻘﻋ ﻩﺎﺟﺗﺎﺑ ﻁﻠﺧﻟﺍ ءﺎﻋﻭ ﺓﺩﺣﻭ ﺭﺩﺃ 5
ﻝﻳﻁﺗﺳﻣﻟﺍ ﺔﻣﻼﻋ ﻊﻣ ﻁﻼﺧﻟﺍ ﻕﺭﻭﺩ ﺓﺩﻋﺎﻗ ﻰﻠﻋ ﺙﻠﺛﻣﻟﺍ ﺔﻣﻼﻋ
ﻉﺎﻣﺳﻭ ﺏ ﻝﻛﺷﻟﺍ ﻲﻓ ﺢﺿﻭﻣ ﻭﻫ ﺎﻣﻛ ﺭﻭﺗﻭﻣﻟﺍ ﺔﺑﻠﻋ ﻰﻠﻋ
."ﺔﻘﻁﻘﻁ" ﺕﻭﺻ
.ﺏﺳﺎﻧﻣﻟﺍ ﺔﻗﺎﻁﻟﺍ ﺭﺩﺻﻣ ﻝﻐﺷﻭ ﺱﺑﺎﻘﻟﺍ ﻝﺻﻭ 6
.ﻡﺍﺩﺧﺗﺳﻻﺍ ءﺎﻧﺛﺃ ﻁﻠﺧﻟﺍ ءﺎﻋﻭ ﺓﺩﺣﻭ ﻡﻋﺩﺍ 7
ﺔﻳﻌﺿﻭﻟﺍ ﻲﻓ (ﻥﻳﺑﻧﺎﺟﻟﺍ ﻼﻛ) ﺕﺎﺑ ّ
ﻼﻛﻟﺍ ﻊﺿﻭ ﻡﺩﻋ ﻥﻣ ﺩﻛﺄﺗ 
ﻼﻛ) ﺕﺎﺑ ّ
ﻼﻛﻟﺎﺑ ﺭﺍﺭﺿﻹﺍ ﺏﻧﺟﺗﻟ 1 ﻝﻛﺷﻟﺍ ﻲﻓ ﺔﺣﺿﻭﻣﻟﺍ
.(ﻥﻳﺑﻧﺎﺟﻟﺍ
."I" ﺔﻣﻼﻋ ﻰﻠﻋ ﻁﻐﺿﻟﺎﺑ ﻁﻼﺧﻟﺍ ﻝﻐﺷ 8
."0" ﺔﻣﻼﻋ ﻰﻠﻋ ﻁﻐﺿﻟﺎﺑ ﺯﺎﻬﺟﻟﺍ ﺄﻔﻁﺃ ،ﻁﻠﺧﻟﺍ ﻥﻣ ءﺎﻬﺗﻧﻻﺍ ﺩﻌﺑ 9
.ﺎًﻣﺎﻣﺗ ﺭﻭﺗﻭﻣﻟﺍ ﻑﻗﻭﺗﻳ ﻰﺗﺣ ﻁﻠﺧﻟﺍ ءﺎﻋﻭ ﺓﺩﺣﻭ ﻡﻋﺩﺍ 
ﻁﻼﺧﻟﺍ
.ءﺎﺑﺭﻬﻛﻟﺍ ﻥﻣ ﺱﺑﺎﻘﻟﺍ ﺏﺣﺳﺍﻭ ﺯﺎﻬﺟﻟﺍ ﺄﻔﻁﺃ ⑩
ﺎﻬﻋﺯﻧﺍﻭ ﺔﻋﺎﺳﻟﺍ ﺏﺭﺎﻘﻋ ﻩﺎﺟﺗﺍ ﺱﻛﻋ ﻁﻠﺧﻟﺍ ءﺎﻋﻭ ﺓﺩﺣﻭ ﺭﺩﺃ ⑪
.ﺭﻭﺗﻭﻣﻟﺍ ﺔﺑﻠﻋ ﻕﻭﻓ ﻥﻣ
.ﺏﻘﻋﻰﻠﻋﺎًﺳﺃﺭﻁﻠﺧﻟﺍءﺎﻋﻭﺓﺩﺣﻭﺏﻠﻗﺍ⑫
ﺯﺈﺑﻡﻗﻭﺔﻋﺎﺳﻟﺍﺏﺭﺎﻘﻋﻩﺎﺟﺗﺍﺱﻛﻋﻁﻼﺧﻟﺍﻕﺭﻭﺩﺓﺩﻋﺎﻗﺭﺩﺃ⑬
.ﺏﺭﺳﺗﻟﺍﺏﻧﺟﺗﻟءﻁﺑﺑﻪﻟﺯﺃﻭﺍًﺭﺫﺣﻥﻛ.ﻁﻠﺧﻟﺍءﺎﻋﻭﻕﻭﻓﻥﻣﻪﺗﻟﺍ
ﻊﺿ.ﺢﻳﺣﺻﻟﺍﻪﻧﺎﻛﻣﻲﻓﺏﺭﺳﺗﻟﺍﻊﻧﻣﻕﻭﻁﻊﺿﻭﻥﻣﺩﻛﺄﺗ⑭
ﻥﻣﻭﺔﻋﺎﺳﻟﺍﺏﺭﺎﻘﻋﻩﺎﺟﺗﺍﺱﻛﻋً
ﻼﻳﻠﻗﻩﺭﺩﺃﻭﻁﻠﺧﻟﺍءﺎﻋﻭءﺎﻁﻏ
ﺔﻋﺎﺳﻟﺍﺏﺭﺎﻘﻋﻩﺎﺟﺗﺍﻲﻓﻡﺛ
ﻥﻵﺍﻭ.ﻪﻘﻠﻏﻡﺎﻛﺣﺇﻡﺗﻳﻰﺗﺣ
.ﻙﺑﺍﺭﺷﺑﻉﺎﺗﻣﺗﺳﻻﺍﻙﻧﻛﻣﻳ
78
1 ﻝﻛﺷﻟﺍ
⑩⑪
⑫
⑬
⑭
ﻊﻧﻣ ﻕﻭﻁ
ﺏﺭﺳﺗﻟﺍ
ﻑﻳﻭﺟﺗ
1 2 3
4
5
6
A
B
ﻑﻳﻭﺟﺗ
ءﺎﻋﻭ ءﺎﻁﻏ
ﻁﻠﺧﻟﺍ
.ﺮﻣﻷﺍ ﻡﺰﻟ ﺍﺫﺇ ﺭﺍﻭﺪﻟﺍ ءﺰﺠﻟﺍ ﻲﻬﺟﻭ ﻲﻠﺴﻏﺍ ﺖﺤﺗﺞﻨﻔﺳﻷﺍ ﻦﻣ ﺔﻌﻄﻘﺑ 1
ﻡﺍﺪﺨﺘﺳﺎﺑ ﺮﺗﺎﻔﻟﺍ ﻭﺃ ﺩﺭﺎﺒﻟﺍ ءﺎﻤﻟﺍ ﻲﻓ ءﺍﺰﺟﻷﺍ ﻦﻣ ءﺰﺟ ﻞﻛ ﻞﺴﻏﺍ 2
ﻞﺒﻗ ﻡﺎﺗ ﻞﻜﺸﺑ ﺎﻬﻔﻴﻔﺠﺗﻭ ءﺍﺰﺟﻷﺍ ﻞﺴﻏ ﻰﻠﻋ ﺹﺮﺣﺍﻭ .ﺔﻨﻴﻟﺞﻨﻔﺳﺇ ﺔﻌﻄﻗ
.ﺯﺎﻬﺠﻟﺍ ﻦﻳﺰﺨﺗ
.ﺔﺑﺎﺻﻹﺍ ﺏﺑﺳﺗ ﺩﻘﻓ ،ﻑﻳﻅﻧﺗﻟﺍ ءﺎﻧﺛﺃ ﻕﻓﺭﺑ ﺏﻭﺑﻧﻷﺍﻭ ﺓﺭﺍﻭﺩﻟﺍ ﺔﻧﻳﻛﺳﻟﺍ ﻊﻣ ﻝﻣﺎﻌﺗ
.ﺔﻠﻳﻭﻁ ﺽﺑﺎﻘﻣ ﺕﺍﺫ ﺕﺎﺟﻧﻔﺳﺍ ﻭﺃ ﺓﺎﺷﺭﻓ ﺭﻳﻓﻭﺗ ﻡﺗﻳ ﻻ *
:ﺔﻈﺣﻼﻣ
.ﺯﺎﻬﺠﻟﺍ ﺢﻄﺳ ﺭﺮﻀﺘﻴﺳﻻﺇﻭ ،ﺔﻴﻧﺪﻌﻣ ﺓﺎﺷﺮﻓ ﻭﺃ ﻊﻴﻤﻠﺘﻟﺍ ﻕﻮﺤﺴﻣ ﻭﺃ ﻝﻮﺤﻜﻟﺍ ﻭﺃ ﻥﺎﻫﺪﻠﻟ ﻖﻗﺮﻤﻟﺍ ﻦﻳﺰﻨﺒﻟﺍ ﻡﺪﺨﺘﺴﺗ ﻻ
.ﻕﺎﺒﻁﻷﺍ ﺔﻟﺎﺴﻏ ﻲﻓ ﺯﺎﻬﺠﻟﺍ ﻊﻀﺗ ﻻﻭ
.ﻡﺍﺪﺨﺘﺳﻻﺍ ﺔﺠﻴﺘﻧ ﺔﻳﻭﺎﺤﻠﻟ ﻲﻠﺧﺍﺪﻟﺍ ءﺰﺠﻟﺍ ﻭﺃ ﺔﻳﻭﺎﺤﻟﺍ ءﺎﻄﻏ ﻭﺃ ﺭﺍﻭﺪﻟﺍ ءﺰﺠﻟﺍ ﻥﻮﻠﻟ ﻂﻴﺴﺑ ﻝﺍﻭﺯ ﺙﺪﺤﻳ ﺪﻗﻭ 
ءﺰﺠﻟﺍ ﻭﺃ ،ﺮﻴﺼﻌﻟﺍ ﺏﻮﻛ ءﺎﻄﻏ ﻭﺃ ،ﺐُﻠﻟﺍ ﺔﻳﻭﺎﺣ ﻭﺃ ،ﺔﻳﻭﺎﺤﻟﺍ ءﺎﻄﻏ ﻭﺃ ،ﺭﺍﻭﺪﻟﺍ ﻞﺼﻨﻟﺍ ﻲﻓ ﻥﻮﻠﻟﺍ ﻲﻓ ﺮﻴﻐﺗ ﺙﺪﺤﻳ ﺪﻗ 
.ﻡﺍﺪﺨﺘﺳﻻﺍ ﻞﻌﻔﺑ ءﺎﻋﻮﻟﺍ ﺓﺪﺣﻭ ﻦﻣ ﻲﻠﺧﺍﺪﻟﺍ

:ﺔﻅﺣﻼﻣ
ﻉﺍﺭﺫ ﻝﺧﺍﺩ ﺕﺎﻧﻭﻛﻣ ﻭﺃ ﺔﺑﻳﺭﻏ ﺕﺎﺋﻳﺯﺟ ﺩﻭﺟﻭ ﻡﺩﻋ ﻥﻣ ﺩﻛﺄﺗﻭ .ءﺎﻋﻭﻟﺍ ﻰﻠﻋ ﻪﻌﺿﻭ ﻝﺑﻗ ﻥﺎﻣﻷﺍ ﻉﺍﺭﺫ ﺔﻛﺭﺣ ﺔﻳﺭﺣ ﻥﻣ ﺩﻛﺄﺗ •
.ﻪﺗﻛﺭﺣ ﺔﻳﺭﺣ ﻥﺎﻣﺿﻟ ﻑﻳﻅﻧﺗﻟﺍ ﺩﻌﺑ ﻥﺎﻣﻷﺍ
.ﻑﻳﻅﻧﺗﻟﺍ ءﺎﻧﺛﺃ ﺭﺫﺣﺑ ﻊﻳﻁﻘﺗﻟﺍ ﺓﺭﻔﺷ ﻊﻣ ﻝﻣﺎﻌﺗ .ﻑﻳﻅﻧﺗﻟﺍ ﻝﺑﻗ ءﺎﺑﺭﻬﻛﻟﺍ ﻥﻋ ﺱﺑﺎﻘﻟﺍ ﻝﺻﻓﺍ •
.ﻕﺎﺑﻁﻷﺍ ﺔﻟﺎﺳﻏ ﻝﺧﺍﺩ ﻊﺿﻭﻳ ﻻ •
.ﻡﺍﺩﺧﺗﺳﻻﺍ ﺏﺑﺳﺑ ءﺎﻋﻭﻟﺍ ﺓﺩﺣﻭ ﻥﻣ ﺔﻳﻠﺧﺍﺩﻟﺍ ءﺍﺯﺟﻷﺍ ﻭﺃ ءﺎﻋﻭﻟﺍ ﻥﻭﻟ ﻲﻓ ﺭﻳﻐﺗ ﺙﺩﺣﻳ ﺩﻗ •
ﻰﻠﻋ ﺵﻭﺩﺧ ﺙﺩﺣُﺗ ﺩﻗ) .ﺔﻳﻛﻳﺗﺳﻼﺑﻟﺍ ءﺍﺯﺟﻷﺍ ﻝﺳﻐﻟ ﺎﻫﺭﻳﻏﻭ ﻥﻭﻠﻳﺎﻧﻟﺍ ﺞﻧﻔﺳﻻﺍﻭ ﺩﻳﻟﺍ ﺓﺎﺷﺭﻓﻭ ﺔﻳﻛﻠﺳﻟﺍ ﻑﺎﻳﻟﻷﺍ ﻡﺩﺧﺗﺳﺗ ﻻ •
(ﺢﻁﺳﻟﺍ
.ﺔﻠﻳﻭﻁ ﺽﺑﺎﻘﻣ ﺕﺍﺫ ﺕﺎﺟﻧﻔﺳﺍ ﻭﺃ ﺓﺎﺷﺭﻓ ﺭﻳﻓﻭﺗ ﻡﺗﻳ ﻻ *
1 2
19
ﻥﺎﻣﻷﺍ ﻉﺍﺭﺫ ﻙﺭﺣﺗ
ﺔﻳﺭﺣﺑ
1
2
3
(15 ﺔﺤﻔﺻ ﻊﺟﺍﺭ :ﺯﺎﻬﺠﻟﺍ ﻚﻓ ) .ﺔﻗﺎﻄﻟﺍ ﺬﻔﻨﻣ ﻦﻣ ﺲﺑﺎﻘﻟﺍ ﻉﺰﻧﺍ ﻢﺛ ،ﺎًﻣﺎﻤﺗ ﻙ ﺮﺤﻤﻟﺍ ﻒﻗﻮﺗ ﻦﻣ ﺪﻛﺄﺗ ،ءﺍ ﺰﺟ ﻷ ﺍ ﻚﻓ ﻞﺒﻗ
ﻒﻴﻈﻨﺘﻟﺍ
.ﺭﺍﻭﺪﻟﺍ ءﺰﺠﻟﺍ ﻞﻄﻌﺗ ﻰﻟﺇ ﻱﺩﺆﺗ ﻭﺃ ﺎًﻌﻘﺑ ﻭﺃ ﺔﻬﻳﺮﻛ ﺔﺤﺋﺍﺭ ﺐﺒﺴﺗ ﺪﻗ ءﺍﺰﺟﻷﺍ ﻰﻠﻋ ﺔﻴﻘﺒﺘﻤﻟﺍ ﺔﻬﻛﺎﻔﻟﺍ ءﺍﺰﺟﺄﻓ ،ءﺍﺰﺟﻷﺍ ﻞﻛ ﻒﻴﻈﻨﺗ ﺐﺠﻳ
ﺓﺭﺎﺻﻌﻟﺍ
ﻱﺭﺎﺟﻟﺍ ءﺎﻣﻟﺍ ﺕﺣﺗ ءﺎﻋﻭﻟﺍ ﻝﺳﻏﺍ .ﺏﺭﺳﺗﻟﺍ ﻊﻧﻣ ﻕﻭﻁ ﺔﻟﺍﺯﺈﺑ ﻡﻗ 1
ﻝﺳﻐﺑ ﻰﺻﻭﻳﻭ .ﻝﻳﻭﻁ ﺽﺑﻘﻣ ﺕﺍﺫ ﺔﺟﻧﻔﺳﺍ ﻡﺍﺩﺧﺗﺳﺎﺑ ﻪﻔﻅﻧﻭ
.ﺓﺎﺷﺭﻓ ﻡﺍﺩﺧﺗﺳﺎﺑ ءﺎﻋﻭﻟﺍ ﻑﻳﻭﺟﺗ
.ﻥﻭﺑﺎﺻﻟﺍﻭ ءﺎﻣﻟﺎﺑ ءﺎﻋﻭﻟﺍ ءﺎﻁﻏﻭ ﺏﺭﺳﺗﻟﺍ ﻊﻧﺎﻣﻭ ءﺎﻋﻭﻟﺍ ﻝﺳﻏﺍ 2
.ﻡﻬﻔﻔﺟﻭ ﻡﻬﻔﻁﺷﺍ ﻡﺛ ﻥﻣﻭ
.ﻱﺭﺎﺟﻟﺍ ءﺎﻣﻟﺍ ﺕﺣﺗ ﺓﺎﺷﺭﻓ ﻡﺍﺩﺧﺗﺳﺎﺑ ﻊﻳﻁﻘﺗﻟﺍ ﺓﺭﻔﺷ ﻑﻅﻧ 3
ﻁﻼﺧﻟﺍ
ﻑﻳﻅﻧﺗﻟﺍ ﺩﻌﺑ
ﺏﻧﺟﺗﻟ ءﺎﻋﻭﻟﺍ ﻊﻣ ﻁﻼﺧﻟﺍ ﻕﺭﻭﺩ ﺓﺩﻋﺎﻗﻭ ﺏﺭﺳﺗﻟﺍ ﻊﻧﺎﻣ ﻊﻳﻣﺟﺗ ﺩﻋﺃ •
.ﺔﻓﻭﺷﻛﻣ ﻊﻳﻁﻘﺗﻟﺍ ﺓﺭﻔﺷ ﻙﺭﺗ
ﻙﺮﺤﻣﻟﺍ ﺔﻴﻭﺎﺣ
.ﺔﻠﻠﺑﻣ ﺵﺎﻣﻗ ﺔﻌﻁﻘﺑ ﺭﻭﺗﻭﻣﻟﺍ ﺔﺑﻠﻋ ﺢﺳﻣﺍ
ﻦﻳﺰﺨﺘﻟﺍ
20
ﺙﻼﺛ ﻙﻠﺳﻟﺍ ﻑﻟﻭ ﺭﻭﺗﻭﻣﻟﺍ ءﺎﻋﻭ ﺏﻠﻗﺍ (1
.ﺢﺿﻭﻣ ﻭﻫ ﺎﻣﻛ ﺕﺎﻔﻟ
.ﺏﻭﺑﻧﻷﺎﺑ ﺭﺍﺭﺿﻹﺍ ﺏﻧﺟﺗﻟ ﺏﻭﻠﻘﻣﻟﺎﺑ ءﺎﻋﻭﻟﺍ ﺓﺩﺣﻭ ﻊﺿﻭﺑ ﺢﺻﻧُﻳ
ﺩﻛﺄﺗ ،ﻡﺍﺩﺧﺗﺳﻻﺍ ﺩﻌﺑ ﻭﺃ ﻡﺍﺩﺧﺗﺳﻻﺍ ﺩﻧﻋ (3
ﺏﻧﺟﺗﻟ ﺢﺿﻭﻣ ﻭﻫ ﺎﻣﻛ ﻙﻠﺳﻟﺍ ﻊﺿﻭ ﻥﻣ
.ﻙﻠﺳﻟﺎﺑ ﺭﺍﺭﺿﻹﺍ
ﻙﻠﺳﻟﺍﻭ ﺱﺑﺎﻘﻟﺍ
ءﺎﻋﻭﻟﺍ
ﺖﻴﺒﺜﺘﻟﻑﺎﻄﺨﻟﺍ ﻲﻓ ﻚﻠﺴﻟﺍ ﻞﺧﺩﺃ (2
.ﻪﻌﺿﻮﻣ ﻲﻓ ﻚﻠﺴﻟﺍ

Other Panasonic Juicer manuals

Panasonic MJ-H100 User manual

Panasonic

Panasonic MJ-H100 User manual

Panasonic MJ-L500 User manual

Panasonic

Panasonic MJ-L500 User manual

Panasonic MJ-CB100 User manual

Panasonic

Panasonic MJ-CB100 User manual

Panasonic MJ-SJ01 User manual

Panasonic

Panasonic MJ-SJ01 User manual

Panasonic MJ-L600 User manual

Panasonic

Panasonic MJ-L600 User manual

Panasonic MJ-L500 User manual

Panasonic

Panasonic MJ-L500 User manual

Panasonic MJ-DJ01 User manual

Panasonic

Panasonic MJ-DJ01 User manual

Panasonic MJ-J176PWTC User manual

Panasonic

Panasonic MJ-J176PWTC User manual

Panasonic MJ-J176P User manual

Panasonic

Panasonic MJ-J176P User manual

Panasonic MJ-CB800 User manual

Panasonic

Panasonic MJ-CB800 User manual

Panasonic MJ-DJ01SSD-HK User manual

Panasonic

Panasonic MJ-DJ01SSD-HK User manual

Panasonic MJ-M176P User manual

Panasonic

Panasonic MJ-M176P User manual

Panasonic MJ-L700 User manual

Panasonic

Panasonic MJ-L700 User manual

Panasonic MJ-66PRA User manual

Panasonic

Panasonic MJ-66PRA User manual

Panasonic MJ-DJ01SSL User manual

Panasonic

Panasonic MJ-DJ01SSL User manual

Panasonic MJ-M171PWTQ User manual

Panasonic

Panasonic MJ-M171PWTQ User manual

Panasonic MJ-CB600 User manual

Panasonic

Panasonic MJ-CB600 User manual

Panasonic MJ-CS100WSK User manual

Panasonic

Panasonic MJ-CS100WSK User manual

Panasonic MJ-DJ01 User manual

Panasonic

Panasonic MJ-DJ01 User manual

Panasonic MJ-L501 User manual

Panasonic

Panasonic MJ-L501 User manual

Panasonic MJ-L501 User manual

Panasonic

Panasonic MJ-L501 User manual

Panasonic MJ-DJ01 User manual

Panasonic

Panasonic MJ-DJ01 User manual

Panasonic MJ-DJ31SRA-VN User manual

Panasonic

Panasonic MJ-DJ31SRA-VN User manual

Panasonic MJ-CS100 User manual

Panasonic

Panasonic MJ-CS100 User manual

Popular Juicer manuals by other brands

Robot Coupe J 100 Ultra User instruction

Robot Coupe

Robot Coupe J 100 Ultra User instruction

Smeg CJF01DGEU manual

Smeg

Smeg CJF01DGEU manual

Gorenje JC 800 G instruction manual

Gorenje

Gorenje JC 800 G instruction manual

Superior Electric Juicer user manual

Superior

Superior Electric Juicer user manual

Sage Nutri Juicer Pro BJE820UK Instruction book

Sage

Sage Nutri Juicer Pro BJE820UK Instruction book

Bartscher Powerfresh instruction manual
Bartscher

Bartscher Powerfresh instruction manual
Royal Catering RCSJ-200W user manual

Royal Catering

Royal Catering RCSJ-200W user manual

Cuisinart CCJ210E instructions

Cuisinart

Cuisinart CCJ210E instructions

Twinzee SD80A user manual

Twinzee

Twinzee SD80A user manual

HUROM HG series owner's manual

HUROM

HUROM HG series owner's manual

Redmond RJ-914S user manual

Redmond

Redmond RJ-914S user manual

Rommelsbacher ZP 60/E instruction manual

Rommelsbacher

Rommelsbacher ZP 60/E instruction manual

Moulinex BKA123 manual

Moulinex

Moulinex BKA123 manual

Oster FPSTJU4200 instruction manual

Oster

Oster FPSTJU4200 instruction manual

Moulinex BKB 486 manual

Moulinex

Moulinex BKB 486 manual

Vitality 4 Life Oscar Neo DA 1000 User manual and  recipe book

Vitality 4 Life

Vitality 4 Life Oscar Neo DA 1000 User manual and recipe book

HUROM HU-100W instruction manual

HUROM

HUROM HU-100W instruction manual

Blaupunkt SJV301 instruction manual

Blaupunkt

Blaupunkt SJV301 instruction manual

manuals.online logo
manuals.online logoBrands
  • About & Mission
  • Contact us
  • Privacy Policy
  • Terms and Conditions

Copyright 2025 Manuals.Online. All Rights Reserved.