ENGLISH-3
Before replacing the lamp unit
z
Makesuretoturnothepowerbeforereplacingthe
lamp unit.
zWhenswitchingotheprojector,makesure
tofollowtheproceduresin“Switchingothe
projector” (page 3).
■
Checking the lamp unit to be
replaced
Check the status of the lamp
indicators <LAMP1>/<LAMP2>.
zThe lamp unit corresponding to the lamp indicator
that is lit in red is required to be replaced.
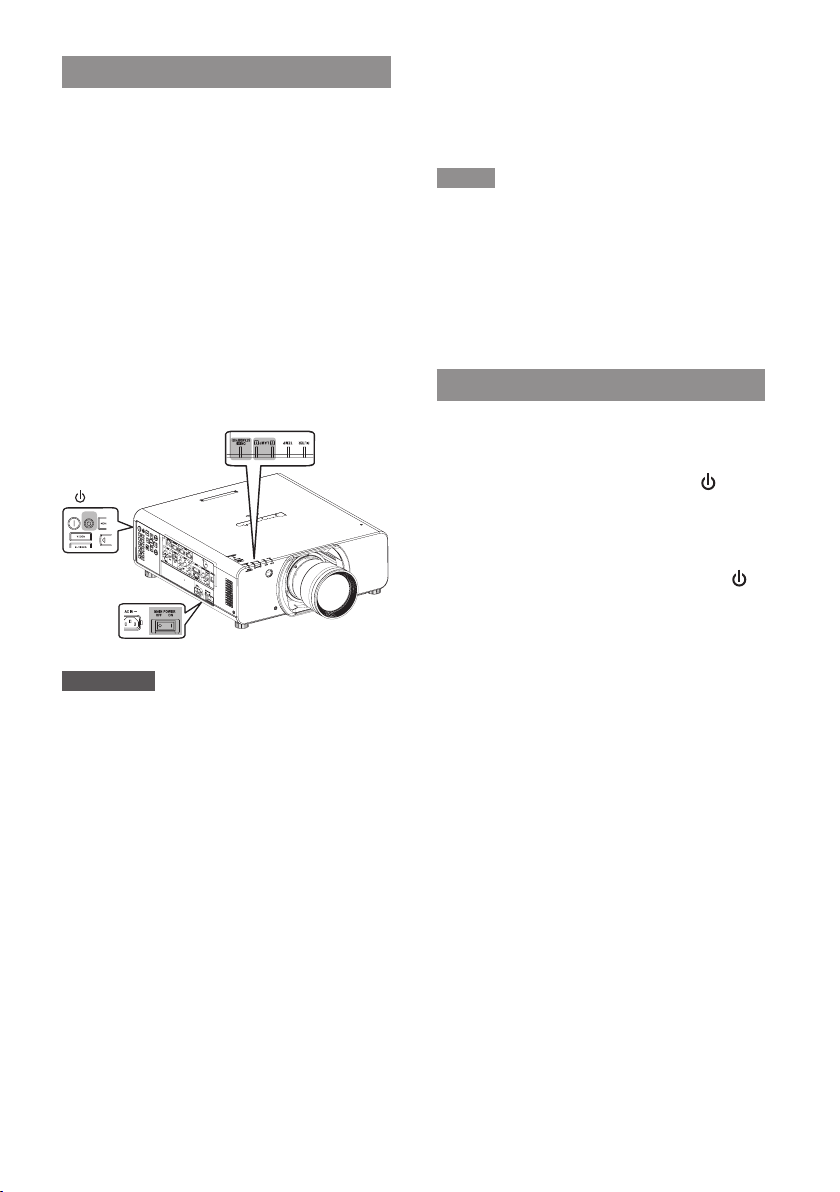
Main unit operating part
(ON (G) / STANDBY (R) )
<Lamp indicator>
(LAMP1, LAMP2)
> button
Attention
zPanasonic Connect Co., Ltd. shall not be
responsible for damages or malfunctioning of the
product due to the use of other than a Panasonic
ConnectCo.,Ltd.lampunit.Useonlyspecied
lamp units.
zDo not use replacement lamp units (for portrait
mode) and normal lamp units together. Check
the product number on the label attached to the
replacement lamp unit.
zA replacement lamp unit (for portrait mode) must
be used when installing in a portrait orientation.
zDo not install the projector in any orientation other
than portrait when using a replacement lamp unit
(for portrait mode).
zSince the luminous lamp is made of glass, it may
burst if dropped or hit with a hard object. Please
handle with care.
zDo not disassemble or modify the lamp unit.
zWhen replacing the lamp unit, be sure to hold it
by the handle because its surface is pointed and
its shape is protruded.
zThe lamp may be burst. Replace the lamp unit
carefully so that the broken pieces of the lamp
glass will not scatter.
zThe lamp contains mercury. When disposing of
used lamp units, contact your local authorities or
dealer for correct methods of disposal.
zPanasonic Connect Co., Ltd. recommends
that the lamp unit be replaced by a specialized
engineer. Contact your dealer.
Note
zA Phillips screwdriver is necessary when
replacing the lamp unit.
zThe Multi Projector Monitoring & Control Software
in the CD-ROM supplied with the PT-DZ13K
series may not support the Model No. display of
the replacement lamp unit (for portrait mode).
Download the latest version of the software from
“Multi Projector Monitoring & Control Software” on
the website (https://panasonic.net/cns/projector/).
Switching o the projector
When the projector is operating, perform the follow-
ingstepstoturnotheprojector,andwaituntilthe
lampunitcoolsothenmakethereplacement.
1) Press the power standby < >
button.
2) Press ◀▶ to select [OK], and
press the <ENTER> button.
(Or press the power standby < >
button again.)
zProjection of the image will stop, and the
power indicator <ON (G)/STANDBY (R)> on
the projector lights in orange.
(The fan keeps running.)
3) Wait until the power indicator
<ON (G)/STANDBY (R)> of the
projector lights in red (and the
fan stops) for approximately 170
seconds.
4) Press the <OFF> side of the <MAIN
POWER> switch to turn o the
power.