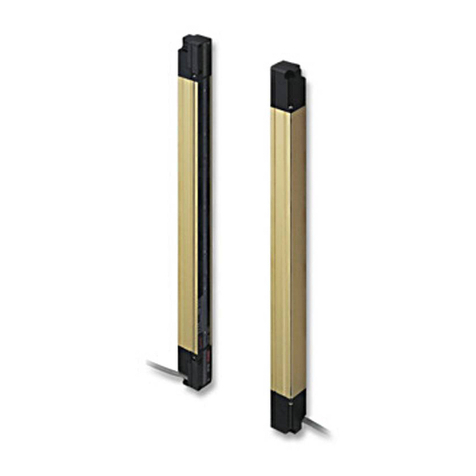
Panasonic SF2C Series User manual

QUICK INSTRUCTION MANUAL
Light Curtain / Type 2
SF2C Series ME-SF2C No.0053-20V
Thank you very much for purchasing Panasonic products. Read this Instruction Man-
ual carefully and thoroughly for the correct and optimum use of this product. Kindly
keep this manual in a convenient place for quick reference.
●
This is an abridged instruction manual simply explains mounting, wiring and etc. Kindly refer
“our web site” when you need more detail of contents.
●Instruction Manuals in the
following languages are published on our Web site.
Japanese, English, Chinese, Korean, German, French, Spanish, Italian, Brazilian Portuguese
• Die deutsche Betriebsanleitung ist auf unserer Website veröffentlicht.
• Le manuel d’instructions français est publié sur notre site web.
•
El Manual de Instrucciones en español se encuentra publicado en nuestro sitio web.
• Il manuale di istruzioni italiano è pubblicato sul nostro sito web.
•
O Manual de Instruções em Português Brasileiro está publicado em nosso Web site.
1SAFETY PRECAUTIONS
● Usethisdeviceasperitsspecications.Donotmodifythisdevicesinceitsfunc-
tions and capabilities may not be maintained and it may malfunction.
●This device has been developed / produced for industrial use only.
●This device is suitable for indoor use only.
●
Use of this device under the following conditions or environments is not presupposed.
Please consult us if there is no other choice but to use this device in such an environment.
1)
Operating this device under conditions or environments not described in this manual.
2)
Usingthisdeviceinthefollowingelds:nuclearpowercontrol,railroad,aircraft,
auto mobiles, combustion facilities, medical systems, aerospace development, etc.
●
When this device is to be used for enforcing protection of a person from any danger occurring
around an operating machine, the user should satisfy the regulations established by national
orregionalsecuritycommittees(OccupationalSafetyandHealthAdministration:OSHA,the
European Standardization Committee, etc.). Contact the relative organization(s) for details.
●
In case of installing this device to a particular machine, follow the safety regulations in
regard to appropriate usage, mounting (installation), operation and maintenance. The us-
ers including the installation operator are responsible for the introduction of this device.
●Note that this device may be damaged if it is subject to a strong shock (if it is
droppedontotheoor,forexample).
●Use this device by installing suitable protection equipment as a countermeasure
for failure, damage, or malfunction of this device.
●Before using this device, check whether the device performs properly with the
functionsandcapabilitiesasperthedesignspecications.
●In case of disposal, dispose this device as an industrial waste.
WARNING
♦Machine designer, installer, employer and operator
• The machine designer, installer, employer and operator are solely responsible
to ensure that all applicable legal requirements relating to the installation and
theuseinanyapplicationaresatisedandallinstructionsforinstallationand
maintenance contained in the instruction manual are followed.
• Whether this device functions as intended to and systems including this de-
vice comply with safety regulations depends on the appropriateness of the
application, installation, maintenance and operation. The machine designer,
installer, employer and operator are solely responsible for these items.
♦Engineer
•
The engineer would be a person who is appropriately educated, has widespread knowl-
edge and experience, and can solve various problems which may arise during work,
such as a machine designer, or a person in charge of installation or operation etc.
♦Operator
• The operator should read this instruction manual thoroughly, understand its
contents, and perform operations following the procedures described in this
manual for the correct operation of this device.
•
In case this device does not perform properly, the operator should report this to
the person in charge and stop the machine operation immediately. The machine
mustnotbeoperateduntilcorrectperformanceofthisdevicehasbeenconrmed.
♦Environment
• Do not use a mobile phone or a radio phone near this device.
•
Ifthereexistsareectivesurfaceintheplacewherethisdeviceistobeinstalled,
makesuretoinstallthisdevicesothatreectedlightfromthereectivesurface
does not enter into the receiver, or take countermeasures such as painting, mask-
ing,roughening,orchangingthematerialofthereectivesurface,etc.Failureto
do so may cause the device not to detect, resulting in death or serious injury.
• Do not install this device in the following environments.
1)
Areasexposedtointenseinterference(extraneous)lightsuchashigh-frequencyuorescent
lamp(invertertype),rapidstarteruorescentlamp,stroboscopiclightsordirectsunlight.
2) Areas with high humidity where condensation is likely to occur
3) Areas exposed to corrosive or explosive gases
4)Areasexposedtovibrationorshockoflevelshigherthanthatspecied
5) Areas exposed to contact with water
6) Areas exposed to too much steam or dust
♦Installation
• Always keep the correctly calculated safety distance between this device and
the dangerous parts of the machine.
•
Install extra protection structure around the machine so that the operator must pass
through the sensing area of this device to reach the dangerous parts of the machine.
•
Install this device such that some part of the operator’s body always remains in
the sensing area when operator is done with the dangerous parts of the machine.
•
Donotinstallthisdeviceatalocationwhereitcanbeaffectedbywallreection.
• When installing multiple sets of this device, connect the sets and, if necessary,
install some barriers such that mutual interference does not occur. For details,
refer to “ 4DEVICE PLACEMENT.”
• Donotusethisdeviceinareectiveconguration.
• The corresponding emitter and receiver must have the same serial No. and be
correctly oriented.
♦Machine in which this device is installed
•
When this device is used in the “PSDI Mode,” an appropriate control circuit
mustbeconguredbetweenthisdeviceandthemachinery.Fordetails,besure
to refer to the standards or regulations applicable in each region or country.
• In Japan and China, Korea, do not use this device as safety equipment for a
press machine.
• Do not install this device with a machine whose operation cannot be stopped
immediately in the middle of an operation cycle by an emergency stop equip-
ment.
• This device starts the performance after 2 seconds from the power ON. Have
the control system started to function with this timing.
♦Wiring
• Be sure to carry out the wiring in the power supply OFF condition.
• All electrical wiring should conform to the regional electrical regulations and
laws. The wiring should be done by engineer(s) having the special electrical
knowledge.
• Do not run the wires together with high-voltage lines or power lines or put
them in the same raceway. This can cause malfunction due to induction.
• In case of extending the cable of the emitter or the receiver, each can be
extended up to 50m by using the exclusive cable. Extending the cable longer
than 50m may cause malfunction, which can result in death or serious injury.
• Use both control output (OSSD) and lockout output (SSD).
• In order that the output is not turned ON due to earth fault of control output
(OSSD 1 / 2), be sure to ground to 0V side (PNP output) / +24V side (NPN
output).
♦Maintenance
• When replacement parts are required, always use only genuine supplied re-
placement parts. If substitute parts from another manufacturer are used, the
device may not come to detect, result in death or serious injury.
• The periodical inspection of this device must be performed by an engineer
having the special knowledge.
• After maintenance or adjustment, and before starting operation, test this de-
vicefollowingtheprocedurespeciedin“ 9MAINTENANCE.”
• Clean this device with a clean cloth. Do not use any volatile chemicals.
♦Others
• Nevermodifythisdevice.Modicationmaycausethedevicenottodetect,
resulting in death or serious injury.
• Donotusethisdevicetodetectobjectsyingoverthesensingarea.
• Do not use this device to detect transparent objects, translucent objects or
objectssmallerthanthespeciedminimumsensingobjects.
2CONFIRMATION OF PACKED CONTENTS
Sensor:Emitter,Receiver 1pc.each
Test Rod 1 pc.
SF4C-TR25 (ø25 × 220mm)
Quick Instruction Manual (Japanese, English, Chinese, Korean) 1 pc. each language
3PART DESCRIPTION OF INDICATORS
Large multi-purpose
indicator
Beam-axis side
Large multi-purpose
indicator
Front Back Emitter
Receiver
Operator indicatorOperator indicator
Test indicator
Fault indicator
Frequency setting indicator
OSSD indicator
Unstable light reception
indicator
Fault indicator
Frequency setting indicator
●Common to emitter and receiver
Description Function
Large multi-purpose indicator (Orange) Lights up when input for the large multi-purpose indicator is valid.
Turns OFF when input for the large multi-purpose indicator is invalid.
Frequency setting indicator (Orange) Turns OFF when Frequency 1 is set.
Lights up when Frequency 2 is set.
Fault indicator (Yellow) Turns OFF during normal operation.
Lights up or blinks when fault occurs in the device.
●Emitter Description Function
Operation indicator (Green) Lights up when device operation is as follows.
Turns OFF when test input is valid.
Test indicator (Red) Lights up when test input is valid.
Turns OFF when test input is invalid.
●ReceiverDescription Function
OSSD indicator (Red / Green) Whencontroloutput(OSSD)isOFF:lightsupinred
Whencontroloutput(OSSD)isON:lightsupingreen
Unstable light reception indicator (Orange)
Turns OFF when stable light is received (the percentage of light re-
ceived is more than 150%). [Control output (OSSD) ON]
Lights up when unstable light is received (the percentage of light re-
ceived is between 100% and 150%). [Control output (OSSD) ON]
Turns OFF when light is blocked (the percentage of light received is
less than 100%) [Control output (OSSD) OFF]


4DEVICE PLACEMENT
●This is the configuration when two or more sets of emitter and receiver facing
each other are placed. It is used for the case that there is a problem in wiring or
for system evaluation in case of addition of equipment.
It is used for system evaluation in case of addition of equipment.
WARNING
●Refer to the examples of device placement given below and understand them
thoroughly before installing the devices. Improper sensor placement could cause
device malfunction, which can result in death or serious injury.
●If this device is used in multiple sets, arrange them to avoid mutual interference.
If mutual interference occurs, it can result in death or serious injury.
<Example of device placement>
1) Install emitter and the receiver back
to back 2) Arrange the emitter and the receiver
vertically on opposite sides.
Emitter EmitterReceiver Receiver Emitter Receiver
Receiver Emitter
3) Arrange the emitter and the receiver
horizontally on opposite sides. 4) Install a barrier
Emitter
Emitter
Receiver
Receiver
ReceiverEmitterReceiver Emitter
Barrier
<Reference>
Theaboveguresarejustexamplesofdeviceplacement.Ifthereareanyques-
tionsorproblems,pleasecontactourofce.
WARNING
Position the emitter and receiver so that their cables are aligned. Failure to do so
will cause the system to malfunction.
Cable Cable
Cable
Cable
5MOUNTING
CAUTION
The minimum bending radius of the cable is R5mm. Mount the device considering
the cable bending radius.
<Reference>
Mount the emitter and the receiver at the same level and parallel to each other. The ef-
fective aperture angle of this device is ±5° or less for a sensing distance of 3m or more.
<In case of using standard mounting bracket (MS-SFC-1) (accessory)>
1. Remove the M3 countersunk head screw [with anti-loosening agent (length 4mm)]
which is attached to the back of the device.
2. Decide the direction of the standard mounting bracket.
3. Tighten with the M3 countersunk head screw [with anti-loosening agent (length
4mm)].Thetighteningtorqueshouldbe0.3N•morless.
M3 countersunk head screw
[With anti-loosening agent (length 4mm)]
This device
Mountable in three directions
Standard mounting bracket
MS-SFC-1 (Accessory)
4. Set the standard mounting bracket that is ready for setting to the mounting sur-
face using two hexagon-socket head bolts [M5 (please arrange separately)].
Hexagon-socket head bolt
[M5 (purchase separately)]
This device
6WIRING
WARNING
●Earth the machine or the support where the device is mounted on to frame
ground (F.G.). Failure to do so could cause the malfunction of the device by
noise, resulting in death or serious injury. Furthermore, the wiring should be done
in a metal box connected to the frame ground (F.G.).
●Take countermeasure against the system to be applied for this device so as not
to carry out the dangerous performance caused by the earth failure. Failure to do
so could cause invalid for the system stop, resulting in death or serious injury.
●In order that the output is not turned ON due to earth fault of control output
(OSSD), be sure to ground to 0V side (PNP output) / +V side (NPN output).
CAUTION
Make sure to insulate the ends of the unused lead wires.
<Reference>
Use a safety relay unit or an equivalent control circuit in safety for FSD.
●Power Supply Unit
CAUTION
Wire correctly using a power supply unit which conforms to the laws and standards
of the region where this device is to be used. If the power supply unit is non-con-
forming or the wiring is improper, it can cause damage or malfunction of this device.
<Reference>
A specialist who has the required electrical knowledge should perform the wiring.
The power supply unit must satisfy the conditions given below.
1) Power supply unit authorized in the region where this device is to be used.
2) Power supply unit SELV (safety extra low voltage) / PELV (protected extra low
voltage) conforming to EMC Directive and Low-voltage Directive.
(only for requiring CE marking conformation)
3) Power supply unit conforming to the Low-voltage Directive and with an output of
100VA or less.
4) The frame ground (F.G.) terminal must be connected to ground when using a
commercially available switching regulator.
5) Power supply unit with an output holding time of 20ms or more.
6) In case a surge is generated, take countermeasures such as connecting a surge
absorber to the origin of the surge.
7) Power supply unit corresponding to CLASS 2 (only for requiring CTÜVUS Mark
conformation).

●I/O Circuit Diagrams
Main circuitMain circuit
Emitter
Receiver
0.1μF
0.47μF
6.8Ω
470Ω
6.6kΩ
6.6kΩ
6.6kΩ
6.6kΩ
(Brown) +V
(Brown) +V
(Green) Interference prevention output
(Pink) Test input
(Orange) Large multi-purpose indicator input
(Gray) Frequency setting input
(White) Lockout output (SSD)
(Black) Control output (OSSD)
(Blue) 0V
(Blue) 0V
22kΩ
540kΩ
540kΩ
●Basic Wiring
<In case of using I/O circuit for PNP output>
+
-24V DC
±20%
(Brown) +V
(Brown) +V
(Green) Interference prevention output
(Pink) Test input
(Orange) Large multi-purpose indicator input
(Gray) Frequency setting input
(White) Lockout output (SSD)
(Black) Control output (OSSD)
(Blue) 0V
(Blue) 0V
Load
K1
Emitter
Receiver
Gray cable
Gray cable
with black line
<In case of using I/O circuit for NPN output>
+
-24V DC
±20%
(Brown) +V
(Brown) +V
(Green) Interference prevention output
(Pink) Test input
(Orange) Large multi-purpose indicator input
(Gray) Frequency setting input
(White) Lockout output (SSD)
(Black) Control output (OSSD)
(Blue) 0V
(Blue) 0V
Load K1
Emitter
Receiver
Gray cable
Gray cable
with black line
<Reference>
K1:Externaldevice(Forcedguidedrelayormagneticcontactor)
●Wiring for Test Input Function / Large Multi-purpose Indicator Function /
Interference Prevention Function
<In case of using I/O circuit for PNP output>
(Brown) +V
(Brown) +V
(Green) Interference prevention output
(Pink) Test input
(Orange) Large multi-purpose indicator input
(Gray) Frequency setting input
(White) Lockout output (SSD)
(Black) Control output (OSSD)
(Blue) 0V
(Blue) 0V
Load
K1
Emitter
Receiver
Gray cable
Gray cable
with black line
+
-
24V DC
±20%
(Brown) +V
(Brown) +V
* S1
* S1
* S1
(Green) Interference prevention output
(Pink) Test input
(Orange) Large multi-purpose indicator input
(Gray) Frequency setting input
(White) Lockout output (SSD)
(Black) Control output (OSSD)
(Blue) 0V
(Blue) 0V
Load
K1
Emitter
Receiver
Gray cable
Gray cable
with black line
Frequency 1 light curtain
Frequency 2 light curtain
* S1 <Frequency setting input>
ON:Vs–2.5VtoVs
OFF:Open
Frequency1setting:Open
Frequency2setting:+V
Notes:1)Theorangeindicatorlightsupwhentheinputwireforthelargemulti-purposeindicator(orange)isconnected
to the +V terminal, and turns OFF when it is disconnected.
2) Vs is the applying supply voltage.
<In case of using I/O circuit for NPN output>
+
-
24V DC
±20%
(Brown) +V
(Brown) +V
(Green) Interference prevention output
(Pink) Test input
(Orange) Large multi-purpose indicator input
(Gray) Frequency setting input
(White) Lockout output (SSD)
(Black) Control output (OSSD)
(Blue) 0V
(Blue) 0V
Load K1
Emitter
Receiver
Gray cable
Gray cable
with black line
(Brown) +V
(Brown) +V
* S1
* S1
* S1
(Green) Interference prevention output
(Pink) Test input
(Orange) Large multi-purpose indicator input
(Gray) Frequency setting input
(White) Lockout output (SSD)
(Black) Control output (OSSD)
(Blue) 0V
(Blue) 0V
Load K1
Emitter
Receiver
Gray cable
Gray cable
with black line
Frequency 1 light curtain
Frequency 2 light curtain
* S1 <Frequency setting input>
ON:0to+2.5V
OFF:Open
Frequency1setting:Open
Frequency2setting:+V
Note: Theorangeindicatorlightsupwhentheinputwireforthelargemulti-purposeindicator(orange)isconnectedto
the +V terminal, and turns OFF when it is disconnected.
<Reference>
K1:Externaldevice(Forcedguidedrelayormagneticcontactor)

7OPERATION OF INDICATORS
●Normal Operation
:Lightsupinred, :Lightsupingreen, :TurnsOFF
Device status Indicators Control output
(OSSD) Lockout output
(SSD)
Emitter Receiver
Before power is ON OFF OFF
After power is ON
Light received status
(all beams received) ON ON
After power is ON
Light blocked status
One or more beams blocked OFF ON
●When an error occurs
:Blinksinorange, :Lightsupinred, :Lightsupingreen, :TurnsOFF:Blinksinyellow,
Setting procedure and check
items Indicators (Note) Control output
(OSSD) Lockout output
(SSD)
Emitter Receiver
Normal state ON ON
Error state
Emitter
abnormal OFF OFF
Receiver
abnormal OFF OFF
8 FUNCTION
●Refer “our web site” for details of func-
tions of this product.
9MAINTENANCE
<Reference>
When any errors are found, refer to “our web site”andreportthesymptomsto
themaintenanceincharge.Iftherectificationmethodisnotclear,pleasecontact
ouroffice.
Please make a copy of this checklist, check each inspection item in the respective
square,andlethelistforrecord.
●Daily Inspection
WARNING
Besuretoinspectthefollowingitemspriortooperationandconrmthatthereisno
error. Operating this device without inspection or in an error condition can result in
death or serious injury.
Check column
Inspection item
□Dangerous parts of the machine cannot be reached without passing through the sensing area of this
device.
□Some part of operator’s body remains in the sensing area when operation is done with dangerous
parts of the machine.
□The calculated safety distance has been maintained or exceeded during installation.
□There is no damage to the safety guard or protective structure.
□There is no defect, fold, or damage in the wiring.
□The corresponding connectors have been connected securely.
□No dirt or scratches exist on the light emitting surface.
□The test rod is not deformed or defective.
□
The operation indicator (green) of the emitter and the OSSD indicator (green) of the receiver light up
when no object is present in the sensing area.
The control output (OSSD) shall be ON. At this time, the effect of external noise can be inspected. In
case external noise affects the operation, remove its cause and reinspect.
□
Move the test rod (ø25mm) up and down 1,600 mm/sec. or less at three positions, just in front of the
emitter, between the emitter and receiver and just in front of the receiver.
The OSSD indicator (red) of the receiver and the operation indicator (red) of the emitter continue to
light up as long as the test rod is present in the sensing area.
□With the machine in the operating condition, the dangerous parts operate normally when no object is
present in the sensing area.
□With the machine in the operating condition, the dangerous parts stop immediately when the test rod
(ø25mm) is inserted into the sensing area at any of the three positions, directly in front of the emitter,
midway between the emitter and the receiver, and directly in front of the receiver.
□The dangerous parts remain stopped as long as the test rod is present in the sensing area.
□The dangerous parts stop immediately when the power supply of this device is turned OFF.
□
Thecontroloutput(OSSD)mustturnOFFwhenthetestinputwire(pink)isopen(PNPoutputtype:
connectedto+V,NPNoutputtype:connectedto0V).Atthistime,theeffectofexternalnoisecanbe
inspected. In case external noise affects the operation, remove its cause and reinspect.
●Periodic Inspection (Every Six Months)
WARNING
Besuretoinspectthefollowingitemseverysixmonthsandconrmthatthereisno
error. Operating this device without inspection or in an error condition can result in
death or serious injury.
Check column
Inspection item
□The structure of the machine does not obstruct any safety mechanism for stopping operation.
□Nomodicationhasbeenmadeinthemachinecontrolswhichobstructsthesafetymechanisms.
□The output of this device is correctly detected.
□The wiring from this device is correct.
□The overall response time of the complete machine is equal or less than the calculated value.
□The actual number of operation cycle (time) of the limited lifetime parts (relay, etc.) is less than their
rated operation cycles (time).
□No screws or connectors of this device are loose.
□Noextraneouslightsourceorreectiveobjecthasbeenaddednearthisdevice.
●Inspection after Maintenance
1. When any parts of this device are replaced.
2. When some abnormality is felt during operation.
3. When beam-axis alignment of the emitter and receiver is done.
4. When the device installation place or environment is changed.
5. When the wiring method or wiring layout is changed.
6. When FSD (Final Switching Device) parts are replaced.
7. When FSD (Final Switching Device) setting is changed.
10
SPECIFICATIONS
Type 20mm pitch type
Model No. SF2C-H□
Number of beam channels 8 / 12/ /16 / 20 / 24 / 28 / 32
Protective hight 160 (8 channels) to 640 (32 channels) mm
Sensing range 0.1 to 3m
Minimum sensing object ø25mm opaque object
Supply voltage 24V DC ±20%
Control output (OSSD) Maximumsource(PNP)/sink(NPN)current:200mA,Residualvoltage:2.5Vorless
Leakagecurrent:200µAorless,Maximumloadcapacity:2.2μF,Loadwiringresistance:3Ωorless
Response time WhenOFF:20msorless,WhenON:80to100ms
Lockout output (SSD) Maximumsource(PNP)/sink(NPN)current:60mA,Residualvoltage:2.5Vorless
Leakagecurrent:200µAorless,Maximumloadcapacity:2.2μF,Loadwiringresistance:3Ωorless
Ambient temperature -10to+55°C,Storage:-25to+60°C
Ambient humidity 30to85%RH,Strage:30to85%RH
11
CE MARKING DECLARATION OF CONFORMITY
Itemized Essentials of EU Declaration of Conformity
Manufacturer’s Name: Panasonic Industrial Devices SUNX Co., Ltd.
Manufacturer’s Address: 2431-1, Ushiyama-cho, Kasugai, Aichi 486-0901, Japan
EU Representative’s Name: Panasonic Marketing Europe GmbH Panasonic Testing Center
EU Representative’s Address: Winsbergring 15, 22525 Hamburg,Germany
Product: Active Opto-electronic Protective Device (Light Curtain)
Model Name: SF2C Series
Trade Name: Panasonic
Application of Council Directive:
- 2006/42/EC Machinery Directive
- 2004/108/EC EMC Directive (Valid until April 19, 2016)
- 2014/30/EU EMC Directive (Valid from April 20, 2016)
- 2011/65/EU RoHS Directive
Harmonized standards:
-EN61496-1:2013
-ENISO13849-1:2008
-EN55011:2009+A1:2010
-EN61000-6-2:2005
-EN50581:2012
Type Examination:CertiedbyTÜVSÜDProductServiceGmbHRidlerstrasse
65 80339 München Germany
Table of contents
Other Panasonic Lighting Equipment manuals

Panasonic
Panasonic ET-LAD320P User manual

Panasonic
Panasonic ET-LAE16 User manual

Panasonic
Panasonic KX-HNL100 User manual

Panasonic
Panasonic EY3790 User manual

Panasonic
Panasonic SF4B C Series User manual

Panasonic
Panasonic ET-LAT100 User manual

Panasonic
Panasonic UJ30 Series User manual

Panasonic
Panasonic ET-LAC300 User manual

Panasonic
Panasonic ET-LAF100A User manual

Panasonic
Panasonic ET-LAV400 User manual