manuals.online logo
Brands
  1. Home
  2. •
  3. Brands
  4. •
  5. Paradox
  6. •
  7. Control Unit
  8. •
  9. Paradox Digiplex APR-ADM2 User manual

Paradox Digiplex APR-ADM2 User manual

INTRODUCTION
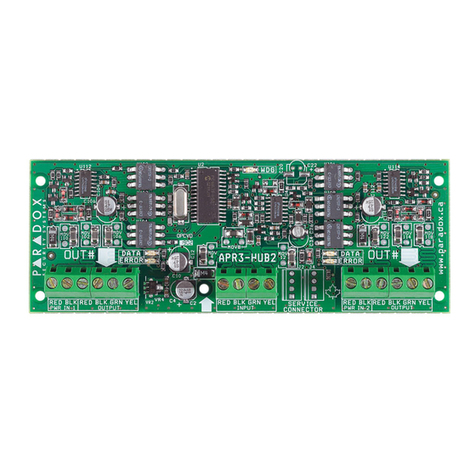
The Voice-Assisted Arm/Disarm Bus Module allows the user to arm
or disarm their security system as well as activate or deactivate In
Touch’s PGM from any touch-tone telephone. The APR-ADM2
uses detailed voice prompts to guide the user. Due to the Auto-
panel Recognition feature, the In Touch can be connected to either
the Spectra (V2.0 or higher) or Digiplex control panels.
TECHNICALSPECIFICATIONS
Operating Voltage: 9 - 15VDC
Current Consumption: Typical: 70mA
Maximum: 105mA (with PGM enabled)
Power Consumption: 1 Watt
PGM Outputs: 1 form “C” relay rated @ 125V, 5A
receptive load
Operating Temperature: 0°C to 50°C (32°F to 122°F)
Compatible Telephone: DTMF (Touch-tone)
Compatibility: Any Digiplex control panel
INSTALLATION
The APR-ADM2 is connected to Digiplex’s communication bus.
Connect the four terminals labeled “12VDC”, “GND”, “GRN”, and “YEL“
of the APR-ADM2 to the corresponding terminals of the Digiplex
control panel as shown in Figure 1. Please refer to the Digiplex
Reference & Installation Manual for the maximum allowable
installation distance from the control panel.
Connect In Touch’s “RING” terminal to Digiplex’s “R1” terminal and
the “TIP” terminal of the In Touch to the “T1” terminal of the Digiplex
control panel as shown in Figure 1. If the household telephone is
sharing the telephone line with Digiplex and APR-ADM2, connect
the house-hold telephone to the “R-1” and “T-1” terminals of the bus
module as shown in Figure 1.
Connect APR-ADM2’s PGM as shown in Figure 2.
If the control panel is configured to report Arming and
Disarming events and if the In Touch and control panel
share the same telephone line, the user’s call will be
interrupted during use.
AUTO-PANELRECOGNITION
This is a feature that allows In Touch to be used with either
Spectra or Digiplex. When connected to the bus, the APR-ADM2
will automatically detect which system it is connected to and adjust
its internal communication parameters accordingly. It allows In
Touch to be connected to any Digiplex control panel as well as any
Spectra control panel V2.0 or higher.
If connecting the APR-ADM2 to a Spectra control panel, refer to
the Spectra APR-ADM2 Reference & Installation Manual.
PROGRAMMING METHOD
To access the In Touch programming mode:
APR-ADM2 can also be programmed using Digiplex’s Module
Broadcast feature as well as through the WinLoad Software. Refer
to the Digiplex Reference & Installation Manual for more
information on the Module Broadcast feature and to WinLoad’s
Online Help for information on programming with WinLoad. The
bus module’s serial number can be found on its PC board.
NUMBEROFRINGS
Section [001][001]
The value (001 to 255, 000 = disabled) programmed in section
[001] represents the number of rings the APR-ADM2 will wait
before picking-up the line. If the line is not answered after the
number of programmed rings, In Touch will answer the call.
Be sure to program the APR-ADM2 module’s number of
rings to be less than the number of rings programmed in the
Digiplex control panel or enter 000 as the number of rings
for the Digiplex.
ANSWERING MACHINEOVERRIDE
Section [002][002]
If the In Touch uses a telephone line that uses an answering
machine or service, the Answering Machine Override must be
programmed. The value (010 to 255 seconds, 000 = disabled)
programmed in section [002] represents the delay period that APR-
ADM2 will wait between the first and second call. The user calls the
In Touch, hangs-up, and then calls back within the value
programmed in section [002]. If the APR-ADM2 is called back
within the programmed delay period, the bus module will override
the answering machine or service by picking-up the line on the first
ring.
PGM TIMER
Section [003][003]
When the PGM is activated by a user, the value (001 to 255, 000 =
No Timer) programmed in section [003] determines the time that
APR-ADM2’s PGM will remain activated. Once the time value set
in section [003] has elapsed, the PGM will deactivate. If a value of
000 is entered into section [003], the PGM will remain activated
until it is manually deactivated by the user.
Option [4] in section [004] determines whether the PGM
Timer programmed in section [003] is in seconds or
minutes.
STEP 1: Press and hold the [0] key
STEP 2: Enter the [INSTALLERCODE]
STEP 3: Enter section [953]
STEP 4: Enter the APR-ADM2’s 8-digit [SERIALNUMBER]
STEP 5: Enter the 3-digit [SECTION]you want to program
STEP 6: Enter the required data
PGM OUTPUT
Section [004][004] - option [3][3]
If option [3] in section [004] is on, the APR-ADM2 PGM output is
enabled and can be used. If option [3] in section [004] is off, the
APR-ADM2 PGM output is disabled and cannot be used.
PGM TIMEBASE SELECTION
Section [004][004] - option [4][4]
This option determines whether the PGM Timer will be in seconds
or minutes. If option [4] in section [004] is off, the PGM Timer will
be in seconds. If option [4] in section [004] is on, the PGM Timer
will be in minutes.
PARTITION ASSIGNMENT
Section [005][005] - options [1][1] to [4][4]
In Touch will only access the partitions that have been assigned to
it and ignore the partitions that have not. Section [005], options [1]
to [4] represent partitions 1 to 4 respectively. To assign a partition
to the APR-ADM2 module, enable the option that corresponds to
the desired partition.
Figure 2: Installing In Touch’s PGM
Figure 1: Installing the In Touch

Other Paradox Control Unit manuals

Paradox MG-RCV3 User manual

Paradox

Paradox MG-RCV3 User manual

Paradox IP100 User manual

Paradox

Paradox IP100 User manual

Paradox IP150 User manual

Paradox

Paradox IP150 User manual

Paradox Digiplex EVO PRT3 Installation manual

Paradox

Paradox Digiplex EVO PRT3 Installation manual

Paradox PCS300 User manual

Paradox

Paradox PCS300 User manual

Paradox PCS265LTE Installation guide

Paradox

Paradox PCS265LTE Installation guide

Paradox ZX8 User manual

Paradox

Paradox ZX8 User manual

Paradox ZX32D User manual

Paradox

Paradox ZX32D User manual

Paradox RPT1+ User manual

Paradox

Paradox RPT1+ User manual

Paradox PCS265 LTE Installation guide

Paradox

Paradox PCS265 LTE Installation guide

Paradox ZX16D User manual

Paradox

Paradox ZX16D User manual

Paradox Digiplex EVO EVO192 V7.11 Operating instructions

Paradox

Paradox Digiplex EVO EVO192 V7.11 Operating instructions

Paradox ZX82 User manual

Paradox

Paradox ZX82 User manual

Paradox IMPERIAL DIGIPLEX EVO ACM24D User manual

Paradox

Paradox IMPERIAL DIGIPLEX EVO ACM24D User manual

Paradox IP150 Operating instructions

Paradox

Paradox IP150 Operating instructions

Paradox ZX8 User manual

Paradox

Paradox ZX8 User manual

Paradox PCS250G Installation guide

Paradox

Paradox PCS250G Installation guide

Paradox PCS265 User manual

Paradox

Paradox PCS265 User manual

Paradox DGP2-ZX4 User manual

Paradox

Paradox DGP2-ZX4 User manual

Paradox ZX82 User manual

Paradox

Paradox ZX82 User manual

Paradox IP150+ User manual

Paradox

Paradox IP150+ User manual

Paradox Magellan VG-RTX3 User manual

Paradox

Paradox Magellan VG-RTX3 User manual

Paradox IP150+ User manual

Paradox

Paradox IP150+ User manual

Paradox PCS265 Installation guide

Paradox

Paradox PCS265 Installation guide

Popular Control Unit manuals by other brands

Telecom Octopus F50 operating instructions

Telecom

Telecom Octopus F50 operating instructions

GEM 52 Installation, operating and maintenance instructions

GEM

GEM 52 Installation, operating and maintenance instructions

Befaco LICH user manual

Befaco

Befaco LICH user manual

GE Tetra GECLPS5-2 installation guide

GE

GE Tetra GECLPS5-2 installation guide

Parker 89-00B Installation, Service and Parts Information

Parker

Parker 89-00B Installation, Service and Parts Information

Asco 290 Series Installation and maintenance instructions

Asco

Asco 290 Series Installation and maintenance instructions

Joy-it VAO10020 manual

Joy-it

Joy-it VAO10020 manual

AGFEO AS 40 Installation instruction

AGFEO

AGFEO AS 40 Installation instruction

Azbil ACTIVAL VY51 K Series Specifications & instructions

Azbil

Azbil ACTIVAL VY51 K Series Specifications & instructions

Pickering SYSTEM 10 user manual

Pickering

Pickering SYSTEM 10 user manual

Beninca DA.24V operating instructions

Beninca

Beninca DA.24V operating instructions

GCAN GC-2018 user manual

GCAN

GCAN GC-2018 user manual

Zte RSU82 user manual

Zte

Zte RSU82 user manual

SEW-Eurodrive MOVISAFE DCS B Series manual

SEW-Eurodrive

SEW-Eurodrive MOVISAFE DCS B Series manual

AlfaRadio AlfaSpid Rotator and Controller instruction manual

AlfaRadio

AlfaRadio AlfaSpid Rotator and Controller instruction manual

minikon CND1 quick start guide

minikon

minikon CND1 quick start guide

ProFire PF3100 Series product manual

ProFire

ProFire PF3100 Series product manual

Pilz PNOZ ma1p operating instructions

Pilz

Pilz PNOZ ma1p operating instructions

manuals.online logo
manuals.online logoBrands
  • About & Mission
  • Contact us
  • Privacy Policy
  • Terms and Conditions

Copyright 2025 Manuals.Online. All Rights Reserved.