Park Tool Co. 5115 Hadley Ave. N., St. Paul, MN 55128 (USA) www.parktool.com
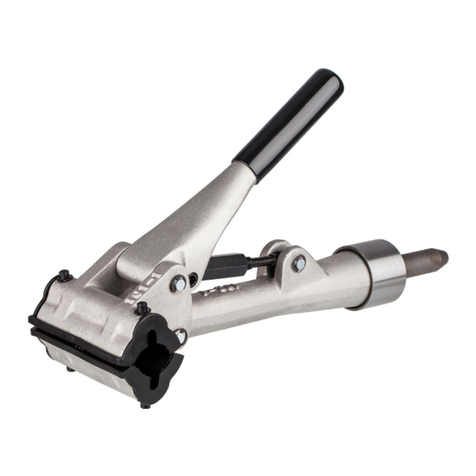
100-7X Extreme Range Clamp
• Quickly adjusts to fit round, aero, rectangular or square tubes
from 7/8” to 4”
• Fully adjustable clamping pressure
• Cam-actuated handle quickly releases bike
• Pivots 90 degrees to clamp top and bottom or left and right side
of tube
• Narrow clamping jaws
• Replaceable jaw covers (part #1259)
• Fits ParkTool PRS-2, PRS-2 OS, PRS-2 OS-1, PRS-2 OS-2, PRS-3,
PRS-3 OS, PRS-3 OS-1, PRS-3 OS-2, PRS-4, PRS-4 OS, PRS-4 OS-1,
PRS-4 OS-2, PRS-4W, PRS-4W-1, and PRS-4W-2 Repair StandS
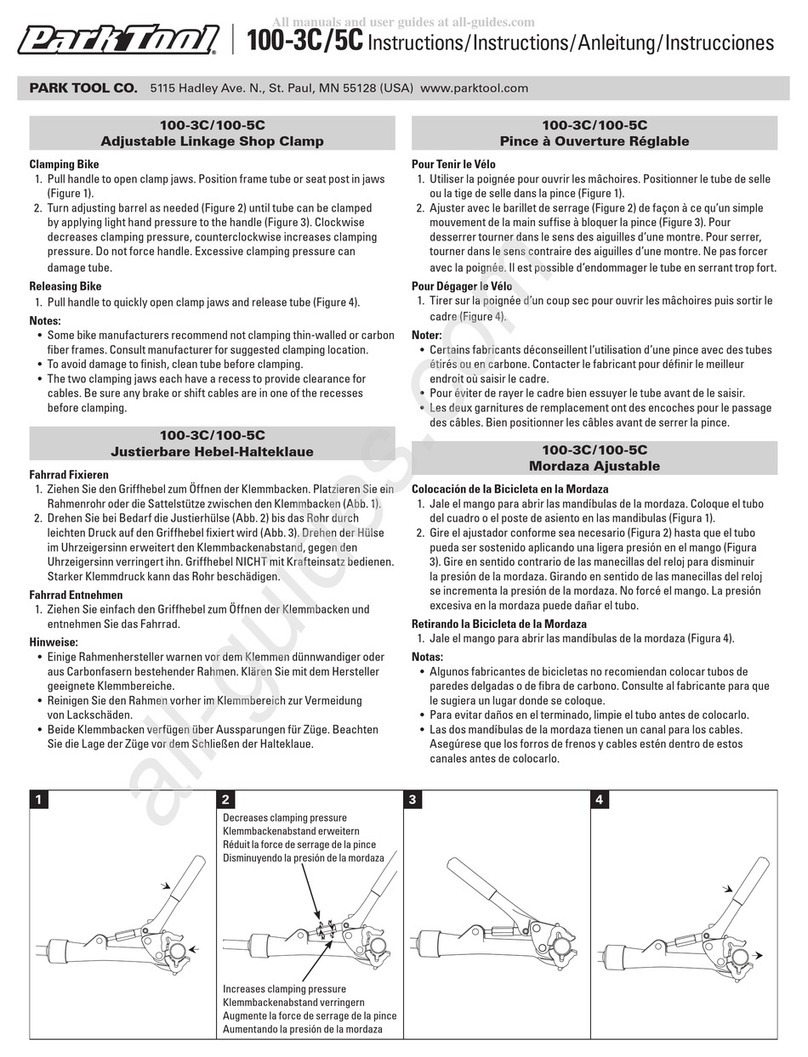
Clamping Bike
a. Turn cam handle counterclockwise until jaws accommodate
frame tube or seat post (Figure 1).
b. Turn cam handle clockwise to close jaws on tube (Figure 2).
To avoid damage to tube, do not over tighten.
Releasing Bike
a. Turn cam handle counterclockwise half to one full turn to
remove clamping pressure from tube (Figure 3).
b. Flip cam handle 180 degrees to quickly release tube from
jaws (Figure 4).
Pivoting Clamp
a. Remove bike from clamp.
b. Pull quick release lever to open position (Figure 5).
c. Pivot clamp 90 degrees and push quick release lever to lock
position (Figure 6).
Notes:
• Some bike manufacturers recommend not clamping thin-walled
or carbon fiber frames. Consult manufacturer for suggested
clamping location.
• To avoid damage to finish, clean tube before clamping.
• The two clamping jaws each have a recess to provide clearance
for cables. Be sure any brake or shift cables are in one of the
recesses before clamping.
100-7X Extrem-Halteklaue
• Für jede Größe und Form – Rund-, Aero-, Rechteck- und
Quadratrohre von 7/8“ bis 4“
• Stufenlos anpassbarer Klemmdruck
• Kurbel-Schnellverschluss zum leichten Entnehmen des Fahrrads
• Blitzschnelle Schwenkbarkeit um 90°, so dass jedes Rohr wahlweise
vertikal oder horizontal geklemmt werden kann
• Schmale Klemmbacken
• Austauschbare Ersatz-Klemmbacken (# 1259)
• Passend für ParkTool Montageständer PRS-2, PRS-2 OS, PRS-2
OS-1, PRS-2 OS-2, PRS-3, PRS-3 OS, PRS-3 OS-1, PRS-3 OS-2,
PRS-4, PRS-4 OS, PRS-4 OS-1, PRS-4 OS-2, PRS-4W, PRS-4W-1 und
PRS-4W-2
Fahrrad Fixieren
a. Drehen Sie die Kurbel gegen den Uhrzeigersinn bis die Kl-
emmbacken Rahmenrohr oder Sattelstütze aufnehmen können
(Abbildung 1).
b. Drehen Sie die Kurbel im Uhrzeigersinn bis die Klemmbacken
das Rohr umschließen (Abbildung 2). Damit das Rohr nicht
beschädigt wird, nicht zu stark fixieren.
Fahrrad Entnehmen
a. Drehen Sie die Kurbel eine halbe bis ganze Umdrehung gegen
den Uhrzeigersinn zur Reduktion des Klemmdrucks (Abbildung
3).
b. Klappen Sie die Kurbel um 180° zur schnellen Öffnung der
Klemmbacken (Abbildung 4).
Klaue Umklappen
a. Entnehmen Sie das Fahrrad aus der Halteklaue
b. Ziehen Sie den Schnellverschlusshebel zum Öffnen in die
Open“-Position (Abbildung 5).
c. Klappen Sie die Halteklaue um 90° und sichern Sie den Schnell-
verschlusshebel anschließend in der „Lock“-Position (Abbildung 6).
Hinweise:
• Einige Rahmenhersteller warnen vor dem Klemmen von dünnwan-
digen Carbonrohren. Fragen Sie bei Bedarf den Hersteller nach
geeigneten Klemmbereichen.
• Reinigen Sie zunächst den Klemmbereich des Rohres zur Vermeid-
ung von Lackschäden.
• Beide Klemmbacken verfügen über Aussparungen für Brems- und
Schaltzüge. Achten Sie auf die sichere Positionierung der Züge vor
dem Schließen der Klaue.
100-7X Pince Extrême pour Pied de Réparation
• S’ajuste rapidement pour s’adapter aux tubes ronds, profilés,
carrés ou rectangulaires de 22mm à 100mm
• Pression de serrage totalement réglable
• Le levier de serrage rapide permet de vite libérer le vélo
• Pivote sur 90° pour se fixer sur les tubes en haut, en bas, à gauche
ou encore à droite
• Mâchoire étroites pour plus d’accessibilité
• Mors de pince remplaçables (pièce #1259)
• Peut être monté sur les pieds PRS-2, PRS-2OS, PRS-2 OS-1, PRS-2
OS-2, PRS-3, PRS-3 OS, PRS-3 OS-1, PRS-3 OS-2, PRS-4, PRS-4 OS,
PRS-4 OS-1, PRS-4 OS-2, PRS-4W, PRS-4W-1 et PRS-4W-2
Serrage du Velo
a. Tourner la molette de réglage dans le sens inverse des aiguilles
d’une montre jusqu’à ce qu’on puisse y loger le tube du cadre
ou de la tige de selle (Figure 1).
b. Tourner la molette dans le sens des aiguilles d’une montre afin
de fermer la pince sur le tube (Figure 2).
Relâcher le Velo
a. Tourner la molette de serrage dans le sens inverse des aiguilles
d’une montre sur un demi-tour afin de retirer la pression sur le
tube. (Figure 3).
b. Basculer la molette de 180° afin de libérer rapidement le tube
des mâchoires. (Figure 4).
Pivoter la Pince
a. Retirer le velo de la pince.
b. Tirer le levier de serrage rapide en position ouvert (Figure 5).
c. Pivoter la pince sur 90°et pousser le levier de serrage rapide en
position fermée. (Figure 6).
Notes:
• Certains fabriquant de velo recommandent de ne pas serrer les
tubes de cadres à paroi fine ou en fibres de carbone.
• Afin d’éviter d’abimer les finitions, nettoyer le tube avant de le
serrer dans la pince.
• Les deux mâchoires de la pince possèdent un renfoncement per-
mettant de libérer les câbles. S’assurer que tous les câbles de frein
ou dérailleur sont le long de ces renfoncements avant de serré le
tube.
100-7X Mordaza de Rango Extremo
• Rápido ajuste en tubos redondos, aero, rectangulares o cuadrados
de 7/8” a 4”
• La presión en la mordaza es completamente ajustable
• Facilita el manejo de la bicicleta
• Gira 90 grados para sujetar cualquier parte del tubo superior o
inferior o cualquier lado ya sea derecho o izquierdo
• Mandíbulas estrechas
• Cubiertas de la mordaza reemplazables (parte #1259)
• Se adapta a los soportes de reparación de ParkTool PRS-2, PRS-2
OS, PRS-2 OS-2, PRS-3, PRS-3 OS, PRS-3 OS-1, PRS-3 OS-2,
PRS-4, PRS-4 OS, PRS-4 OS-1, PRS-4 OS-2, PRS-4W, PRS-4W-1 y
PRS-4W-2
Montando la Bicicleta
a. Gire la manivela en sentido contrario de las manecillas del
reloj para abrir las mandíbulas y acomodar el tubo del cuadro
o el poste de asiento (Figura 1).
b. Gire las manivela en sentido de las manecillas del reloj para
cerrar las mandíbulas en el tubo (Figura 2). Para evitar daños
no apriete demasiado el tubo.
Desmontando la Bicicleta
a. Gire la manivela en sentido contrario de las manecillas de reloj
de media a una vuelta completa para aflojar la presión del tubo
en la mordaza (Figura 3).
b. Levante la manivela del bloqueo 180 grados para retirar el
tubo de las mandíbulas (Figura 4).
Girando la Mordaza
a. Retire la bicicleta de la mordaza.
b. Jale la palanca del bloqueo a la posición de abierto (Figura 5).
c. Gire la mordaza 90 grados y empuje la palanca del bloqueo a
la posición cerrado (Figura 6).
Notas:
• Algunos fabricantes de bicicletas no recomiendan montar cuadros
con paredes delgadas o de fibra de carbono. Consulte al fabri-
cante para que le sugiera un lugar del cuadro a donde pueda
montarse.
• Para evitar daños al acabado limpie los tubos antes de montarlos.
• Las dos mandíbulas tienen canales para acomodar los cables.
Asegúrese de colocar los forros de freno y cables en estos canales
antes de montarlos.
©2018 ParkTool Co. / PARK TOOL® and the color BLUE are registered trademarks of Park Tool Co. 10/18
