manuals.online logo
Brands
  1. Home
  2. •
  3. Brands
  4. •
  5. parktool
  6. •
  7. Tools
  8. •
  9. parktool 100-5C User manual

parktool 100-5C User manual

Park Tool Co. 5115 Hadley Ave. N., St. Paul, MN 55128 (USA) www.parktool.com
100-3C and 100-5C Adjustable
Linkage Repair Stand Clamp
• Clamps tubes from 1” to 1-5/8” (25mm-41mm)
• Die-cast aluminum construction
• Replaceable jaw covers
100-3C fits PRS-2, PRS-2 OS, PRS-2 OS-1, PRS-2 OS-2,
PRS-3, PRS-3 OS, PRS-3 OS-1, PRS-3 OS-2,
PRS-4, PRS-4 OS, PRS-4 OS-1, PRS-4 OS-2,
PRS-4W, PRS-4W-1, PRS-4W-2 Repair Stands.
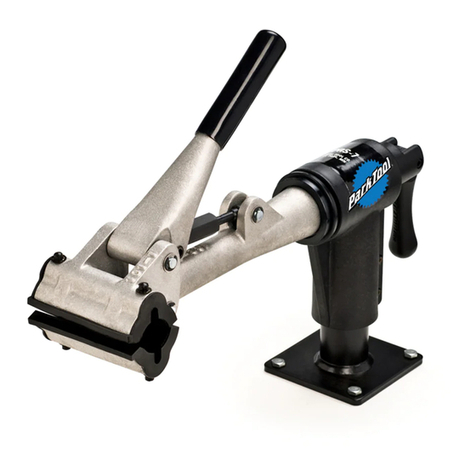
100-5C fits PCS-1, PCS-4, PCS-4-1, PCS-4-2, PRS-7,
PRS-7-1, PRS-7-2 Repair Stands with com-
posite top tubes manufactured after 2001.
Clamping Bike
1. Pull handle to open clamp jaws. Position frame tube
or seat post in jaws (Figure 1).
2.Turn adjusting barrel as needed (Figure 2) until tube
can be clamped by applying light hand pressure to
the handle (Figure 3). Clockwise decreases clamp-
ing pressure, counterclockwise increases clamping
pressure. Do not force handle. Excessive clamping
pressure can damage tube.
Releasing Bike
1. Pull handle to quickly open clamp jaws and release
tube (Figure 4).
Notes:
• Some bike manufacturers recommend not clamp-
ing thin-walled or carbon fiber frames. Consult
manufacturer for suggested clamping location or
use a Park Tool ISC-4 Internal SeatTube Clamp.
• To avoid damage to finish, clean tube before
clamping.
• The two clamping jaws each have a recess to
provide clearance for cables. Be sure any brake
or shift cables are in one of the recesses before
clamping.
100-3C und 100-5C Justierbare Hebel-Halteklaue
• Für Rohrdurchmesser von 1” bis 1-5/8” (25-41 mm)
• Solide Aluguss-Bauweise
• Austauschbare Gummi-Klemmbacken
100-3C passend für Montageständermodelle PRS-2,
PRS-2 OS, PRS-2 OS-1, PRS-2 OS-2, PRS-3, PRS-3 OS,
PRS-3 OS-1, PRS-3 OS-2, PRS-4, PRS-4 OS, PRS-4 OS-
1, PRS-4 OS-2, PRS-4W, PRS-4W-1, PRS-4W-2.
100-5C passend für nach 2001 produzierte Montag-
eständermodelle mit Kunststoffaufnahme PCS-1, PCS-
4, PCS-4-1, PCS-4-2, PRS-7, PRS-7-1, PRS-7-2.
Fahrrad Fixieren
1. Ziehen Sie den Griffhebel zum Öffnen der Klem-
mbacken. Platzieren Sie ein Rahmenrohr oder die
Sattelstütze zwischen den Klemmbacken (Abb. 1).
2. Drehen Sie bei Bedarf die Justierhülse (Abb. 2) bis
das Rohr durch leichten Druck auf den Griffhebel
fixiert wird (Abb. 3). Drehen der Hülse im Uhrzeigers-
inn erweitert den Klemmbackenabstand, gegen den
Uhrzeigersinn verringert ihn. Griffhebel NICHT mit
Krafteinsatz bedienen. Starker Klemmdruck kann das
Rohr beschädigen.
Fahrrad Entnehmen
1. Ziehen Sie einfach den Griffhebel zum Öffnen der
Klemmbacken und entnehmen Sie das Fahrrad.
Hinweise:
• Einige Rahmenhersteller warnen vor dem Klem-
men dünnwandiger oder aus Carbonfasern beste-
hender Rahmen. Klären Sie mit dem Hersteller
geeignete Klemmbereiche oder verwenden Sie im
Zweifelsfall die ISC-4 Sitzrohr-Innenklemme von
ParkTool.
• Reinigen Sie den Rahmen vorher im Klemmbere-
ich zur Vermeidung von Lackschäden.
• Beide Klemmbacken verfügen über Aussparungen
für Züge. Beachten Sie die Lage der Züge vor dem
Schließen der Halteklaue.
Park Tool Co. 5115 Hadley Ave. N., St. Paul, MN 55128 (USA) www.parktool.com
100-3C and 100-5C Adjustable
Linkage Repair Stand Clamp
100-3C et 100-5C Pince à Réglage Manuel pour
Pied de Réparation
• Se fixe sur tous tubes de 1” à 1-5/8” (25mm-41mm)
• Construction solide en aluminium coulé
• Garnitures de mâchoires remplaçables
100-3C convient aux pieds PRS-2, PRS-2 OS, PRS-2
OS-1, PRS-2 OS-2, PRS-3, PRS-3 OS, PRS-3 OS-1, PRS-
3 OS-2, PRS-4, PRS-4 OS, PRS-4 OS-1, PRS-4 OS-2,
PRS-4W, PRS-4W-1, PRS-4W-2.
100-5C convient aux pieds PCS-1, PCS-4, PCS-4-1,
PCS-4-2, PRS-7, PRS-7-1, PRS-7-2 avec tube supérieur
en composite livrés à partir de 2001.
Pour Tenir le Vélo
1. Utiliser la poignée pour ouvrir les mâchoires. Po-
sitionner le tube de selle ou la tige de selle dans la
pince (Figure 1).
2. Ajuster avec le barillet de serrage (Figure 2) de façon
à ce qu’un simple mouvement de la main suffise à
bloquer la pince (Figure 3). Pour desserrer tourner
dans le sens des aiguilles d’une montre. Pour serrer,
tourner dans le sens contraire des aiguilles d’une
montre. Ne pas forcer avec la poignée. Il est possible
d’endommager le tube en serrant trop fort.
Pour Dégager le Vélo
1. Tirer sur la poignée d’un coup sec pour ouvrir les
mâchoires puis sortir le cadre (Figure 4).
A Noter:
• Certains fabricants déconseillent l’utilisation d’une
pince avec des tubes étirés ou en carbone. Con-
tacter le fabricant pour définir le meilleur endroit
où saisir le cadre ou utiliser la fixation par inté-
rieur du tube.
• Pour éviter de rayer le cadre bien essuyer le tube
avant de le saisir.
• Les deux garnitures de remplacement ont des en-
coches pour le passage des câbles. Bien position-
ner les câbles avant de serrer la pince.
100-3C y 100-5C Mordaza Ajustable para Sopo-
rte de Reparación
• Para tubos de 1” a 1-5/8” (25mm-41mm)
• Fabricado en aluminio forjado
• Cubiertas de la mordaza reemplazables
100-3C Para Soportes de Reparación PRS-2, PRS-2 OS,
PRS-2 OS-1, PRS-2 OS-2, PRS-3, PRS-3 OS, PRS-3 OS-
1, PRS-3 OS-2, PRS-4, PRS-4 OS, PRS-4 OS-1, PRS-4
OS-2, PRS-4W, PRS-4W-1, PRS-4W-2.
100-5C Se adapta a Soportes con tubos tipo composite
posteriores a 2001 PCS-1, PCS-4, PCS-4-1, PCS-4-2,
PRS-7, PRS-7-1, PRS-7-2.
Colocación de la Bicicleta en la Mordaza
1. Jale el mango para abrir las mandíbulas de la morda-
za. Coloque el tubo del cuadro o el poste de asiento
en las mandibulas (Figura 1).
2. Gire el ajustador conforme sea necesario (Figura 2)
hasta que el tubo pueda ser sostenido aplicando una
ligera presión en el mango (Figura 3). Gire en sentido
contrario de las manecillas del reloj para disminuir
la presión de la mordaza. Girando en sentido de las
manecillas del reloj se incrementa la presión de la
mordaza. No forcé el mango. La presión excesiva en
la mordaza puede dañar el tubo.
Retirando la Bicicleta de la Mordaza
1. Jale el mango para abrir las mandíbulas de
la mordaza (Figura 4).
Notas:
• Algunos fabricantes de bicicletas no recomiendan
colocar tubos de paredes delgadas o de fibra de
carbono. Consulte al fabricante para que le sugi-
era un lugar donde se coloque o utilice un ISC-4
adaptador al tubo de asiento de ParkTool.
• Para evitar daños en el terminado, limpie el tubo
antes de colocarlo.
• Las dos mandíbulas de la mordaza tienen un canal
para los cables. Asegúrese que los forros de fre-
nos y cables estén dentro de estos canales antes
de colocarlo.
Park Tool Co. 5115 Hadley Ave. N., St. Paul, MN 55128 (USA) www.parktool.com
100-3C and 100-5C Adjustable
Linkage Repair Stand Clamp
Figure-1 Figure-2
Figure-3 Figure-4
Decreases clamping pressure
Klemmbackenabstand erweitern
Réduit la force de serrage de la pince
Disminuyendo la presión de la mordaza
Increases clamping pressure
Klemmbackenabstand verringern
Augmente la force de serrage de la pince
Aumentando la presión de la mordaza
Park Tool Co. 5115 Hadley Ave. N., St. Paul, MN 55128 (USA) www.parktool.com
100-3C and 100-5C Adjustable
Linkage Repair Stand Clamp
© 2014 Park Tool Co. / PARK TOOL® and the color BLUE are registered trademarks of Park Tool Co.
Part No. Description Qty.
138 Handle Grip 1
103S Handle 1
107S-2 Pin with Washer and Circlip 2
101-3 Moveable Jaw 1
468B Jaw Cover Set (Includes Circlips) 1
102-3 Rotating Shaft (100-3C clamp only) 1
102-5 Rotating Shaft (100-5C clamp only) 1
Part No. Description Qty.
108S-2 Pin with Washers and Circlip 1
117S-1 Eyebolt 1
118S Adjusting Barrel 1
121S Adjusting Barrel Pivot 1
136 Nut 1/4” - 28 1
122S
Linkage Assembly, Includes Items 8 through 11
1
116S Cap Screw 2
1
2
3
4
5
6
12
1
11
10
9
8
7
2
3
4
5
6
3
7
7
8
9
10
11
12
12
3
3

This manual suits for next models

2

Other parktool Tools manuals

parktool HHP-3 User manual

parktool

parktool HHP-3 User manual

parktool CRS-15.2 User manual

parktool

parktool CRS-15.2 User manual

parktool PP-1.2 User manual

parktool

parktool PP-1.2 User manual

parktool PCS-12 User manual

parktool

parktool PCS-12 User manual

parktool CT-4 User manual

parktool

parktool CT-4 User manual

parktool CRP-1 User manual

parktool

parktool CRP-1 User manual

parktool DT-4.2 User manual

parktool

parktool DT-4.2 User manual

parktool 1554-1 User manual

parktool

parktool 1554-1 User manual

parktool BTS-1 User manual

parktool

parktool BTS-1 User manual

parktool DAG-3 User manual

parktool

parktool DAG-3 User manual

parktool 100-3C User manual

parktool

parktool 100-3C User manual

parktool DT-1.2 User manual

parktool

parktool DT-1.2 User manual

parktool WH-1 User manual

parktool

parktool WH-1 User manual

parktool DT-1 User manual

parktool

parktool DT-1 User manual

parktool BBT-90.3 User manual

parktool

parktool BBT-90.3 User manual

parktool BBT-9 User manual

parktool

parktool BBT-9 User manual

parktool CRC-15 User manual

parktool

parktool CRC-15 User manual

parktool CT-7 User manual

parktool

parktool CT-7 User manual

parktool CRP-2 User manual

parktool

parktool CRP-2 User manual

parktool CT-4.3 User manual

parktool

parktool CT-4.3 User manual

parktool DT-4 User manual

parktool

parktool DT-4 User manual

parktool CT-5 User manual

parktool

parktool CT-5 User manual

parktool CBP-8 User manual

parktool

parktool CBP-8 User manual

parktool 791 User manual

parktool

parktool 791 User manual

Popular Tools manuals by other brands

Neilsen CT1535 Original instructions

Neilsen

Neilsen CT1535 Original instructions

Harbor Freight Tools HAULMASTER 59665 Owner's manual & safety instructions

Harbor Freight Tools

Harbor Freight Tools HAULMASTER 59665 Owner's manual & safety instructions

Utility Solutions Jack Jumper USJJ-006 manual

Utility Solutions

Utility Solutions Jack Jumper USJJ-006 manual

BGS technic 67305 instruction manual

BGS technic

BGS technic 67305 instruction manual

Fahrenheit 28021 user manual

Fahrenheit

Fahrenheit 28021 user manual

ReelCraft SW7000 Series operating instructions

ReelCraft

ReelCraft SW7000 Series operating instructions

Topeak TORQ STICK quick start guide

Topeak

Topeak TORQ STICK quick start guide

Milwaukee M12 FUEL FPXP Operator's manual

Milwaukee

Milwaukee M12 FUEL FPXP Operator's manual

FAR FHU 05 Original instructions

FAR

FAR FHU 05 Original instructions

ujk technology Pocket Hole Jig operating instructions

ujk technology

ujk technology Pocket Hole Jig operating instructions

Alice's Garden NW-H7115B quick start guide

Alice's Garden

Alice's Garden NW-H7115B quick start guide

Teryair ENS100V Operation and maintenance guide

Teryair

Teryair ENS100V Operation and maintenance guide

PennEngineering Atlas 801 operating instructions

PennEngineering

PennEngineering Atlas 801 operating instructions

Hilti NURON SJT 6-22 manual

Hilti

Hilti NURON SJT 6-22 manual

arf Thunder Streak instruction manual

arf

arf Thunder Streak instruction manual

Harbor Freight Tools 47926 Usage and Safety Warnings

Harbor Freight Tools

Harbor Freight Tools 47926 Usage and Safety Warnings

PROFESSIONAL HYDRAULIC JACKS 61204 Operator's manual

PROFESSIONAL HYDRAULIC JACKS

PROFESSIONAL HYDRAULIC JACKS 61204 Operator's manual

BOMBARDIER Challenger 604 2004 Pilot training guide

BOMBARDIER

BOMBARDIER Challenger 604 2004 Pilot training guide

manuals.online logo
manuals.online logoBrands
  • About & Mission
  • Contact us
  • Privacy Policy
  • Terms and Conditions

Copyright 2025 Manuals.Online. All Rights Reserved.