5115 Hadley Ave. N., St. Paul, MN 55128 (USA) www.parktool.com
PARK TOOL CO.
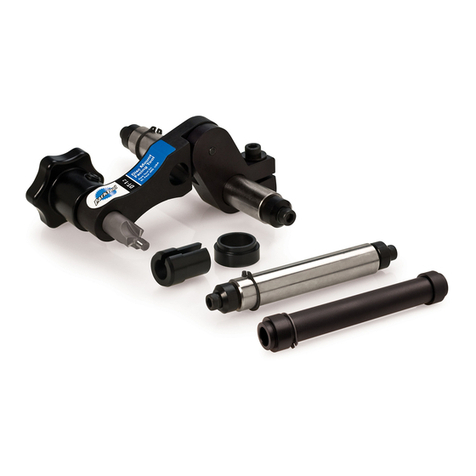
CRS-15.2 Crown Race Setting System
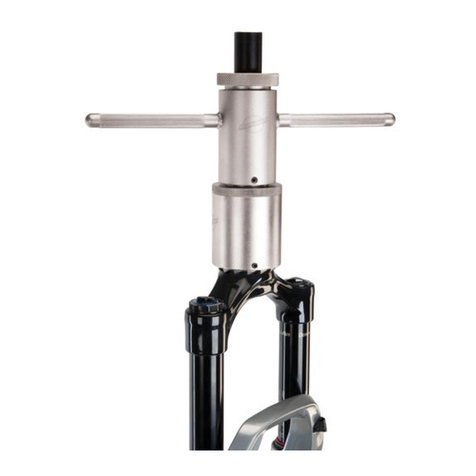
The CRS-15.2 uses specially-sized aluminum setting rings and a heavy duty
driver tube to safely, quickly and precisely install crown races used in 1-1/4”
and 1.5” headset systems.
Instructions
1. Measure outside diameter of crown race seat on fork and inside diameter
of crown race. A crown race that is .1mm to .2mm smaller than the crown
race seat will create a proper press fit. If difference is greater, crown
race seat must be milled to size. If crown race slips on crown race seat
easily, an appropriate Loctite®retaining compound should be used to
ensure a secure fit. New headset parts will be needed if crown race is
larger than crown race seat.
2. Place crown race on crown race seat of fork.
3. Select appropriate aluminum ring and place on crown race (#821 for
1-1/4” and #827 for 1.5”).
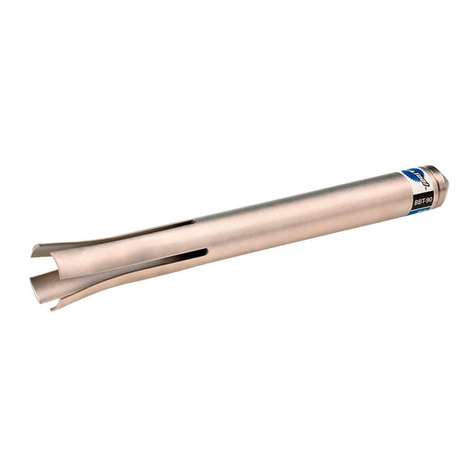
4. Place driver tube (#829A) over aluminum ring. If your steerer tube is
longer than 335mm, use part #828A and #829-EXT for added reach. Drive
with hammer until crown race is properly seated.
CRS-15.2 Gabelkonus Aufschlaggerät
Das CRS-15.2 besteht aus einem spezifisch dimensionierten Aluminum
Aufsatzring-Set und einem besonders widerstandfähigen Aufschlagrohr um
sicher, schnell und präzise den Gabelkonus für 1-1/4” und 1,5“ Steuersätze
zu installieren.
Nutzungsanleitung
1. Messen Sie den Außendurchmesser der Konussitzes am Gabelschaft,
sowie den Innendurchmesser des Gabelkonus. Ein Gabelkonus, der
ca. 0,1-0,2mm geringer dimensioniert ist als der Konussitz stellt eine
zuverlässige Presspassung sicher. Sollte der Unterschied größer sein,
so muss der Konussitz entsprechend abgedreht werden – dies gilt nur
für Gabeln mit einem Konussitz aus Metall. Lässt sich der Konus zu
einfach auf den Konussitz schieben, sollten geeignete Sicherungsmittel
z.B. von Loctite®genutzt werden, um einen sicheren Sitz zu
gewährleisten. Ein Gabelkonus, dessen Innendurchmesser größer als der
Außendurchmesser des Konussitzes ist, lässt sich nicht montieren.
2. Stecken Sie den Gabelkonus auf den Gabelschaft auf und schieben Sie
ihn soweit möglich Richtung Konussitz.
3. Platzieren Sie den geeigneten Aufsatzring (#821 für 1-1/4“ und #827 für
1,5“) auf dem Gabelkonus.
4. Den Aluminium Aufsatzring (# 829A) auf das Treiberrohr setzen. Wenn Ihr
Gabelrohr länger als 335mm ist, verwenden die Teile # 828A und #829-EXT
für zusätzliche Verlängerung verwenden. Mit dosierten Hammerschlägen
den Lagerkonusring aufschlagen bis er richtig plan aufsitzt.
CRS-15.2 Outil pour Monter Cone de Fourche
Le CRS-15.2 utilise des inserts spécifiques ainsi qu’un tube de placement
robuste pour monter avec précision et de façon sûre les cônes de fourche
pour pivots de 1-1/4” et 1.5”.
Mode d’Emploi
1. Mesurer le diamètre externe et interne du cône de fourche. Un cône qui
mesure de 0.1mm à 0.2 mm de moins que son emplacement sur le pivot aura
une bonne mise en place. Si la différence est plus grande il faudra surfacer.
Si le cône s’enclenche assez facilement il faut utiliser du Loctite®ou
équivalent pour sécuriser l’installation. Il faudra utiliser de nouvelles pièces
pour le jeu de direction si le cône est plus grand que l’emplacement du pivot.
2. Placer le cône sur son emplacement sur le pivot.
3. Sélectionner le bon insert et le placer sur le cône (#821 for 1-1/4” et #827
pour 1.5”).
4. Placer le tube d’emmanchement (#829A) sur la bague en aluminium. Si
votre tube de fourche mesure plus de 335mm, utiliser la pièce #828A et
le #829-EXT pour augmenter la longueur. Enfoncer à l’aide d’un marteau
jusqu’à ce que le cône soit proprement enfoncé.
CRS-15.2 Barra con Guía para Montar Cono Inferior
El CRS-15.2 utiliza un juego de anillos en aluminio de tamaño especial y una
barra, para una segura, rápida y precisa instalación del cono inferior del
sistema de tazas de dirección de 1-1/4” y 1.5”.
Instrucciones
1. Mida el diámetro exterior de la base del tubo de la tijera y el diámetro
interior del cono de la taza de dirección. Si la base del tubo de la tijera es
.1mm o .2mm mas pequeño que el cono inferior de la taza de dirección,
se creara una apropiada presión al instalar el cono. Si la diferencia es
mayor, necesitara rebajarla. Si el cono asienta sobre la base del tubo de
la tijera deberá de usar un compuesto de relleno como el Loctite®para
asegurar el cono inferior de la taza de dirección. En caso de que el cono
de la taza de dirección sea mas grande que el tubo de la tijera necesitara
adquirir un nuevo juego de taza de direccion.
2. Coloque el cono inferior de la taza de dirección en la base del tubo de tijera.
3. Seleccione el anillo de aluminio adecuado y colóquelo en el tubo de la
tijera (#821 para 1-1/4” y el #827 para 1.5”).
4. Coloque la barra (# 829A) sobre el anillo de aluminio. Si su tubo de
dirección es mayor a 335 mm, utilice la parte # 828A y #829-EXT para
aumentar el alcance. Utilice el martillo hasta que la corona esté bien
asentada.
CRS-15.2 Instructions/Instructions/Anleitung/Instrucciones
