manuals.online logo
Brands
  1. Home
  2. •
  3. Brands
  4. •
  5. Parrot
  6. •
  7. Automobile Accessories
  8. •
  9. Parrot CK3100 Series User manual

Parrot CK3100 Series User manual

This sheet is designed to help you with the installation of a Parrot product and is provided purely for information purposes. The installer is
solely responsible for any installation carried out in accordance with the instructions in this sheet and for the quality of the installation. All
rights reserved © Copyright 2011 PARROT SA, a French Société Anonyme (Public Limited Company) Registered on the Paris Trade and
Companies Register under No. 394 149 496 Reproduction not permitted without authorisation from Parrot SA. Images not contractually
binding.
CLASS-C
CLASS-C (W203)
Installation manual:
Parrot MKi + Parrot
CK3100 range
The brand name MERCEDES-BENZ CLASS-C and the MERCEDES logo are the property of MERCEDES.
This document is only valid for the vehicle model CLASS-C® year 2000 to 2007, excluding all other models in the same range and excluding later
modifications made to the vehicle by the manufacturer.
The Parrot brand name and logos are the exclusive property of Parrot SA.
This sheet is designed to help you with the installation of a Parrot product and is provided purely for information purposes. The installer is
solely responsible for any installation carried out in accordance with the instructions in this sheet and for the quality of the installation. All
rights reserved © Copyright 2011 PARROT SA, a French Société Anonyme (Public Limited Company) Registered on the Paris Trade and
Companies Register under No. 394 149 496 Reproduction not permitted without authorisation from Parrot SA. Images not contractually
binding.
CLASS-C
Disassembly
40min
Kit installation
45min
Refitting
40min
Testing
15min
Total
2h10min
NO
ACC wire
YES* / NO
ISO
YES (with the reserve
of steering wheel
coding)
UNIKA
FRONT SPEAKER
TEL mode
ALL
MUSIC mode
Fitting time (estimated) / Main features
Tools
-TORX screwdriver
- Cutting pliers
- Crimping pliers
- Multimeter or pilot lamp
- Hose clamp
- Electrical tape
- Round male terminal
- Jumper
- Semi-rigid guide
Plastic trim removal tools
FACOM / BERNER
MERCEDES factory tool:
140 589 02 33 00
This sheet is designed to help you with the installation of a Parrot product and is provided purely for information purposes. The installer is
solely responsible for any installation carried out in accordance with the instructions in this sheet and for the quality of the installation. All
rights reserved © Copyright 2011 PARROT SA, a French Société Anonyme (Public Limited Company) Registered on the Paris Trade and
Companies Register under No. 394 149 496 Reproduction not permitted without authorisation from Parrot SA. Images not contractually
binding.
CLASS-C
Updating
Accessories required
Kram ref.
Dealer ref.
CK range
86111
PC000033AA
MKi range
84099
PC000033AA
Photos not contractually binding
CK range MKi range
ATTENTION: For vehicles equipped with the AUDIO 5 radio, the connection is by ISO. For
vehicles equipped with the AUDIO 20 or AUDIO 50 radio, the connection is by FAKRA and
requires an adaptor.
Comments - Remarks
To get the most out of your hands-free kit we recommend that you update your
software regularly. The update procedure can be found at
www.parrot.com/usa/support/downloads
“Quick Connect harness references available at
http://certified.parrot.com/faisceaux_US.php"
This sheet is designed to help you with the installation of a Parrot product and is provided purely for information purposes. The installer is
solely responsible for any installation carried out in accordance with the instructions in this sheet and for the quality of the installation. All
rights reserved © Copyright 2011 PARROT SA, a French Société Anonyme (Public Limited Company) Registered on the Paris Trade and
Companies Register under No. 394 149 496 Reproduction not permitted without authorisation from Parrot SA. Images not contractually
binding.
CLASS-C
Disassembly
This sheet is designed to help you with the installation of a Parrot product and is provided purely for information purposes. The installer is
solely responsible for any installation carried out in accordance with the instructions in this sheet and for the quality of the installation. All
rights reserved © Copyright 2011 PARROT SA, a French Société Anonyme (Public Limited Company) Registered on the Paris Trade and
Companies Register under No. 394 149 496 Reproduction not permitted without authorisation from Parrot SA. Images not contractually
binding.
CLASS-C
Disassembly 1 / 3
Using the plastic trim tools,
unclip the gear lever cover and
remove the bellows.
Using the plastic trim tools,
unclip the ashtray and cigarette
lighter assembly, then place it to
the side being careful not to
disconnect it.
Under the air conditioning unit. Remove screws 1 and 2.
1
3
2
4
5 6
Using the plastic trim tools, unclip the air
conditioning cover taking care not to
disconnect it.
Make a quarter turn upwards on the
ventilation slots and remove screws
3 and 4 on the bottom.
1 2
3 4
This sheet is designed to help you with the installation of a Parrot product and is provided purely for information purposes. The installer is
solely responsible for any installation carried out in accordance with the instructions in this sheet and for the quality of the installation. All
rights reserved © Copyright 2011 PARROT SA, a French Société Anonyme (Public Limited Company) Registered on the Paris Trade and
Companies Register under No. 394 149 496 Reproduction not permitted without authorisation from Parrot SA. Images not contractually
binding.
CLASS-C
Disassembly 2 / 3
7 8
Make a quarter turn downwards on
the ventilation slots and insert the
MERCEDES removal tool. Then make a
quarter turn to unclip it and pull the air
vents.
Remove screws 5 and 6 above
the WARNING cover. Then
remove it without disconnecting
it.
Unscrew screws 7 and 8 located
above the radio.
Unscrew screws 9 and 10 located under
the radio unit, then pull and disconnect
the connector and antennas.
9 10
11 12
Remove the rubber cover in the
centre console.
Unclip the coin tray by rotating to the left.
5
6
7 8 9 10
This sheet is designed to help you with the installation of a Parrot product and is provided purely for information purposes. The installer is
solely responsible for any installation carried out in accordance with the instructions in this sheet and for the quality of the installation. All
rights reserved © Copyright 2011 PARROT SA, a French Société Anonyme (Public Limited Company) Registered on the Paris Trade and
Companies Register under No. 394 149 496 Reproduction not permitted without authorisation from Parrot SA. Images not contractually
binding.
CLASS-C
Disassembly 3 / 3
13 14
Unclip the joint. Unscrew screws 11, 12 and 13
located under the glove box.
Unfasten and half open the
cover.
Unclip the cabin light and allow
it to hang down without
disconnecting it.
15 16
17 18
Using the plastic trim tools,
unclip the passenger side of the
dashboard.
Remove the passenger door seal.
11 12 13
This sheet is designed to help you with the installation of a Parrot product and is provided purely for information purposes. The installer is
solely responsible for any installation carried out in accordance with the instructions in this sheet and for the quality of the installation. All
rights reserved © Copyright 2011 PARROT SA, a French Société Anonyme (Public Limited Company) Registered on the Paris Trade and
Companies Register under No. 394 149 496 Reproduction not permitted without authorisation from Parrot SA. Images not contractually
binding.
CLASS-C
Finding an ACC wire
Using a guide, pass an electric
wire from the cigarette lighter to
the underneath of the air
conditioning control housing.
Make a pigtail connection (or use
the jumper) to the
BLACK/YELLOW wire.
Attach the electric wire and
insulate with electrical tape. (With
the Multimeter, check that the
+12V is properly controlled by the
key.)
1 2
10
9
For the Audio 5 car radio (also
applies to PC000033AA), swap
the fuses on the kit's original
connector. (i.e. The red and
orange wires.) Cut the red wire
between the fuse holder and the
ISO connector, then connect to
the ACC wire.
3 4
For adaptor 84099, (Mki range
only) connect the ACC wire with
a male round terminal to the
blue wire at the front of the fuse
holder.
OR
This sheet is designed to help you with the installation of a Parrot product and is provided purely for information purposes. The installer is
solely responsible for any installation carried out in accordance with the instructions in this sheet and for the quality of the installation. All
rights reserved © Copyright 2011 PARROT SA, a French Société Anonyme (Public Limited Company) Registered on the Paris Trade and
Companies Register under No. 394 149 496 Reproduction not permitted without authorisation from Parrot SA. Images not contractually
binding.
CLASS-C
Microphone passage
Feed the cable under the rear
view mirror arm towards the
cabin light.
Glue the bracket (supplied) to the
rear view mirror arm, after
carefully cleaning the surface, then
refit the cabin light.
Using the plastic trim tools, run
the cable along the windscreen.
Slide the cable along the passenger
door pillar while replacing the door
seal.
1
3
2
4
5
Pass the cable through the
passenger side of the dashboard.
6
Pass the cable under the glove
box towards the radio housing.
This sheet is designed to help you with the installation of a Parrot product and is provided purely for information purposes. The installer is
solely responsible for any installation carried out in accordance with the instructions in this sheet and for the quality of the installation. All
rights reserved © Copyright 2011 PARROT SA, a French Société Anonyme (Public Limited Company) Registered on the Paris Trade and
Companies Register under No. 394 149 496 Reproduction not permitted without authorisation from Parrot SA. Images not contractually
binding.
CLASS-C
Feeding the accessory cable
Using a drill, make a hole with
diameter 22 and feed the cable
(supplied) through.
Refit the insert.
1 2
Clip the coin tray back on. Replace the rubber cover.
3 4
5
Be careful to feed through enough
of the cable.
This sheet is designed to help you with the installation of a Parrot product and is provided purely for information purposes. The installer is
solely responsible for any installation carried out in accordance with the instructions in this sheet and for the quality of the installation. All
rights reserved © Copyright 2011 PARROT SA, a French Société Anonyme (Public Limited Company) Registered on the Paris Trade and
Companies Register under No. 394 149 496 Reproduction not permitted without authorisation from Parrot SA. Images not contractually
binding.
CLASS-C
Fitting the hands-free system 1 / 3
Connect the factory connector, invert the fuses
(i.e. the RED and ORANGE wires) then cut the
RED wire between the fuse holder and the ISO
connector and connect the ACC wire above.
1
For cars with the AUDIO 20 and 50: Use adapter 86111/PC000033AA and the factory
connector for CK (same mounting as AUDIO 5) or 84099/PC000033AA for MKI. (For
the PC000033AA add the factory connector and the same mounting as the AUDIO 5.)
For the adapter 84099, remove the terminals
from the blue wire in front of the fuse holder.
Then mount a round female terminal on the
ACC wire and connect it to the blue wire.
2
This sheet is designed to help you with the installation of a Parrot product and is provided purely for information purposes. The installer is
solely responsible for any installation carried out in accordance with the instructions in this sheet and for the quality of the installation. All
rights reserved © Copyright 2011 PARROT SA, a French Société Anonyme (Public Limited Company) Registered on the Paris Trade and
Companies Register under No. 394 149 496 Reproduction not permitted without authorisation from Parrot SA. Images not contractually
binding.
CLASS-C
Fitting the hands-free system 2 / 3
Direct adaptor cable
3 Connect all the cables on the blue box as shown on the diagram below, then test
before reassembling.
Then slide the assembly behind the air conditioning control unit.
This sheet is designed to help you with the installation of a Parrot product and is provided purely for information purposes. The installer is
solely responsible for any installation carried out in accordance with the instructions in this sheet and for the quality of the installation. All
rights reserved © Copyright 2011 PARROT SA, a French Société Anonyme (Public Limited Company) Registered on the Paris Trade and
Companies Register under No. 394 149 496 Reproduction not permitted without authorisation from Parrot SA. Images not contractually
binding.
CLASS-C
Fitting the hands-free system 3 / 3
Feed the cable through the side of
the vents situated near the
bottom screw.
Glue the support (supplied) after
cleaning, to the buttons on the
WARNING panel.
Pass the cable towards the air
conditioning housing.
4
6
5
This sheet is designed to help you with the installation of a Parrot product and is provided purely for information purposes. The installer is
solely responsible for any installation carried out in accordance with the instructions in this sheet and for the quality of the installation. All
rights reserved © Copyright 2011 PARROT SA, a French Société Anonyme (Public Limited Company) Registered on the Paris Trade and
Companies Register under No. 394 149 496 Reproduction not permitted without authorisation from Parrot SA. Images not contractually
binding.
CLASS-C
Testing
Before refitting the system, switch the kit on using the
ignition (or by starting the car). By pushing the central knob
of the remote control, check:
1 - That the menu is displayed on the screen (language or
iPod.)
2 - That the system can be muted. (Click in the blue box.)
3 - That there is no sound coming from the speakers.
4 - That the sound from the voice menu is coming out of the
front speakers.
5 - Then turn off the ignition, check that the kit switches off
and that the "goodbye" message appears on the screen. (if
this fails, reverse the fuses on the kit's wiring harness.)
6 - Pair a telephone with the kit to make a call. (Check that
both the microphone and the kit are working.)
This sheet is designed to help you with the installation of a Parrot product and is provided purely for information purposes. The installer is
solely responsible for any installation carried out in accordance with the instructions in this sheet and for the quality of the installation. All
rights reserved © Copyright 2011 PARROT SA, a French Société Anonyme (Public Limited Company) Registered on the Paris Trade and
Companies Register under No. 394 149 496 Reproduction not permitted without authorisation from Parrot SA. Images not contractually
binding.
CLASS-C
Reassembly
Refit the system using the following procedure:
1 - Reconnect the radio (and the antennas) and slide it into its housing.
2 - Refit the 4 screws (7, 8, 9 and 10) for the car stereo .
3 - Clip the WARNING panel back on and replace screws 5 and 6.
4 - Clip the central air vent back on (be careful with the screen cable), make a
quarter turn and refit screws 3 and 4.
5 - Clip the air conditioning cover back on and replace screws 1 and 2.
6 - Re-clip the ashtray.
7 - Re-clip the central cover.
8 - Replace the 3 screws (11, 12 and 13) located under the glove box.
9 - Refit the right dashboard panel.
10 –Re-test to check that the system is working correctly.

Other manuals for CK3100 Series

9

Other Parrot Automobile Accessories manuals
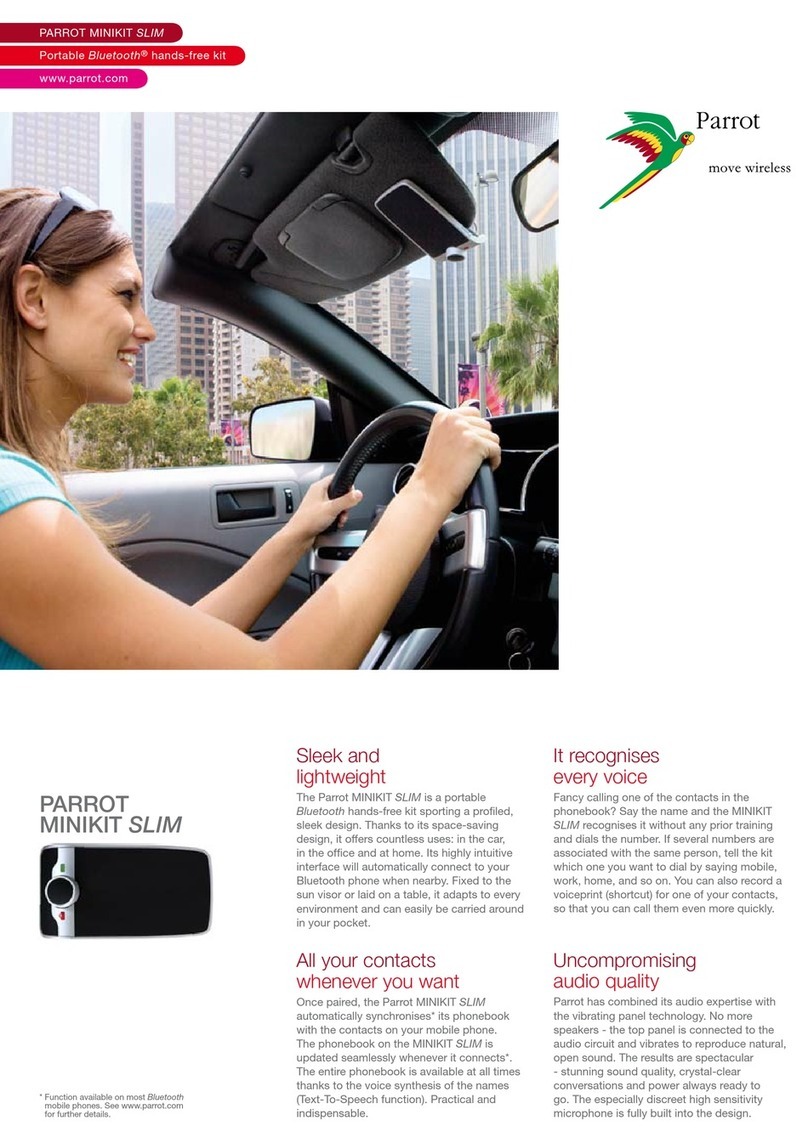
Parrot 3100 User manual

Parrot

Parrot 3100 User manual

Parrot SAMOS3 User manual

Parrot

Parrot SAMOS3 User manual

Parrot CK3300 Operating and safety instructions

Parrot

Parrot CK3300 Operating and safety instructions

Parrot CK3100 Series User manual

Parrot

Parrot CK3100 Series User manual

Parrot MINIKIT SLIM User manual

Parrot

Parrot MINIKIT SLIM User manual
Parrot MINIKIT SLIM User manual

Parrot

Parrot MINIKIT SLIM User manual

Parrot CK3100 LCD User manual

Parrot

Parrot CK3100 LCD User manual

Parrot CK3300 User manual

Parrot

Parrot CK3300 User manual

Parrot UNIKA User manual

Parrot

Parrot UNIKA User manual

Parrot CK3100 Series User manual

Parrot

Parrot CK3100 Series User manual

Parrot MINIKIT NEO User manual

Parrot

Parrot MINIKIT NEO User manual

Parrot MINIKIT Smart User manual

Parrot

Parrot MINIKIT Smart User manual

Parrot SAT-3500 User manual

Parrot

Parrot SAT-3500 User manual

Parrot MKi9000 User manual

Parrot

Parrot MKi9000 User manual

Parrot Minikit+ User manual

Parrot

Parrot Minikit+ User manual

Parrot MINIKIT SLIM User manual

Parrot

Parrot MINIKIT SLIM User manual

Parrot CK3300 Manual

Parrot

Parrot CK3300 Manual

Parrot CK3100 LCD User manual

Parrot

Parrot CK3100 LCD User manual

Parrot CK3100 LCD User manual

Parrot

Parrot CK3100 LCD User manual

Parrot MKi9100 User manual

Parrot

Parrot MKi9100 User manual

Parrot CK 3000 Evolution Quick start guide

Parrot

Parrot CK 3000 Evolution Quick start guide

Parrot Parrot MKi + ParrotCK3100 range LOGAN User manual

Parrot

Parrot Parrot MKi + ParrotCK3100 range LOGAN User manual

Parrot CK3100 Series User manual

Parrot

Parrot CK3100 Series User manual

Parrot Minikit Neo 2 HD User manual

Parrot

Parrot Minikit Neo 2 HD User manual
Popular Automobile Accessories manuals by other brands

Badland ZXR9000 owner's manual

Badland

Badland ZXR9000 owner's manual

Simplicity 318 installation instructions

Simplicity

Simplicity 318 installation instructions

Federal Signal Corporation SpectraLux SIFZJ FSJoin Installation maintenance and service manual

Federal Signal Corporation

Federal Signal Corporation SpectraLux SIFZJ FSJoin Installation maintenance and service manual

Whispbar K073W Fitting instructions

Whispbar

Whispbar K073W Fitting instructions

Grizzly H8098 user manual

Grizzly

Grizzly H8098 user manual

Ram Mounts RAM AQUA BOX PRO 10 Series quick start guide

Ram Mounts

Ram Mounts RAM AQUA BOX PRO 10 Series quick start guide

CHAOS nGauge Powerstroke installation guide

CHAOS

CHAOS nGauge Powerstroke installation guide

Soaiy S-62 quick start guide

Soaiy

Soaiy S-62 quick start guide

Blueant S1 user manual

Blueant

Blueant S1 user manual

AFX MOTORSPORTS CAN AM MAVERICK 2 SEATER installation manual

AFX MOTORSPORTS

AFX MOTORSPORTS CAN AM MAVERICK 2 SEATER installation manual

Steinhof S-016 FITTING AND OPERATION MANUAL

Steinhof

Steinhof S-016 FITTING AND OPERATION MANUAL

Audiovox AA-9093 installation guide

Audiovox

Audiovox AA-9093 installation guide

Fonexion fX1000 instruction manual

Fonexion

Fonexion fX1000 instruction manual

BulletProofDiesel 90201188 installation manual

BulletProofDiesel

BulletProofDiesel 90201188 installation manual

curt Spectrum 51170 installation manual

curt

curt Spectrum 51170 installation manual

Yakima DoubleHaul manual

Yakima

Yakima DoubleHaul manual

Whelen Engineering Company 64 Series installation guide

Whelen Engineering Company

Whelen Engineering Company 64 Series installation guide

DVB SRJL-09 installation manual

DVB

DVB SRJL-09 installation manual

manuals.online logo
manuals.online logoBrands
  • About & Mission
  • Contact us
  • Privacy Policy
  • Terms and Conditions

Copyright 2025 Manuals.Online. All Rights Reserved.