manuals.online logo
Brands
  1. Home
  2. •
  3. Brands
  4. •
  5. Parrot
  6. •
  7. Drone
  8. •
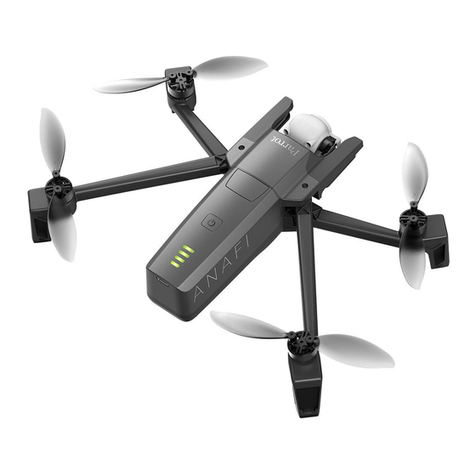
  9. Parrot ANAFI User manual

Parrot ANAFI User manual

Other manuals for ANAFI

5

Other Parrot Drone manuals

Parrot ANAFI USA GOV User manual

Parrot

Parrot ANAFI USA GOV User manual

Parrot wellbotts User manual

Parrot

Parrot wellbotts User manual

Parrot ANAFI Ai User manual

Parrot

Parrot ANAFI Ai User manual

Parrot bebop 2 User manual

Parrot

Parrot bebop 2 User manual

Parrot Bebop User manual

Parrot

Parrot Bebop User manual

Parrot ANAFI USA User manual

Parrot

Parrot ANAFI USA User manual

Parrot ANAFI Ai User manual

Parrot

Parrot ANAFI Ai User manual

Parrot ANAFI User manual

Parrot

Parrot ANAFI User manual

Parrot bebop 2 User manual

Parrot

Parrot bebop 2 User manual

Parrot BUZZ User manual

Parrot

Parrot BUZZ User manual

Parrot AR User manual

Parrot

Parrot AR User manual

Parrot NEWZ User manual

Parrot

Parrot NEWZ User manual

Parrot Disco User manual

Parrot

Parrot Disco User manual
Parrot minidrones NEWZ User manual

Parrot

Parrot minidrones NEWZ User manual

Parrot MusicKit 6000 User manual

Parrot

Parrot MusicKit 6000 User manual

Parrot BEBOP 2 FPV Pack User manual

Parrot

Parrot BEBOP 2 FPV Pack User manual

Parrot TRAVIS User manual

Parrot

Parrot TRAVIS User manual

Parrot ANAFI Thermal User manual

Parrot

Parrot ANAFI Thermal User manual

Parrot AR.Drone User manual

Parrot

Parrot AR.Drone User manual

Parrot Disco FPV User manual

Parrot

Parrot Disco FPV User manual

Parrot bebop 2 User manual

Parrot

Parrot bebop 2 User manual

Parrot BLAZE User manual

Parrot

Parrot BLAZE User manual

Parrot Bebop-Pro Thermal User manual

Parrot

Parrot Bebop-Pro Thermal User manual

Parrot Bluegrass Fields User manual

Parrot

Parrot Bluegrass Fields User manual

Popular Drone manuals by other brands

Foxtech GAIA 160MP user manual

Foxtech

Foxtech GAIA 160MP user manual

Ryze Tello quick start guide

Ryze

Ryze Tello quick start guide

PowerVision PowerRay user manual

PowerVision

PowerVision PowerRay user manual

Force1 rogue F72 user manual

Force1

Force1 rogue F72 user manual

Zerotech DOBBY user manual

Zerotech

Zerotech DOBBY user manual

Walkera ZHUN quick start guide

Walkera

Walkera ZHUN quick start guide

Arris M900 user manual

Arris

Arris M900 user manual

Potensic D58 Operation Guidance

Potensic

Potensic D58 Operation Guidance

Protocol VIDEODRONE AP instruction manual

Protocol

Protocol VIDEODRONE AP instruction manual

dji Matrice M210 quick start guide

dji

dji Matrice M210 quick start guide

Storm DJI Flamewheel F450 RTF manual

Storm

Storm DJI Flamewheel F450 RTF manual

SYMA X440 user manual

SYMA

SYMA X440 user manual

XIRO Xplorer G Calibration guide

XIRO

XIRO Xplorer G Calibration guide

Freefly ALTA Setup guide

Freefly

Freefly ALTA Setup guide

Twodots TVVIN BOARD quick guide

Twodots

Twodots TVVIN BOARD quick guide

Potensic ATOM SE user manual

Potensic

Potensic ATOM SE user manual

SYMA X5UW(720P) user manual

SYMA

SYMA X5UW(720P) user manual

Happymodel Mobula7 HD DSMX user manual

Happymodel

Happymodel Mobula7 HD DSMX user manual

manuals.online logo
manuals.online logoBrands
  • About & Mission
  • Contact us
  • Privacy Policy
  • Terms and Conditions

Copyright 2025 Manuals.Online. All Rights Reserved.

How to assemble and
disassemble Anafi
ANAFI assembly and disassembly processes 2
Prerequisites
The best way to repair ANAFI is to use Parrot official drones repair kit. You will need the cruciform as
well as the Torx 5 (T5) in order to carry out this procedure.
Parrot repair kit
Anafi disassembly process
-Remove the battery from the drone.
-Gently unstick the sticker from the body of the drone.
ANAFI assembly and disassembly processes 3
-Remove both screws under the sticker and then quickly put the sticker back in position to
stop the glue from drying.
-Remove both screws from the bottom of the drone at the arms junction.
-Lift the bottom cover from the front of the drone, then push it toward the rear to remove it.
ANAFI assembly and disassembly processes 4
-Pull the ventilator to remove it from its slot and remove the LED connector, near the
ventilator.
-Remove antennas from the motherboard. Antennas on the middle of the motherboard are
linked to the rear feet; the side antennas are plugged to the front feet.
ANAFI assembly and disassembly processes 5
-Remove the plastic holder from the motherboard by pulling on the plastic stamp, then slide
the holder.
-Remove the gimbal connector from the motherboard.
-Unplug the micro coaxial wire from the motherboard.
ANAFI assembly and disassembly processes 6
-Remove the four rubbers gently: Parrot recommends you hold the motherboard during the
process, to stop rubbers from falling from their support. Once rubbers are removed, unplug
the GPS antenna which can be found on hidden face of the motherboard.
-Unstick the SD slot, then remove it by pulling it through the plastic structure’s hole.
ANAFI assembly and disassembly processes 7
-Remove the vertical camera from the support by pushing gently on it.
-Remove the three screws under each arm of the drone.
ANAFI assembly and disassembly processes 8
-Pull on the bottom cover of each arm to remove them.
-Remove the two screws from the GPS cover (orange circle) then push on the button above
located the gimbal to remove the cover (red circle).
ANAFI assembly and disassembly processes 9
-Remove the screws closest to the center of the GPS card.
-Remove the screws holding the hinges: a screw can be found at each extremity of the GPS
card. Do not forget to remove screws from the bottom of the drone as well.
-Retract the arms towards the body of the drone before removing the black plastic holder of
each hinge.
-Push the lower side of each hinge to remove them.
-Caution: a washer will fall off from each hinge when removed, make sure that you do not
lose them.
ANAFI assembly and disassembly processes 10
-Remove the plastic part which holds antennas by pulling the clips on each side of the part.
-Unplug motors by pulling the connectors out of their sockets.
-Caution: Do not pull on the wires.
-Remove the arms carefully, one after the other: make sure that antenna cables do not get
stuck with other cables.